Air Fryer Garlic Butter Cod Bites Tasty Quick Recipe

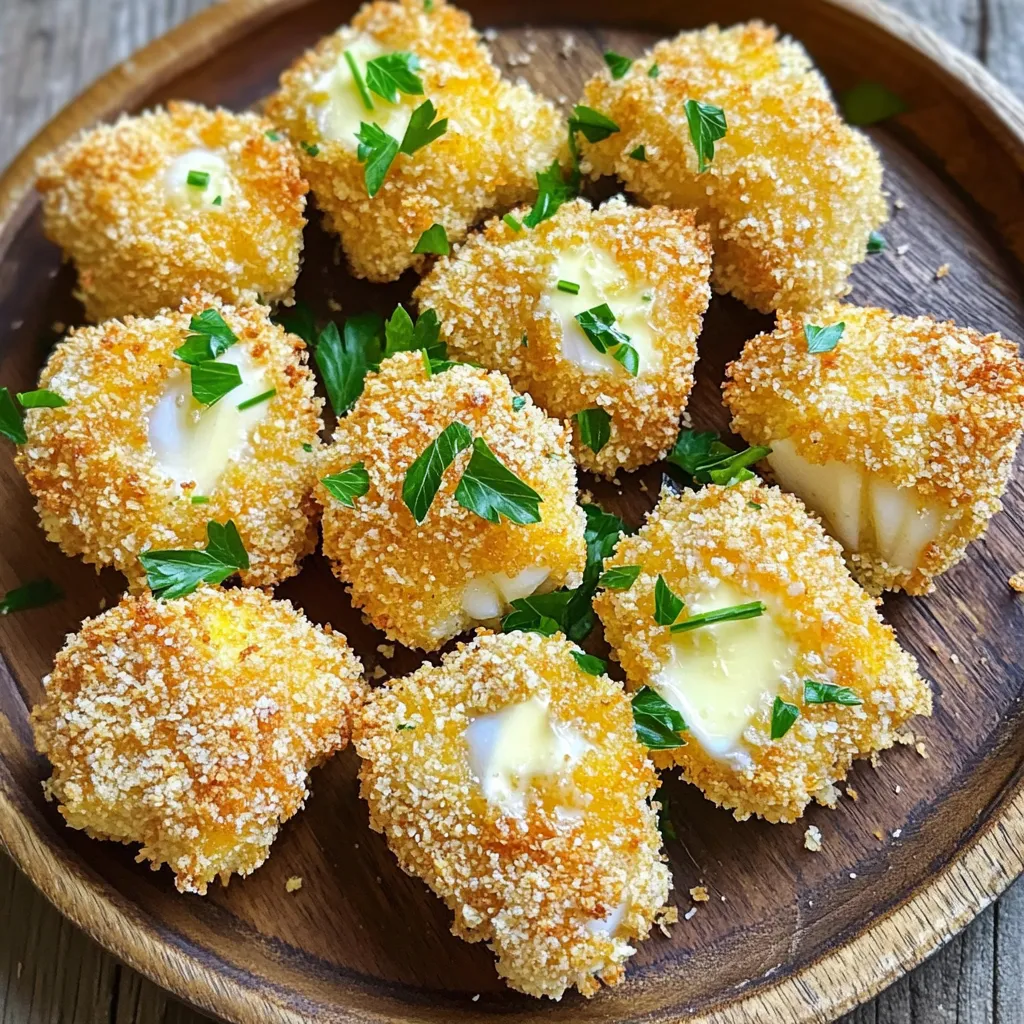
If you’re looking for a simple yet delicious meal, try my Air Fryer Garlic Butter Cod Bites. This quick recipe packs flavor and is perfect for busy weeknights. With buttery cod, fresh herbs, and a crispy coating, it’s a dish you’ll love sharing. Plus, it’s healthy and easy to make! Let’s dive into how to whip up these tasty bites that will impress everyone around your table.
Ingredients
Main Ingredients for Air Fryer Garlic Butter Cod Bites
– 1 lb cod fillets, cut into bite-sized pieces
– 4 tablespoons unsalted butter, melted
– 1 tablespoon fresh parsley, finely chopped (plus extra for garnish)
Seasoning and Coating Ingredients
– 4 cloves garlic, finely minced
– 1 teaspoon fresh lemon juice
– 1/2 teaspoon smoked paprika
– 1/2 cup Panko breadcrumbs (for an extra crunchy texture)
– Salt and freshly ground black pepper to taste
Optional Garnishes
– Fresh parsley
– Additional seasoning options
In this recipe, I focus on using fresh, simple ingredients. Cod fillets form the base, bringing a mild fish flavor that pairs well with garlic and butter. The unsalted butter adds richness, while fresh parsley brightens the dish.
For flavor, I use minced garlic, lemon juice, and smoked paprika. Each ingredient plays its part to create a well-rounded taste. Panko breadcrumbs provide that crunchy coating we all love. The salt and pepper finish the mix, enhancing all the other flavors.
You can get creative with garnishes too. Fresh parsley adds a pop of color and freshness. You might want to sprinkle on some extra spices if you like a little heat or zing. This recipe is all about making it your own!
Step-by-Step Instructions
Preparation of the Garlic Butter Mixture
To start, grab a mixing bowl. Combine the melted unsalted butter, minced garlic, and chopped parsley. Add fresh lemon juice, smoked paprika, salt, and black pepper. Whisk these ingredients until they blend well. This mixture adds rich flavor to your cod bites.
Next, gently add the cod pieces to the bowl. Make sure each piece gets coated in the garlic butter mix. Let the cod marinate for about 15 minutes. This step is key; it lets the flavors seep in.
Preparing the Air Fryer
While your cod marinates, preheat your air fryer. Set it to 400°F (200°C) and let it heat for about 5 minutes. This ensures that your cod bites cook evenly.
Once the air fryer is ready, take the marinated cod pieces. Roll each piece in Panko breadcrumbs until fully coated. This will give them a crunchy texture.
Cooking the Cod Bites
Now, it’s time to cook! Place the breadcrumb-coated cod bites in a single layer in the air fryer basket. To help them crisp up, lightly spray the tops with cooking spray.
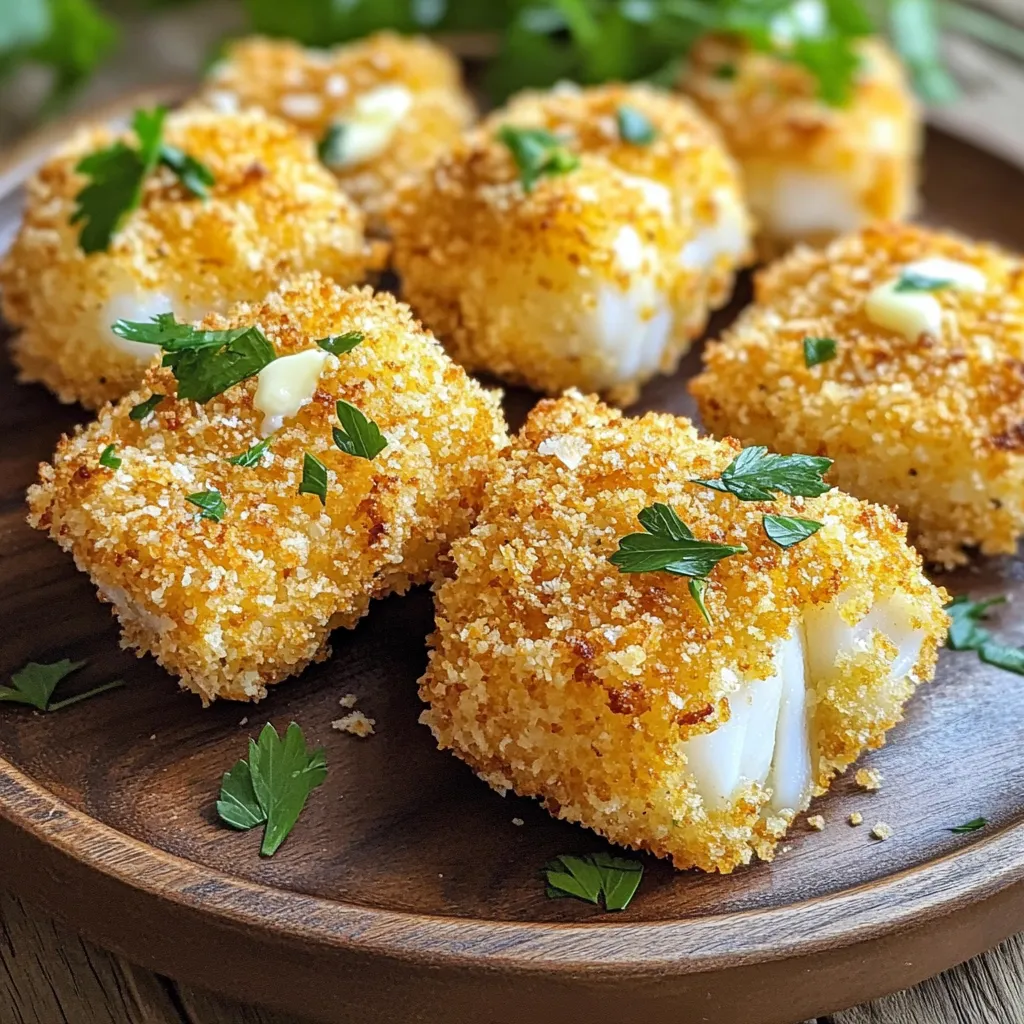
Cook the cod bites at 400°F (200°C) for 8-10 minutes. Flip them halfway through to achieve even browning. They should turn a lovely golden brown and become crispy.
Once done, carefully transfer them to a serving platter. For a fresh touch, sprinkle additional chopped parsley on top before serving. Enjoy your delicious Air Fryer Garlic Butter Cod Bites!
Tips & Tricks
Best Practices for Perfect Cod Bites
Marinating the cod is key to great flavor. It allows the fish to soak up the garlic and herbs. I suggest marinating for at least 15 minutes. You can go longer if you want a stronger taste.
To avoid overcooking, keep an eye on the time while air frying. Cod cooks fast. Aim for 8 to 10 minutes at 400°F (200°C). Flip halfway for even cooking. If your cod bites are golden brown, they are ready!
Enhancing Flavor
You can add more flavor with a few extra spices. Try adding a pinch of cayenne for heat. A dash of Italian seasoning can also work well.
If you need substitutions, use olive oil if you lack butter. You can swap fresh parsley for cilantro or dill. This keeps the dish fresh and exciting!
Air Fryer Maintenance Tips
Cleaning your air fryer is easy but important. After each use, let it cool. Then, wipe down the basket and the inside with a damp cloth. Use warm, soapy water for tough spots.
To ensure even cooking, avoid overcrowding the basket. If you have many cod bites, cook in batches. This allows hot air to circulate freely, giving you that perfect crispiness.

Variations
Alternative Protein Options
You can substitute cod with other fish, like tilapia or haddock. These fish work well with the garlic butter flavors. If you’re looking for a non-fish option, try shrimp or even chicken bites. They can soak up the same tasty marinade.
For a vegetarian twist, consider using firm tofu or tempeh. Cut them into bite-sized pieces and marinate them just like the cod. This will give you a great flavor while keeping it meat-free.
Flavor Variations
Mix up the herbs and spices to suit your taste. You can use dill, thyme, or even oregano. Each will give your cod bites a unique twist. If you’re a fan of heat, try adding a pinch of cayenne pepper or red pepper flakes.
You can also incorporate cheese into your recipe. Try mixing in some grated Parmesan with the Panko breadcrumbs. This will add a rich, cheesy flavor to your bites. For a different texture, use crushed cornflakes or tortilla chips instead of Panko.
Serving Suggestions
Serve your cod bites with a fresh salad or steamed veggies. They pair well with a side of rice or quinoa for a complete meal. You can also try them with crispy fries for a fun twist.
For dips, consider a zesty lemon aioli or a creamy garlic sauce. These will enhance the flavors and give you a delightful bite. You can even make a spicy sriracha mayo for those who love a kick!
Storage Info
How to Properly Store Leftovers
To store your cod bites, let them cool first. Place them in an airtight container. In the fridge, they will stay good for up to three days. If you want to keep them longer, freezing is a great option. Wrap each cod bite in plastic wrap, then place them in a freezer bag. They can last for up to three months in the freezer.
Reheating Methods
To reheat cod bites, the air fryer is your best friend. Set it to 350°F (175°C) and cook for about 5 minutes. This keeps them crispy and warm. You can also use an oven. Preheat it to 350°F (175°C) and bake for 10 minutes. A microwave is not recommended as it can make them soggy.
Shelf Life of Prepared Cod Bites
In the fridge, your prepared cod bites last three days. Look for signs of spoilage. If they smell off or have a slimy texture, it’s best to toss them. Always trust your senses; if it seems bad, it probably is.
FAQs
How long can I marinate cod before cooking?
You can marinate cod for about 15 to 30 minutes. This time allows the fish to soak up the garlic butter flavors. If you let it sit too long, the fish may become mushy. Keep it short for the best texture and taste.
Can I make Air Fryer Garlic Butter Cod Bites ahead of time?
Yes, you can prepare the cod bites ahead. Marinate the cod and coat it in breadcrumbs. Place them in the fridge for a few hours or overnight. When ready, air fry them for a quick meal. This saves you time and still delivers a fresh taste.
What is the best way to achieve a crispy texture?
To get a crispy texture, use Panko breadcrumbs. They add crunch and lightness. Also, lightly spray the cod bites with cooking spray before air frying. Flipping them halfway through cooking helps them brown evenly.
Can I use frozen cod for this recipe?
You can use frozen cod, but it’s best to thaw it first. This helps the cod cook evenly. If you use it frozen, increase cooking time by a few minutes. Cook until the bites are golden brown and fully cooked through.
Air Fryer Garlic Butter Cod Bites blend great taste and simple steps.
We explored key ingredients, shared cooking tips, and discussed smart storage. Each bite delivers flavor and crispness.
These cod bites are easy to make and offer room for creativity. Try different proteins or flavors to keep things fresh.
Enjoy your crispy treats and share them with family or friends!


![- 1 ripe mango, diced into small cubes - 2 ripe avocados, diced into small cubes - 1 small red onion, finely chopped - 1 jalapeño, minced - 1/4 cup fresh cilantro, finely chopped - Juice of 2 limes - Salt and pepper to taste - Optional: 1/2 teaspoon ground cumin To create a vibrant mango avocado salsa, you need fresh, tasty ingredients. First, pick a ripe mango. A ripe mango should feel slightly soft when you press it. Next, choose ripe avocados. They should also yield slightly to gentle pressure. The red onion adds a nice crunch and color. Finely chop it for the best texture. The jalapeño brings the heat. If you want less spice, remove the seeds. Fresh cilantro adds a bright flavor. Always choose fresh herbs for the best taste. Lime juice helps balance the sweetness of the fruits. It also keeps the avocados from browning. Salt and pepper enhance all the flavors. If you like a warm taste, add ground cumin. You can switch things up based on your taste. Try different types of onions, like white or green. They each bring a unique flavor. You can also add black beans or corn for extra texture and nutrition. If you love spice, add more jalapeño or try other peppers. Each choice lets you make this salsa your own. Explore and enjoy the creative process. Check out the Full Recipe for more details! - Start with a ripe mango. Cut it into small cubes. Place the mango in a large mixing bowl. - Next, take two ripe avocados. Dice them into small cubes, too. Add them gently to the bowl. - Now, grab a small red onion. Finely chop it and mix it into the bowl. - For some heat, use a jalapeño. Deseed it and mince it based on your spice level. - Chop 1/4 cup of fresh cilantro. This herb adds a bright flavor to the salsa. - Finally, squeeze the juice of two limes into the bowl. This keeps the avocados fresh. - Combine all the fresh ingredients carefully. Use a gentle folding motion. - This method keeps the avocados and mango intact. You want a nice texture in your salsa. - Pour in the lime juice and season with salt and pepper. If you like, add 1/2 teaspoon of ground cumin. - Mix everything together until well blended. Make sure not to break the avocado pieces. - Before serving, taste your salsa. Adjust the flavors if needed. - Add a pinch of salt or more lime juice for brightness. - Check the texture. It should be fresh and chunky, not mushy. You can find the Full Recipe for more details. Enjoy this fresh and vibrant salsa! Choosing the best mango and avocado is key. Look for a mango that feels slightly soft when you squeeze it. The skin should be mostly yellow with some red. For avocados, choose ones that yield to gentle pressure. They should feel soft but not mushy. Knowing when fruits are perfectly ripe matters. A ripe mango has a sweet smell at the stem end. The avocado should be dark green or nearly black. Check both fruits daily if you buy them unripe. To store salsa and preserve freshness, cover it tightly with plastic wrap. Press the wrap down to touch the salsa. This limits air exposure, keeping it bright. You can also store it in an airtight container. Best practices for flavor development overnight include letting the salsa sit in the fridge for at least an hour. This allows the flavors to marry. The lime juice helps keep the avocados from browning. Serve the salsa in a vibrant bowl for eye-catching appeal. A colorful dish makes the salsa pop on your table. Garnish with a sprig of cilantro on top for extra flair. Ideal accompaniments include crispy tortilla chips for dipping. You can also serve it with grilled meats like chicken or fish. Mango avocado salsa adds a fresh kick to any meal. Don’t forget to check the [Full Recipe] for more details! {{image_4}} You can change the fruits in this salsa. Try adding diced pineapple or peach for a sweet twist. These fruits bring a bright flavor and can make your salsa unique. If you want a vegan option, you can use black beans or corn. They add protein and make the salsa heartier. Many cultures have their own takes on salsa. You can add ingredients like mango or cilantro to reflect those flavors. For a spicy kick, adjust the jalapeño or add other peppers. For example, try using serrano peppers for more heat. Each region adds a special touch that can excite your taste buds. This salsa shines as a dip or topping. Serve it with crispy tortilla chips for a fun snack. You can also use it on grilled chicken or fish for a fresh meal. It adds color and flavor to your plate. Get creative with how you serve it, and enjoy the burst of flavors. For the full recipe, check out the complete guide above! To keep your Mango Avocado Salsa fresh, store it in the fridge. Place it in an airtight container. This helps prevent exposure to air, which can cause browning. Your salsa will last about 2 to 3 days in the fridge. Look for signs of spoilage, like an off smell or brown color in the avocados. If you see these signs, it's best to toss it out. Can you freeze Mango Avocado Salsa? Yes, but it's not the best option. Freezing can change the texture of avocados. If you choose to freeze it, do so right after making it. Use a freezer-safe container, leaving some space at the top for expansion. When you thaw it, the salsa might be watery. To fix this, drain any excess liquid before serving. Choose the best storage container for your salsa. Glass or BPA-free plastic containers work well. Airtight options are ideal because they keep air out. This helps maintain flavor and freshness. Using the right container can make a big difference in how long your salsa lasts. Mango Avocado Salsa stays fresh in the fridge for about 2 to 3 days. After that, the avocados may turn brown. You can freeze it, but it’s best to eat it fresh. If you freeze it, use it within a month for the best taste. Yes, you can swap ingredients based on your needs. If you're allergic to avocados, try using diced cucumbers instead. If you don’t like cilantro, fresh parsley works too. For a milder taste, skip the jalapeño or use sweet bell peppers. This salsa pairs well with many dishes. Serve it with tortilla chips for a crunchy snack. It’s also great on grilled chicken or fish. Try it on tacos or as a topping for burrito bowls for added flavor. The spice level depends on how much jalapeño you use. If you remove the seeds and ribs, it will be milder. If you like heat, add more jalapeño or try a spicier pepper. Adjusting the amount gives you control over the spice. Yes, you can prep it ahead! If you want to make it a day before, do so. Just add lime juice to keep the avocados bright. Store it in an airtight container in the fridge. This will help the flavors blend nicely. For the best taste, mix in the avocado right before serving. For the full recipe, check out the [Full Recipe]. Mango Avocado Salsa combines fresh ingredients for a tasty dish. We covered how to pick ripe fruits and mix flavors. You learned about variations, storage tips, and serving ideas. This salsa is perfect for gatherings or a light snack. It’s simple to make and adjust to your taste. Enjoy making it and share the joy of fresh flavors with others!](https://joymealplan.com/wp-content/uploads/2025/07/8dfe7157-a149-4f91-a822-36a2fad97dae-768x768.webp)
![- 2 ripe avocados - 4 slices of whole grain bread - 4 large eggs - 1 tablespoon fresh lemon juice - Salt and pepper to taste - Optional: red pepper flakes for heat - Fresh herbs for garnish To make avocado toast with poached egg, gather these fresh ingredients. Start with ripe avocados. They should feel slightly soft but not mushy. Whole grain bread gives a nice texture and is healthy, too. Eggs are key to this dish; use large eggs for a satisfying poach. Lemon juice adds brightness to the avocado spread. Salt and pepper enhance the flavors, while red pepper flakes can add a bit of heat if you like. Finally, fresh herbs make your dish look and taste wonderful. You can choose cilantro, chives, or parsley, depending on your preference. Check out the Full Recipe to see how these simple ingredients transform into a tasty meal! Start by toasting the whole grain bread. You can use a toaster for quick results. Alternatively, heat a dry skillet over medium heat and add the bread slices. Toast until they turn golden brown and crispy. This gives your toast the perfect base. While the bread toasts, grab your ripe avocados. Cut them in half and scoop the flesh into a bowl. Use a fork to mash the avocado; it should be creamy but still a bit chunky. Stir in fresh lemon juice and a pinch of salt and pepper. This adds flavor and keeps the avocado bright. Fill a medium saucepan with about 3 inches of water. Bring it to a gentle simmer. Crack each egg into a small bowl first. This helps keep them intact. Gently slide each egg into the water, one by one. Poach them for about 3-4 minutes. If you want firmer yolks, cook them a bit longer. Once the bread is toasted, take a slice and spread a generous layer of the avocado mix on top. Place a poached egg carefully on each slice. Make sure the yolk stays intact for that delightful runny experience. This layering creates both flavor and visual appeal. For a little extra heat, sprinkle some red pepper flakes over the poached eggs. This is optional, but it adds a nice kick. Finish by adding fresh herbs like chopped cilantro or chives. They provide a pop of color and freshness. Serve your toast right away to enjoy the great mix of textures and flavors. For the full recipe, check out the instructions above. To poach eggs well, start with fresh eggs. Fresh eggs hold their shape better. A common mistake is using water that boils too hard. This can break the eggs. Instead, let the water simmer gently. Add a splash of vinegar to help the egg whites stay together. If you want tools, consider using a poaching pod or a small mesh strainer. These tools make it easier to transfer eggs into the water. When picking avocados, look for ones that yield slightly to gentle pressure. This means they are ripe and ready. Avoid avocados with dark spots or large dents. The best varieties for flavor are Hass and Bacon. Hass avocados have a creamy texture and rich taste, while Bacon avocados are milder and lighter. Both make your toast tasty and delightful. You can toast bread in many ways. Use a toaster, skillet, or even an oven. For a crunchy texture, try broiling the bread for a short time. Keep an eye on it to avoid burning. To enhance your toast, add toppings like cheese, herbs, or spices. A sprinkle of garlic powder or a slice of mozzarella can elevate the flavor. Try different combinations to find your favorite! {{image_4}} You can add fun toppings for more flavor. Try sliced tomatoes or radishes for crunch. Smoked salmon gives a nice salty taste. Cheese options are also great. Feta or goat cheese can add creaminess and tang. The bread you choose changes the taste and feel. Whole grain gives a nutty flavor. Sourdough adds a bit of tang. For gluten-free eaters, use gluten-free bread. Each type adds its own special touch. Spices can make your toast even better. Cumin adds warmth, while paprika gives a slight kick. Fresh herbs like basil or dill can brighten the dish. Experimenting with these can enhance your avocado toast experience. Want to learn more? Check the Full Recipe for more ideas! To keep your leftover avocado fresh, use these tips. First, cover the avocado tightly with plastic wrap. Press the wrap directly onto the flesh to limit air exposure. You can also store it in an airtight container. Adding lemon juice can help slow down browning. If you have half an avocado, use it within one day for the best taste. For longer storage, consider freezing avocado. Cut it into chunks and toss it with lemon juice. Place the pieces in a freezer bag. They will last up to six months. Just remember, frozen avocado is best used in smoothies or spreads. Once you've cooked your poached eggs, store them in the fridge. They can last for about two days. Place them in a container with a lid to keep them fresh. When you are ready to eat them, gently reheat them in warm water to avoid overcooking. You can also use the eggs in salads or sandwiches. For the avocado spread, store it in the fridge as well. It can last about three days. If you notice browning, simply stir it before use. You can also use it as a dip for chips or veggies. This way, you can enjoy your delicious leftovers in various ways! To keep your poached eggs intact, follow these tips: - Use fresh eggs. Fresh eggs hold their shape better. - Crack each egg into a small bowl first. This helps you control the drop. - Create a gentle whirlpool in the water. Stir the water with a spoon before adding the egg. - Poach in simmering, not boiling, water. This helps prevent the eggs from breaking. These steps lead to beautiful poached eggs every time. Yes, you can prep some parts ahead of time! Here’s how: - Toast the bread just before serving for crispness. - Mash the avocado but add lemon juice to slow browning. - Store the avocado mix in an airtight container. Press plastic wrap on the surface to keep it fresh. - Poach the eggs right before serving for the best texture. Prepping ahead saves time, but fresh is always best! If you love avocado toast, try these dishes: - Hummus toast with sliced veggies. - Nut butter toast with banana slices. - Smoked salmon on cream cheese toast. - Ricotta with honey and figs on bread. These options are tasty and easy to make! Yes, avocado toast is a healthy choice! Here’s why: - Avocados are rich in healthy fats. They help your heart and keep you full. - Eggs provide protein, which is great for muscle health. - Whole grain bread offers fiber, good for digestion. - Adding fresh herbs boosts vitamins and flavor. This meal is a great way to start your day! For the full recipe, check out [Full Recipe]. This blog post explored the steps to make delicious avocado toast. We covered the key ingredients, from ripe avocados to perfectly poached eggs. You learned how to toast bread, prepare avocado spread, and assemble your dish. Keep these tips in mind. Experiment with toppings and seasoning. Try different breads for new flavors. With a little practice, you’ll create a tasty, healthy meal. Enjoy your avocado toast creations and share them with others!](https://joymealplan.com/wp-content/uploads/2025/07/56055f10-0617-41ac-9d2a-da1e092d61f6-768x768.webp)


. When making buffalo chicken lettuce wraps, choose your buffalo sauce wisely. Some sauces are mild, while others pack a punch. If you like heat, go for a hotter sauce. If you prefer less spice, choose a milder option. You can also add extra spices. A pinch of cayenne or red pepper flakes boosts the heat without changing the sauce. To make your wraps even better, think about toppings. Shredded carrots add crunch and color. You can also try diced celery for extra freshness. Blue cheese crumbles add a creamy touch. If you want a sauce, ranch or blue cheese dressing pairs well. They balance the heat of the buffalo sauce and add creaminess. Serve your wraps in a fun way. Use a large platter to hold the wraps. Surround them with extra lettuce leaves. This lets guests make their own wraps. Add a small bowl of dressing on the side for dipping. Use bright garnishes, like chopped green onions, to make the dish pop. These tips make your wraps look as good as they taste! {{image_4}} You can switch up the protein in these wraps. Ground chicken or turkey works well. Just cook it in the same way as the diced chicken. For a vegetarian twist, try using plant-based proteins. Crumbled tofu or tempeh can soak up the buffalo sauce nicely. These options keep the wraps healthy and flavorful. If you need gluten-free options, check your buffalo sauce. Many brands are gluten-free. For a dairy-free option, skip the blue cheese. You can use a vegan ranch dressing instead. It brings a nice creaminess without the dairy. These swaps let everyone enjoy the wraps. Pair your wraps with fresh veggies, like carrot sticks or cucumber slices. These sides add crunch and color. You might also serve chips for a fun crunch. For drinks, refreshing iced tea or lemonade works well. These options make a great meal or snack. If you want the full recipe, you can find it here: [Full Recipe] To store your buffalo chicken lettuce wraps, place them in an airtight container. This keeps them fresh and tasty. Try to refrigerate them within two hours after cooking. They will stay good for about 3 to 4 days in the fridge. When reheating, I suggest using the stovetop or microwave. For the stovetop, warm them in a skillet over low heat. This helps keep the wraps from getting soggy. If using a microwave, heat on medium power for short bursts. Do not reheat more than once, as this can affect the flavor and texture. Yes, you can freeze buffalo chicken wraps! To freeze, place the chicken filling in a freezer-safe bag or container. Remove as much air as possible. You can freeze them for up to three months. When ready to eat, thaw the filling overnight in the fridge. Reheat it and serve in fresh lettuce leaves for the best taste. The spice level depends on the buffalo sauce you choose. You can find mild, medium, or hot sauces. If you like heat, pick a hot sauce. For a mild kick, go for a mild sauce. You can also mix sauces to control the heat. If you want to tone down the spice, add extra toppings like ranch dressing or blue cheese. These cool flavors balance the heat well. Yes, you can prepare the chicken and other ingredients in advance. Cook the chicken and store it in the fridge for up to three days. You can also wash and dry the lettuce leaves ahead of time. Keep the chicken and lettuce in separate containers to maintain freshness. When you’re ready to eat, just assemble the wraps. This makes for a quick and healthy snack. If you want an alternative to lettuce, try tortillas or collard greens. Tortillas work well if you prefer a more traditional wrap. Collard greens are sturdy and add a nice flavor. You can also use rice paper for a fun twist. Each option brings its own taste and texture, so choose what you like best. For the complete recipe, check out the Buffalo Bliss Chicken Lettuce Wraps full recipe for easy access. Buffalo chicken lettuce wraps are a fun and tasty dish. We reviewed key ingredients, cooking steps, and tips for customization. You can mix flavors, adjust spice, and even swap proteins to suit your needs. These wraps are great for meals and snacks. Remember to store leftovers properly for later enjoyment. I hope this guide helps you create delicious wraps for friends or family. Enjoy experimenting with your own twists!](https://joymealplan.com/wp-content/uploads/2025/07/5600c779-5454-4d90-be3f-06d6a192c4a1-768x768.webp)
![To make a tasty loaded baked potato salad, you need the right mix of ingredients. Here’s the list you’ll need: - 4 large Russet potatoes - ½ cup sour cream - ½ cup mayonnaise - 1 cup shredded sharp cheddar cheese - 1 cup cooked and crumbled turkey bacon or turkey sausage - 4 green onions, chopped - ½ teaspoon garlic powder - ½ teaspoon onion powder - Salt and pepper to taste - Optional: 1 cup diced tomatoes Russet potatoes are great because they are fluffy and hold up well. The sour cream and mayonnaise create a creamy base that brings all the flavors together. Cheese adds richness, while turkey bacon or sausage gives a nice savory touch. Don’t forget the seasonings! Garlic powder and onion powder add depth. You can adjust the salt and pepper to fit your taste. If you want a fresh bite, toss in some diced tomatoes. For the full recipe, check out the [Full Recipe]. Enjoy making your loaded baked potato salad! You can cook your potatoes in two ways: using a microwave or an oven. The microwave is quick. It takes about 10-15 minutes. Just wash the potatoes well and poke holes in them. This helps steam escape. If you choose the oven, it takes longer, about 45-60 minutes. Preheat it to 200°C (400°F). For the best texture, let the potatoes cool a bit after cooking. This way, they stay firm when you cut them. Cut the potatoes into bite-sized cubes, leaving the skin on. The skin adds a nice texture and flavor. Now, let’s make the dressing. Start with ½ cup of sour cream and ½ cup of mayonnaise. Combine them in a large bowl. These two create a creamy base. Then, add ½ teaspoon each of garlic powder and onion powder. Mix well. Taste the dressing and adjust the salt and pepper to your liking. You can also add more spices if you wish. It’s time to put it all together. Add the cubed potatoes to the bowl with the dressing. Now, add 1 cup of shredded sharp cheddar cheese and 1 cup of cooked, crumbled turkey bacon. If you want some fresh flavor, toss in half of the chopped green onions. Gently mix everything so that the potatoes get coated well with the dressing. Make sure all flavors spread evenly throughout. If you like, you can add 1 cup of diced tomatoes for extra freshness. Transfer the salad to a serving bowl and sprinkle the rest of the green onions on top. Cover the salad and chill it in the fridge for at least an hour. This allows the flavors to meld together nicely. You can find the Full Recipe in the earlier section. To make the best loaded baked potato salad, avoid common mistakes. First, don’t rush the cooking of your potatoes. If undercooked, they remain hard. Overcooked potatoes turn mushy. Test them with a fork; they should be tender but firm. Another mistake is not adjusting seasonings. Everyone has different tastes. Start with the basic amounts, then taste as you mix. Add more salt, pepper, or garlic powder until it feels just right. You want a balance that brings out the flavors. Serving your salad well makes it even more enjoyable. Use a bright bowl to attract the eye. You can line the bowl with crisp lettuce leaves. This adds color and freshness. Garnishes enhance visual appeal. Try sprinkling extra cheese on top. Chopped green onions add a nice touch. For a burst of color, diced tomatoes look great too. These small details make your dish pop and impress guests. {{image_4}} You can easily adapt this recipe for different diets. For a dairy-free option, use vegan sour cream and mayo. There are many brands that taste great and work well. For a gluten-free version, just check that all your ingredients are certified gluten-free. Most potatoes, sour creams, and cheeses are already gluten-free. This way, you can enjoy this dish without worry. You can change the flavors of your Loaded Baked Potato Salad by adding new ingredients. Try adding cooked chicken, shrimp, or even tofu for protein. You can also toss in different veggies, like bell peppers or corn, for extra crunch. Thinking outside the box can inspire new tastes. For a spicy kick, add jalapeños or hot sauce. If you love herbs, mix in fresh dill or parsley for a fresh twist. You can also explore flavors from other cuisines. Imagine a barbecue twist with smoked paprika or a Mediterranean flair with olives and feta. The options are endless, so get creative and make it your own! For the complete recipe, check out the Full Recipe section above. To keep your Loaded Baked Potato Salad fresh, store it in the fridge. Use an airtight container to keep moisture in and odors out. This salad will stay good for about 3 to 5 days. It’s best to eat it within this time for optimal flavor and texture. If you have leftovers, you can enjoy them cold or warm. If you prefer to reheat, the best way is to use the microwave. Heat it in short bursts, about 30 seconds at a time. Stir it well after each burst to ensure even heating. Always check that the salad is hot all the way through. When reheating, avoid letting it sit out too long to keep it safe to eat. You can easily prepare this salad in advance. First, cook and cool the potatoes. Then, mix the dressing and store it separately. Combine them just before serving. This keeps the potatoes fresh and firm. You can store the salad in the fridge for up to three days. Just remember to cover it tightly to keep it fresh. Yes, you can! While Russet potatoes are classic, you can use Yukon Gold or red potatoes. These options add a different texture and flavor. Yukon Golds are creamy, while red potatoes hold their shape well. Experimenting with different types can bring new life to your salad. Loaded Baked Potato Salad pairs well with grilled meats, like chicken or steak. You can also serve it with burgers or hot dogs for a fun cookout. For a lighter meal, try it with a fresh garden salad or grilled veggies. The flavors complement each other nicely, creating a balanced plate. Absolutely! To add heat, you can stir in diced jalapeños or a splash of hot sauce. Adding spicy cheese, like pepper jack, can also kick up the flavor. If you want a smoky touch, try adding chipotle powder. Feel free to adjust the heat to suit your taste! For the full recipe, check out [Full Recipe]. You’ve learned how to make a great Loaded Baked Potato Salad. We covered the right ingredients, preparation methods, and unique variations. Remember, that making this dish is all about balance—flavors, textures, and presentation. Keep experimenting with new ideas and tips to create your perfect salad. Don’t hesitate to adjust ingredients to fit your diet or spice it up. Enjoy every bite, and share your results!](https://joymealplan.com/wp-content/uploads/2025/06/ae05b21a-4cc0-4914-b0ca-5616115dbf5d-768x768.webp)