Air Fryer Garlic Mushrooms Easy and Flavorful Snack

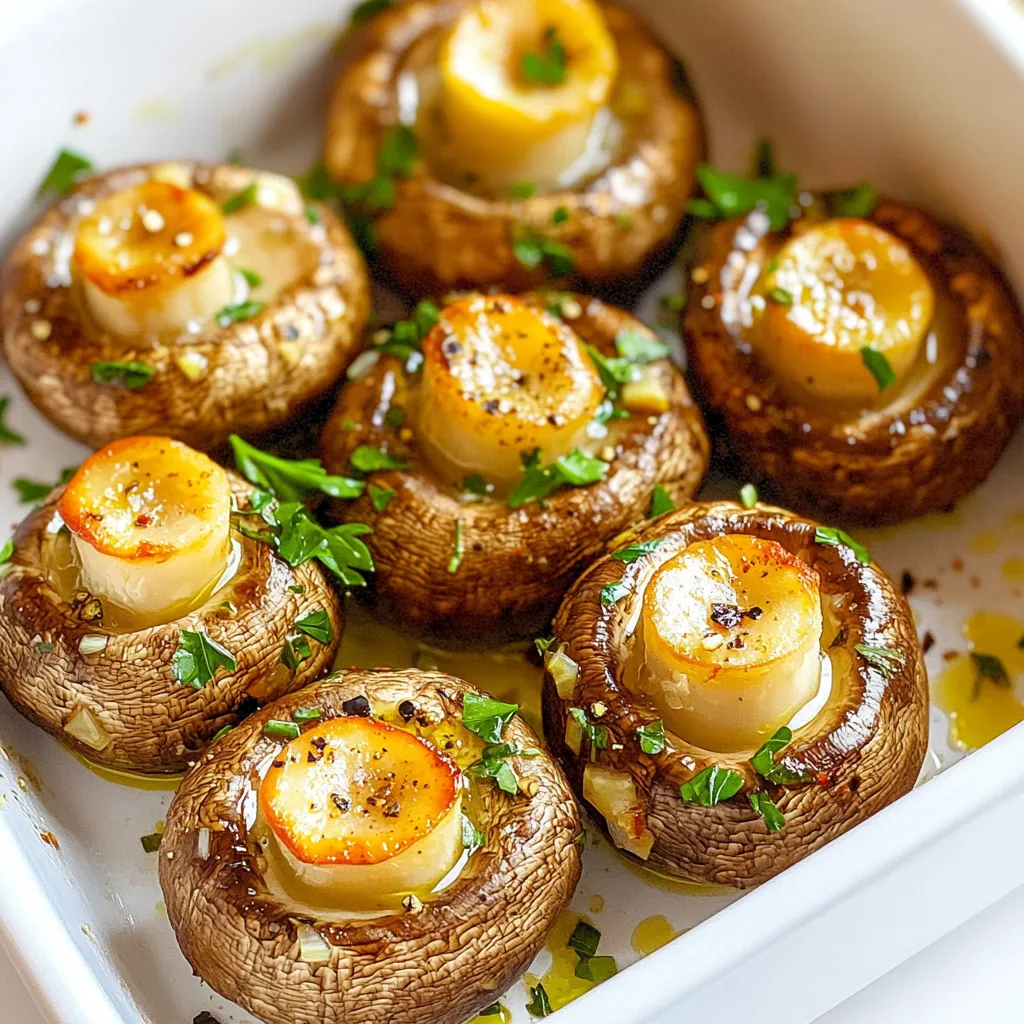
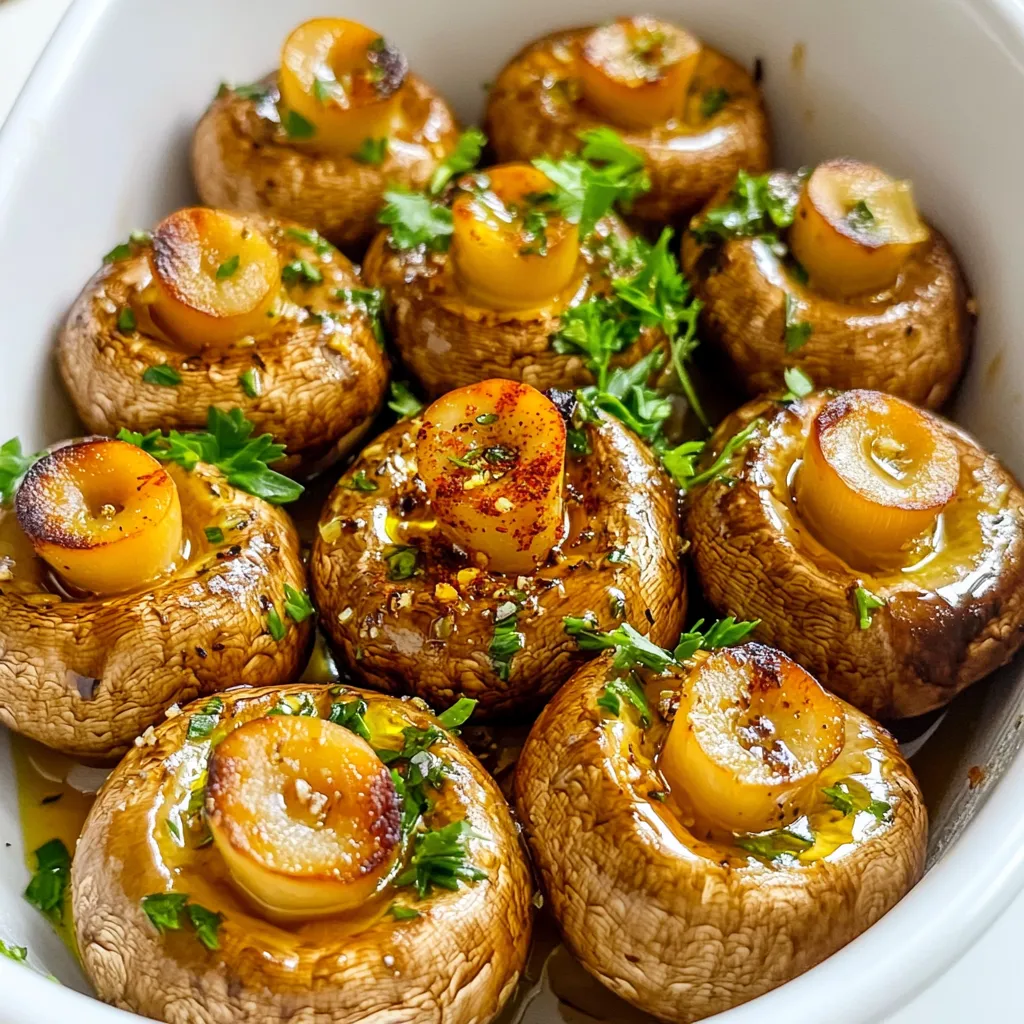
Looking for a quick, tasty snack that’s easy to whip up? Air Fryer Garlic Mushrooms are the answer! Bursting with flavor from garlic and herbs, these mushrooms cook up crispy without the added oil. Plus, they use simple ingredients you probably have at home. In just a few steps, you can enjoy this delightful treat. Ready to dive in? Let’s make the best air-fried mushrooms together!
Ingredients
Main Ingredients
– 500g fresh button mushrooms
– 4 tablespoons extra virgin olive oil
– 4 cloves fresh garlic
– 1 teaspoon dried thyme leaves
– 1 teaspoon smoked paprika
Spices and Seasonings
– Sea salt
– Freshly ground black pepper
Garnish
– Fresh parsley
When I make Air Fryer Garlic Mushrooms, I start with fresh button mushrooms. They have a nice, mild flavor. You’ll need about 500 grams, so grab a good handful. Clean them well and trim the stems.
Next, I add four tablespoons of extra virgin olive oil. This oil brings a rich taste and helps the mushrooms cook well. I also use four cloves of fresh garlic. I mince the garlic finely to spread that delicious flavor.
For a little extra taste, I sprinkle in one teaspoon of dried thyme leaves. Thyme pairs beautifully with mushrooms. Then, I add one teaspoon of smoked paprika. This gives a nice, smoky kick to the dish.
Don’t forget your spices! You’ll need some sea salt and freshly ground black pepper to taste. These will enhance all the flavors in your mushrooms.
To finish, I use fresh parsley as a garnish. It adds a pop of color and freshness. It’s a simple touch, but it makes the dish look great!
Step-by-Step Instructions
Preparation of Mushrooms
Start with fresh button mushrooms. Rinse them well under cold water. Use a damp cloth or paper towel to wipe the mushrooms clean. Trim the stems to remove any tough parts.
Next, take a large mixing bowl. Add the cleaned mushrooms to the bowl. Pour in 4 tablespoons of extra virgin olive oil. Add 4 finely minced garlic cloves, 1 teaspoon of dried thyme, and 1 teaspoon of smoked paprika. Season with sea salt and freshly ground black pepper. Gently mix everything together. Ensure each mushroom is coated in the tasty blend.
Preheating the Air Fryer
Set your air fryer to 180°C (356°F). Preheating is key for even cooking. Let it warm up for about 3 minutes. This helps the mushrooms cook perfectly and get crispy.
Cooking Process
Once preheated, place the mushrooms in the air fryer basket. Arrange them in a single layer, leaving space between each one. Do not overcrowd the basket. This allows the hot air to circulate freely.
Air fry the mushrooms for 12-15 minutes. Remember to shake the basket halfway through. This ensures all sides cook evenly and turn golden brown. After cooking, carefully remove the basket and transfer the mushrooms to a serving dish. Garnish with freshly chopped parsley for a bright touch. Enjoy this easy and flavorful snack!
Tips & Tricks
Achieving the Perfect Texture
To get the best texture, avoid overcrowding the basket. If you pack too many mushrooms, they won’t cook evenly. I like to cook in batches for that perfect crisp.
To check for doneness, look for a nice golden brown color. You can also poke a mushroom with a fork. It should feel tender but not mushy.
Flavor Enhancements
For extra flavor, try adding fresh herbs like rosemary or oregano. You can also sprinkle in some chili flakes for a kick.
Marinating the mushrooms can boost the flavor. Mix your mushrooms with olive oil, garlic, and herbs. Let them sit for 30 minutes before cooking for more depth in taste.
Best Serving Practices
When serving, I recommend a rustic bowl or a wooden platter. This makes the dish look inviting and warm.
Pair the mushrooms with crusty bread or a fresh salad. They also go well with grilled meats or as a side for pasta dishes. Enjoy the delightful combination!

Variations
Dietary Adjustments
You can easily change this dish to fit your diet. To make it vegan or vegetarian, simply skip any cheese. The garlic and spices add great flavor. For gluten-free needs, this recipe is already safe! Just ensure your spices and oils are gluten-free.
Special Flavor Profiles
Want to spice things up? Add chili flakes for some heat. You can also try other mushrooms, like shiitake or portobello. Each type brings a unique taste. Mixing different mushrooms can create a fun flavor adventure.
Additional Ingredients
Feel free to incorporate cheese for a creamy touch. Feta or Parmesan work well. You can also mix in other vegetables. Think about bell peppers or zucchini for added color and taste. Experiment with oils too! Use sesame oil for a nutty flavor or avocado oil for a lighter touch.
Storage Info
Refrigeration
To store leftovers, let the mushrooms cool down first. Place them in an airtight container. This helps keep them fresh. You can store them in the fridge for up to three days. After that, the taste and texture may change.
Freezing
If you want to keep garlic mushrooms longer, freezing is a good option. First, let them cool completely. Spread them out on a baking sheet to freeze individually. Once frozen, transfer them to a freezer-safe bag. This method prevents clumping. You can freeze them for up to three months.
To thaw, take the mushrooms out of the freezer. Place them in the fridge overnight. For a quick option, you can use the microwave. Reheat them on low power until thawed.
Reheating Instructions
You can easily reheat garlic mushrooms in an air fryer or oven. For the air fryer, set it to 180°C (356°F). Place the mushrooms in the basket and heat for about 5 minutes. Shake the basket halfway for even heating.
In the oven, preheat it to 180°C (356°F). Spread the mushrooms on a baking sheet. Heat them for about 10 minutes. This keeps them nice and warm. Enjoy your tasty snack!
FAQs
Can I use other types of mushrooms?
Yes, you can use many types of mushrooms. Some great options include:
– Cremini mushrooms
– Shiitake mushrooms
– Portobello mushrooms
– Oyster mushrooms
These alternatives bring unique flavors and textures. Cremini offers a deeper taste. Shiitake adds a hint of umami. Portobello gives a meaty bite. Oyster mushrooms have a delicate flavor. Feel free to mix different types for a fun twist!
How long can I keep the cooked mushrooms?
Cooked mushrooms can last in the fridge for about 3 to 5 days. Store them in an airtight container. Make sure they cool down first. This keeps them fresh and safe to eat. If you want to keep them longer, freeze them! They can last up to 3 months in the freezer. Just remember to reheat them well before serving.
Why are my mushrooms not crispy?
If your mushrooms are not crispy, you may be making a few common mistakes. Here’s what to check:
– Overcrowding the basket: Make sure mushrooms have space. They need airflow to crisp up.
– Not preheating the air fryer: Preheating is key. It helps cook them evenly and gives that nice crunch.
– Too much oil: Use the right amount of oil. Too much can make them soggy instead of crispy.
Follow these tips, and you’ll have perfectly crispy garlic mushrooms every time!
This blog post provided a clear guide to cooking garlic mushrooms. You learned about the main ingredients, preparation steps, and execution tips. Important techniques like preheating your air fryer ensure great results. You can explore variations to suit your taste, and you’ll also know how to store your leftovers safely.
Enjoy experimenting with flavors and serving these delicious mushrooms. With practice, you’ll make dishes that impress. Happy cooking!


![To make a tasty loaded baked potato salad, you need the right mix of ingredients. Here’s the list you’ll need: - 4 large Russet potatoes - ½ cup sour cream - ½ cup mayonnaise - 1 cup shredded sharp cheddar cheese - 1 cup cooked and crumbled turkey bacon or turkey sausage - 4 green onions, chopped - ½ teaspoon garlic powder - ½ teaspoon onion powder - Salt and pepper to taste - Optional: 1 cup diced tomatoes Russet potatoes are great because they are fluffy and hold up well. The sour cream and mayonnaise create a creamy base that brings all the flavors together. Cheese adds richness, while turkey bacon or sausage gives a nice savory touch. Don’t forget the seasonings! Garlic powder and onion powder add depth. You can adjust the salt and pepper to fit your taste. If you want a fresh bite, toss in some diced tomatoes. For the full recipe, check out the [Full Recipe]. Enjoy making your loaded baked potato salad! You can cook your potatoes in two ways: using a microwave or an oven. The microwave is quick. It takes about 10-15 minutes. Just wash the potatoes well and poke holes in them. This helps steam escape. If you choose the oven, it takes longer, about 45-60 minutes. Preheat it to 200°C (400°F). For the best texture, let the potatoes cool a bit after cooking. This way, they stay firm when you cut them. Cut the potatoes into bite-sized cubes, leaving the skin on. The skin adds a nice texture and flavor. Now, let’s make the dressing. Start with ½ cup of sour cream and ½ cup of mayonnaise. Combine them in a large bowl. These two create a creamy base. Then, add ½ teaspoon each of garlic powder and onion powder. Mix well. Taste the dressing and adjust the salt and pepper to your liking. You can also add more spices if you wish. It’s time to put it all together. Add the cubed potatoes to the bowl with the dressing. Now, add 1 cup of shredded sharp cheddar cheese and 1 cup of cooked, crumbled turkey bacon. If you want some fresh flavor, toss in half of the chopped green onions. Gently mix everything so that the potatoes get coated well with the dressing. Make sure all flavors spread evenly throughout. If you like, you can add 1 cup of diced tomatoes for extra freshness. Transfer the salad to a serving bowl and sprinkle the rest of the green onions on top. Cover the salad and chill it in the fridge for at least an hour. This allows the flavors to meld together nicely. You can find the Full Recipe in the earlier section. To make the best loaded baked potato salad, avoid common mistakes. First, don’t rush the cooking of your potatoes. If undercooked, they remain hard. Overcooked potatoes turn mushy. Test them with a fork; they should be tender but firm. Another mistake is not adjusting seasonings. Everyone has different tastes. Start with the basic amounts, then taste as you mix. Add more salt, pepper, or garlic powder until it feels just right. You want a balance that brings out the flavors. Serving your salad well makes it even more enjoyable. Use a bright bowl to attract the eye. You can line the bowl with crisp lettuce leaves. This adds color and freshness. Garnishes enhance visual appeal. Try sprinkling extra cheese on top. Chopped green onions add a nice touch. For a burst of color, diced tomatoes look great too. These small details make your dish pop and impress guests. {{image_4}} You can easily adapt this recipe for different diets. For a dairy-free option, use vegan sour cream and mayo. There are many brands that taste great and work well. For a gluten-free version, just check that all your ingredients are certified gluten-free. Most potatoes, sour creams, and cheeses are already gluten-free. This way, you can enjoy this dish without worry. You can change the flavors of your Loaded Baked Potato Salad by adding new ingredients. Try adding cooked chicken, shrimp, or even tofu for protein. You can also toss in different veggies, like bell peppers or corn, for extra crunch. Thinking outside the box can inspire new tastes. For a spicy kick, add jalapeños or hot sauce. If you love herbs, mix in fresh dill or parsley for a fresh twist. You can also explore flavors from other cuisines. Imagine a barbecue twist with smoked paprika or a Mediterranean flair with olives and feta. The options are endless, so get creative and make it your own! For the complete recipe, check out the Full Recipe section above. To keep your Loaded Baked Potato Salad fresh, store it in the fridge. Use an airtight container to keep moisture in and odors out. This salad will stay good for about 3 to 5 days. It’s best to eat it within this time for optimal flavor and texture. If you have leftovers, you can enjoy them cold or warm. If you prefer to reheat, the best way is to use the microwave. Heat it in short bursts, about 30 seconds at a time. Stir it well after each burst to ensure even heating. Always check that the salad is hot all the way through. When reheating, avoid letting it sit out too long to keep it safe to eat. You can easily prepare this salad in advance. First, cook and cool the potatoes. Then, mix the dressing and store it separately. Combine them just before serving. This keeps the potatoes fresh and firm. You can store the salad in the fridge for up to three days. Just remember to cover it tightly to keep it fresh. Yes, you can! While Russet potatoes are classic, you can use Yukon Gold or red potatoes. These options add a different texture and flavor. Yukon Golds are creamy, while red potatoes hold their shape well. Experimenting with different types can bring new life to your salad. Loaded Baked Potato Salad pairs well with grilled meats, like chicken or steak. You can also serve it with burgers or hot dogs for a fun cookout. For a lighter meal, try it with a fresh garden salad or grilled veggies. The flavors complement each other nicely, creating a balanced plate. Absolutely! To add heat, you can stir in diced jalapeños or a splash of hot sauce. Adding spicy cheese, like pepper jack, can also kick up the flavor. If you want a smoky touch, try adding chipotle powder. Feel free to adjust the heat to suit your taste! For the full recipe, check out [Full Recipe]. You’ve learned how to make a great Loaded Baked Potato Salad. We covered the right ingredients, preparation methods, and unique variations. Remember, that making this dish is all about balance—flavors, textures, and presentation. Keep experimenting with new ideas and tips to create your perfect salad. Don’t hesitate to adjust ingredients to fit your diet or spice it up. Enjoy every bite, and share your results!](https://joymealplan.com/wp-content/uploads/2025/06/ae05b21a-4cc0-4914-b0ca-5616115dbf5d-768x768.webp)
![To make Pickle Ranch Snack Crackers, you need the following ingredients: - 1 cup all-purpose flour - 1/2 cup cornmeal - 1 teaspoon baking powder - 1/2 teaspoon baking soda - 1/2 teaspoon salt - 1 tablespoon ranch seasoning mix - 1/4 cup dill pickle juice - 1/4 cup melted butter (cooled slightly) - 1/2 cup shredded cheddar cheese - 1/4 cup dill pickle slices (finely chopped) You can swap some ingredients if needed. For the all-purpose flour, try using whole wheat flour for added fiber. If you prefer a gluten-free option, use a gluten-free flour blend. Instead of cornmeal, you can use fine breadcrumbs for a different texture. If you want to skip the ranch seasoning, use herbs like dill, garlic powder, or onion powder to create your own flavor. Each serving, which is about two crackers, provides: - Calories: 120 - Total Fat: 8g - Saturated Fat: 4g - Cholesterol: 20mg - Sodium: 150mg - Carbohydrates: 10g - Fiber: 1g - Sugar: 1g - Protein: 3g These crackers are tasty and balanced, making them a fun snack for any occasion. You can enjoy them without guilt! 1. Preheat your oven to 350°F (175°C). This is key for baking. 2. Line a baking sheet with parchment paper. This helps with easy cleanup. 3. In a large bowl, mix the flour, cornmeal, baking powder, baking soda, salt, and ranch seasoning. Use a whisk to mix well. 4. Slowly add the dill pickle juice and melted butter. Stir until a dough forms. 5. Fold in the cheddar cheese and chopped dill pickles. Make sure they spread evenly in the dough. 6. Roll the dough into small balls, about the size of a quarter. Place them on the sheet, leaving space between them. 1. Flatten each ball gently with a fork or your fingers. Aim for even thickness. 2. Bake the crackers for 12-15 minutes. Watch closely for a light golden brown color. 1. Once baked, let the crackers cool on the sheet for a few minutes. 2. Transfer them to a wire rack to cool completely. This makes them crispier. 3. For a fun serving idea, arrange them on a colorful platter. Add fresh dill sprigs or serve with ranch dip for a tasty snack. Enjoy your Pickle Ranch Snack Crackers! You can find the full recipe above for more details. To get the right texture for your Pickle Ranch Snack Crackers, focus on mixing. Combine the dry ingredients well to avoid lumps. When adding the wet ingredients, mix just until combined. Overmixing can make your crackers tough. Roll the dough into small balls. Keep them uniform in size to ensure even baking. Flatten them gently for a crispier edge. To boost flavor, consider adding more ranch seasoning. You could also try garlic powder or onion powder. A pinch of cayenne can add a nice kick if you like spice. Adding herbs like dill or parsley can enhance the pickle flavor. For extra richness, sprinkle some grated Parmesan cheese on top before baking. One common mistake is using hot melted butter. It can change the dough's texture. Be careful not to skip the cooling step after baking. Allowing them to cool helps the crackers firm up. Also, don’t crowd the baking sheet. If they are too close, they may stick together. Check them often while baking to avoid burning. For a full recipe, refer to the complete instructions. {{image_4}} You can add fun twists to Pickle Ranch Snack Crackers. Want some heat? Try adding cayenne pepper or crushed red pepper flakes. Just a pinch will do! For a cheesy version, swap in pepper jack cheese instead of cheddar. Mixing in some garlic powder can also boost flavor. These tweaks keep your snack game exciting! If you need a gluten-free option, use gluten-free all-purpose flour. It works well in this recipe. You can also try almond flour for a nutty taste. Make sure your ranch seasoning is gluten-free too. This way, everyone can enjoy these tasty crackers without worry. These crackers shine when paired with dips. Creamy ranch dip is a favorite, but you can also serve them with hummus or guacamole. For a fun party snack, arrange them on a platter with fresh veggies. They also taste great with cheese slices or charcuterie. Each bite will surprise your guests! Explore the [Full Recipe] to start making your own delicious Pickle Ranch Snack Crackers today! Store your Pickle Ranch Snack Crackers in an airtight container. This keeps them fresh and crisp. You can use a glass jar or a plastic container. Make sure they are completely cool before sealing. If you live in a humid area, consider adding a small bag of rice to absorb moisture. When stored properly, these crackers can last up to one week. They taste best in the first few days. After that, they may lose some crunch. If you want to keep them longer, you can freeze them. Just place them in a freezer-safe bag or container. If your crackers lose their crunch, you can reheat them. Preheat your oven to 300°F (150°C). Spread the crackers on a baking sheet in a single layer. Heat them for about 5-7 minutes. Check often to avoid burning. Let them cool before enjoying again. For the full recipe, refer to the earlier section. Pickle Ranch Snack Crackers are tasty, crunchy treats. They mix the flavors of dill pickles and ranch dressing. These snacks are perfect for parties or game nights. They are easy to make at home with simple ingredients. To make Pickle Ranch Snack Crackers at home, follow these steps: 1. Preheat your oven to 350°F (175°C). 2. Line a baking sheet with parchment paper. 3. Mix flour, cornmeal, baking powder, baking soda, salt, and ranch seasoning in a bowl. 4. Add dill pickle juice and cooled melted butter. Stir to form a dough. 5. Fold in cheddar cheese and chopped pickles. 6. Roll the dough into small balls. Flatten each ball on the baking sheet. 7. Bake for 12-15 minutes until golden. 8. Let them cool on a wire rack. For the full recipe, check the details provided above. Pickle Ranch Snack Crackers can be a fun snack. They contain some healthy ingredients like cheese and pickles. However, they also have butter and flour, which add calories. Enjoy them in moderation as part of a balanced diet. You can find Pickle Ranch Snack Crackers at many grocery stores. Look in the snack aisle or near the crackers. Some stores may also sell them online. Check popular websites for easy shopping options. These crackers pair well with many dips and spreads. Serve them with ranch dressing, creamy dip, or hummus. You can also enjoy them with cheese or fresh veggies. They make a great snack for any gathering. This blog post covers everything about Pickle Ranch Snack Crackers. We discussed the key ingredients, including substitutions, and shared helpful nutritional data. You learned precise steps for preparation and baking, along with cooling tips for best results. I shared easy tricks to get the perfect texture and flavor. You now know various tasty variations to try and how to store them properly. Finally, you have answers to common questions about these delicious snacks. Enjoy making and sharing your own Pickle Ranch Snack Crackers!](https://joymealplan.com/wp-content/uploads/2025/07/696f27ca-dd07-4295-82fd-de9c637e8141-768x768.webp)
![To make delicious Rainbow Veggie Wraps, gather these fresh ingredients: - 4 large whole wheat tortillas - 1 cup of your favorite hummus - 1 cup shredded carrots - 1 cup red bell pepper, thinly sliced - 1 cup cucumbers, julienned - 1 cup purple cabbage, shredded - 1 ripe avocado, sliced - 1 cup fresh spinach leaves - 2 tablespoons sesame seeds (optional) - Salt and pepper to taste - Fresh herbs like cilantro or basil for garnish (optional) Each ingredient brings unique flavors and colors to your wraps. Whole wheat tortillas provide a healthy base. Hummus adds creaminess and taste. Shredded carrots offer crunch and sweetness. Red bell pepper adds vibrant color and a mild flavor. Cucumbers bring a refreshing crunch, while purple cabbage adds a nice texture. Avocado gives a creamy richness. Fresh spinach leaves add nutrition and color. You can sprinkle sesame seeds for extra crunch. Optional toppings like fresh herbs enhance the taste and look of your wraps. A pinch of salt and pepper brings all the flavors together. For the full recipe, check out the entire section. Start by washing all your vegetables. This keeps them fresh and clean. First, rinse the cucumbers, carrots, red bell pepper, purple cabbage, and spinach under cold water. Pat them dry with a clean towel. Next, slice the cucumbers into thin sticks. Shred the carrots and purple cabbage using a grater. For the red bell pepper, cut it into thin slices. Lastly, slice the ripe avocado carefully to avoid any bruising. When you are ready to spread the hummus, take a large spoonful. Place it in the center of each tortilla. Use the back of the spoon to spread it evenly. Leave about an inch of space from the edges. This helps to fill the wrap without making a mess. Now it's time to build your wrap. Start by laying a handful of fresh spinach leaves in the center of each tortilla. Next, add a layer of shredded carrots, followed by the red bell pepper slices. Then, place the cucumber sticks, shredded cabbage, and avocado slices on top. Lightly sprinkle salt and pepper over the veggies to boost their flavor. If you like, add some sesame seeds for a crunchy texture. To roll your wrap, begin at one end. Tuck the filling tightly as you roll towards the other end. Be sure to fold in the sides as you go. This helps keep all the tasty fillings secure. Once you have rolled all the wraps, grab a sharp knife. Cut each wrap in half diagonally. This shows off the bright, colorful layers inside. Now, arrange your cut wraps on a serving platter. If you want, sprinkle some fresh herbs like cilantro or basil on top for a lovely touch. Try this full recipe to enjoy a fresh and flavorful meal! You can swap or add veggies based on what you have. Here are some ideas: - Use zucchini or yellow squash for a different taste. - Try radishes for a crunchy bite. - Sweet potato adds natural sweetness when roasted. - Bell pepper colors can change based on what’s fresh. For spreads, think outside the box: - Guacamole gives a creamy touch. - Tzatziki adds a fresh, tangy flavor. - Try a spicy hummus for a kick. Make your wraps look great for any gathering. Cut them into smaller pieces for easy sharing. Arrange them on a colorful plate. You can also use a large platter and create a rainbow effect with the veggies. Add fresh herbs on top for a pop of color. Pair your wraps with tasty dips: - A simple yogurt sauce works well. - Try a spicy salsa for heat. - Peanut sauce can add a nice twist. For a fun touch, serve the wraps with toothpicks. This makes them easier to grab and enjoy. For the full recipe, check out the Rainbow Veggie Wraps section. {{image_4}} You can make these rainbow veggie wraps even more exciting. Adding protein boosts flavor and fills you up. Grilled chicken, shrimp, or tofu works great. Just slice them thin and layer them in the wrap. You can also mix in herbs and spices. Fresh cilantro or basil adds a tasty kick. Want a bit of heat? Add sliced jalapeños or a dash of hot sauce. For a zesty touch, try a sprinkle of lemon juice or a bit of garlic powder. These small changes can turn a simple wrap into a flavor explosion. These wraps are easy to adjust for different diets. If you need gluten-free options, use gluten-free tortillas. Many brands offer great taste without gluten. For a vegan version, skip the chicken or shrimp. The fresh veggies and hummus keep it tasty and filling. If you want lower calories or low-carb options, swap the tortilla for lettuce leaves. This keeps the wraps light and fresh. You can also reduce the hummus or use a low-calorie spread. These tweaks help you enjoy the wraps while sticking to your goals. For the complete recipe, check out the [Full Recipe]. To keep your Rainbow Veggie Wraps fresh, store them in a sealed container. Wrap each one in parchment paper or plastic wrap. This helps prevent them from drying out. If you make wraps in advance, place a paper towel in the container. This will absorb excess moisture and keep them crisp. If you want to meal-prep, assemble the ingredients without rolling them. Store the veggies and hummus separately. When ready to eat, just spread the hummus and roll. This keeps everything fresh and tasty. You can keep your wraps in the fridge for about three days. After that, they may start to lose their crunch and flavor. Check for any signs of spoilage like a sour smell or slimy texture. If you see these signs, it's best to throw them away. Enjoy your wraps while they are still fresh for the best taste! To make your Rainbow Veggie Wraps more filling, you can add proteins or grains. Here are some suggestions: - Grilled chicken for a meaty option - Tofu or tempeh for a plant-based choice - Quinoa or brown rice for hearty grains - Chickpeas or black beans for extra fiber These ingredients not only add bulk but also enhance the flavor and nutrition. Yes! You can prepare Rainbow Veggie Wraps ahead of time. Here are some tips to make it easy: - Prep all your veggies a day before. Store them in airtight containers to keep them fresh. - Spread hummus on the tortillas and stack them in the fridge. Just add the veggies when you’re ready to eat. - Roll the wraps tightly and wrap them in plastic for easy storage. This way, you can enjoy your wraps without much hassle. Rainbow Veggie Wraps pair well with various sides and drinks. Here are some ideas: - Fresh fruit salad for a sweet touch - Crispy sweet potato fries for a fun crunch - A light soup, like tomato or vegetable, to warm up your meal - Sparkling water or herbal tea for a refreshing drink These options complement the flavors of the wraps and make for a balanced meal. These rainbow veggie wraps are easy and fun to make. We covered the key ingredients, their preparation, and how to assemble each wrap. I shared tips on ingredient swaps and how to make your wraps look great. You can also try different flavors and adapt the recipe for various diets. When stored correctly, these wraps stay fresh and tasty. Now, get creative and enjoy making these vibrant, healthy meals!](https://joymealplan.com/wp-content/uploads/2025/07/35a6ca00-0a2a-4347-b538-1c234b42866c-768x768.webp)

![- 4 large portobello mushrooms, stems removed - 1 cup cooked quinoa - 1 small zucchini, finely diced - 1/2 cup feta cheese, crumbled - 2 cloves garlic, minced - 1 teaspoon dried oregano - 1 red bell pepper, finely diced - 1 small red onion, finely chopped - Fresh parsley, for garnish Using these ingredients, you will create a dish that is both tasty and simple. The portobello mushrooms serve as a perfect base. They have a meaty texture and a rich flavor. You will stuff them with a mix of cooked quinoa and fresh vegetables. The quinoa adds protein and texture, making this dish satisfying. The feta cheese brings a creamy saltiness that balances the flavors. Garlic and oregano add depth. You can also add a red bell pepper and red onion for sweetness and crunch. Finishing with fresh parsley gives a burst of color and freshness. This recipe is easy to follow and uses ingredients you can find at any grocery store. You can even customize it with your favorite veggies or cheese. For a full recipe, check out the [Full Recipe]. - Preheat oven to 375°F (190°C). - Clean portobello mushrooms gently. Use a damp cloth to wipe off dirt. Place them gill-side up on a baking sheet. This helps with the filling later. - Sauté onions and garlic until translucent. Heat olive oil in a skillet over medium heat. - Add zucchini and red bell pepper, sauté until softened. Stir for about five minutes. - Incorporate fresh spinach until wilted. This takes about two minutes. The spinach adds flavor and color. - Mix quinoa and sautéed vegetables in a bowl. This is where the magic happens! - Spoon mixture into the portobello mushrooms. Press down gently with a spoon for even filling. - Bake for 25-30 minutes until golden. The mushrooms will get tender and delicious. Check them often to avoid overcooking. Try this recipe for a tasty meal. For the full recipe, visit the recipe section. To make your stuffed portobello mushrooms really pop, add fresh herbs. Basil and thyme work great. They bring a lovely aroma and zest. You can also try different cheeses. Goat cheese adds tang, while mozzarella offers creaminess. Each cheese gives a unique taste to the dish. When serving your stuffed mushrooms, think about fresh salads. A light, crisp salad pairs well. It balances the rich flavors of the mushrooms. You can also add some dipping sauces. Try a tangy vinaigrette or a garlic aioli. For presentation, place the mushrooms on greens like arugula. A drizzle of balsamic reduction looks fancy and adds flavor. One mistake is overcooking the mushrooms. They should be tender but not mushy. Keep an eye on the time as they bake. Another common error is not seasoning the filling. Adding enough salt and pepper makes a big difference. Taste as you go to find the right balance. Following these tips will help you create perfect stuffed portobello mushrooms. For the full recipe, check out the instructions above. {{image_4}} You can make stuffed Portobello mushrooms even more exciting. Start by using different vegetables in your filling. Try using eggplant, asparagus, or carrots for unique tastes. Each veggie adds its own flavor and texture. You can also switch out quinoa for brown rice or couscous. Brown rice gives a nutty flavor, while couscous offers a fluffy texture. Both options work well in these stuffed mushrooms. If you want to add meat, you have great options. You can include cooked ground meat or sausage in your stuffing. This adds a savory richness that meat lovers will enjoy. Another choice is to use chicken or turkey for a protein boost. Cooked and shredded chicken offers a wonderful taste that pairs well with the mushrooms. For those with dietary needs, there are easy swaps. If you need gluten-free options, make sure to use gluten-free grains. Quinoa is already gluten-free, but you can also use rice. For vegan adaptations, simply omit the cheese. You can replace feta with a nut-based cheese or nutritional yeast for a cheesy flavor without dairy. These changes help everyone enjoy the dish! To keep your stuffed portobello mushrooms fresh, store leftovers in an airtight container. This helps seal in flavors and moisture. Place the container in the fridge. The mushrooms will stay good for about three days. To keep them tasty, don’t stack them too high. This prevents squishing the filling. You can also freeze stuffed mushrooms for future meals. First, allow them to cool completely. Then, wrap each mushroom in plastic wrap and place them in a freezer bag. Make sure to remove as much air as possible. They can last for up to three months in the freezer. When you're ready to eat, thaw them overnight in the fridge. This helps maintain texture. When it’s time to reheat, you have two good options: oven or microwave. For the oven, preheat it to 350°F (175°C). Place the mushrooms on a baking sheet and cover with foil. Heat for about 15 minutes. This ensures they warm evenly without drying out. If you use a microwave, place the mushrooms on a microwave-safe plate. Heat in short bursts of 30 seconds until warm. This method is quick but can make them a bit soggy. Enjoy your stuffed mushrooms just like they were fresh! You can tell stuffed mushrooms are done when they feel tender. The tops should be lightly golden. If you see a nice brown color on top, that's a good sign! The mushrooms will shrink slightly as they cook, so check for softness. Yes, you can prepare stuffed mushrooms ahead of time! Here’s how: Make the filling and stuff the mushrooms. Then, cover them and put them in the fridge. You can keep them there for a day or two. When you’re ready, just bake them as usual. This saves time on busy days! Stuffed Portobello mushrooms go well with many sides. Here are some ideas: - A light salad with mixed greens - Roasted vegetables for extra flavor - Quinoa or rice to match the filling - A glass of white wine or sparkling water Pair these to make your meal even better! For more ideas, check out the Full Recipe for serving tips. Stuffed portobello mushrooms are a tasty and healthy dish. We covered the main ingredients, like quinoa and feta cheese, to create a flavorful filling. I shared step-by-step instructions to guide you through prepping, cooking, and assembling. You also learned tips for enhancing flavor and avoiding common mistakes. Finally, we explored variations for different diets and storage methods. These mushrooms offer endless possibilities. Enjoy making them your way and savor the delicious results.](https://joymealplan.com/wp-content/uploads/2025/06/f2d78041-f354-4b2f-8927-65aa38224e9e-768x768.webp)
