Air Fryer Onion Rings with Ranch Simple and Crispy

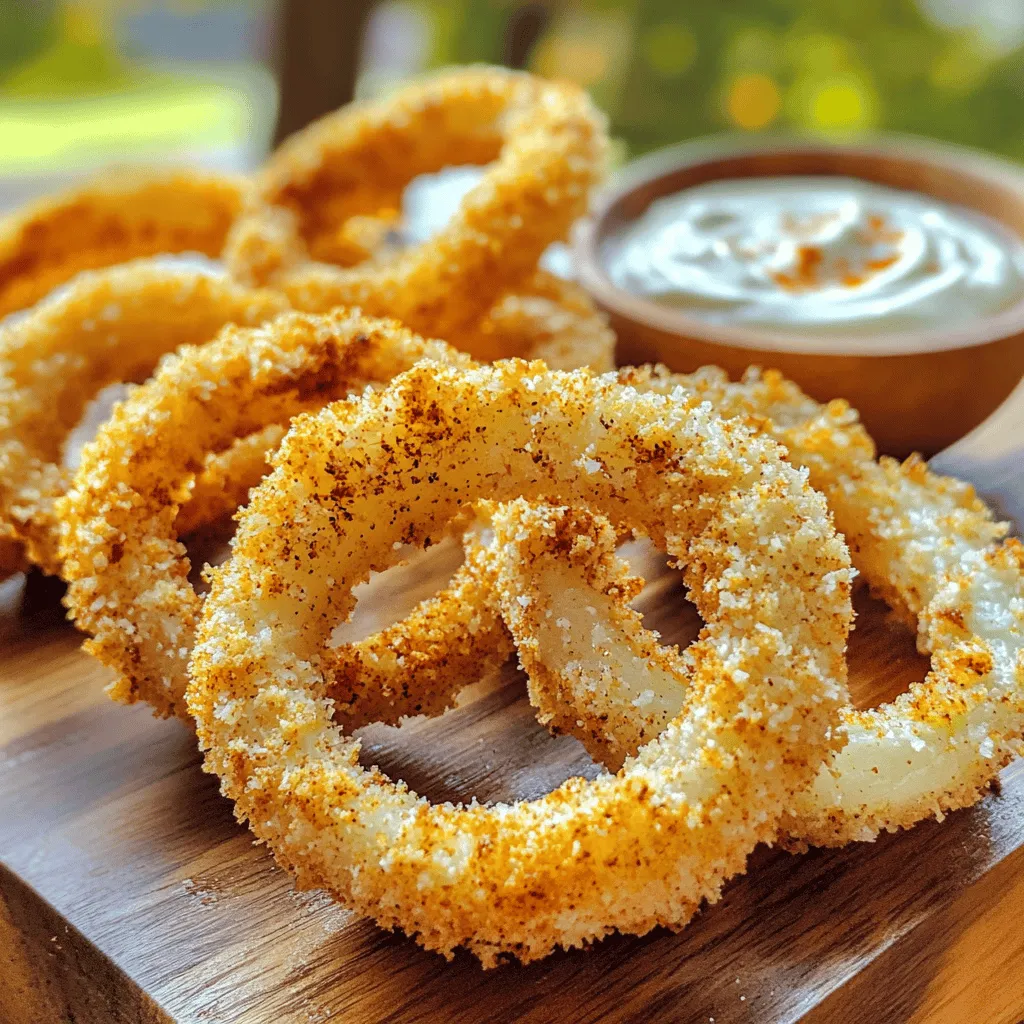
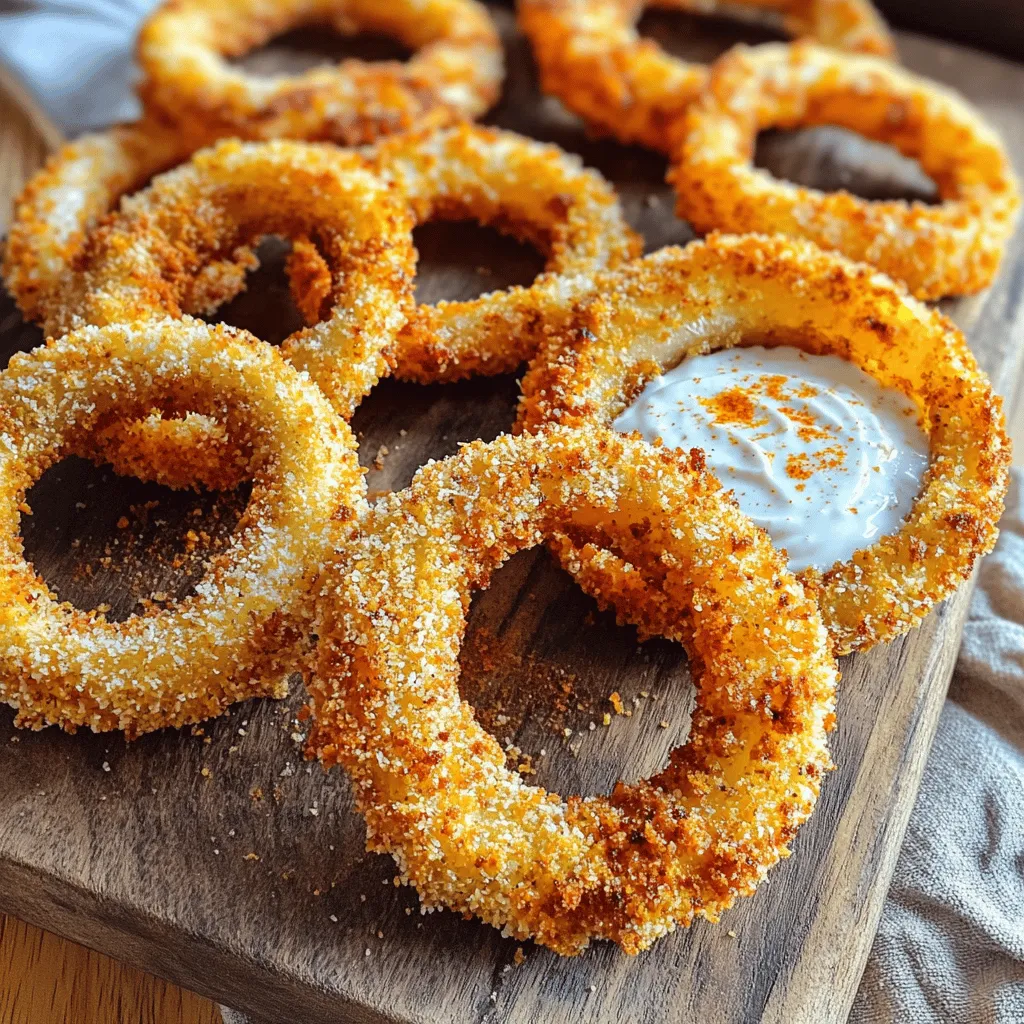
Craving a delicious, crispy snack? Look no further! My Air Fryer Onion Rings with Ranch are easy to make and bursting with flavor. You’ll love the crunch of these rings paired with creamy ranch. In just a few simple steps, you can whip up this tasty treat at home. Let’s dive into the ingredients and get frying! You won’t want to miss this recipe!
Ingredients
List of Ingredients
– 2 large onions, sliced into 1/4-inch thick rings
– 1 cup all-purpose flour
– 1 teaspoon garlic powder
– 1 teaspoon smoked paprika
– 1 teaspoon salt
– 1/2 teaspoon black pepper
– 2 large eggs, beaten
– 1 cup panko breadcrumbs
– 1/2 teaspoon cayenne pepper (optional)
– Cooking spray
In this recipe, I use two large onions. I slice them into rings, about a quarter-inch thick. This thickness gives the rings a great bite while frying. I mix one cup of all-purpose flour with garlic powder, smoked paprika, salt, and black pepper. This seasoned flour coats the onions and adds flavor.
I use two beaten eggs as a binding agent. The eggs help the coating stick well. For crunch, I use one cup of panko breadcrumbs. If you want some heat, add half a teaspoon of cayenne pepper. Finally, a light spray of cooking spray helps make the onion rings crispy.
Optional Garnishes
– Finely chopped chives
– Fresh parsley
For a pop of color, I like to garnish the onion rings with finely chopped chives or fresh parsley. These herbs add freshness and make the dish look even more inviting.
Step-by-Step Instructions
Preparation Steps
– Preheat air fryer to 375°F (190°C).
– Slice onions into rings and separate them.
Start by preheating your air fryer. This step is key. A hot air fryer makes the onion rings crispy. While it heats, slice two large onions into 1/4-inch thick rings. Gently pull apart the rings. Set them aside on a plate.
Coating the Onion Rings
– Prepare the seasoned flour mixture.
– Beat the eggs as a binding agent.
– Combine panko breadcrumbs and cayenne.
Next, let’s make the coating. In a bowl, mix 1 cup of all-purpose flour with 1 teaspoon of garlic powder, 1 teaspoon of smoked paprika, 1 teaspoon of salt, and 1/2 teaspoon of black pepper. This mixture adds great flavor. In another bowl, beat two large eggs. These will help the coating stick. In a third bowl, mix 1 cup of panko breadcrumbs with 1/2 teaspoon of cayenne pepper. This adds a nice kick if you want it.
Cooking the Onion Rings
– Dip onion rings into flour, eggs, and panko.
– Arrange rings in the air fryer basket.
– Air fry for 10-12 minutes, flipping halfway.
Now it’s time to coat the onion rings. First, dip each ring into the flour mixture. Shake off any extra flour. Next, coat it in the beaten egg. Let the excess egg drip off. Finally, roll the ring in the panko mixture. Make sure it’s fully covered.
Once coated, place the rings in a single layer in the air fryer basket. Try not to stack them. Lightly spray the tops with cooking spray. This adds more crispiness.
Air fry the rings for 10-12 minutes. Flip them halfway through for even cooking. They should turn golden brown and crispy. Enjoy the process; the smell will be amazing!
Tips & Tricks
Achieving Perfect Crispiness
To get those onion rings just right, keep a few tips in mind. First, arrange your onion rings in a single layer in the air fryer basket. This helps hot air circulate around each ring. If the rings stack on top of each other, they may not crisp up well. Next, lightly spray the tops with cooking spray. This adds moisture and helps the breading turn golden brown.
Customizing Flavor
Want a kick? Adjust the spice level with cayenne pepper. Add just half a teaspoon for a mild kick. If you like it hotter, add more to suit your taste. You can also mix in other herbs and spices. Try adding Italian seasoning or even some chili powder for a fun twist.
Serving Suggestions
Dipping sauces make a big difference. Serve your onion rings with the zesty ranch dip. It enhances the flavor and adds a creamy touch. You can also try ketchup or a spicy aioli for variety. To make your dish look nice, garnish the onion rings and ranch dip with finely chopped chives or parsley. This adds a pop of color and makes it all more inviting.

Variations
Flavored Breading Options
You can add flavor to your breading. One fun way is to mix in some grated Parmesan cheese. This adds a nice, cheesy taste to your onion rings. Just stir about half a cup into your panko breadcrumbs. For those who need gluten-free options, use gluten-free flour and gluten-free breadcrumbs. It still tastes great!
Onion Variations
Different onions give different tastes. Sweet onions like Vidalia add a mild flavor and sweetness. Yellow onions are more robust and savory. You can also try different sizes of onions. Small onions make bite-sized rings, while large ones give hearty bites.
Different Dips
While ranch is classic, you can try other dips. For a zesty twist, try a spicy mayo or a yogurt dip. To make your own dressing, mix mayonnaise with lemon juice and a bit of garlic. This gives a fresh and creamy taste. You can even play with herbs like dill or chives to create a unique flavor.
Storage Info
How to Store Leftovers
To store your leftover onion rings, use an airtight container. This keeps them fresh. You can also wrap them in foil. In the fridge, they last about 2-3 days. Avoid keeping them longer, as they may lose their crunch.
Reheating Instructions
To reheat your onion rings, use the air fryer or oven. Set the air fryer to 375°F (190°C). Cook for about 5 minutes. This helps them stay crispy. Avoid using the microwave, as it can make them soggy. For best results, place them in a single layer when reheating. Enjoy your crispy onion rings again!
FAQs
How do I make my onion rings crispier?
To make your onion rings crispier, you can try a few tricks. First, ensure you coat each ring well in the panko mixture. This gives the rings a nice crunch. Second, use cooking spray lightly on each ring before frying. This helps them achieve a golden brown color. Lastly, avoid overcrowding the air fryer. Cook in a single layer for best results.
Can I use other types of onions for this recipe?
Yes, you can use other types of onions! Sweet onions, like Vidalia or Walla Walla, add a nice flavor. Yellow onions are great for a classic taste. Red onions also work, giving a milder flavor and vibrant color. Each type will change the taste slightly, so feel free to experiment!
Is it possible to make these onion rings ahead of time?
You can prepare the onion rings ahead of time, but they taste best fresh. After coating them, store them in the fridge for a few hours. Just remember to cook them right before serving. If you want to freeze them, freeze the coated rings in a single layer. Once frozen, store them in a bag, and cook straight from the freezer.
What can I substitute for panko breadcrumbs?
If you don’t have panko breadcrumbs, you can use regular breadcrumbs. They won’t be as crunchy, but they’ll still work. You can also crush crackers or cornflakes for a fun twist. Just make sure whatever you use is well-seasoned to keep the flavor strong.
How do I make homemade ranch dressing?
Making homemade ranch dressing is easy! Mix 1/2 cup of ranch dressing with a splash of fresh lemon juice. Stir until well combined. This adds a zesty flavor that pairs perfectly with the onion rings. If you want, you can also add herbs like dill or parsley for more taste.
This blog post explored the steps to make crunchy air-fried onion rings. We discussed key ingredients like onions, flour, and panko breadcrumbs. You learned how to coat and cook the rings for the best crispiness. I shared helpful tips and variations to customize the flavor. Remember, creativity in dips and spices can make this dish your own. Enjoy serving these delicious rings as a fun snack or side dish. Now, it’s time to try this simple recipe and impress your friends and family!


![- 6 large eggs - 1 cup fresh spinach, roughly chopped - 1/2 bell pepper, diced - 1/2 cup cherry tomatoes, halved - 1/4 cup red onion, finely minced - 1/2 cup feta cheese, crumbled - Seasonings and oil These ingredients make a tasty breakfast that is also healthy. The eggs provide protein, while the veggies add color and nutrients. You can use any bell pepper you like for a fun twist. You can swap out the spinach for other greens like kale or Swiss chard. Zucchini and mushrooms also work well in this recipe. If feta isn’t your favorite, try cheddar or goat cheese for a different taste. Each muffin has about 100 calories. They offer around 8 grams of protein, 7 grams of fat, and 2 grams of carbs. This makes them a great option for a filling breakfast. If you want the full recipe, check out [Full Recipe]. 1. Preheat your oven to 350°F (175°C). This ensures even cooking. 2. Grease your muffin tin using cooking spray or olive oil. This helps the muffins release easily. 1. In a large bowl, crack the 6 eggs. Whisk them vigorously until mixed well. 2. Fold in the chopped spinach, diced bell pepper, halved cherry tomatoes, and minced red onion. Make sure the veggies spread evenly. 3. Add the crumbled feta cheese for extra flavor. Mix in garlic powder, dried oregano, salt, and black pepper. Stir until everything is well combined. 1. Carefully pour the egg-veggie mix into the muffin tin. Fill each cup about three-quarters full. 2. Place the muffin tin in the oven and bake for 18-20 minutes. Check for doneness by pressing lightly on the tops. They should feel firm and slightly golden. 3. After baking, let the muffins cool in the tin for about 5 minutes. Use a butter knife to run around the edges. This helps them come out easily. Then, transfer them to a wire rack to cool completely. For the full recipe, check the earlier sections. Enjoy these tasty muffins as a quick breakfast! To get the perfect texture in your veggie muffins, cook them until they are just firm. If you bake them too long, they can become dry. Use a toothpick to check doneness. Stick it in the center, and if it comes out clean, they are ready. Do not overfill the muffin cups. Fill them about three-quarters full. This gives the muffins room to rise without spilling over. If you overfill, you will have a messy oven and uneven muffins. To keep your muffins fresh, store them in an airtight container in the fridge. They can last up to a week this way. If you want to keep them longer, consider freezing them. Wrap each muffin in plastic wrap and place them in a freezer bag. They will last for about three months in the freezer. When you want to enjoy a muffin, take it out and reheat it. You can warm it in the microwave for about 30 seconds or until hot. If you prefer a crispy edge, heat it in an oven at 350°F for 10 minutes. These muffins pair well with many toppings. Try them with fresh salsa for a zesty kick. Avocado adds creaminess and healthy fats. For a fun twist, serve them with a dollop of Greek yogurt. For a great presentation, arrange the muffins on a colorful platter. Garnish with freshly chopped herbs like parsley or basil. This adds a nice pop of color and makes the dish more inviting. Enjoy your veggie-packed egg muffins! {{image_4}} You can easily modify these muffins for different diets. For gluten-free options, just use gluten-free flour or a gluten-free muffin mix. This makes them safe for those with gluten sensitivities. If you're looking for a vegan alternative, replace eggs with chickpea flour or a plant-based egg substitute. This keeps the muffins tasty and healthy while meeting vegan needs. Want to add more flavor? Consider spices like cumin or smoked paprika. Fresh herbs like basil or parsley also work well. They can really wake up the taste of the muffins. For creative mix-ins, think about adding cooked bacon or sausage for extra protein. You can also try different cheeses, like cheddar or goat cheese, to change the taste. You can make mini muffins or standard size muffins. Mini muffins are great for snacks or kids. They bake faster, so check them at about 12-15 minutes. For standard muffins, stick to the 18-20 minute baking time. Just keep an eye on them, so they don't overcook. Adjusting the size helps you serve the muffins just how you like them. For the full recipe, you can refer back to the main section. Veggie packed egg muffins are small, baked dishes made with eggs and vegetables. They are light, nutritious, and perfect for breakfast. These muffins are easy to make and customizable. You can add your favorite veggies and cheeses. They provide protein from eggs and fiber from vegetables. This makes them a healthy choice for busy mornings. Veggie muffins last about 4 to 5 days in the fridge. Store them in an airtight container to keep them fresh. Signs of spoilage include a sour smell or mold. If you see either, throw them away. Always check before eating leftovers to ensure safety. Yes, you can freeze veggie packed egg muffins. Allow them to cool completely first. Place them in a freezer-safe bag or container. They can last up to 3 months in the freezer. To thaw, simply place them in the fridge overnight. You can also heat them in the microwave for a quick meal. Veggie packed egg muffins are easy to make and healthy. First, you prep your ingredients. The recipe takes about 10 minutes to prep and 18-20 minutes to cook. You can make 12 muffins in total. 1. Prep the oven: Preheat it to 350°F (175°C). 2. Grease the muffin tin: Use cooking spray or olive oil. 3. Whisk the eggs: Crack 6 large eggs into a bowl. Mix them well. 4. Add veggies: Mix in 1 cup of spinach, 1/2 diced bell pepper, 1/2 cup cherry tomatoes, and 1/4 cup red onion. 5. Season and add cheese: Add 1/2 cup of feta cheese, 1 tsp garlic powder, 1 tsp oregano, and salt and pepper. 6. Fill the muffin tin: Pour the mix into the cups, filling them about three-quarters full. 7. Bake: Put the tin in the oven for 18-20 minutes. Check if they are firm and golden. 8. Cool and serve: Let them cool for 5 minutes before removing them from the tin. These muffins are perfect for a quick breakfast or snack. Enjoy them warm or store them for later. This blog post covered how to make veggie-packed egg muffins. We discussed ingredients, nutritional info, and step-by-step instructions. You learned about tips for perfect muffins and various fun variations. With clear directions, you can create tasty muffins that fit your diet. I hope you feel inspired to try making these muffins. They are good for breakfast, snacks, or meal prep. Enjoy experimenting with flavors and share your results!](https://joymealplan.com/wp-content/uploads/2025/07/ffbefcb5-f112-4a21-bd30-7331a5bc5463-768x768.webp)

![- 1 ripe mango, diced - 2 ripe avocados, diced - 1 small red onion, finely chopped - 1 sweet red bell pepper, diced - 1 jalapeño, minced - 1/4 cup fresh cilantro, chopped - Juice of 2 limes - 1 tablespoon extra virgin olive oil - Salt and black pepper to taste How to choose the perfect mango Look for a mango that feels slightly soft when you press it. The skin should have a nice golden hue. A ripe mango smells sweet at the stem end. Choosing the best avocados Pick avocados that yield to gentle pressure. The skin should be dark green or black, depending on the variety. Avoid hard or overly mushy avocados. Signs of a fresh jalapeño A fresh jalapeño should be firm and glossy. Look for bright green skin without wrinkles. A fresh pepper has a crisp feel and a spicy aroma. These tips will help you find the best ingredients for your salsa. Fresh produce makes your dish more vibrant and tasty. For the full recipe, check the details above. - Start by washing all your fresh produce. - Dice the ripe mango into small cubes. - Carefully cut the avocados into bite-sized pieces. - Finely chop the red onion for sharp flavor. - Dice the red bell pepper for sweetness. - Mince the jalapeño, adjusting to your heat preference. Next, in a large mixing bowl, combine the diced mango, avocado, chopped onion, red bell pepper, and minced jalapeño. Gently fold in the chopped cilantro, spreading the fresh herb throughout. Squeeze the juice of two fresh limes over the mix, along with a tablespoon of olive oil. This adds richness. Use a spatula to carefully toss the ingredients. Keep the avocado pieces intact to maintain texture. Season the salsa with salt and freshly cracked black pepper, mixing lightly to combine. Resting time is key for great flavor. Let the salsa sit for about 10 minutes at room temperature. This duration allows the ingredients to blend and the flavors to develop. When you let the salsa rest, the lime juice and olive oil soak in. This process enhances the taste and makes every bite burst with flavor. Enjoy this fresh, vibrant dish as a wonderful side or topping. For the full recipe, check out the details above. - How to keep avocados from browning: To stop avocados from turning brown, use lime juice. The acid in lime juice slows oxidation. Squeeze fresh lime juice right after cutting the avocado. Mix it in well to cover all the flesh. You can also store the salsa in an airtight container to keep it fresh longer. - Using lime juice effectively: Lime juice brightens the flavors in your salsa. Use freshly squeezed lime juice rather than bottled juice. It tastes better and adds a nice zing. Aim for about two limes for this recipe. Adjust based on your taste! - Importance of ingredient proportions: Balance is key to great salsa. Use equal parts of mango and avocado for a good mix. Too much onion can overpower the other flavors. Keep the jalapeño mild if you prefer less heat. Taste as you go, and adjust the ingredients to suit your own palate. - Pairing with tortilla chips: Serve your mango avocado salsa with crispy tortilla chips. The crunch of the chips pairs well with the smoothness of the salsa. It makes for a perfect snack or appetizer at parties. - Using as a topping for grilled meats: This salsa works great as a topping for grilled chicken or fish. The sweet and spicy flavors complement the meat beautifully. Just spoon it on right before serving for the best taste. - Incorporating into tacos or burritos: Use this salsa to add freshness to tacos or burritos. It enhances your meal with vibrant flavors. Just add a scoop in your taco or wrap it up in a burrito, and enjoy! For the full recipe, check out the complete method to create this delicious dish. {{image_4}} You can make mango avocado salsa even better with new flavors. Try adding tropical fruits like pineapple or papaya. These fruits bring a sweet twist and a fun texture. You can also mix in fresh herbs like mint or basil. These herbs give a fresh taste that brightens the salsa. Want more heat? You can swap out the jalapeño for a serrano or habanero pepper. These peppers can make your salsa spicy and exciting. Just remember to taste as you go! Making mango avocado salsa fit your diet is easy. If you're vegan, this recipe is already perfect. It has no animal products and is full of healthy fats. If you need a low-sodium option, skip the added salt. The fresh lime juice and other ingredients give plenty of flavor. For those with allergies, check each ingredient. You can always swap out foods that cause issues for you. This salsa is a versatile dish that everyone can enjoy. Try these ideas to make it your own! For the full recipe, check out the [Full Recipe]. To keep your mango avocado salsa fresh, put it in the fridge. Use an airtight container. This helps prevent the salsa from browning. The salsa stays good for about 2 to 3 days in the fridge. If you see browning, it’s best to toss it. Yes, you can freeze mango avocado salsa! However, know that the texture might change. For best results, freeze it without the avocado. This keeps the salsa tasting fresh. When you're ready to use it, transfer it to the fridge for a slow thaw. To freeze, use a freezer-safe container. Leave some space at the top for expansion. You can also use freezer bags. Squeeze out the air before sealing. When thawing, avoid using a microwave. This can make the salsa mushy. Instead, let it sit in the fridge overnight. Once thawed, mix it well before serving. If it seems dry, add a splash of lime juice for extra flavor. Enjoy your mango avocado salsa fresh and flavorful! How long does mango avocado salsa last? Mango avocado salsa lasts about 2 to 3 days in the fridge. To keep it fresh, store it in an airtight container. The avocado may brown, but it will still taste good. Can I make salsa ahead of time? You can make salsa ahead of time. Just prepare it a few hours before serving. This allows the flavors to mix well. If you make it too early, the avocado may brown. What can I substitute for cilantro? If you dislike cilantro, you can use parsley instead. Parsley adds a fresh taste without the strong flavor of cilantro. Green onions or basil are also good options. What are the health benefits of mangoes and avocados? Mangoes are high in vitamins A and C. They support your immune system and promote healthy skin. Avocados contain healthy fats and fiber. They help with digestion and heart health. Is mango avocado salsa good for meal prep? Yes, mango avocado salsa is great for meal prep. It adds flavor to many meals. Use it on tacos, salads, or grilled meats for a fresh twist. Can I use canned ingredients instead of fresh? You can use canned ingredients, but fresh tastes better. Canned mango or avocado may change the texture. If you must use canned, pick options with no added sugar or salt. Mango avocado salsa is fresh, tasty, and easy to make. We covered how to choose ripe ingredients, prepare them, and enhance flavors. Remember to rest your salsa for the best taste. You can adjust it to fit your diet or add new ingredients. Store leftovers properly to enjoy later. This salsa pairs well with many dishes and adds great flavor. Enjoy your cooking and try new flavor combinations!](https://joymealplan.com/wp-content/uploads/2025/07/4f0b2596-afb2-4ef7-a95d-26c50b7bed60-768x768.webp)

