Almond Poppy Seed Muffins Bakery Fresh Recipe Guide

If you love warm, tasty muffins, you’re in for a treat! My “Almond Poppy Seed Muffins Bakery Fresh Recipe Guide” is packed with simple steps to make these delightful treats. You’ll find easy ingredient lists, expert tips, and even variations for gluten-free and vegan options. Get ready to whip up a batch that fills your kitchen with mouthwatering aromas. Let’s bake some muffins that everyone will love!
Ingredients
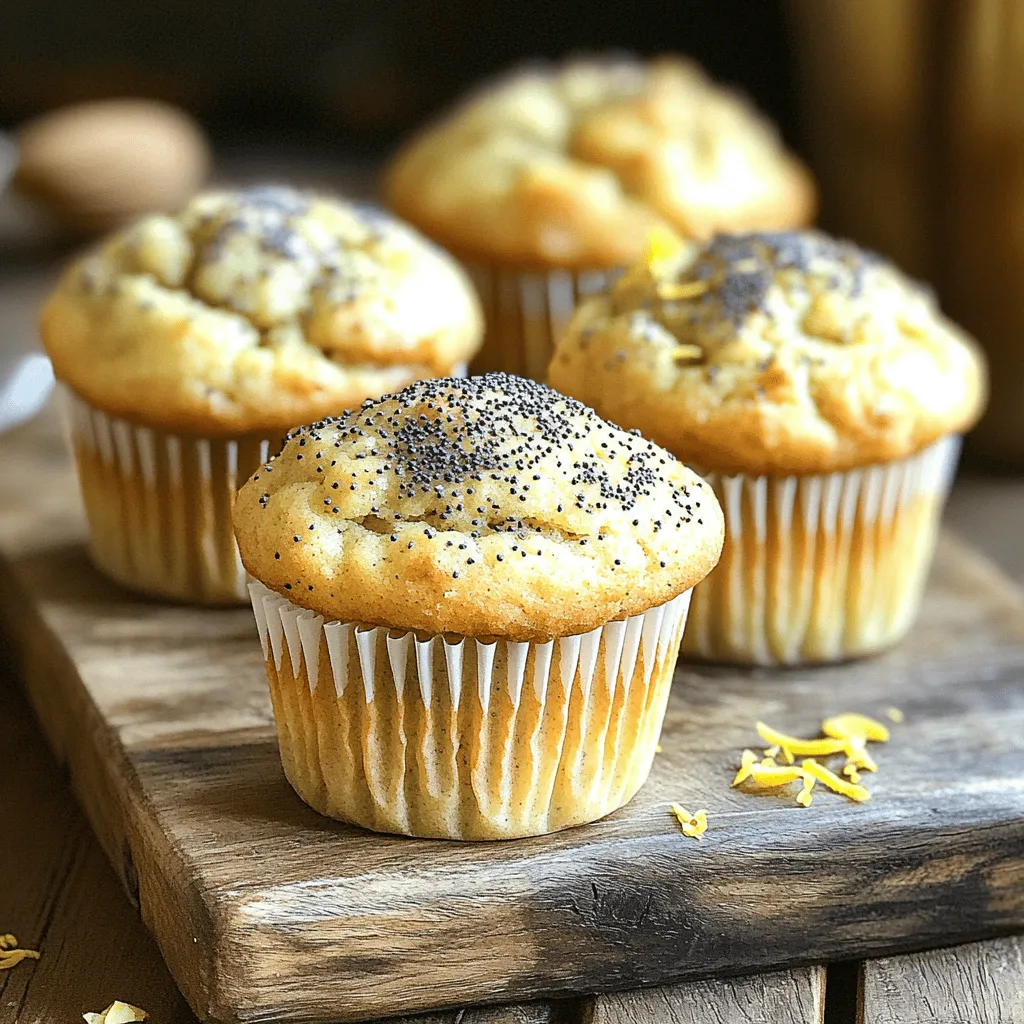
List of Required Ingredients
– 1 cup all-purpose flour
– 1/2 cup almond flour
– 1/2 cup granulated sugar
– 2 tablespoons poppy seeds
– 2 teaspoons baking powder
– 1/2 teaspoon baking soda
– 1/4 teaspoon salt
– 1/2 cup unsalted butter, melted and slightly cooled
– 2 large eggs, at room temperature
– 1/2 cup milk (any variety will work)
– 1 teaspoon almond extract
– 1 teaspoon pure vanilla extract
– Zest of 1 lemon
Ingredient Notes
If you have nut allergies, you can skip the almond flour. Use all-purpose flour instead. You can also use coconut flour, but you will need to adjust the liquid. For a dairy-free option, use plant-based butter and milk.
Optional Add-ins
Here are some fun options to mix in:
– Chopped nuts like almonds or walnuts
– Fresh blueberries or raspberries
– Chocolate chips for a sweet twist
– Dried fruits like cranberries or apricots
Feel free to get creative! Each add-in can change the flavor and texture, making your muffins unique.
Step-by-Step Instructions
Prepping the Oven and Muffin Tin
First, heat your oven to 350°F (175°C). This step warms the oven and gets it ready for baking. Next, prepare your muffin tin. You can line it with paper liners or apply a light coat of cooking spray. This will help the muffins come out easily after baking.
Mixing Dry Ingredients
In a large bowl, add the following dry ingredients:
– 1 cup all-purpose flour
– 1/2 cup almond flour
– 1/2 cup granulated sugar
– 2 tablespoons poppy seeds
– 2 teaspoons baking powder
– 1/2 teaspoon baking soda
– 1/4 teaspoon salt
Use a whisk to mix these ingredients well. This ensures that the baking powder and poppy seeds blend evenly throughout, leading to fluffy muffins.
Combining Wet Ingredients
In a separate bowl, combine your wet ingredients:
– 1/2 cup unsalted butter, melted and slightly cooled
– 2 large eggs, at room temperature
– 1/2 cup milk (any variety will work)
– 1 teaspoon almond extract
– 1 teaspoon pure vanilla extract
– Zest of 1 lemon
Whisk these together until the mixture is smooth. The lemon zest adds a fresh flavor that brightens your muffins.
Folding Mixtures Together
Now, pour the wet mixture into the dry bowl. Use a spatula to fold them together gently. Mix until just combined. It’s okay if the batter is slightly lumpy. Overmixing can make the muffins tough, so be careful!
Filling Muffin Cups
Grab a spoon or an ice cream scoop. Use it to fill each muffin cup about two-thirds full. This allows the muffins to rise without spilling over the edges.
Baking and Cooling Process
Place the muffin tin in your preheated oven. Bake for 15 to 20 minutes. Check if they’re done by inserting a toothpick in the center. If it comes out clean, your muffins are ready! After baking, let them cool in the tin for about 5 minutes. Finally, transfer the muffins to a wire rack to cool completely. This helps them keep the right texture.
Tips & Tricks
Perfecting the Muffin Texture
For the best muffin texture, use room temperature eggs and milk. This helps the batter mix well. Be careful not to overmix the batter. A few lumps are okay. Overmixing can make your muffins tough. Also, fill the muffin cups about two-thirds full. This allows the muffins to rise nicely.
Storage Tips for Freshness
To keep your muffins fresh, store them in an airtight container. Keep them at room temperature for up to three days. For longer storage, freeze them in a freezer bag. They can last up to three months in the freezer. Just remember to let them cool completely before freezing.
Enhancing Flavor with Zest and Extracts
Adding lemon zest boosts the flavor of your muffins. It gives them a fresh taste. You can also experiment with different extracts. Try using orange or even coconut extract for a twist. Just a teaspoon can change the flavor profile. These simple tweaks make each batch exciting and new.

Variations
Gluten-Free Almond Poppy Seed Muffins
You can make gluten-free almond poppy seed muffins easily. Replace all-purpose flour with gluten-free flour. Use a blend that works well for baking. Try to look for a mix that has xanthan gum. This helps mimic the structure gluten provides. Follow the same steps as in the original recipe. The muffins will still be light and tasty. You may want to adjust the baking time slightly. Keep an eye on them as they bake.
Vegan Version of Almond Poppy Seed Muffins
For a vegan twist, swap the eggs with flax eggs. Mix 1 tablespoon of flaxseed meal with 2.5 tablespoons of water. Let it sit until it thickens. Use plant-based milk instead of regular milk. Coconut, almond, or soy milk work well. Replace the butter with coconut oil or vegan butter. Follow the same mixing and baking steps. You’ll get a fluffy and delicious muffin that everyone will love.
Add-ins and Flavor Twists
You can make these muffins even more fun! Add-ins can include chocolate chips or dried fruit. Chopped nuts like almonds or walnuts give a nice crunch. Try adding lemon zest for a bright flavor boost. Dried cranberries or blueberries also work well. Use about half a cup of your favorite add-ins. Mix them in gently with the batter. This keeps the muffins moist and flavorful. Each bite will be a delightful surprise!
Storage Info
Best Practices for Storing Muffins
To store your almond poppy seed muffins, cool them completely first. This keeps moisture from forming, which can make them soggy. Place the muffins in an airtight container. You can use a zip-top bag, too. Keep them at room temperature for up to three days. For longer freshness, store them in the fridge for about a week.
Freezing Muffins for Later Use
Freezing is great for these muffins! Wrap each muffin in plastic wrap. Then, put them in a freezer bag. This helps to keep them fresh. You can freeze them for up to three months. When you want to eat one, take it out and let it thaw at room temperature.
Reheating Tips
To reheat, you can use the microwave or oven. For the microwave, place a muffin on a plate. Heat it for about 15-20 seconds. For the oven, preheat to 350°F (175°C). Wrap the muffin in foil and bake for about 10 minutes. This keeps the muffin soft and warm. Enjoy your tasty treat!
FAQs
Can I use regular flour instead of almond flour?
Yes, you can use regular flour. However, almond flour adds a nice flavor and texture. If you swap it, use the same amount of all-purpose flour. Your muffins will still taste great but may lack some nutty flavor.
How long will my muffins stay fresh?
Your muffins will stay fresh for about 2 to 3 days at room temperature. To keep them fresh, store them in an airtight container. If you want them to last longer, try freezing them. They freeze well for up to three months.
What can I use instead of poppy seeds?
You can use chia seeds or sesame seeds instead of poppy seeds. Both options add nice crunch and flavor. If you want a different taste, try using finely chopped nuts or even dried fruits.
Can I make the batter ahead of time?
Yes, you can make the batter ahead of time. Store it in the fridge for up to 24 hours. When you are ready to bake, just scoop it into the muffin tin and bake. Keep in mind that the muffins may rise slightly less if the batter is cold.
In this blog post, we covered the key ingredients for almond poppy seed muffins, along with step-by-step instructions. You learned tips to achieve the perfect texture and ways to store your muffins for freshness. We also discussed variations, including gluten-free and vegan options. Explore these ideas to make tasty muffins your way. Keep experimenting with flavors and enjoy delicious results. You now have the tools to bake successful muffins anytime. Happy baking!


![- 1 ¾ cups all-purpose flour - 1 teaspoon baking soda - ½ teaspoon baking powder - ½ teaspoon salt - 1 teaspoon ground cinnamon - ½ teaspoon ground nutmeg - ½ teaspoon ground ginger - ½ cup granulated sugar - ½ cup brown sugar, packed firmly - 2 large eggs - 1 cup pumpkin puree - ½ cup vegetable oil - 1 teaspoon pure vanilla extract - 1 cup semi-sweet chocolate chips - ½ cup chopped walnuts (optional) To make Chocolate Chip Pumpkin Bread, you need simple ingredients. You’ll want to gather flour, sugars, eggs, and pumpkin puree. Pumpkin puree gives the bread moisture and flavor. The spices, like cinnamon and nutmeg, add warmth and depth. You can use canned pumpkin or make your own from fresh pumpkins. Using two types of sugar helps balance the flavor. Granulated sugar adds sweetness, while brown sugar adds a rich, caramel taste. Don’t forget the chocolate chips! They melt into gooey pockets of joy. If you like nuts, add walnuts for crunch. They complement the sweet and spicy flavors. - 9x5-inch loaf pan - Mixing bowls (medium & large) - Whisk or electric mixer - Spatula or wooden spoon - Parchment paper For baking, you’ll need some tools. A 9x5-inch loaf pan is perfect for this bread. Mixing bowls, both medium and large, will help you combine ingredients. A whisk or electric mixer makes it easy to blend. Use a spatula or wooden spoon to fold in the chocolate chips. Parchment paper is a must for easy removal after baking. This is your list of ingredients and tools to create a cozy fall treat. You can find the full recipe in the previous sections to guide you through the steps. Enjoy the process of baking and the delightful smell that fills your kitchen! - Preheat oven to 350°F (175°C). - Grease and line the loaf pan with parchment paper. To start, you need your oven hot. Preheating helps the bread rise well. Greasing the pan is key. It keeps the bread from sticking. Lining it with parchment paper makes removal easy. You’ll thank yourself later! - Whisk together flour, baking soda, baking powder, salt, and spices. - Set aside for later use. Next, grab a mixing bowl. Add the flour, baking soda, and baking powder. Toss in the salt, cinnamon, nutmeg, and ginger. Whisk them together until mixed well. This step ensures even flavors in your bread. Set this bowl aside for now. - Beat sugars and eggs until fluffy. - Stir in pumpkin puree, oil, and vanilla extract. In a large bowl, mix granulated and brown sugars with the eggs. Use an electric mixer or a whisk. Beat until it’s light and fluffy. Then, stir in the pumpkin puree, vegetable oil, and vanilla. Mix until it’s smooth. This creates the moist base for your bread. - Gradually add dry ingredients to wet mixture. - Fold gently to avoid overmixing. Now, slowly add the dry mix to the wet mix. Use a spatula for this step. Gently fold the ingredients together. Be careful not to overmix. This keeps your pumpkin bread light and airy. - Fold in chocolate chips and optional walnuts. Time for the fun part! Gently fold in the chocolate chips. If you like nuts, add the walnuts now. This gives your bread an amazing crunch and flavor. Ensure they are evenly distributed. - Pour batter into loaf pan and smooth the top. - Bake for 55-65 minutes and check for doneness. Pour your batter into the prepared loaf pan. Smooth the top with a spatula. Place it in the oven. Bake for 55 to 65 minutes. Check doneness with a toothpick. It should come out clean or with a few moist crumbs. Enjoy the aroma filling your kitchen! This step brings you closer to a delicious treat. For the full recipe, refer to the entire guide. Checking for doneness is easy. Insert a toothpick into the center of the bread. If it comes out clean or with a few moist crumbs, the bread is ready. This method helps ensure you don’t overbake. If you live at a high altitude, you may need to adjust the baking time. Start checking at the 50-minute mark to see if it is done. To keep your chocolate chip pumpkin bread light, avoid overmixing. Mix the wet and dry ingredients just until combined. This small tip makes a big difference! Also, using ingredients at room temperature helps them blend better. Eggs and oil mix more smoothly when they are warm. For a lovely presentation, serve the bread warm with butter. This adds a rich flavor that everyone loves. You can also dust the top with powdered sugar for a sweet touch. Fresh mint leaves make a nice garnish and add a pop of color. Arrange the slices on a wooden board for a rustic feel. This will impress your guests! {{image_4}} You can make this bread gluten-free. Just substitute all-purpose flour with a gluten-free flour blend. This change keeps the taste and texture similar. Look for a blend that contains xanthan gum to improve the bread's structure. Want a vegan option? You can replace the eggs with flaxseed meal or applesauce. For flaxseed, mix one tablespoon with three tablespoons of water. Let this sit until it thickens. Applesauce works well too; use ¼ cup instead of one egg. Also, choose plant-based oils and sugars for a fully vegan treat. Adding fruits like raisins or cranberries gives the bread a fruity twist. These add a burst of flavor and chewiness. You can also swap chocolate chips for white chocolate or caramel. These options create a different taste and make the bread even more exciting. Try mixing and matching for your perfect loaf! To keep your chocolate chip pumpkin bread fresh, store it in two ways. At room temperature, wrap the bread tightly in plastic wrap or place it in an airtight container. This method helps maintain its soft texture. You can also refrigerate it to extend its shelf life. In the fridge, it will stay good for about one week. If you want to save some for later, freezing is a great option! First, wrap the bread tightly in plastic wrap, then place it in a freezer-safe bag. This will help keep it fresh. When you’re ready to enjoy it, just take it out and let it thaw in the fridge overnight. To warm it up, pop slices in the microwave for a few seconds or use a toaster. Chocolate chip pumpkin bread tastes amazing with drinks! Pair it with coffee or tea for a cozy treat. The warm flavors of the bread go well with hot beverages, making it a perfect snack for fall. You can also serve it with a bit of butter or cream cheese for extra richness. Yes, you can use fresh pumpkin puree instead of canned. Using fresh pumpkin can add a deeper flavor. To make fresh puree, cut a pumpkin in half and remove the seeds. Bake the halves at 350°F for about 45 minutes, or until soft. Let them cool, then scoop out the flesh. Blend until smooth for your recipe. Look for a golden-brown top. The bread should spring back when touched gently. For the best test, insert a toothpick into the center. If it comes out clean or with a few moist crumbs, the bread is done. If it has wet batter, bake it a bit longer. Yes, you can add more chocolate chips! This will make the bread sweeter and richer. Just remember that too many chips can make the bread dense. Start with an extra half cup if you want more chocolate flavor. Use a sharp serrated knife for clean slices. Wait until the bread has cooled completely. This helps prevent the bread from squishing. Start at one end and slice straight down for even pieces. At room temperature, this bread lasts about 3 to 5 days. Keep it in an airtight container. If you put it in the fridge, it can last up to a week. Just remember that refrigeration can change the texture a bit. Sure! You can use nutmeg, allspice, or cardamom. Each spice brings a new twist to the flavor. Try mixing in a teaspoon of nutmeg for warmth or allspice for a hint of sweetness. Adjust the amount to your taste for a new fall delight. For the full recipe, check the [Full Recipe]. You now have a complete guide to making Chocolate Chip Pumpkin Bread. From the key ingredients to equipment and steps, you can easily whip up this tasty treat. Don't forget the tips for storage and variations to customize your bread. Whether you try a gluten-free version or add fruits, the options are endless. Enjoy your baking journey and share this delicious bread with family or friends!](https://joymealplan.com/wp-content/uploads/2025/06/f538d1de-de93-4194-9f26-14cc05263462-768x768.webp)


