Apple Cider Glazed Donuts Simple and Tasty Treat

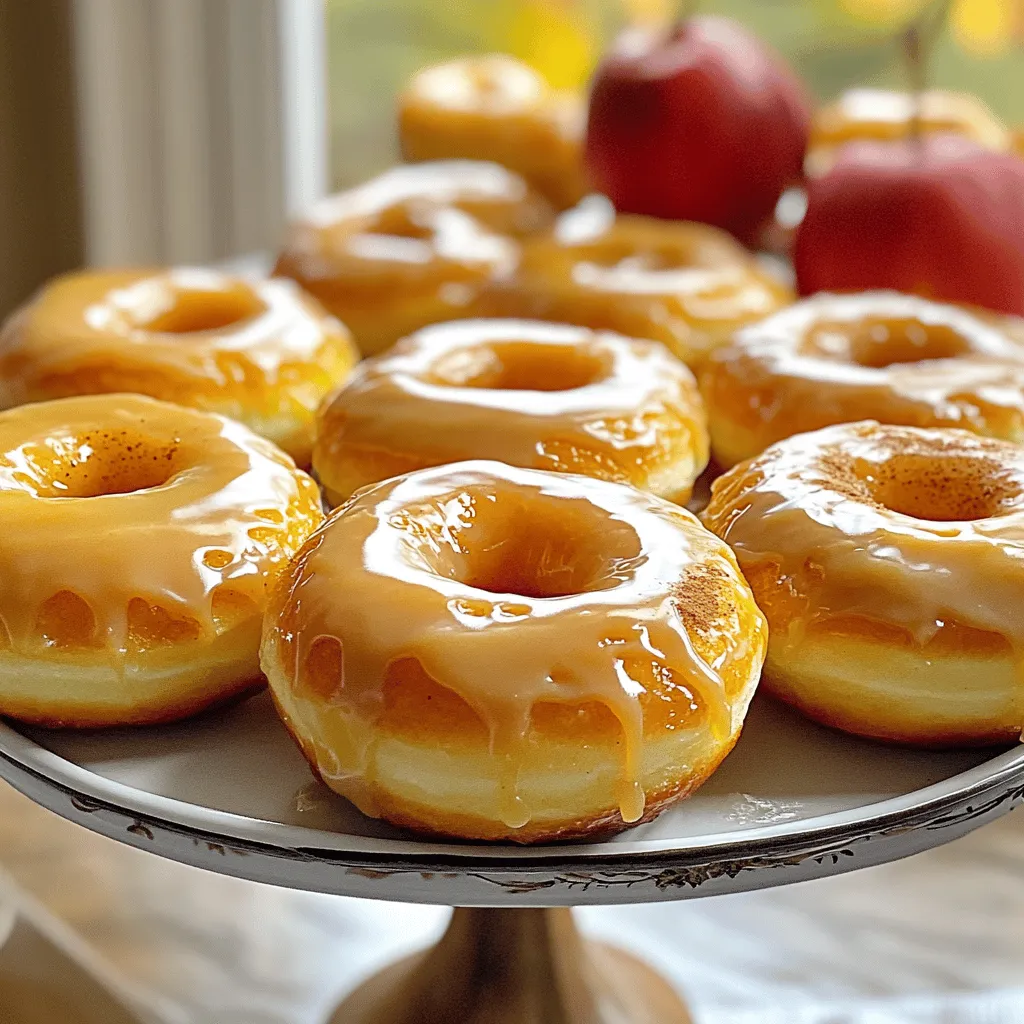
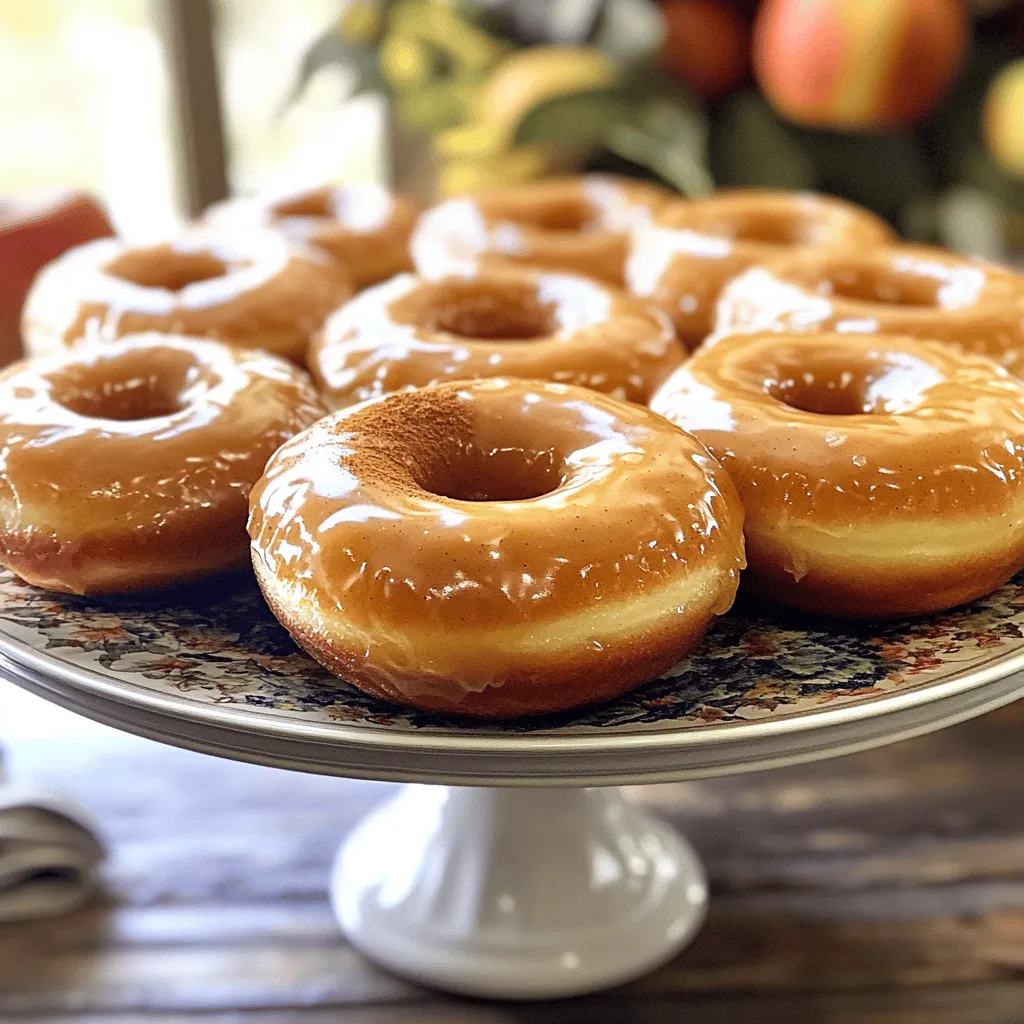
Craving a sweet treat that captures the essence of fall? Look no further than these Apple Cider Glazed Donuts! With simple ingredients and a step-by-step guide, you can whip up these delicious donuts in no time. I’ll share my best tips and tricks for perfecting texture and flavor, plus variations to satisfy any palate. Get ready to impress your family and friends with this easy and tasty treat!
Ingredients
List of Essential Ingredients
To make these delicious apple cider glazed donuts, gather these key items:
– 2 cups all-purpose flour
– 1 cup apple cider
– 1 cup granulated sugar
– 1/2 teaspoon ground cinnamon
– 1/4 teaspoon ground nutmeg
– 1 tablespoon baking powder
– 1/2 teaspoon salt
– 1/4 cup unsalted butter, melted
– 2 large eggs
– 1 teaspoon vanilla extract
– 1 cup powdered sugar (for the glaze)
– 2-3 tablespoons apple cider (for the glaze)
Optional Ingredients for Variation
You can add some fun twists to your donuts with these extras:
– Chopped apples for added texture
– Walnuts or pecans for crunch
– A splash of maple syrup for a richer flavor
Tips for Selecting Fresh Ingredients
Choosing the right ingredients makes a big difference. Here’s how to ensure freshness:
– For apple cider, pick a brand with no added sugars or preservatives.
– Choose flour that is fresh and stored in a cool place.
– Check eggs for firmness and bright yolks; they should be free from cracks.
– When buying spices, pick ones in airtight containers for the best flavor.
Step-by-Step Instructions
Preparation and Preheating
First, you need to preheat your oven to 350°F (175°C). If you have a metal donut pan, lightly grease it. A silicone mold does not need greasing. Set your pan aside as you prepare the batter.
Reducing the Apple Cider
Next, grab a medium saucepan and pour in 1 cup of apple cider. Heat it over medium heat. Bring the cider to a rolling boil. Once it boils, lower the heat and let it simmer. Stir it occasionally for about 10-15 minutes. The cider should reduce to about 1/2 cup. After reducing, remove it from the heat and let it cool for a few minutes.
Mixing the Ingredients
In a large bowl, combine the dry ingredients. Measure 2 cups of all-purpose flour, 1 cup of granulated sugar, 1/2 teaspoon of ground cinnamon, 1/4 teaspoon of ground nutmeg, 1 tablespoon of baking powder, and 1/2 teaspoon of salt. Whisk these items together until mixed well.
In another bowl, mix the wet ingredients. Pour in 1/4 cup of melted unsalted butter, add 2 large eggs, 1 teaspoon of vanilla extract, and your cooled reduced apple cider. Stir everything until smooth.
Now, pour the wet mixture into the bowl with the dry ingredients. Gently stir with a spatula or wooden spoon until just combined. A few lumps are okay; do not overmix.
Using a spoon or piping bag, fill each cavity of the donut pan about two-thirds full. This allows room for the donuts to rise while baking.
Place the pan in the oven and bake for 10-12 minutes. The donuts are done when they spring back slightly when touched. A toothpick should come out clean when inserted.
Let the donuts cool in the pan for 5 minutes. Then transfer them to a wire rack to cool completely before glazing.
Tips & Tricks
Ensuring the Perfect Donut Texture
To get soft and fluffy donuts, follow these steps:
– Use fresh ingredients for the best flavor.
– Measure your flour accurately. Too much flour will make them dense.
– Mix wet and dry ingredients just until combined. Overmixing can lead to tough donuts.
– Fill the donut pan about two-thirds full. This allows room for rising.
– Bake at the right temperature. An oven thermometer can help ensure accuracy.
Common Mistakes to Avoid
Avoid these common pitfalls to ensure your donuts turn out great:
– Not reducing the apple cider enough. It should be down to half a cup for the right flavor.
– Skipping the cooling step. Glazing warm donuts can cause the glaze to melt away.
– Using too much glaze. Dip just the top for a nice coating without it dripping.
– Forgetting to grease the pan if using metal. This can lead to sticking.
Best Practices for Glazing
Follow these tips for a perfect glaze:
– Whisk the powdered sugar and cider until smooth. Adjust the thickness to your liking.
– Dip each donut while they are cool. This helps the glaze set properly.
– Let the excess glaze drip off. This will prevent a puddle on your plate.
– For a special touch, sprinkle cinnamon on top right after glazing. It adds flavor and looks nice.

Variations
Apple Cider Glazed Donuts with Spice
You can add warm spices to the donuts for extra flavor. Try adding 1/2 teaspoon of ground ginger or cloves. This gives a nice kick that pairs well with the apple cider. Mix these spices with your dry ingredients. The result is a donut that warms you from the inside out, perfect for chilly days.
Gluten-Free Version of Apple Cider Donuts
To make these donuts gluten-free, swap all-purpose flour for a gluten-free blend. Look for one that contains xanthan gum, as it helps with texture. Use the same amount of flour in the recipe. The donuts will still be soft and tasty, with that lovely apple cider flavor.
Alternative Glazes and Toppings
If you want to shake things up, try different glazes. For a chocolate glaze, melt dark chocolate and mix with a bit of cream. Dip your cooled donuts in this mix. You can also sprinkle chopped nuts or shredded coconut on top. For a fruity twist, drizzle with a simple lemon glaze made from powdered sugar and lemon juice. Each option adds a unique touch to your apple cider donuts.
Storage Info
How to Properly Store Donuts
To keep your apple cider glazed donuts fresh, store them in an airtight container. This will help them stay soft and moist. Place a piece of parchment paper between layers to avoid sticking. They stay fresh for up to three days at room temperature. If you want to keep them longer, consider freezing.
Freezing Donuts for Later
Freezing is a great way to save your donuts. Allow them to cool completely, then wrap each donut in plastic wrap. Place them in a freezer-safe bag or container. This method keeps them fresh for about three months. When you’re ready to enjoy, just thaw them overnight in the fridge.
Best Way to Reheat
To reheat your donuts, preheat your oven to 350°F (175°C). Place the donuts on a baking sheet and warm them for about 5-7 minutes. This will revive their softness. If you want a crispy outside, you can use a toaster oven. Enjoy them warm for the best taste!
FAQs
How do I make Apple Cider Glazed Donuts from scratch?
To make these tasty donuts, gather your ingredients first. You need flour, sugar, apple cider, and spices. Start by preheating your oven to 350°F (175°C). Then, reduce the apple cider in a pan until it’s thick. Mix your dry ingredients in one bowl and wet ingredients in another. Combine them gently, fill your donut pan, and bake for 10-12 minutes. After cooling, dip them in a simple glaze made from powdered sugar and apple cider.
Can I use store-bought apple cider?
Yes, you can use store-bought apple cider. It saves time, and the flavor stays great. Just make sure it’s fresh, as this affects the taste of your donuts. If you choose to reduce it, follow the same steps as with homemade cider.
What can I substitute for butter in the recipe?
If you need a butter substitute, use coconut oil or vegetable oil. Both give a nice texture and flavor. You can also use unsweetened applesauce for a lower-fat option. This will change the taste a bit but keeps the donuts moist.
How long do the donuts stay fresh?
These donuts stay fresh for about 2 days at room temperature. Store them in an airtight container to maintain their taste. If you want to keep them longer, freeze them. They last up to 2 months in the freezer. Just thaw them before serving.
This blog post covered all you need for tasty apple cider donuts. We looked at essential and optional ingredients and tips for choosing fresh ones. You learned step-by-step instructions, common mistakes to avoid, and ways to get the perfect texture. We explored fun variations and how to store your donuts.
With these tips, you can create delicious treats anytime. Enjoy making and sharing your apple cider donuts!


![- 1 cup pumpkin puree - 1 ½ cups crushed graham crackers - ½ teaspoon pumpkin spice - ½ cup powdered sugar - 1 teaspoon vanilla extract - 8 oz dark chocolate - 1 tablespoon coconut oil - Flaky sea salt To create chocolate covered pumpkin truffles, you need simple yet flavorful ingredients. Start with pumpkin puree, either canned or homemade. This is the base for your truffles. Next, grab crushed graham crackers. They give the truffles a unique texture and sweetness. Pumpkin spice adds warmth and flavor. You can adjust the amount if you want a stronger taste. Powdered sugar sweetens the mixture, making each bite a delight. Vanilla extract rounds out the flavor profile beautifully. For the chocolate coating, use dark chocolate. It contrasts nicely with the sweetness of the truffles. Adding coconut oil to the chocolate helps it melt smoothly. Finally, a sprinkle of flaky sea salt on top enhances the flavor, making each truffle even more irresistible. - Mixing bowl - Spoon or spatula - Measuring cups and spoons - Parchment paper - Baking sheet - Double boiler or microwave-safe bowl You will need a few tools to make these truffles. A mixing bowl is essential for combining your ingredients. A spoon or spatula helps you mix everything well. Measuring cups and spoons ensure that your ingredients are precise. Parchment paper is key for lining your baking sheet. It keeps the truffles from sticking. You also need a baking sheet to hold the truffles while they chill. Finally, a double boiler or a microwave-safe bowl helps melt the chocolate evenly. With these ingredients and tools, you're ready to create chocolate covered pumpkin truffles that everyone will love. For the complete recipe, check out the Full Recipe link. Start by mixing the pumpkin puree with the dry ingredients. In a large bowl, add: - 1 cup pumpkin puree - 1 ½ cups crushed graham crackers - ½ teaspoon pumpkin spice - ½ cup powdered sugar - 1 teaspoon vanilla extract Use a spatula or wooden spoon to blend these together. Mix until you have a smooth, dough-like consistency. The mixture should be firm enough to hold its shape. Next, it’s time to shape the truffles. With clean hands, scoop out tablespoon-sized portions. Roll each portion into a ball, about 1 inch in diameter. Place the balls on a parchment-lined baking sheet. Make sure to space them apart. This helps them keep their shape. After shaping, cover the baking sheet with plastic wrap and chill in the fridge for about 30 minutes. While the truffles chill, let’s melt the chocolate. You can use a double boiler or the microwave. If you choose the double boiler, place a heatproof bowl over a pot of simmering water. Stir the chocolate and coconut oil together until smooth. If using the microwave, heat in 20-second bursts, stirring in between. Make sure the chocolate is silky before dipping. Once the truffles are chilled, it’s time to coat them. Dip each ball into the melted chocolate. Make sure it’s fully covered. Use a fork to lift it out, letting the excess chocolate drip back into the bowl. Place the coated truffles back on the parchment-lined sheet. While the chocolate is still wet, sprinkle a pinch of flaky sea salt on each truffle. This adds a burst of flavor that balances the sweetness. Let the truffles sit at room temperature until the chocolate sets. You can speed up this process by placing them in the fridge for about 15-20 minutes. Now, your delicious chocolate-covered pumpkin truffles are ready to enjoy. You can find the full recipe above for more details on each step. Chilling the truffles is key. It helps them hold their shape better when you dip them. After you roll the truffles, place them in the fridge for about 30 minutes. This step makes a big difference in texture. To roll smooth truffles, make sure your hands are clean and dry. Use a light touch as you form the balls. If your mixture is sticky, wet your hands slightly. This helps shape them without making a mess. Melting chocolate can be tricky. To melt chocolate evenly, I recommend using a double boiler. Fill a pot with a bit of water, then place a heatproof bowl on top. Stir the chocolate as it melts. This method prevents burning. If you want a nice shine, add a tablespoon of coconut oil to the chocolate. It will make your truffles look glossy and appealing. Get creative when it comes to serving. You can sprinkle a little cinnamon on top for extra flavor. Pumpkin seeds also add a nice crunch and look great on a dessert table. These truffles pair well with coffee or a spiced chai. Consider serving them at your next fall gathering or holiday party. They will surely impress your guests! For the full recipe, check the main section. {{image_4}} You can easily change the taste of your truffles. Try adding almond extract for a nutty twist. A bit of orange zest will give your truffles a fresh, fruity kick. You can also swap out the pumpkin spice for cinnamon or nutmeg. Each spice brings a new flavor to your truffles. If you need gluten-free options, look for gluten-free graham crackers. Many brands offer these, and they work just as well. For those who prefer dairy-free treats, use dairy-free chocolate for the coating. There are great dairy-free chocolate chips available that melt nicely. Want to make your truffles extra special? Roll them in crushed nuts like pecans or walnuts. This adds a nice crunch. You can also use colorful sprinkles for a fun look. If dark chocolate isn’t your thing, try coating the truffles in white chocolate instead. It adds a sweet, creamy flavor that pairs well with pumpkin. For the full recipe, check out the [Full Recipe]. To keep your chocolate covered pumpkin truffles fresh, store them in the fridge. The cool temperature helps maintain their texture and flavor. Place the truffles in an airtight container to prevent them from drying out. This way, they can stay yummy for up to one week. If you want to enjoy them longer, try to avoid leaving them out at room temperature for too long. If you want to save some truffles for later, freezing is a great option. First, place the truffles on a baking sheet, making sure they don’t touch. Freeze them for about an hour until they are firm. Once frozen, transfer the truffles to a freezer-safe bag or container. They can last for up to three months in the freezer. When you’re ready to enjoy them, simply take out the number of truffles you want. Let them thaw in the fridge for a few hours or at room temperature for about 30 minutes. Avoid using heat to thaw, as this can ruin their texture. Now they're ready to be devoured! Chocolate covered pumpkin truffles can last about one week in the fridge. Store them in an airtight container to keep them fresh. After a week, check for signs of spoilage, such as a change in smell or texture. If they feel sticky or smell off, it's best to toss them. Yes, you can easily make these truffles vegan! Use dairy-free chocolate instead of dark chocolate. Swap the coconut oil for a plant-based butter or more coconut oil. This keeps the rich flavor while making it suitable for a vegan diet. These truffles shine at holiday gatherings and parties. They also make great gifts for friends and family. Their festive look and delicious taste fit well with autumn themes. Serve them during Halloween, Thanksgiving, or any cozy get-together. Yes, you can find chocolate covered pumpkin truffles at many bakeries. Look for local shops that specialize in gourmet treats. Some popular brands also offer these truffles online. You can enjoy them without all the fuss of making them at home. For a homemade touch, check out the Full Recipe for a delightful DIY version! Creating chocolate covered pumpkin truffles is simple and fun. We covered key ingredients like pumpkin puree, graham crackers, and dark chocolate. You learned tools needed, step-by-step instructions, and tips for easy truffle-making. We also looked at flavors, variations, storage, and common questions. These truffles make a perfect treat for any occasion. Enjoy making these delightful bites and share them with friends! You’ll impress everyone with your tasty skills.](https://joymealplan.com/wp-content/uploads/2025/07/35417da5-91a5-48e5-8a48-b090ca73d24b-768x768.webp)
