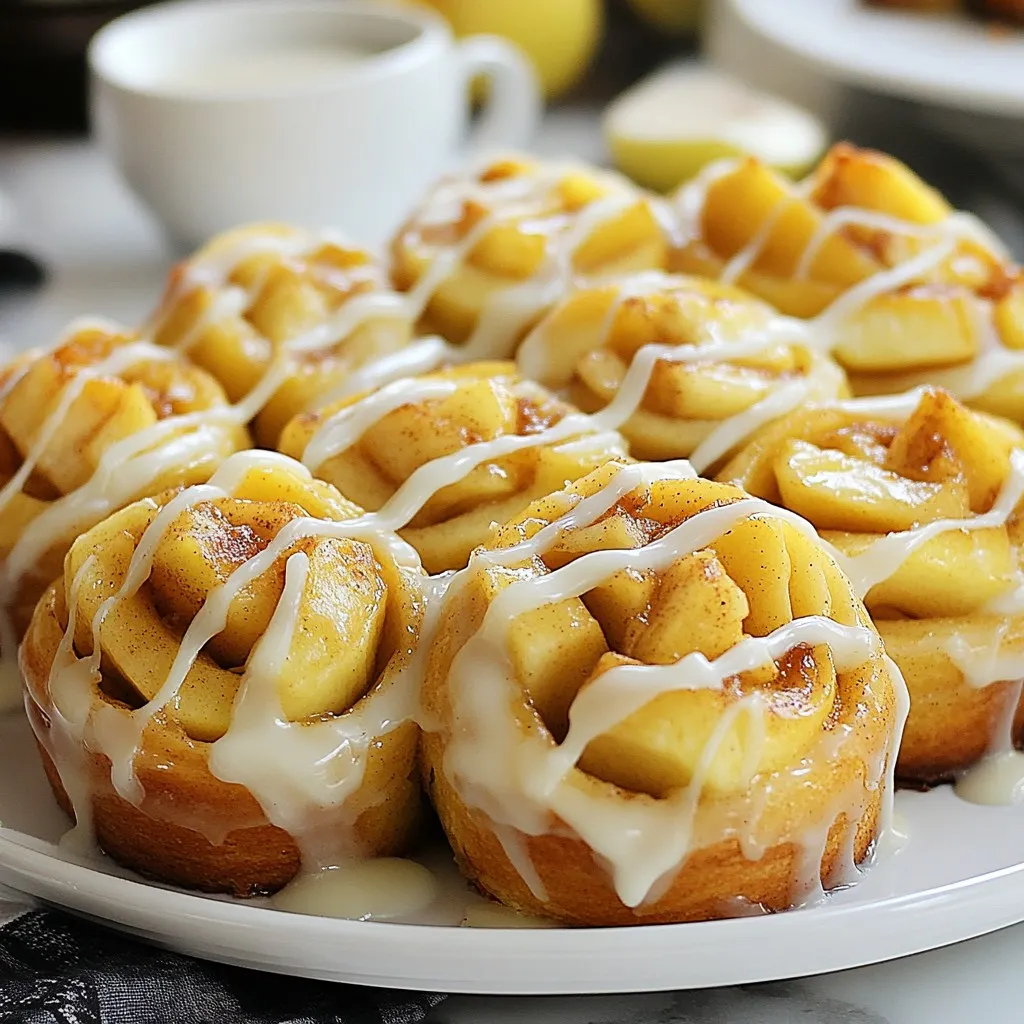
Ready to bake a treat that blends two classic favorites? These Apple Pie Cinnamon Rolls are a twist you won’t want to miss! With gooey apple filling and a sweet glaze, they make the perfect breakfast or dessert. Whether you’re a novice baker or a pro, my step-by-step guide will help you create these delightful rolls easily. Let’s dive into the ingredients and get started on this sweet culinary adventure!
Why I Love This Recipe
- Delicious Flavor Combination: The blend of warm cinnamon and sweet apple creates a comforting and delightful taste that reminds me of cozy fall days.
- Easy to Make: This recipe simplifies the process of making cinnamon rolls by incorporating a delicious apple filling, making it accessible for bakers of all skill levels.
- Perfect for Any Occasion: These apple pie cinnamon rolls are a fantastic treat for breakfast, brunch, or dessert, making them versatile for any gathering.
- Gorgeous Presentation: The swirls of apple filling and the glossy glaze on top make these rolls not only tasty but visually appealing, perfect for impressing guests.
Ingredients
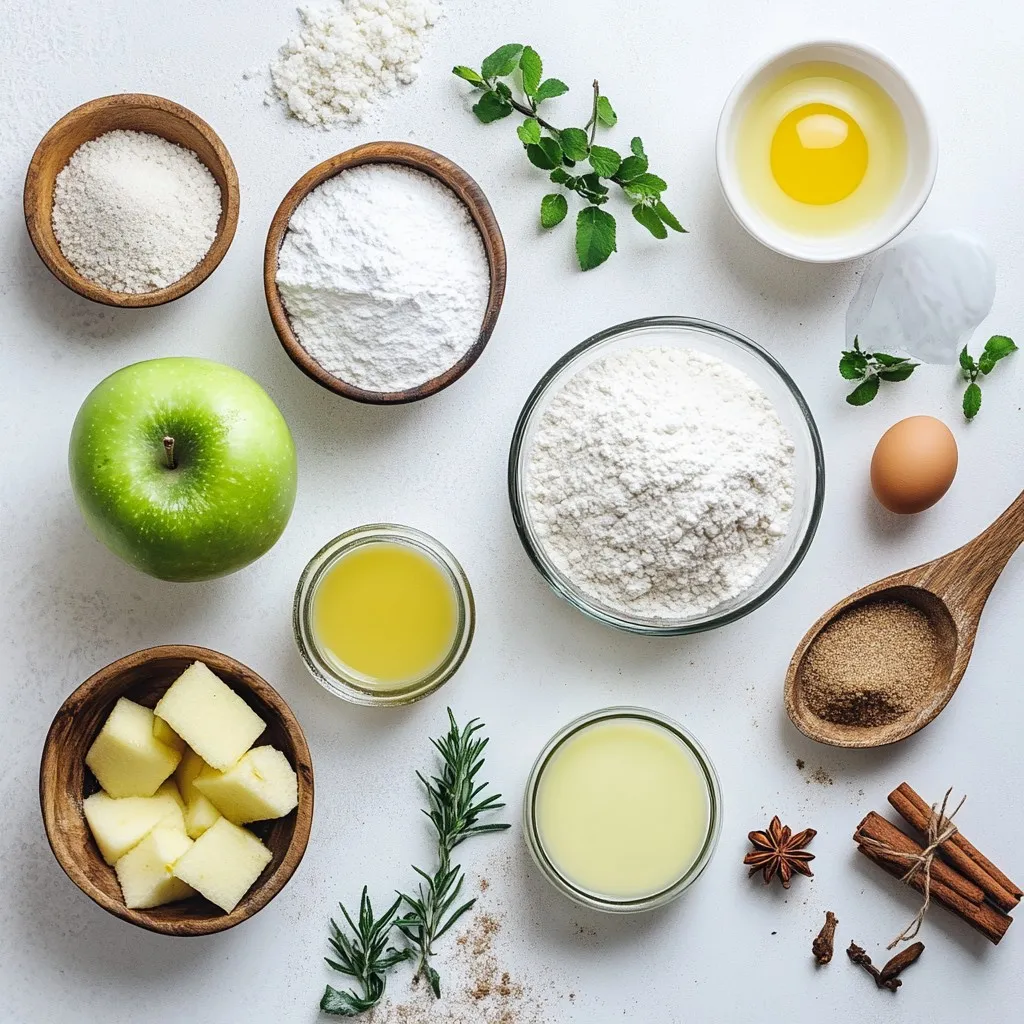
Dough Ingredients
– 3 cups all-purpose flour
– 1/4 cup granulated sugar
– 1 packet (2 1/4 teaspoons) instant yeast
– 1/2 teaspoon salt
– 1/4 cup unsalted butter, melted
– 1 cup warm milk (approximately 110°F)
– 1 large egg
Filling Ingredients
– 2 medium apples, peeled, cored, and finely chopped
– 1 tablespoon lemon juice
– 1 tablespoon ground cinnamon
– 1/4 cup packed brown sugar
– 1 tablespoon all-purpose flour
– 1/4 teaspoon ground nutmeg
Glaze Ingredients
– 1 cup powdered sugar
– 2 tablespoons milk
– 1/2 teaspoon vanilla extract
When making apple pie cinnamon rolls, each ingredient plays a key role. The dough starts with all-purpose flour. This gives the rolls their structure. Granulated sugar adds sweetness, while instant yeast helps the dough rise. Salt enhances flavor, and melted butter makes the dough rich and soft. Warm milk activates the yeast. The egg binds everything together.
For the filling, I choose medium apples. They offer the right balance of sweet and tart. Lemon juice keeps the apples fresh. Ground cinnamon adds warmth and spice, while brown sugar gives it a caramel-like taste. A little flour thickens the filling, making it gooey. Ground nutmeg adds a touch of warmth.
Finally, the glaze is simple but essential. Powdered sugar gives it sweetness. Milk creates a smooth texture, and vanilla extract adds a lovely aroma. Together, these ingredients create a delightful treat that will impress everyone.
Step-by-Step Instructions
Prepare the Dough
– In a large bowl, whisk together:
– 3 cups all-purpose flour
– 1/4 cup granulated sugar
– 1 packet (2 1/4 teaspoons) instant yeast
– 1/2 teaspoon salt
– In a separate bowl, mix the wet ingredients:
– 1/4 cup melted unsalted butter
– 1 cup warm milk (about 110°F)
– 1 large egg
Create and Knead the Dough
– Gradually pour the wet mixture into the dry ingredients.
– Stir with a wooden spoon until a dough forms.
– Transfer to a floured surface.
– Knead for about 5-7 minutes until the dough feels smooth and elastic.
Rising and Shaping the Dough
– Shape the dough into a ball and place it in a greased bowl.
– Cover it with a kitchen towel.
– Let it rise in a warm spot for about 1 hour or until it doubles in size.
– While the dough rises, prepare the apple filling.
Fill, Roll, and Cut the Dough
– Once the dough has risen, punch it down to release air.
– Roll it out on a floured surface into a rectangle, about 18×12 inches.
– Spread the apple filling evenly over the rolled dough.
– Starting from one long edge, roll the dough tightly into a log shape.
– Use a sharp knife to slice the log into 12 equal pieces.
Second Rise and Baking
– Place the sliced rolls in a greased 9×13 inch baking dish.
– Cover the dish with a cloth and let the rolls rise again for 30 minutes.
– Preheat your oven to 350°F.
– Bake the rolls for 25-30 minutes until golden brown.
Glaze Preparation
– While the rolls bake, whisk together the glaze:
– 1 cup powdered sugar
– 2 tablespoons milk
– 1/2 teaspoon vanilla extract
– Mix until smooth and creamy.
These steps ensure you create scrumptious apple pie cinnamon rolls. Enjoy the process and the delicious results!
Tips & Tricks
Achieving the Perfect Dough
Kneading is key to good dough. It helps develop gluten, which gives rolls their nice texture. Knead for about 5-7 minutes until smooth. This step is fun and easy. You can feel the dough change as you work it.
Dough needs warmth to rise well. The best temperature is around 75°F to 80°F. If your kitchen is cool, find a warm spot. An oven with just the light on works great. This helps the dough double in size.
Enhancing Flavor Profiles
To make your rolls even better, add spices. Try a pinch of ginger or allspice. These extra flavors will make your rolls pop. You can also mix in a bit of vanilla for sweetness.
The type of apples you use matters too. Fuji and Honeycrisp apples are sweet and hold their shape. Granny Smith apples add a nice tartness. Mixing different apple types can create a balanced flavor.
Presentation Tips
Serve your rolls on a colorful platter. It makes them look special. Drizzle more glaze on top for a sweet touch. This adds shine and makes them look inviting.
For garnishing, use thin apple slices. Place them around the rolls for color. A light dusting of cinnamon on top adds a nice finish. These small details will impress your guests.
Pro Tips
- Use Fresh Apples: For the best flavor, choose firm and tart apple varieties like Granny Smith or Honeycrisp to balance the sweetness of the rolls.
- Prevent Sticking: Lightly flour your work surface and rolling pin to prevent the dough from sticking while rolling it out, making it easier to handle.
- Check for Doneness: To ensure your rolls are perfectly baked, look for a golden brown color and check that the internal temperature reaches 190°F (88°C).
- Let Them Cool: Allow the cinnamon rolls to cool slightly before drizzling the glaze, as this will help it adhere better and prevent it from melting away.
Variations
Caramel Apple Cinnamon Rolls
You can make your cinnamon rolls even sweeter! Adding caramels gives them a rich flavor. Simply sprinkle chopped caramels on top of the apple filling. When you bake them, the caramels will melt and blend perfectly with the apples. You get a delightful mix of flavors and textures.
Nutty Apple Pie Cinnamon Rolls
If you like nuts, try adding them to the filling. Chopped pecans or walnuts work well. Just mix them in with the apples, lemon juice, and spices. The nuts add a crunchy texture and a nutty taste. This variation gives your rolls a unique twist that everyone will love.
Vegan Apple Pie Cinnamon Rolls
You can easily make these rolls vegan! Replace the milk with almond or oat milk. Use flax eggs instead of regular eggs. For the butter, try coconut oil or vegan butter. These swaps keep the flavors rich and delicious while being plant-based. Enjoy your warm, gooey rolls without any animal products!
Storage Info
Storing Leftover Rolls
To keep your apple pie cinnamon rolls fresh, refrigeration is key. Place leftover rolls in an airtight container. This helps keep them soft and tasty. If you do not have a container, wrap them tightly in plastic wrap. Store them in the fridge for up to 3 days.
Freezing Instructions
Freezing is a great way to save extra rolls. Start by letting the rolls cool completely. Once cool, place them in an airtight freezer bag. Remove as much air as you can before sealing. These rolls can last in the freezer for up to 3 months. When you want to enjoy them, take out the rolls and let them thaw in the fridge overnight. To reheat, simply warm them in the oven at 350°F for about 10 minutes. This will restore their fluffy texture.
Shelf Life Recommendations
At room temperature, these rolls last about 2 days. Keep them covered to avoid drying out. If the weather is hot or humid, I recommend refrigerating them sooner. This keeps the rolls from spoiling too quickly.
FAQs
Can I use store-bought dough for this recipe?
Yes, you can use store-bought dough. It saves time and effort.
Pros:
– Quick and easy to use.
– No need to knead or rise dough.
Cons:
– Flavor may not be as fresh.
– Texture might be different than homemade.
What type of apples are best for cinnamon rolls?
For the best flavor, use a mix of sweet and tart apples.
I recommend these types:
– Honeycrisp: Sweet and crisp
– Granny Smith: Tart and firm
– Fuji: Sweet and juicy
This mix gives your rolls a nice balance of flavor.
How can I tell when my rolls are done baking?
Look for these signs:
– Golden brown color on top.
– Rolls should feel firm to the touch.
– A toothpick comes out clean when poked in the center.
Letting them cool a bit will help too.
Can I make these cinnamon rolls ahead of time?
Yes, you can prepare them ahead.
– Make the dough and filling, then chill overnight.
– Shape the rolls and let them rise in the fridge.
– Bake them fresh in the morning.
This way, you enjoy warm rolls without morning stress.
You learned how to make delicious apple pie cinnamon rolls. We covered the ingredients, step-by-step instructions, and helpful tips. These rolls are perfect for any occasion. You can also try variations like caramel or vegan options. Storing leftovers is easy, so you can enjoy them later. Whether you’re baking for yourself or friends, these rolls will impress. I hope you enjoy making them as much as I do. Your kitchen will smell amazin


