Avocado Egg Salad Lettuce Wraps for a Fresh Meal

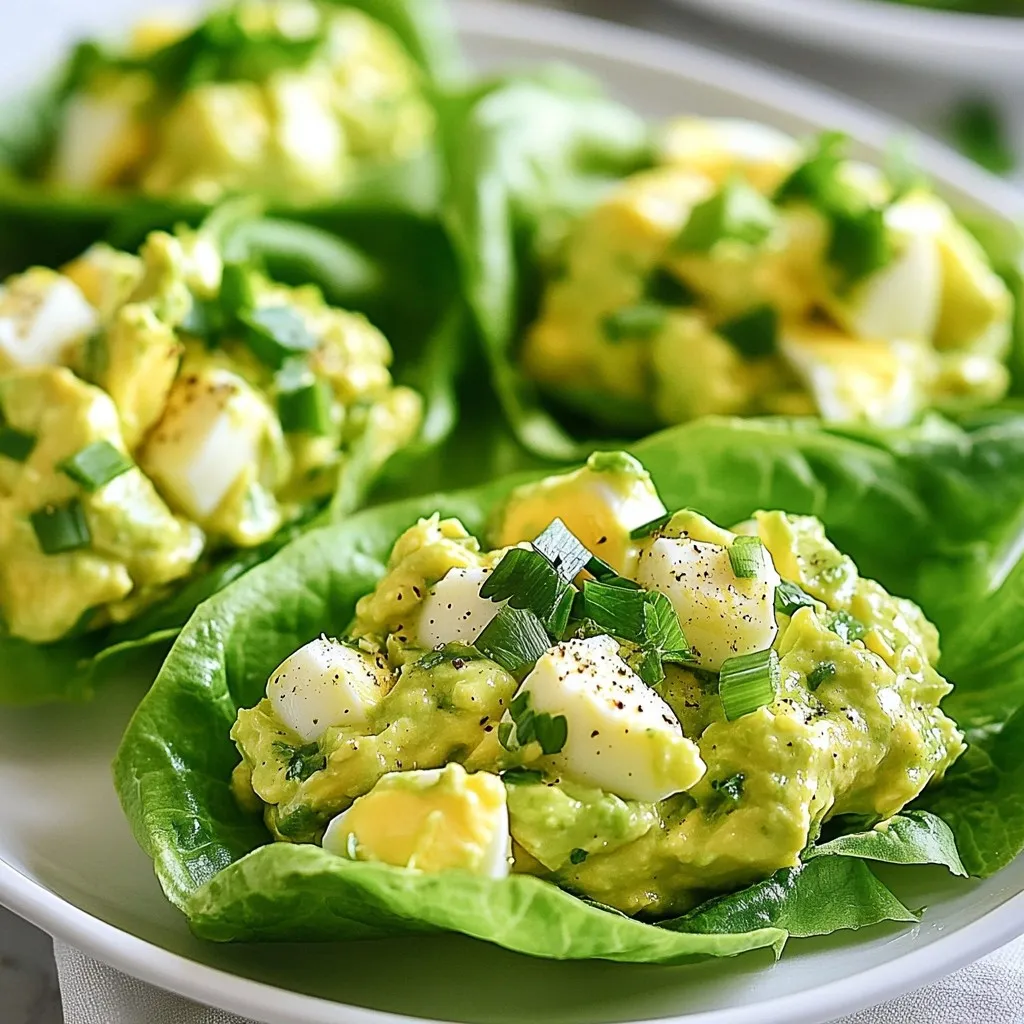
If you’re craving a fresh, healthy meal, look no further than avocado egg salad lettuce wraps. Packed with protein and healthy fats, these wraps are easy to make and bursting with flavor. I’ll guide you through each step, from choosing ingredients to assembling your perfect wrap. Plus, you’ll discover tips to make it your own and store the leftovers. Let’s dive into this delicious and nutritious recipe!
Why I Love This Recipe
- Healthy and Nutritious: This avocado egg salad is packed with protein from the eggs and healthy fats from the avocado, making it a perfect nutrient-dense meal.
- Quick and Easy: With just 10 minutes of prep time, this recipe is ideal for busy days when you want something delicious without spending hours in the kitchen.
- Customizable: You can easily adjust the ingredients to suit your taste, adding more spices or herbs for an extra flavor boost.
- Perfect for Meal Prep: These lettuce wraps can be made ahead of time and stored in the fridge, making them a great option for quick lunches or snacks throughout the week.
Ingredients
List of Ingredients
– 4 hard-boiled eggs, peeled and coarsely chopped
– 1 ripe avocado, perfectly mashed
– 2 tablespoons Greek yogurt (or creamy mayonnaise)
– 1 tablespoon Dijon mustard
– 1 tablespoon freshly squeezed lemon juice
– 1 green onion, finely chopped
– Sea salt and freshly cracked black pepper to taste
– 8 large lettuce leaves (Romaine or Butter)
– Optional: Fresh herbs like cilantro or parsley, finely chopped
Substitutions for Ingredients
You can swap Greek yogurt for creamy mayonnaise for a different taste. If you want a kick, try spicy mustard instead of Dijon. For a vegan option, use mashed chickpeas or silken tofu instead of eggs. You can also replace lettuce with collard greens or cabbage for a sturdy wrap.
Health Benefits of Key Ingredients
Avocados are rich in healthy fats and fiber. They support heart health and help keep you full. Eggs provide high-quality protein, which is good for muscle health. Greek yogurt adds probiotics, promoting gut health. Green onions add vitamins A and C, boosting your immune system. Lettuce is low in calories and high in water, making it great for hydration.

Step-by-Step Instructions
Preparation of Ingredients
Start by gathering all your ingredients. You need four hard-boiled eggs, one ripe avocado, and some Greek yogurt or mayonnaise. Add Dijon mustard, lemon juice, and one green onion to your list. Don’t forget sea salt and black pepper for seasoning. Choose large lettuce leaves, like Romaine or Butter lettuce, for the wraps.
Combining Ingredients for the Egg Salad
In a medium bowl, add the coarsely chopped hard-boiled eggs. Then, take your ripe avocado and mash it well before adding it to the bowl. Next, mix in two tablespoons of Greek yogurt or creamy mayonnaise. Add one tablespoon of Dijon mustard and the lemon juice. Stir everything together gently until it’s creamy and smooth.
Now, finely chop your green onion and fold it into the mixture. Season with sea salt and freshly cracked black pepper to taste. This will enhance the flavors and make your egg salad delicious.
Assembling the Lettuce Wraps
Take one lettuce leaf and place about two to three tablespoons of the egg salad in the center. If you like, sprinkle some chopped fresh herbs on top for extra flavor. Gently fold the lettuce around the filling to create a wrap. Repeat this with the remaining leaves and egg salad until everything is used up.
For a nice presentation, arrange the wraps on a platter. You can garnish with more fresh herbs for a pop of color. Enjoy your fresh and tasty avocado egg salad lettuce wraps!
Tips & Tricks
How to Perfectly Boil Eggs
To boil eggs well, start with cold water. Place your eggs in a pot and add enough water to cover them. Bring the water to a gentle boil. Once boiling, turn off the heat and cover the pot. Let the eggs sit for about 9-12 minutes depending on how cooked you like them. After that, transfer the eggs to an ice bath. This will stop cooking and make peeling easier.
Making the Salad Creamy and Flavorful
For a creamy texture, mash the avocado well. Mix it with Greek yogurt or creamy mayonnaise. Adding Dijon mustard gives a nice tang. Fresh lemon juice brightens the flavor, while green onions add crunch. Season with sea salt and black pepper to taste. For extra flavor, add finely chopped herbs like cilantro or parsley.
Serving Suggestions and Pairings
Serve the avocado egg salad in fresh lettuce wraps. Romaine or Butter lettuce works best for this. You can arrange the wraps on a platter for a pretty look. For an extra touch, garnish with more herbs. Pair these wraps with a light soup or fresh fruit salad for a complete meal. Enjoy your fresh and tasty creation!
Pro Tips
- Choose the Right Lettuce: Opt for Romaine or Butter lettuce for the best wraps, as they provide a sturdy structure and a fresh flavor that complements the egg salad.
- Perfectly Mash Avocado: Ensure your avocado is ripe for easy mashing. A perfectly mashed avocado enhances the creaminess of the egg salad.
- Season to Taste: Don’t hesitate to adjust the seasoning with sea salt and black pepper. Taste as you go to achieve the perfect flavor balance.
- Add Your Twist: Feel free to mix in your favorite ingredients, such as diced tomatoes or cucumbers, for a personalized touch that adds flavor and texture.

Variations
Alternative Dressings and Add-ins
You can switch up the dressing to suit your taste. Instead of Greek yogurt, try sour cream or avocado oil for a different flavor. You can add a touch of hot sauce if you like heat. Pickles or capers can also bring a nice zing to the salad. Feel free to mix in diced celery or bell peppers for a crunchy twist.
Vegan and Low-Carb Versions
To make a vegan version, replace eggs with mashed chickpeas or tofu. Use a vegan mayo or tahini instead of Greek yogurt. For a low-carb option, skip the yogurt and keep the avocado. Use diced cucumbers instead of lettuce wraps for a fresh crunch. This keeps the dish light and healthy while still being delicious.
Creative Garnish Ideas
Garnishing adds flair to your wraps. Fresh herbs like cilantro or parsley brighten up the dish. You can also sprinkle some paprika or chili flakes for extra color. Chopped nuts, like walnuts or almonds, add crunch and flavor. For a fun touch, add edible flowers to your platter for a beautiful presentation.
Storage Info
How to Store Leftover Egg Salad
To store leftover egg salad, place it in an airtight container. This keeps it fresh longer. Make sure to press plastic wrap onto the salad before sealing. If you skip this step, air can dry it out. Leftover egg salad lasts for three days in the fridge. If it turns brown, it’s best to toss it.
Best Practices for Storing Lettuce Wraps
Lettuce wraps are best when fresh. If you need to store them, keep the filling and leaves separate. Wrap the filling in plastic wrap and place it in a container. Store the lettuce leaves in a damp paper towel. This helps them stay crisp. When ready to eat, fill the lettuce with the salad.
Shelf Life and Reheating Tips
Egg salad does not freeze well. It can change in texture and flavor. However, if you want to save it, use the fridge. After three days, it’s time to let it go. If you have extra lettuce, it can last a week. Just remember, the fresher the better! Enjoy your wraps while they are still crisp and tasty.
FAQs
Can I use avocado instead of mayonnaise in egg salad?
Yes, you can use avocado instead of mayonnaise. Avocado adds creaminess and flavor. It also boosts nutrition. Avocado has healthy fats and fiber. This swap makes the dish lighter and fresher.
What type of lettuce is best for wraps?
Romaine and Butter lettuce are the best for wraps. Romaine has a crisp texture and strong shape. Butter lettuce is soft and tender, making it easy to fold. Both types hold the filling well.
How long does avocado egg salad last in the fridge?
Avocado egg salad lasts about 1-2 days in the fridge. To keep it fresh, store it in an airtight container. Check for color changes or off smells before eating. Use fresh ingredients for the best taste.
Can I make this recipe ahead of time?
Yes, you can make this recipe ahead of time. Prepare the egg salad and store it in the fridge. Just wait to assemble the wraps until you are ready to eat. This keeps the lettuce crisp and fresh.
This blog post covers making a tasty egg salad in lettuce wraps. We started with the key ingredients and their health benefits. I shared tips to boil eggs and make the salad creamy. We explored variations for different diets and how to store leftovers.
In the end, this dish is fun and easy. Feel free to get creative with flavors and toppings. Enjoy your egg salad wraps—healthy meals can be simple and deliciou

Avocado Egg Salad Lettuce Wraps
Ingredients
- 4 large hard-boiled eggs, peeled and coarsely chopped
- 1 ripe avocado, perfectly mashed
- 2 tablespoons Greek yogurt (or creamy mayonnaise)
- 1 tablespoon Dijon mustard
- 1 tablespoon freshly squeezed lemon juice
- 1 green onion finely chopped
- to taste sea salt
- to taste freshly cracked black pepper
- 8 large lettuce leaves (Romaine or Butter lettuce)
- optional fresh herbs such as cilantro or parsley, finely chopped
Instructions
- In a medium mixing bowl, add the coarsely chopped hard-boiled eggs and the creamy mashed avocado.
- To this mixture, incorporate the Greek yogurt (or mayonnaise), Dijon mustard, and lemon juice.
- Gently stir together until the ingredients are well combined, ensuring a creamy and smooth texture forms.
- Carefully fold in the finely chopped green onion, and season the mixture with sea salt and freshly cracked black pepper to enhance the flavors.
- Take one of the lettuce leaves and place about 2-3 tablespoons of the avocado egg salad mixture into the center.
- If you like, sprinkle some finely chopped fresh herbs over the filling for an extra burst of flavor and a pop of color.
- Gently fold the lettuce around the filling, creating a neat and portable wrap.
- Repeat the process with the remaining lettuce leaves and the egg salad mixture until everything is used up.


![- 1 red bell pepper, cut into even-sized chunks - 1 yellow bell pepper, cut into even-sized chunks - 1 green zucchini, sliced into round pieces - 1 red onion, cut into wedges - 1 cup cherry tomatoes, washed and stems removed - 1 cup mushrooms, cleaned and stems trimmed - 1 cup fresh pineapple chunks - 3 tablespoons extra virgin olive oil - 2 tablespoons balsamic vinegar - 1 teaspoon garlic powder - 1 teaspoon dried oregano - Salt and freshly cracked black pepper, to taste - Fresh basil leaves, for garnish The ingredients are bright and colorful. They bring life to your plate. I love how fresh vegetables like bell peppers and zucchini can add crunch and flavor. The cherry tomatoes burst with sweetness. Pineapple brings a tropical twist. For the marinade, the extra virgin olive oil and balsamic vinegar work wonders. They help the veggies soak in all the flavors. Garlic powder and dried oregano add depth. Don’t forget salt and pepper; they bring balance. When it comes to garnishing, fresh basil leaves are a must. They add a lovely aroma and a splash of green. Your skewers will look stunning with these vibrant ingredients. For the complete recipe, check out the [Full Recipe]. Enjoy the process of gathering these ingredients. It sets the stage for a fun cooking adventure! - Preheating the grill Start by preheating your grill to medium-high heat. This step is key for even cooking. A hot grill helps create nice grill marks and adds flavor. - Making the marinade In a large bowl, mix together the extra virgin olive oil, balsamic vinegar, garlic powder, dried oregano, salt, and pepper. Whisk it all together until well blended. This marinade is what makes your veggies burst with flavor. - Soaking wooden skewers (if using) If you choose wooden skewers, soak them in water for 30 minutes. This prevents them from burning on the grill. It’s a simple step that makes a big difference. - Threading vegetables and pineapple Take your soaked or metal skewers and start threading on the veggies and pineapple. I like to alternate colors and shapes. This not only looks pretty but also makes every bite exciting. - Cooking time and turning frequency Place the skewers on the preheated grill. Grill them for about 10 to 15 minutes. Remember to turn them every couple of minutes. This ensures they cook evenly and get that lovely char. - Checking for doneness Check the veggies for tenderness. They should be soft but not mushy. You want them to have a nice bite. Once they reach that point, they are ready to come off the grill. This simple method lets you create a vibrant and tasty treat that's sure to impress. For the full recipe, check out the details above. To get the best grill marks, keep your grill hot. Place the skewers on the grill and don't move them too much. This helps veggies sear well and get those beautiful lines. Turn them every few minutes to cook evenly. Burning veggies can ruin your meal. To prevent this, choose the right veggies. Use firmer ones like bell peppers and mushrooms. Slice them thick enough to hold up on the grill. Soak wooden skewers in water for at least 30 minutes. This helps them not catch fire. Adding spices can boost the taste. Try adding smoked paprika for a nice kick. A sprinkle of cumin can also give a warm flavor. Fresh herbs like thyme or rosemary can make a big difference too. For marinades, you can try mixing soy sauce with the balsamic vinegar. This adds a salty, rich flavor. Citrus juices, like lemon or lime, are great too. They add a fresh, bright taste to the veggies. When serving, arrange the skewers on a large platter. Keep colors in mind for a vibrant look. Place the greens with the reds and yellows for a beautiful display. Drizzling the remaining marinade over the skewers adds flavor and shine. This step makes the dish look even more appealing. You can also serve with a side of tzatziki or hummus for extra dipping fun. {{image_4}} You can switch up the veggies for your skewers. Seasonal veggies add fun flavors. Try adding: - Carrots, cut into sticks - Bell peppers of various colors - Eggplant, diced into cubes - Asparagus, cut to fit Mushrooms come in many types. Use portobello or shiitake for great taste. You can also try oyster mushrooms; they add a nice texture. Want to make your skewers heartier? Add protein! You can use: - Chicken, cut into bite-sized pieces - Tofu, pressed and cubed - Shrimp, peeled and deveined Marinate your protein apart from the veggies. This helps each ingredient soak in its own flavors. You can use the same marinade for a tasty mix. Make your skewers fit the season! For a fall theme, use: - Sweet potatoes, cubed - Brussels sprouts, halved - Butternut squash, diced In summer, visit local farmers’ markets. Use fresh produce like zucchini, corn, or cherry tomatoes. This way, your skewers taste fresh and vibrant. For the full recipe, check out the Rainbow Veggie Skewers section above! To keep Rainbow Veggie Skewers fresh, store them in the fridge. Place them in an airtight container. This helps prevent moisture loss. They will stay good for about three days. You can also wrap them tightly in plastic wrap. When it’s time to eat leftovers, I recommend reheating them in the oven. Preheat your oven to 350°F (175°C). Place the skewers on a baking sheet and cover them with foil. Heat for about 10 minutes. This method keeps the skewers from getting soggy. You can also use a grill or skillet. Just be careful not to overheat them. You can freeze ungrilled skewers for later use. Just prepare them as normal, but skip grilling. Place the skewers in a single layer on a tray. Freeze them for about an hour. Once frozen, transfer them to a freezer bag. Be sure to squeeze out as much air as possible. When you’re ready to cook, thaw them in the fridge overnight. You can grill them straight from the freezer too, but add a few extra minutes to the cooking time. Grill veggie skewers for about 10 to 15 minutes. Different veggies need different times. For soft veggies like zucchini and tomatoes, check them after 8 minutes. For firmer veggies like bell peppers and onions, wait a bit longer. Turn the skewers every few minutes to cook evenly. Yes, you can prepare these skewers in advance. Cut up the veggies and marinate them the day before. Store them in the fridge in an airtight container. This saves time and boosts flavor. Just remember to soak wooden skewers if you use them. To make Rainbow Veggie Skewers, you need a few simple tools: - Grill - Skewers (metal or wooden) - Mixing bowl - Whisk - Tongs - Knife and cutting board If you don't have skewers, you can grill the veggies directly on the grill rack. Yes! You can use either metal or wooden skewers. Metal skewers are reusable and easy to clean. They also help cook veggies evenly. Wooden skewers are great for one-time use and can add a nice look, but soak them first to prevent burning. Dipping sauces can elevate your skewers. Here are some popular options: - Tzatziki - Hummus - Ranch dressing - Garlic aioli - Sweet chili sauce These dips add flavor and make your Rainbow Veggie Skewers even more fun to eat. For the full recipe, check out the complete instructions. In this article, we explored how to make flavorful veggie skewers. We discussed fresh vegetables, a tasty marinade, and garnishing with basil. I shared step-by-step instructions for preparation, skewering, and grilling. Tips offered help you achieve perfect results. You can add proteins, use seasonal variations, and store leftovers with ease. These skewers offer flavor, color, and fun for any meal. Enjoy grilling and making them your own!](https://joymealplan.com/wp-content/uploads/2025/06/6627606f-c135-4765-9273-fb487ae5d1cd-768x768.webp)
. When making buffalo chicken lettuce wraps, choose your buffalo sauce wisely. Some sauces are mild, while others pack a punch. If you like heat, go for a hotter sauce. If you prefer less spice, choose a milder option. You can also add extra spices. A pinch of cayenne or red pepper flakes boosts the heat without changing the sauce. To make your wraps even better, think about toppings. Shredded carrots add crunch and color. You can also try diced celery for extra freshness. Blue cheese crumbles add a creamy touch. If you want a sauce, ranch or blue cheese dressing pairs well. They balance the heat of the buffalo sauce and add creaminess. Serve your wraps in a fun way. Use a large platter to hold the wraps. Surround them with extra lettuce leaves. This lets guests make their own wraps. Add a small bowl of dressing on the side for dipping. Use bright garnishes, like chopped green onions, to make the dish pop. These tips make your wraps look as good as they taste! {{image_4}} You can switch up the protein in these wraps. Ground chicken or turkey works well. Just cook it in the same way as the diced chicken. For a vegetarian twist, try using plant-based proteins. Crumbled tofu or tempeh can soak up the buffalo sauce nicely. These options keep the wraps healthy and flavorful. If you need gluten-free options, check your buffalo sauce. Many brands are gluten-free. For a dairy-free option, skip the blue cheese. You can use a vegan ranch dressing instead. It brings a nice creaminess without the dairy. These swaps let everyone enjoy the wraps. Pair your wraps with fresh veggies, like carrot sticks or cucumber slices. These sides add crunch and color. You might also serve chips for a fun crunch. For drinks, refreshing iced tea or lemonade works well. These options make a great meal or snack. If you want the full recipe, you can find it here: [Full Recipe] To store your buffalo chicken lettuce wraps, place them in an airtight container. This keeps them fresh and tasty. Try to refrigerate them within two hours after cooking. They will stay good for about 3 to 4 days in the fridge. When reheating, I suggest using the stovetop or microwave. For the stovetop, warm them in a skillet over low heat. This helps keep the wraps from getting soggy. If using a microwave, heat on medium power for short bursts. Do not reheat more than once, as this can affect the flavor and texture. Yes, you can freeze buffalo chicken wraps! To freeze, place the chicken filling in a freezer-safe bag or container. Remove as much air as possible. You can freeze them for up to three months. When ready to eat, thaw the filling overnight in the fridge. Reheat it and serve in fresh lettuce leaves for the best taste. The spice level depends on the buffalo sauce you choose. You can find mild, medium, or hot sauces. If you like heat, pick a hot sauce. For a mild kick, go for a mild sauce. You can also mix sauces to control the heat. If you want to tone down the spice, add extra toppings like ranch dressing or blue cheese. These cool flavors balance the heat well. Yes, you can prepare the chicken and other ingredients in advance. Cook the chicken and store it in the fridge for up to three days. You can also wash and dry the lettuce leaves ahead of time. Keep the chicken and lettuce in separate containers to maintain freshness. When you’re ready to eat, just assemble the wraps. This makes for a quick and healthy snack. If you want an alternative to lettuce, try tortillas or collard greens. Tortillas work well if you prefer a more traditional wrap. Collard greens are sturdy and add a nice flavor. You can also use rice paper for a fun twist. Each option brings its own taste and texture, so choose what you like best. For the complete recipe, check out the Buffalo Bliss Chicken Lettuce Wraps full recipe for easy access. Buffalo chicken lettuce wraps are a fun and tasty dish. We reviewed key ingredients, cooking steps, and tips for customization. You can mix flavors, adjust spice, and even swap proteins to suit your needs. These wraps are great for meals and snacks. Remember to store leftovers properly for later enjoyment. I hope this guide helps you create delicious wraps for friends or family. Enjoy experimenting with your own twists!](https://joymealplan.com/wp-content/uploads/2025/07/5600c779-5454-4d90-be3f-06d6a192c4a1-768x768.webp)

