Baked Ratatouille Flavorful Vegetable Delight

Welcome to my kitchen! Today, I’m excited to share my Baked Ratatouille recipe. This dish is a colorful mix of fresh veggies like zucchini, eggplant, and bell pepper, all baked to perfection. With vibrant flavors from herbs like thyme and basil, it’s a wholesome delight for any meal. Whether you want a simple side dish or a filling main, this ratatouille fits the bill. Let’s dive in and create something delicious together!
Ingredients
Fresh Vegetables
– 1 medium zucchini, sliced into thin rounds
– 1 medium eggplant, sliced into thin rounds
– 1 bell pepper (red or yellow), sliced into thin strips
– 1 medium onion, thinly sliced
– 2 cups cherry tomatoes, halved
Herbs and Seasonings
– 3 cloves garlic, finely minced
– 1 teaspoon fresh thyme leaves
– 1 teaspoon fresh basil, finely chopped
– ½ teaspoon dried oregano
– Salt and pepper to taste
Additional Ingredients
– 4 tablespoons olive oil
– 1 tablespoon balsamic vinegar (for drizzling)
– Fresh basil leaves for garnish
When I make baked ratatouille, I focus on fresh, vibrant vegetables. Each one adds its own flavor. You can get creative with your choices too. Use what you love!
Garlic and herbs build a strong base of flavor. Fresh thyme and basil really make a difference. They add brightness and aroma. Dried oregano brings earthiness, too.
Olive oil is key for roasting. It helps the veggies brown and adds richness. Balsamic vinegar adds a touch of sweetness and tang. It enhances the dish’s overall taste.Enjoy the process of layering these fresh ingredients. Each step brings you closer to a colorful, healthy meal that everyone will love.
Step-by-Step Instructions
Preheat and Sauté
– Preheat your oven to 400°F (200°C). This temperature helps the veggies cook evenly.
– In a large skillet, heat 2 tablespoons of olive oil over medium heat. Add sliced onion and minced garlic. Sauté until the onion is translucent and fragrant, about 5 minutes. I like to season with salt, pepper, and dried oregano to boost the flavor.
Layering the Dish
– Spread the sautéed onion and garlic mixture evenly in a 9×13 inch baking dish. This mix forms a tasty base for our ratatouille.
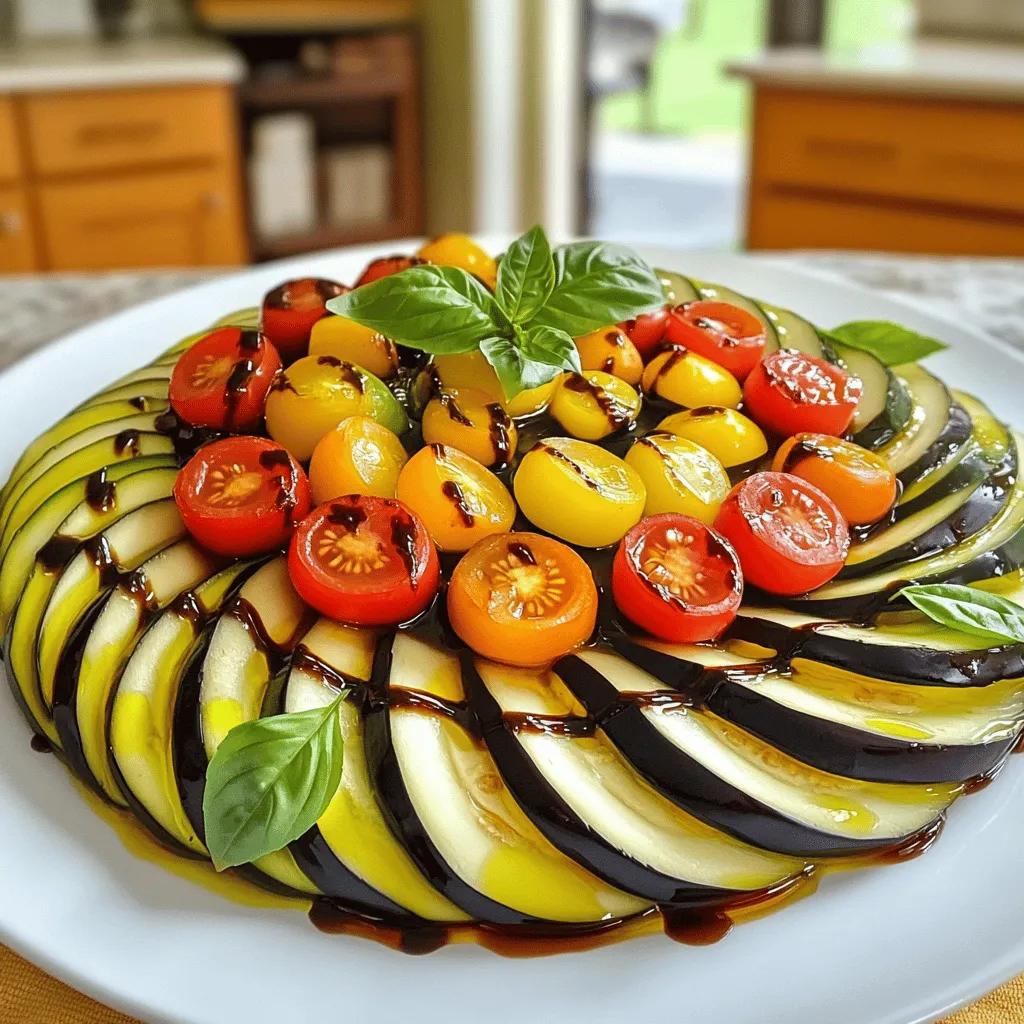
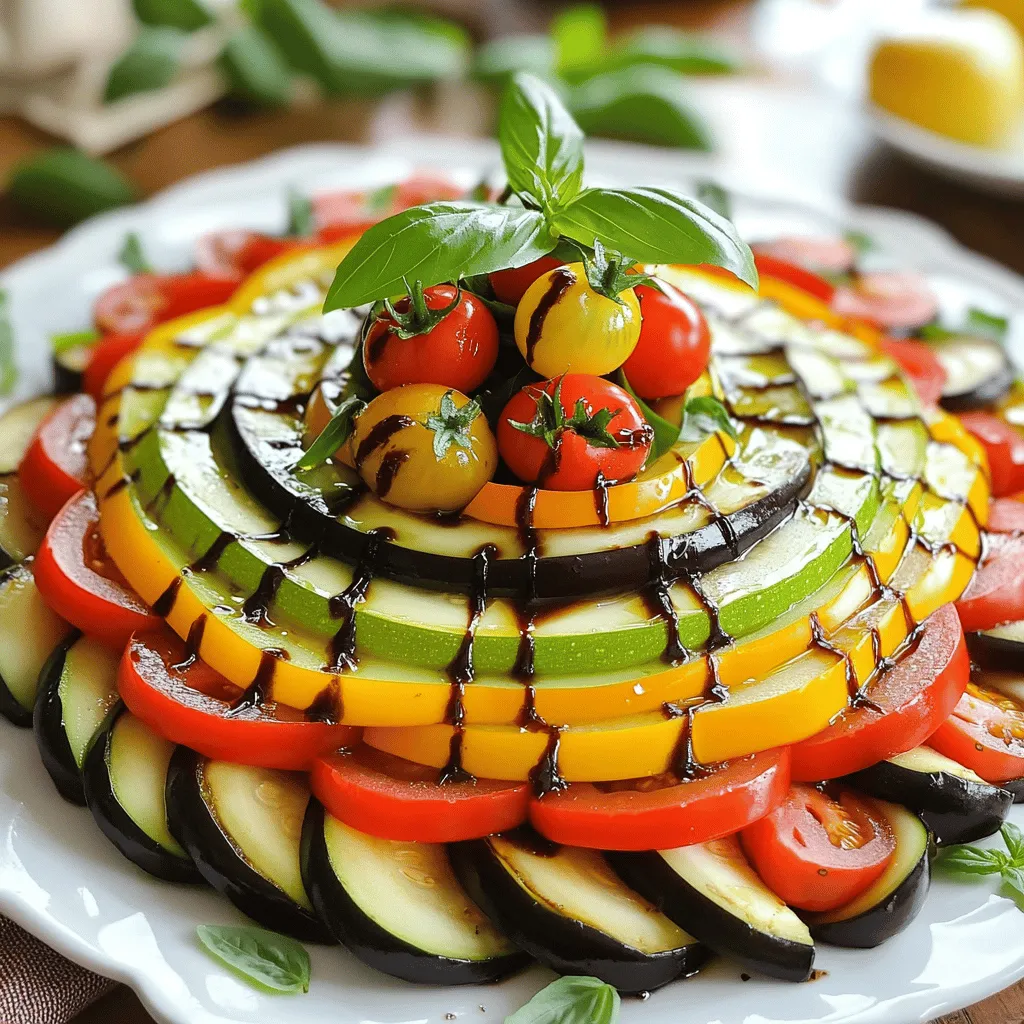
– Now, it’s time to layer! Artfully arrange sliced zucchini, eggplant, bell pepper, and halved cherry tomatoes in an alternating spiral pattern. Standing the vegetables upright creates a colorful display that makes the dish pop.
Baking Process
– Drizzle the remaining 2 tablespoons of olive oil over the veggies. Season with fresh thyme, chopped basil, salt, and pepper to make each bite flavorful.
– Cover the baking dish tightly with aluminum foil. This keeps the moisture in while baking. Bake in the preheated oven for 30 minutes. After that, remove the foil and continue baking for another 15-20 minutes. You want the veggies tender with edges that caramelize.
– Once done, take the dish out of the oven and drizzle balsamic vinegar over the top. This adds a tasty touch of acidity.
– Garnish with fresh basil leaves just before serving. This adds color and a lovely aroma to your baked ratatouille.Enjoy your flavorful vegetable delight.
Tips & Tricks
Perfecting the Bake
To make your baked ratatouille shine, always use fresh, quality vegetables. This choice boosts the dish’s flavor and makes it more appealing. You should also adjust the baking time based on how soft you want the veggies. If you like them firm, check at 30 minutes. For a softer bite, leave them in longer.
Serving Suggestions
You can serve ratatouille warm or at room temperature. It tastes great either way! For an extra touch, garnish with fresh basil and a drizzle of olive oil. This adds flavor and looks nice on the plate.
Presentation Tips
For a beautiful presentation, plate individual portions. This makes your dish look fancy and inviting. Use a colorful serving dish to catch the eye. The bright colors of the veggies pop against a vibrant background, making your ratatouille even more appealing.

Variations
Adding Protein
You can make your baked ratatouille even better by adding protein. A great choice is cheese. Mozzarella or goat cheese melts nicely and adds creaminess. You may also add sliced chicken or turkey. This makes the dish filling and adds new flavors.
Different Vegetables
Feel free to get creative with your veggies! You can swap in different kinds of squash or bell peppers. Adding spinach or kale boosts the nutrients. These greens add color and flavor, making your dish even more delicious.
Flavor Profiles
Try playing with the flavors in your ratatouille. Different herbs can change the taste. Rosemary or parsley can add a fresh twist. If you like heat, add crushed red pepper for a spicy kick. This will make your meal exciting and full of flavor.
Explore these variations to make your baked ratatouille unique!
Storage Info
Refrigeration
After enjoying your baked ratatouille, store any leftovers in an airtight container. This helps keep it fresh. I recommend consuming it within 3-4 days. This way, you still enjoy the vibrant flavors and textures.
Freezing
You can freeze individual portions if you want to save some for later. Just place them in freezer-safe containers. When you’re ready to eat, thaw and reheat gently. This keeps the taste and texture intact.
Reheating Tips
For the best results, reheat your ratatouille in the oven. This method helps maintain its crispness. If you’re in a hurry, using the microwave works too. Just be sure to heat it gently to keep the flavors fresh.
FAQs
How long does baked ratatouille last?
Baked ratatouille generally lasts 3-4 days in the fridge. To keep it fresh, store it in an airtight container. It’s best to enjoy it within this time for the best flavor and texture.
Can I make ratatouille ahead of time?
Yes, you can make ratatouille ahead of time. It’s a great option for meal prep. Store it in the fridge after cooking. You can reheat it later for a quick and tasty meal.
Is ratatouille suitable for vegans?
Yes, ratatouille is suitable for vegans. All the ingredients are completely plant-based. This dish is a colorful way to enjoy healthy vegetables without any animal products. You can feel good about serving it to everyone!
In this article, we explored how to make a delicious baked ratatouille. We talked about fresh veggies like zucchini and eggplant, plus tasty herbs like basil and thyme. I shared easy steps to sauté, layer, and bake your dish to perfection. Remember to use quality ingredients for the best taste. You can also switch up the recipe with proteins or different veggies. This dish keeps well and can be enjoyed again. Enjoy making ratatouille and impress your friends with this colorful meal!


![To make a vibrant Greek pasta salad, gather these key ingredients: - 8 oz whole grain pasta (fusilli or penne work well) - 1 cup cherry tomatoes, halved - 1 medium cucumber, diced - 1 bell pepper, diced - ½ red onion, chopped - 1 cup Kalamata olives, pitted and halved - 1 cup feta cheese, crumbled - ¼ cup fresh parsley, chopped - 2 tablespoons extra virgin olive oil - 1 tablespoon red wine vinegar (or lemon juice) - 1 teaspoon dried oregano - Salt and pepper to taste These ingredients create a mix that bursts with flavor and color. Whole grain pasta adds fiber and nutrients. Fresh vegetables bring crunch and vitamins. Feta cheese adds a creamy touch and saltiness. This salad is not just tasty; it is also packed with nutrition. Whole grain pasta gives you energy and fiber. Fresh veggies like tomatoes and cucumbers offer vitamins and antioxidants. Kalamata olives are rich in healthy fats. Feta cheese provides protein and calcium. Each serving contains: - High fiber content from whole grain pasta - Vitamins A and C from tomatoes and bell peppers - Heart-healthy fats from olives and olive oil This salad is a great choice for a healthy meal that keeps you full and satisfied. You can customize your salad with these optional add-ins: - 1 cup cooked chickpeas for extra protein - Grilled chicken for a heartier option - Artichoke hearts for a tangy twist - Spinach or arugula for more greens - Avocado for creaminess and healthy fats These add-ins allow you to make the dish your own. Mix and match based on your taste and dietary needs. Each addition brings its own flair to this delightful Greek pasta salad. For detailed preparation steps, check the Full Recipe. Start by boiling water in a large pot. Add a pinch of salt for flavor. Once the water boils, add 8 ounces of whole grain pasta. I like using fusilli or penne. Cook the pasta according to the package instructions until it’s al dente. This usually takes about 8 to 10 minutes. After cooking, drain the pasta and rinse it under cold water. This stops the cooking and cools it down. While the pasta cooks, grab your knife and cutting board. Chop 1 cup of cherry tomatoes in half. Dice 1 medium cucumber into bite-sized pieces. Chop 1 bell pepper, any color you like. Finely chop ½ of a red onion. Finally, cut 1 cup of Kalamata olives in half. Place all these colorful veggies into a large mixing bowl. They add great flavor and texture. In a small bowl, whisk together 2 tablespoons of extra virgin olive oil and 1 tablespoon of red wine vinegar. You can use lemon juice if you prefer a zippier taste. Add 1 teaspoon of dried oregano for a nice aroma. Season with a pinch of salt and pepper. Mix well until the dressing is smooth and blended. Next, gently add the cooled pasta to the mixing bowl with the veggies. Toss everything together carefully with your hands or a spatula. This ensures that every piece is coated in flavor. Now, sprinkle 1 cup of crumbled feta cheese and ¼ cup of fresh parsley on top. Drizzle the dressing over the salad and toss once more. This is where all the flavors come together! For the best taste, cover the salad and chill it in the fridge for at least 30 minutes before serving. If you want the full recipe, check out the details above. To cook pasta perfectly, start with a large pot of water. Add a good amount of salt to the water. This helps the pasta taste better. Bring the water to a rolling boil before adding the pasta. Use whole grain pasta for a healthy touch. Cook it until it is al dente, which means it should still have a firm bite. After cooking, drain the pasta and rinse it under cold water. This stops the cooking process and cools it down quickly. Chilling your pasta salad is key to enhancing the flavors. Once you mix all the ingredients, cover the bowl with plastic wrap or a lid. Place it in the refrigerator for at least 30 minutes. This time lets the flavors blend well. If you have more time, chill it for an hour or more. Just remember, the longer you chill, the tastier it gets! Fresh herbs make a big difference in your salad's taste. Parsley adds a fresh touch and brightens the dish. You can also try fresh basil or mint for a new twist. Chop the herbs finely and sprinkle them over the salad just before serving. This keeps them vibrant and aromatic. The fresh herbs will bring your Healthy Greek Pasta Salad to life. They offer a burst of flavor that will impress everyone at the table. For the complete recipe, check out the [Full Recipe]. {{image_4}} You can change the whole grain pasta for gluten-free pasta. Gluten-free pasta works well with this salad. It gives you a similar taste and texture. Just follow the cooking time on the package. You will still have a healthy and tasty meal. For more protein, add canned chickpeas or grilled chicken. Chickpeas add fiber and nutrients. Rinse and drain them before mixing into the salad. For grilled chicken, cook it until it’s golden. Then, chop it into small pieces. This will make your salad heartier and keep you full. To make this salad vegan, skip the feta cheese. You can use avocado for creaminess. Another option is to add a vegan cheese. It provides a similar taste without dairy. Ensure you check the ingredient list to keep it plant-based. These simple swaps keep the salad fresh and flavorful. Try these variations to make your Healthy Greek Pasta Salad unique and fun! For the complete recipe, check out the [Full Recipe]. To store leftover Greek pasta salad, first, let it cool to room temperature. Then, place it in an airtight container. This helps keep the salad fresh and prevents it from drying out. You can store it in the fridge for up to three days. Be sure to label the container with the date. This way, you’ll know when to use it. Freezing Greek pasta salad isn’t recommended. The veggies and feta may lose their texture and taste when thawed. However, if you must freeze it, leave out fresh ingredients like tomatoes and cucumbers. Store the base of the salad in a freezer-safe container. It can last for up to two months. When ready to eat, thaw it overnight in the fridge. Reheating Greek pasta salad is simple. If you prefer it warm, add it to a pan over low heat. Stir gently until it warms through. Avoid high heat to keep the veggies crunchy. If the salad has been in the fridge, you can enjoy it cold as well. Just give it a good toss with a little olive oil to freshen it up. For the full recipe, check out the vibrant Greek-inspired whole grain pasta salad! To make a gluten-free version, choose gluten-free pasta. There are many options, like rice or quinoa pasta. Cook it just as you would regular pasta. Use the same ingredients for the salad. This way, you still enjoy the fresh flavors without gluten. Yes, you can prepare this salad a day ahead. Make the salad and store it in the fridge. The flavors will blend well overnight. Just remember to add the feta just before serving for the best taste. If you want a feta substitute, try goat cheese. It adds a nice creaminess. You can also use vegan feta for a dairy-free option. Crumbled tofu can work too, giving a similar texture without the dairy. Absolutely! This salad is perfect for meal prep. It keeps well in the fridge for several days. You can pack it in individual containers for easy lunches. Just ensure you store the dressing separately for freshness until you're ready to eat. For the full recipe, follow the details provided above! In this blog post, we explored the ingredients for a Healthy Greek Pasta Salad. We discussed key ingredients, nutritional highlights, and optional add-ins. I shared step-by-step instructions, tips for cooking, and variations for dietary needs. Finally, I covered storage methods and answered common FAQs. Making this salad is simple and fun. Whether you’re enjoying it fresh or storing leftovers, this dish is a tasty choice. Enjoy the flavors and nourish your body with this healthy recipe.](https://joymealplan.com/wp-content/uploads/2025/06/b0373296-86bf-4053-9c3f-2e765b8fd918-768x768.webp)


![- 4 boneless, skinless chicken thighs - 1 lb baby potatoes, halved - 1 lemon, zested and juiced - 3 tablespoons extra virgin olive oil - 4 garlic cloves, minced - 1 tablespoon fresh rosemary, finely chopped - 1 tablespoon fresh thyme, finely chopped - 1 teaspoon paprika - Salt and freshly ground pepper to taste - 1 cup broccoli florets (for added color and nutrition) When I make this dish, I get excited about using fresh ingredients. The chicken thighs are juicy and flavorful. They pair perfectly with the baby potatoes, which crisp up beautifully. The lemon adds a bright and zesty touch. It brings life to the dish. I always zest the lemon first. This step releases the essential oils, which pack a punch of flavor. Then, I squeeze the lemon juice right into the marinade. Using fresh herbs like rosemary and thyme makes a big difference. They add a lovely aroma as they cook. I love to chop them finely so their flavor spreads evenly. Garlic, of course, gives that extra depth. If you want more color and nutrition, consider adding broccoli florets. They roast nicely and add a pop of green. For the full recipe, check out the detailed instructions. Each ingredient plays a key role in making this meal a hit. Enjoy cooking! First, preheat your oven to 425°F (220°C). This temperature helps the chicken and potatoes cook evenly. Next, line a sheet pan with parchment paper. This makes cleanup easy and helps prevent sticking. In a large bowl, mix your marinade. Combine 3 tablespoons of olive oil, the juice and zest of one lemon, minced garlic, chopped rosemary, chopped thyme, paprika, and a pinch of salt and pepper. Whisk it all together. This mixture adds great flavor. Now, add your chicken thighs to the marinade. Make sure each piece gets coated well. For the best flavor, let the chicken marinate for at least 15 minutes at room temperature. If you have more time, refrigerate it for up to 1 hour. This helps the flavors soak in. While the chicken marinates, prepare the baby potatoes. Place the halved potatoes on your lined sheet pan. Drizzle them with olive oil and season with salt and pepper. Toss them well so they are coated evenly. Spread them out in a single layer. This helps them crisp up nicely. If you want to add broccoli florets, toss them on the pan as well. They add color and nutrition to the dish. Once your chicken has marinated, take it out of the bowl. Place the chicken thighs on the sheet pan with the potatoes. Arrange them so they cook evenly. Now, put the sheet pan in the oven. Roast for 30-35 minutes. Check the chicken’s internal temperature; it should reach 165°F (75°C) to be safe to eat. The potatoes should be golden and crisp. If you want a golden finish, broil the dish for an extra 2-3 minutes at the end. Keep a close eye on it to avoid burning. After cooking, carefully take the pan out of the oven. Let the dish rest for about 5 minutes. This allows the flavors to settle. Now, you can enjoy your savory Sheet Pan Lemon Herb Chicken and Potatoes! For the complete cooking guide, refer to the Full Recipe. To get juicy chicken, marinate it well. I suggest marinating for at least 15 minutes. For deeper flavor, let it sit in the fridge for up to 1 hour. This helps the flavors sink in. Use a meat thermometer to check doneness. The chicken should reach 165°F (75°C) inside. Insert the thermometer into the thickest part of the thigh. This ensures your chicken is safe to eat. Arranging the potatoes is key to crispiness. Place them cut-side down on the sheet pan. This helps them brown evenly. Roasting in a single layer is important. If you crowd the pan, your potatoes may steam instead of roast. This can lead to soggy potatoes. More space means better air flow and crisp edges. Serve the chicken and potatoes right from the sheet pan. This gives a nice, rustic feel. If you want to impress, transfer it to a big platter. Add garnishes for a pop of color. Fresh lemon slices and more herbs look great. They make your dish more appealing and delicious. {{image_4}} You can switch up the herbs in this dish. Try using basil or oregano instead of rosemary and thyme. Fresh herbs give great flavor, but dried herbs work too. If you prefer dried herbs, use about one-third the amount. Dried herbs are easy to store and use anytime. Feel free to add more veggies to your sheet pan. Carrots, bell peppers, or green beans pair well with chicken and potatoes. You can also use seasonal veggies. In spring, try asparagus or peas. In fall, sweet potatoes or brussels sprouts work nicely. These additions bring color and nutrition. For a flavor kick, think about adding spices. Paprika adds a nice warmth, but you can also try cumin or chili powder for extra heat. Zest from other citrus fruits like lime or orange can brighten the dish. Each change will give your meal a unique twist, making it fun to explore. To keep your leftovers fresh, place them in an airtight container. This helps prevent moisture loss and keeps flavors intact. Store the container in the fridge. Your lemon herb chicken and potatoes will last up to three days. If you want to keep them longer, consider freezing them. In the freezer, they can last for up to three months. For reheating, the oven works best. Preheat your oven to 350°F (175°C). Place the chicken and potatoes on a baking sheet. Cover them with foil to keep them moist. Heat for about 15-20 minutes or until warm. You can also use a microwave if you’re in a hurry. Just be careful; it may make the potatoes a bit soft. To keep the texture nice, try reheating in the oven whenever possible. For a quick snack, you can also enjoy the chicken cold. It's still tasty and full of flavor! You can serve many side dishes with this meal. Here are some tasty options: - Steamed green beans: They add crunch and color. - Simple salad: A fresh salad with mixed greens is perfect. - Rice or quinoa: These grains soak up the juice well. - Roasted carrots: They bring sweetness that pairs nicely. - Garlic bread: This adds a nice touch for bread lovers. Yes, you can! Try these cuts for a fun twist: - Chicken breasts: They cook fast and stay juicy. - Drumsticks: They add a nice crispy skin. - Wings: Great for a fun, finger-licking option. Absolutely! To prep this dish in advance: - Marinate the chicken: You can do this a day before. - Chop the potatoes: Keep them in water to stay fresh. - Store in the fridge: Use airtight containers for best results. You can make it lighter with a few simple swaps: - Use skinless chicken: This cuts down on fat. - Swap olive oil for broth: It reduces calories while keeping taste. - Add more veggies: Include spinach or bell peppers for nutrition. You can find the Full Recipe [here]. It has all the details you need to make this dish perfectly. This recipe gives you a tasty and easy sheet pan lemon herb chicken dish. We've covered ingredients, step-by-step cooking methods, and tips for perfect results. Don't forget the option to add your favorite veggies for more flavor. You can also change this dish with different herbs and spices. Follow the storage tips to keep leftovers fresh. Enjoy making this simple, healthy meal that brings great taste to your table!](https://joymealplan.com/wp-content/uploads/2025/07/eaffd7d4-0358-4ae2-a047-6502860c21d0-768x768.webp)
