If you’re craving a sweet treat that captures the essence of a bakery, you’re in for a delight! These Bakery-Style Maple Brown Sugar Scones offer a warm, comforting taste with just the right crunch. With simple steps and minimal ingredients, you’ll soon impress your friends and family with this delectable recipe. Ready to elevate your baking game? Let’s dive into the ingredients and get started!
Ingredients
Complete List of Ingredients
– 2 cups all-purpose flour
– 1/2 cup packed brown sugar
– 1 tablespoon baking powder
– 1/2 teaspoon salt
– 1/2 cup unsalted butter, cold and cut into small cubes
– 1/2 cup heavy cream
– 1/4 cup pure maple syrup
– 1 large egg
– 1 teaspoon vanilla extract
– 1/2 cup chopped walnuts or pecans (optional)
– Extra maple syrup for drizzle (optional)
You will need basic ingredients for these scones. First, all-purpose flour gives them structure. Brown sugar adds sweetness and a hint of caramel flavor. Baking powder makes them rise and become light. Salt balances the sweetness and enhances flavor.
Cold unsalted butter is key. It creates a flaky texture. Cut it into small cubes for easy mixing. Heavy cream adds richness and moisture. Pure maple syrup gives them a lovely maple taste.
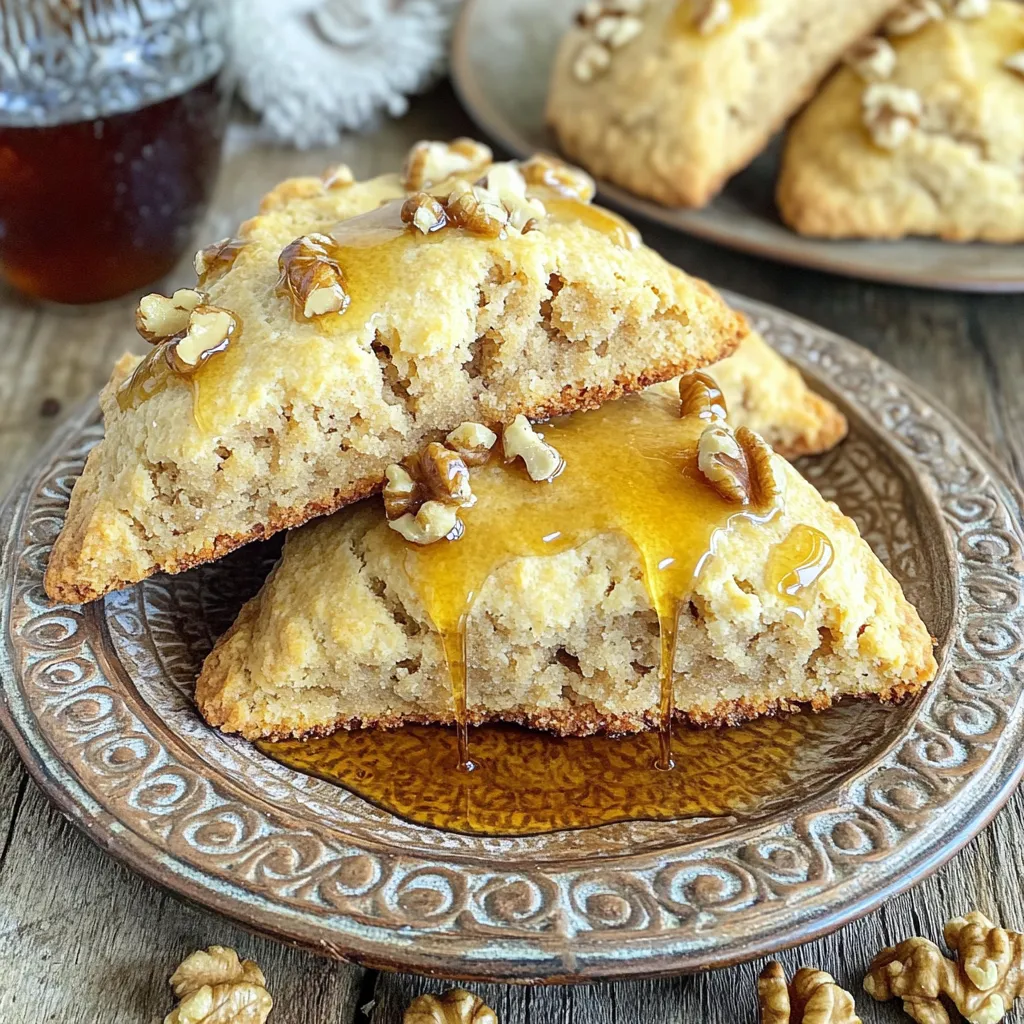
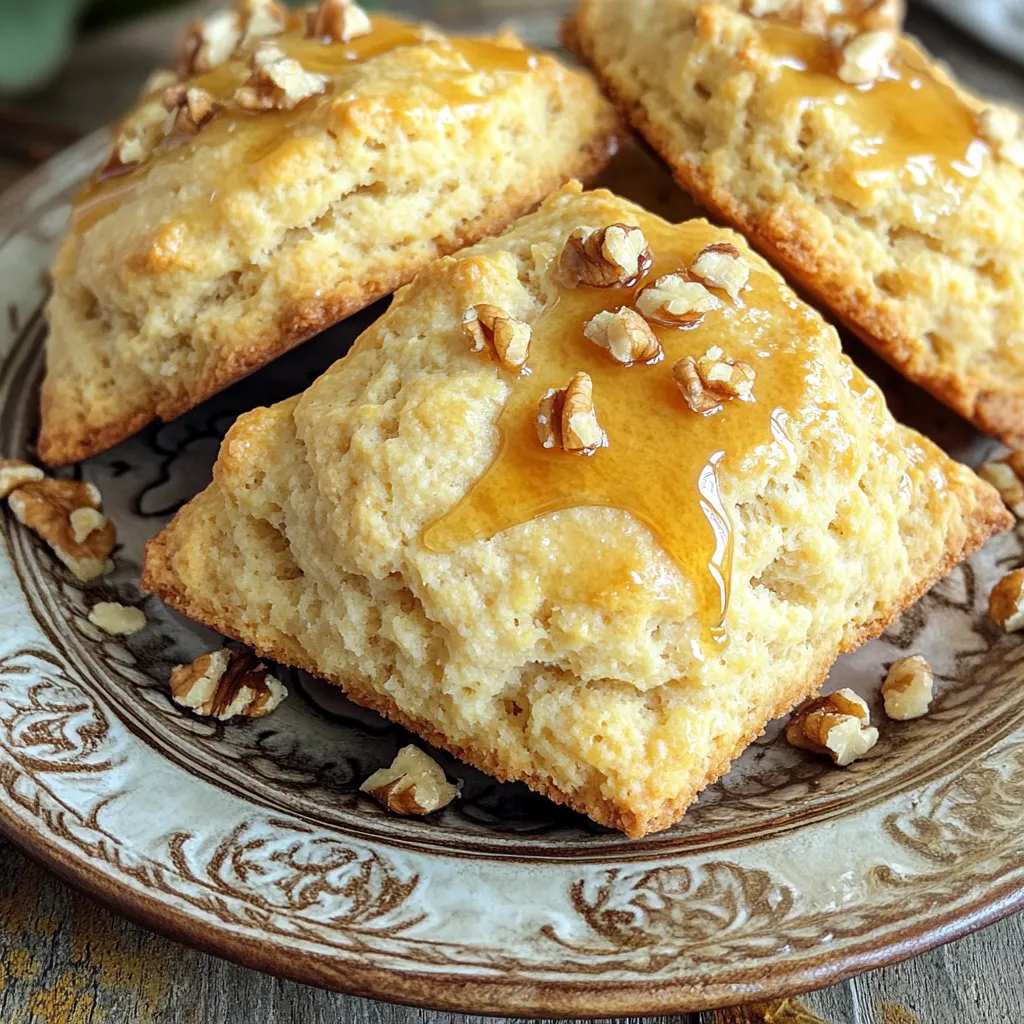
You will also use a large egg for binding. Vanilla extract adds depth to the flavor. If you like nuts, add chopped walnuts or pecans for crunch. Finally, drizzle extra maple syrup on top for an extra sweet touch.
Gather these ingredients, and you’ll be ready to bake delicious scones!
Step-by-Step Instructions
Prepping and Mixing
First, preheat your oven to 400°F (200°C). This step is key to getting those scones golden and crisp. Next, line your baking sheet with parchment paper. This helps prevent the scones from sticking. In a large bowl, combine 2 cups of all-purpose flour, 1/2 cup of packed brown sugar, 1 tablespoon of baking powder, and 1/2 teaspoon of salt. Whisk these dry ingredients together until they are mixed well. This ensures even flavor throughout your scones.
Incorporating Butter and Wet Ingredients
Now, it’s time to work in the butter. Take 1/2 cup of cold, unsalted butter cut into small cubes. Add this to your dry mixture. Use a pastry cutter or your fingertips to mix it in. You want the mixture to look like coarse crumbs, with some pea-sized pieces of butter still visible. This will help make your scones flaky. In a separate bowl, whisk together 1/2 cup of heavy cream, 1/4 cup of pure maple syrup, 1 large egg, and 1 teaspoon of vanilla extract. Mix until smooth.
Forming and Baking the Scones
Next, pour the wet ingredients into the dry mixture. Gently mix with a spatula until just combined. Be careful not to over-mix; it’s okay if the dough is slightly sticky. If you want to add nuts, fold in 1/2 cup of chopped walnuts or pecans now. Turn the dough onto a floured surface. Knead it gently a few times until it comes together. Pat the dough into a circle, about 1-inch thick. Using a sharp knife, cut the dough into 8 wedges. Transfer each wedge to your baking sheet, leaving space between them. Bake these scones for 15-18 minutes until they are golden brown. Let them cool slightly before drizzling with extra maple syrup if you like. Enjoy!
Tips & Tricks
Achieving the Perfect Texture
To make great scones, start with cold butter. Cold butter gives scones a flaky texture. This makes each bite light and airy. Cut the butter into small cubes. Then, mix it into the flour until it looks like coarse crumbs. Leave some pea-sized pieces of butter. This step is key for the best texture.
Do not over-mix the dough. You want to combine the wet and dry ingredients gently. Stir until just combined. The dough should still feel a little sticky. Over-mixing can lead to tough scones, which is not what you want.
Presentation Tips
Present your scones on a nice plate. Warm scones look more inviting. You can garnish them with extra walnuts or pecans. This adds a nice crunch and flavor. Drizzling with maple syrup gives added sweetness and a beautiful shine. It makes the scones even more tempting for guests.
Common Mistakes to Avoid
Avoid overworking the dough. This can make your scones dense and chewy. Remember, less is more when mixing.
Keep an eye on the baking time and temperature. Bake your scones at 400°F (200°C) for 15-18 minutes. Check them after 15 minutes. They should be golden brown on top. If they are too pale, they need more time.
Variations
Flavor Additions
You can change the flavor of your scones easily. Try adding different nuts for a crunch. Pecans or walnuts work great. Nuts add a nice texture and flavor. You can also mix in chocolate chips. They bring a sweet touch that pairs well with maple syrup. Dried fruits like cranberries or raisins add a chewy element too. These simple swaps make every batch unique.
Dietary Adjustments
If you need a gluten-free option, use alternative flours. Almond flour or oat flour can work well. You can also make these scones dairy-free. Replace the cream with coconut cream. For butter, try using a dairy-free stick. These adjustments keep the taste while meeting dietary needs.
Seasonal Twists
Change the scone flavors with the seasons. In fall, add pumpkin spice for warmth. This gives your scones a cozy, festive taste. For a summer twist, add lemon zest. It brightens the flavor and adds a fresh touch. Both variations keep the scones exciting all year round.
Storage Info
How to Store Scones
To keep your scones fresh, place them in an airtight container. This helps maintain their texture and flavor. Line the container with paper towels. This will absorb any moisture and keep them crisp. Store at room temperature for up to three days. If you want to keep them longer, freezing is a great option.
To freeze scones, wrap each one in plastic wrap. Place them in a freezer-safe bag. They can last for up to three months in the freezer. Just make sure to label the bag with the date. This way, you can enjoy bakery-style treats anytime!
Reheating Tips
To enjoy scones at their best, reheating is key. You can use an oven or a microwave. For oven reheating, preheat to 350°F (175°C). Place the scones on a baking sheet. Heat for about 5-10 minutes until warm. This keeps them crisp on the outside.
If you use a microwave, set it to low power. Heat each scone for about 15-20 seconds. Watch closely to avoid making them tough. They are best served warm. Try adding a drizzle of maple syrup on top for extra sweetness!
FAQs
Can I use other types of flour in this recipe?
Yes, you can. All-purpose flour works best for these scones. If you want a healthier option, try whole wheat flour. Just remember, it may change the texture a bit. You can also use gluten-free flour blends. Just ensure they include a binding agent like xanthan gum. This helps the scones hold together well.
How do I know when the scones are done baking?
Look for golden brown tops on your scones. They should feel firm to the touch. If you insert a toothpick, it should come out clean. Baking time is usually around 15 to 18 minutes. Keep an eye on them to avoid burning.
Can I make the dough ahead of time?
Absolutely! You can prepare the dough and chill it for up to 24 hours. Just wrap it tightly in plastic wrap. When you’re ready to bake, cut the scones and bake straight from the fridge. This helps keep them flaky and light.
What can I substitute for heavy cream?
If you don’t have heavy cream, try using whole milk or half-and-half. For a dairy-free option, use coconut cream. Another good choice is almond milk mixed with a bit of oil. This helps mimic the richness of heavy cream.
How long do these scones last?
These scones stay fresh for about 2-3 days at room temperature. Store them in an airtight container. If you want to keep them longer, freeze them. They can last up to 3 months in the freezer. Just reheat in the oven when you’re ready to enjoy them again.
You now have a complete guide for making tasty scones. We covered the ingredients, step-by-step instructions, and helpful tips. I shared ways to adjust flavors and how to store your scones. Avoid common mistakes for the best results.
Remember, the key is to work with cold butter and not over-mix your dough. Enjoy your baking experience and try different variations. With practice, you’ll master these delicious scones and impress everyone!


