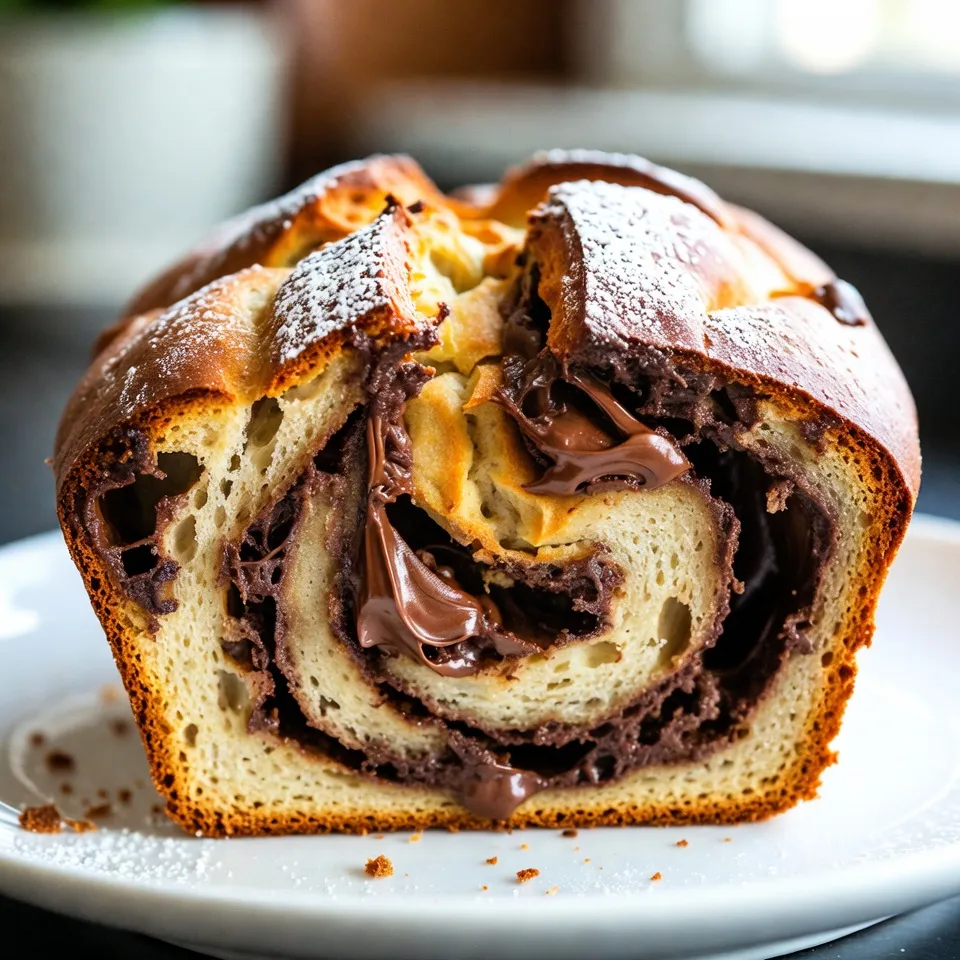
Are you ready to enjoy a delightful treat that’s quick and easy to make? This Banana Nutella Swirl Bread will become your new favorite dessert! It blends soft bananas with rich Nutella, creating a sweet swirl that tastes heavenly. In this post, I’ll share simple steps, tips, and fun variations for making the best Banana Nutella Swirl Bread. Grab your ingredients and let’s get baking!
Why I Love This Recipe
- Deliciously Indulgent: This banana Nutella swirl bread combines the rich flavor of Nutella with the natural sweetness of ripe bananas, creating a decadent treat that’s hard to resist.
- Easy to Make: With simple, everyday ingredients and straightforward steps, this recipe is perfect for bakers of all skill levels. It’s a quick and satisfying way to whip up something special!
- Perfect for Any Occasion: This bread is versatile enough to be enjoyed as a breakfast, snack, or dessert. It’s a great way to impress guests or simply treat yourself.
- Great for Leftover Bananas: Instead of letting overripe bananas go to waste, this recipe provides a delicious solution that transforms them into a delightful treat everyone will love.
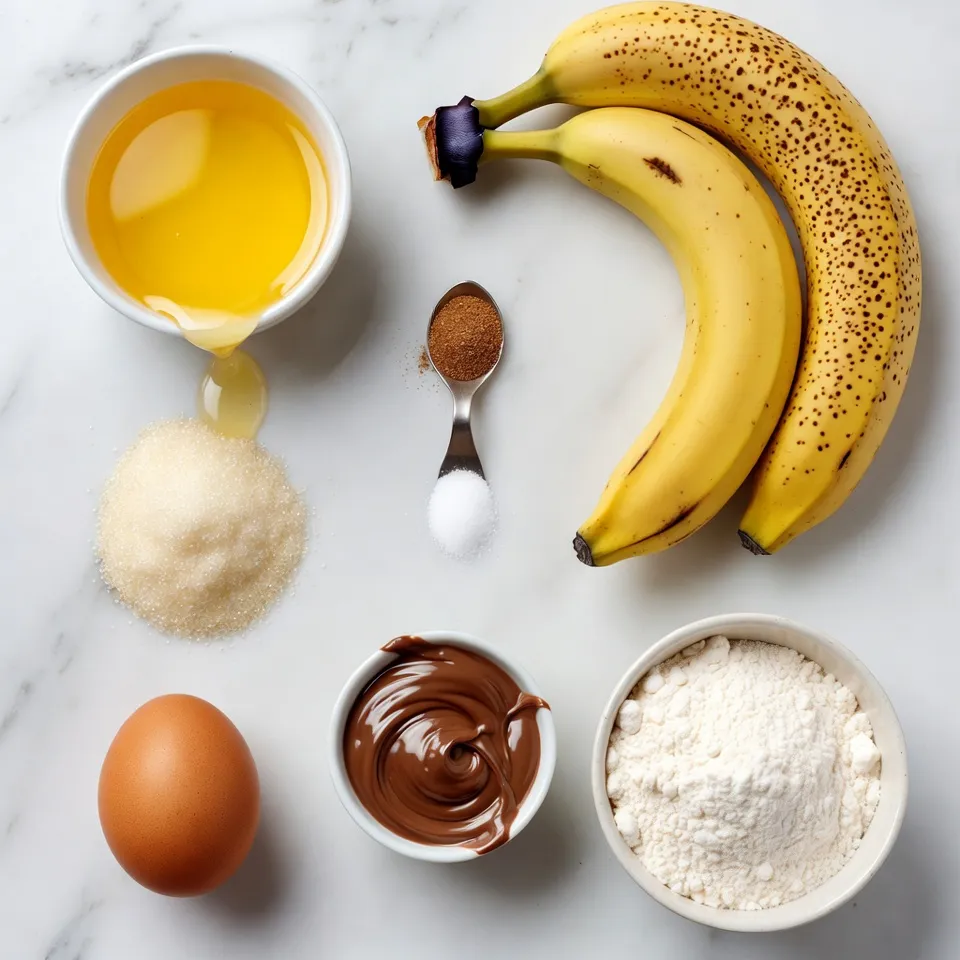
Ingredients
List of Ingredients
– 3 ripe bananas, mashed
– 1/3 cup melted unsalted butter
– 1 teaspoon baking soda
– A pinch of salt
– 3/4 cup granulated sugar
– 1 large egg, beaten
– 1 teaspoon pure vanilla extract
– 1 cup all-purpose flour
– 1/2 cup Nutella
Substitutions and Alternatives
You can swap ripe bananas for applesauce. This change keeps the bread moist. If you need a dairy-free option, use coconut oil instead of butter. For a gluten-free version, try almond flour or a gluten-free blend.
Tips for Choosing the Best Bananas
Look for bananas with brown spots. These bananas are sweeter and softer. If your bananas are green, let them ripen at room temperature. To speed up ripening, place them in a paper bag. The ethylene gas helps them ripen faster. Use ripe bananas for the best flavor and texture in your bread.
Step-by-Step Instructions
Prepping the Oven and Loaf Pan
First, you need to heat your oven. Set it to 350°F (175°C). This step is key for even baking. While the oven warms up, grab your 9×5 inch loaf pan. Generously grease it with butter or non-stick spray. This will help your bread slide out easily later.
Mixing the Batter
Now, let’s mix the batter. Start by taking your ripe bananas. Use a fork to mash them in a large bowl. You want them smooth and creamy. Next, pour in the melted butter and stir until they blend together. Then, add the baking soda and a pinch of salt. Mix this well to combine.
Add the sugar, beaten egg, and vanilla extract. Stir until everything is evenly mixed. Now it’s time to add the flour. Gradually fold it in with a spatula. Be gentle to keep some lumps in the batter.
Creating the Nutella Swirl
Now comes the fun part: the Nutella swirl! Pour half of the banana batter into the prepared loaf pan. Spread it evenly. Then, spoon dollops of Nutella on top. Use a knife to swirl the Nutella into the batter for a marbled look.
Next, pour the rest of the banana batter over the Nutella layer. Add more dollops of Nutella on top. Again, use your knife to swirl it gently. This will create a beautiful pattern.
Finally, place the loaf pan in the center of your preheated oven. Bake for 50-60 minutes. When it’s done, a toothpick should come out clean or with a few moist crumbs. Enjoy the delightful smell that fills your kitchen!
Tips & Tricks
How to Achieve the Perfect Swirl
To make the best swirl, you need balance. Start with half the banana batter in the pan. Spread it evenly. Then, add dollops of Nutella on top. Use a knife to swirl gently. Don’t mix too much, or you’ll lose the pretty pattern. Aim for nice, defined swirls that show both banana and Nutella.
Common Baking Mistakes to Avoid
Baking banana Nutella swirl bread can be simple, but mistakes happen. Here are some to watch out for:
– Overmixing the batter: This can make your bread tough. Mix just until combined.
– Using unripe bananas: They won’t give you the sweet flavor you want. Use ripe, soft bananas.
– Not greasing the pan enough: This can make your bread stick. Generously grease it or use non-stick spray.
Ways to Enhance Flavor and Texture
You can boost the flavor and texture in several ways:
– Add nuts: Chopped walnuts or pecans add crunch and flavor.
– Incorporate spices: A sprinkle of cinnamon or nutmeg can elevate the taste.
– Use flavored extracts: Swap vanilla for almond extract for a unique twist.
These tips will help you create a delicious banana Nutella swirl bread that is sure to impress!
Pro Tips
- Use Overripe Bananas: The riper the bananas, the sweeter and more flavorful your bread will be. Look for bananas with brown spots for the best results.
- Don’t Overmix: When adding the flour, mix just until combined. Overmixing can lead to a dense bread, so keep it slightly lumpy.
- Swirl Effect: For a beautiful marbled effect, use a toothpick or a knife to gently swirl the Nutella into the batter without completely mixing it in.
- Storage Tips: Store the banana Nutella swirl bread in an airtight container at room temperature for up to 3 days, or refrigerate for longer freshness.
Variations
Adding Nuts or Chocolate Chips
You can make this bread even better by adding nuts or chocolate chips. Walnuts or pecans work great. They add a nice crunch and flavor. Just chop them up and mix them into the batter before pouring it into the pan. You can also add chocolate chips for extra sweetness. Stir in about half a cup to the batter. This change makes each bite exciting!
Making it Healthier: Ingredient Swaps
Want to make this treat a bit healthier? You can swap some ingredients. Use whole wheat flour instead of all-purpose flour. This adds fiber and nutrients. You can also reduce the sugar. Use only half a cup, or try a natural sweetener like honey or maple syrup. If you’re feeling bold, substitute mashed avocado for half the butter. It keeps the bread moist and adds healthy fats.
Seasonal Flavor Additions (e.g., Spices or Fruits)
Seasonal flavors can make this bread fun! In fall, add a teaspoon of cinnamon or nutmeg for warmth. In summer, mix in fresh berries like blueberries or strawberries. They pair well with banana and Nutella. You can even add a splash of orange juice for a bright twist. Each season brings new flavors to try. Enjoy getting creative with your banana Nutella swirl bread!
Storage Info
How to Store Leftover Bread
To keep your banana Nutella swirl bread fresh, wrap it well. Use plastic wrap or foil to cover the bread tightly. Store it at room temperature for up to three days. If you want it to last longer, place it in the fridge. Just remember, the fridge can dry it out a bit.
Freezing Tips for Long-term Storage
Freezing is a great way to keep banana Nutella swirl bread. First, let the bread cool completely. Then, slice it into pieces if you wish. Wrap each slice in plastic wrap, then place them in a freezer bag. Make sure to remove as much air as possible. This bread can last for up to three months in the freezer. When you’re ready to enjoy it, just thaw it at room temperature.
Best Ways to Reheat Banana Nutella Swirl Bread
To reheat your banana Nutella swirl bread, you have a few options. The oven works best. Preheat it to 350°F (175°C). Place the bread on a baking sheet for about 10 minutes. This warms it through and keeps it soft. You can also use a microwave. Heat a slice for about 15-20 seconds. Enjoy it warm, and maybe even add a bit more Nutella on top!
FAQs
Can I use frozen bananas?
Yes, you can use frozen bananas! Just thaw them first. Drain any excess liquid before mashing. This helps keep your bread from getting too wet. Frozen bananas often taste sweeter. They work great in banana bread.
How do I know when the banana bread is done?
You can check if the bread is done by using a toothpick. Insert it into the center of the loaf. If it comes out clean or with a few moist crumbs, it’s ready. The bread should also look golden brown and feel firm to the touch.
Can I substitute Nutella with another spread?
Yes, you can swap Nutella for other spreads. Try peanut butter, almond butter, or any chocolate spread you like. Each will give a different taste. Just remember, the texture may change a bit based on your choice.
In this post, we explored how to make delicious Banana Nutella Swirl Bread. We listed the best ingredients and offered swaps when needed. You learned the steps to prep your oven and mix the batter for a perfect swirl. I shared tips to avoid mistakes and how to store your loaf.
Now, with these insights, you can bake the perfect banana bread every time. Enjoy your tasty creatio


