Berry Overnight Oats Simple and Nutritious Recipe

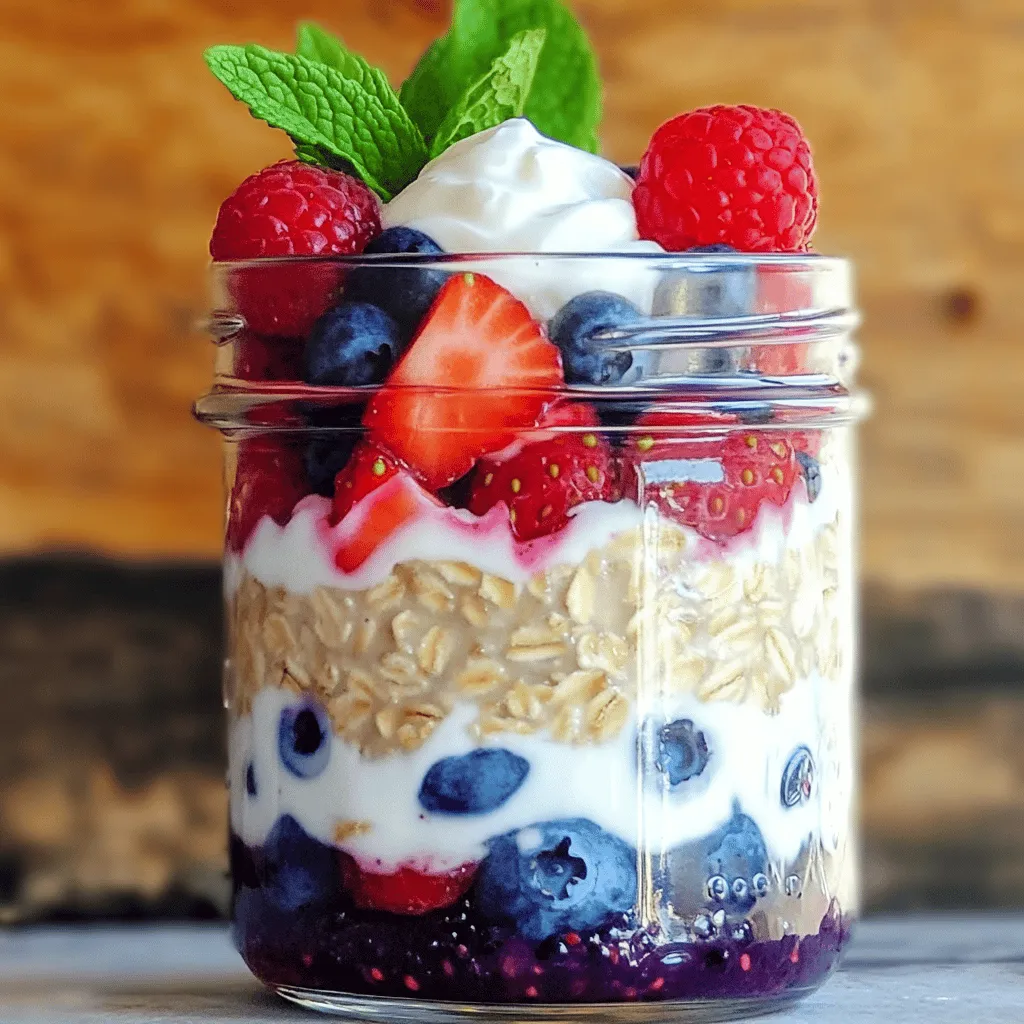
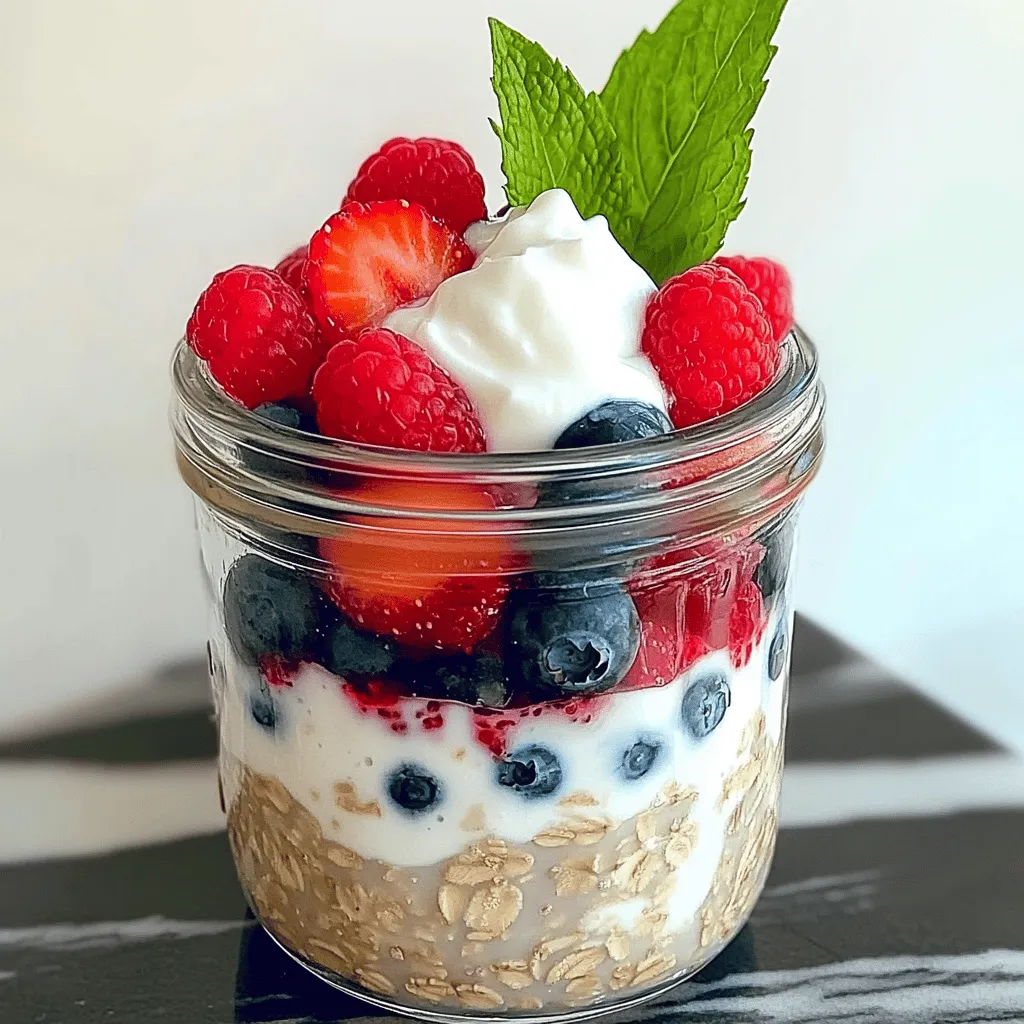
Start your day with a tasty and healthy kick by making Berry Overnight Oats! This simple recipe combines rolled oats, creamy almond milk, and vibrant mixed berries for a nutritious breakfast that you can prepare in minutes. Say goodbye to busy mornings and hello to a delicious meal waiting for you in the fridge. I’ll guide you through easy steps to make this delightful dish, packed with flavor and goodness. Let’s dive in!
Ingredients
To make berry overnight oats, you will need a few simple ingredients. Here’s the list:
– 1 cup rolled oats
– 1 ½ cups almond milk (or milk of your choice)
– 1 tablespoon chia seeds
– 1 tablespoon maple syrup (optional)
– ½ teaspoon vanilla extract
– ½ cup mixed berries (like strawberries, blueberries, and raspberries)
– 2 tablespoons Greek yogurt (optional)
– Fresh mint leaves for garnish
These ingredients come together to create a tasty and healthy meal. The oats give you fiber, while the berries add vitamins. Chia seeds give a nice texture and are good for your body. You can use maple syrup for a touch of sweetness. If you want extra creaminess, Greek yogurt is a great choice.
Using fresh mint leaves as a garnish makes the dish look pretty and adds a fresh taste. The combination of flavors is delightful. This recipe is also very flexible. You can switch the berries or milk based on what you like.
Step-by-Step Instructions
Preparation of Base Mixture
To start, gather your ingredients. You will need:
– 1 cup rolled oats
– 1 ½ cups almond milk (or milk of your choice)
– 1 tablespoon chia seeds
– 1 tablespoon maple syrup (optional)
– ½ teaspoon vanilla extract
In a medium bowl or jar, combine the rolled oats, almond milk, chia seeds, maple syrup, and vanilla extract. Stir the mixture well to mix everything together. This base is key for creamy overnight oats.
Incorporating Berries
Now, it’s time to add some flavor! Carefully fold in:
– ½ cup mixed berries (like strawberries, blueberries, or raspberries)
– 2 tablespoons Greek yogurt (optional for creaminess)
Gently mix the berries into the oat base. If you choose to use Greek yogurt, add it here. This adds extra creaminess and protein to your dish.
Refrigeration Process
Next, cover the bowl or jar tightly. Place it in the fridge for at least 4 hours or overnight. This step is crucial as it lets the oats soak up the milk. It transforms them into a soft, creamy treat.
Final Serving Instructions
When you’re ready to enjoy your oats, take them out of the fridge. Stir the mixture well. If it feels too thick, add a splash more almond milk to reach your desired consistency.
Serve your overnight oats in bowls or jars. Top with any leftover mixed berries. For a fresh touch, add a few mint leaves. This makes your oats look and taste even better. Enjoy your Berry Overnight Oats!
Tips & Tricks
Customizing Sweetness
To adjust the sweetness of your berry overnight oats, start with maple syrup. Add one tablespoon first. Then, taste the mix. If you want it sweeter, add more syrup. You can also use honey or agave for a different flavor. Just remember, less is often more!
Texture Adjustments
Achieving a creamy texture is easy. Use rolled oats, as they soak up liquid well. Adding chia seeds helps too. They expand and thicken the mixture. If your oats are too thick, just add a splash of almond milk. Mix it well until it’s smooth and creamy.
Enhancing Flavor
Want to boost flavor? Try adding a pinch of cinnamon or nutmeg. These spices add warmth and depth. You can also add a splash of almond extract. This gives your oats a nutty taste. Another option is to stir in cocoa powder for a chocolate twist.

Variations
Different Types of Berries
You can use many types of berries in your overnight oats. Strawberries add sweetness and color. Blueberries are juicy and packed with antioxidants. Raspberries bring a tart flavor that wakes up your taste buds. Blackberries offer a rich and bold taste. Mixing different berries makes your dish fun and vibrant. Try using just one type or a mix of all four. The choices are endless!
Alternative Dairy Options
If you want to try different dairy options, consider almond milk or coconut milk. Almond milk is light and nutty. Coconut milk gives a rich, creamy taste. You can also use oat milk if you like. If you prefer yogurt, try Greek yogurt for creaminess. These options help you make the recipe your own. Each choice impacts the flavor and texture, so experiment until you find your favorite!
Additional Toppings
Toppings can take your overnight oats to the next level. Add nuts for crunch and healthy fats. Almonds and walnuts work well. Seeds like chia or flaxseed boost nutrition too. Granola adds sweetness and texture. You can also sprinkle cinnamon for warmth. Fresh mint leaves make a lovely garnish. Get creative with your toppings to keep things fun and tasty!
Storage Info
Best Practices for Storage
To keep your berry overnight oats fresh, store them in an airtight container. Glass jars work well for this. Make sure the lid is on tight to prevent spills and keep out air. If you have leftover oats, you can keep them in the fridge for a quick breakfast.
Shelf Life Expectations
Berry overnight oats can last up to five days in the fridge. This makes them a great option for meal prep. Always check for any off smells or changes in texture before eating. If the oats look dry, add a bit of milk to refresh them.
Freezing Overnight Oats
Yes, you can freeze overnight oats! To do this, use freezer-safe containers. Make sure to leave some space at the top, as the oats will expand when frozen. Thaw them in the fridge overnight before eating. They may need a splash of milk to regain their creamy texture. Enjoy your berry bliss overnight oats!
FAQs
How long do overnight oats last in the fridge?
Overnight oats can last up to five days in the fridge. After that, they may lose flavor and texture. Always check for any signs of spoilage. If they look or smell off, it’s best to throw them away. Store them in a sealed jar or container to keep them fresh. This keeps the oats safe to eat for several breakfasts.
Can you eat overnight oats warm?
Yes, you can eat overnight oats warm! To reheat them, put the oats in a microwave-safe bowl. Heat them for about 30 seconds, then stir. Check the temperature and heat again if needed. You can also add a splash of almond milk to help with the heat. This makes them creamy again, and it’s a cozy way to enjoy your oats.
Is it necessary to use chia seeds?
Chia seeds are not necessary, but they add great benefits. They help thicken the oats and add fiber. Fiber is good for digestion and can keep you full longer. If you don’t have chia seeds, you can skip them. You can also use flaxseeds or just add more oats. This keeps your dish simple while still being nutritious.
In this post, we explored making delicious overnight oats. We covered the ingredients, step-by-step instructions, and helpful tips. Customizing sweetness and texture can enhance your oats. You can add various berries or try different milk options. Remember to store extras properly for freshness.
Overnight oats are easy to make and full of nutrition. Enjoy your tasty, healthy meals throughout the week!


![To make these no-bake lemon cheesecake bites, gather the following ingredients: - 1 cup graham cracker crumbs - 1/4 cup unsalted butter, melted - 2 tablespoons granulated sugar - 8 oz cream cheese, softened to room temperature - 1/2 cup powdered sugar - 1/4 cup plain Greek yogurt - 2 tablespoons freshly squeezed lemon juice - Zest from 1 lemon - 1/2 teaspoon pure vanilla extract - Fresh berries (such as strawberries, blueberries, or raspberries) for garnish (optional) These ingredients create a creamy and zesty treat. The graham cracker crumbs form a delightful crust, while cream cheese adds richness. Greek yogurt gives a light tang, balancing the sweetness. Fresh lemon juice and zest provide a bright flavor that makes these bites so refreshing. The optional berries add color and a burst of fruitiness, making each bite even more tempting. For the complete recipe, check out the [Full Recipe]. - Start by combining the graham cracker crumbs, melted butter, and granulated sugar in a bowl. - Mix until it feels like damp sand and holds together. - Press this mixture firmly into the bottom of mini muffin tins or silicone molds. - Chill the crust in the fridge for about 10 minutes to set. - In a clean bowl, beat the softened cream cheese with powdered sugar until smooth. - Add in plain Greek yogurt, freshly squeezed lemon juice, lemon zest, and vanilla extract. - Mix these ingredients until you have a creamy and fluffy filling. - Spoon the lemon cheesecake filling into each crust. - Use a spatula to smooth the tops for an even look. - Return the molds to the fridge and chill for at least 2 hours, or until firm. You can find the Full Recipe for precise measurements and tips! Softened cream cheese is key for smooth cheesecake bites. If it’s too cold, it will clump. Let your cream cheese sit out for 30 minutes before mixing. Chilling helps the bites set and firm up. I recommend at least 2 hours in the fridge. This makes them easy to pop out and enjoy. Want a bolder lemon taste? Add extra lemon zest to the filling. This little trick brightens the flavor. You can also swap plain Greek yogurt for flavored yogurt. Lemon or vanilla yogurt adds a fun twist, making these bites even more delicious. Garnishing makes your cheesecake bites stand out. Fresh berries on top add color and taste. Drizzling honey brings out sweetness and shine. You can sprinkle extra lemon zest for a pop of brightness. Use a decorative platter to showcase your treats for friends and family. {{image_4}} You can easily change the flavor of your no-bake lemon cheesecake bites. Here are two fun ideas: - Berry cheesecake bites: Swap the lemon juice for mixed berry puree. Use strawberries, blueberries, or raspberries. This adds a sweet and fruity twist. The berry flavor pairs well with the creamy filling. - Chocolate lemon cheesecake bites: Mix in cocoa powder with the cream cheese. This gives a rich chocolate flavor. You still get the bright lemon taste, but with a chocolatey touch. Making these bites fit different diets is simple. Here’s how: - Gluten-free alternatives for crust: Use gluten-free graham cracker crumbs. You can also blend nuts or oats to make a crust. Just mix them with melted butter and sugar. - Substituting dairy for vegan options: Use vegan cream cheese instead of regular cream cheese. You can also replace yogurt with coconut yogurt. These swaps keep the bites creamy and delicious. Feel free to experiment with these variations. You can create a cheesecake treat that fits your taste and dietary needs. Enjoy! To keep your No-Bake Lemon Cheesecake Bites fresh, refrigeration is key. Store them in an airtight container. This helps to lock in moisture and keeps them from drying out. If you want to freeze them, place the bites in a single layer on a baking sheet. Once frozen, transfer them to a freezer-safe container or bag. Make sure to label it with the date. They are easy to grab for a quick treat later! How long do they last in the fridge? These cheesecake bites can last up to 5 days when stored properly in the refrigerator. After that, they may lose their taste and texture. Always check for freshness. Signs of spoilage to watch for include an off smell, discoloration, or an unusual texture. If you notice any of these signs, it’s best to toss them out. For the full recipe, check out the recipe section. No-Bake Lemon Cheesecake Bites need at least 2 hours to chill. This time lets them firm up. If you want them extra cold, you can chill them longer. Just ensure they are firm to the touch before serving. This helps create that perfect bite! Yes, you can use different cheeses! Cream cheese gives the best flavor and texture. However, you might try mascarpone for a richer taste. Cottage cheese can work too, but blend it well to avoid lumps. Each cheese adds a unique twist to these bites. If you don't have graham crackers, try crushed cookies or oat flour. Digestive biscuits work great too! For a gluten-free option, use gluten-free cookies or almond flour. These swaps can change the flavor, but they still make a good crust. Absolutely! These cheesecake bites are great to make a day ahead. Just chill them overnight. This allows the flavors to meld nicely. Be sure to cover them well to keep them fresh. They will taste even better the next day! To make these bites vegan, substitute cream cheese with a vegan cream cheese. For the crust, use coconut oil instead of butter. Replace Greek yogurt with a plant-based yogurt. You can also use maple syrup instead of powdered sugar. These changes keep the flavor while making it vegan-friendly. For the full recipe, check out the [Full Recipe]. You now have the steps to make delicious No-Bake Lemon Cheesecake Bites. We covered all ingredients, from graham cracker crumbs to fresh berries. I shared helpful tips for perfect texture and exciting flavor ideas. Variations let you adapt these bites for any taste or diet. Remember to store them properly for the best quality. Enjoy creating these treats, and don't hesitate to get creative!](https://joymealplan.com/wp-content/uploads/2025/07/839985c9-ca67-4b01-8b72-ff6921bf99fe-768x768.webp)


![- 3 ripe bananas, thoroughly mashed - 1/2 cup unsweetened applesauce - 1/2 cup packed brown sugar - 1/4 cup granulated sugar - 2 large eggs, at room temperature - 1 teaspoon pure vanilla extract - 1 teaspoon baking soda - 1/2 teaspoon baking powder - 1/4 teaspoon fine salt - 1 1/2 cups all-purpose flour - 1 cup semi-sweet chocolate chips, plus an extra handful for topping - 1/2 teaspoon ground cinnamon (optional) When measuring ingredients, accuracy is key. Use standard measuring cups and spoons. For flour, spoon it into the cup and level it off with a knife. This gives you the right amount without packing it down. Bananas should be fully ripe, as this makes the bread sweeter and more flavorful. If you need alternatives, here are some options: - Substitute applesauce with yogurt for a creamier texture. - Use coconut sugar instead of brown sugar for a lower glycemic index. - If you're out of eggs, try using flaxseed meal mixed with water as a binder. - For gluten-free options, use a 1:1 gluten-free flour blend. - Swap semi-sweet chocolate chips with dark chocolate or white chocolate for a twist. These substitutions can change the flavor but keep the essence of the bread intact. You can easily customize this recipe to fit your pantry and taste! If you're curious about the full recipe, check out the Choco-Banana Bliss Bread . Start by gathering all your ingredients. You need ripe bananas, applesauce, sugars, eggs, vanilla, baking soda, baking powder, salt, flour, chocolate chips, and optional cinnamon. Preheat your oven to 350°F (175°C). Grease a 9x5-inch loaf pan with butter or cooking spray. This helps the bread come out easily after baking. In a large bowl, mash the ripe bananas until smooth. Add the applesauce, brown sugar, and granulated sugar. Mix well with a fork or whisk. Next, add the eggs and vanilla extract. Stir until everything is blended. In a separate bowl, whisk the dry ingredients: baking soda, baking powder, salt, and cinnamon if you like. Slowly add this dry mix to the wet mix. Fold gently with a spatula. Be careful not to overmix; you want a light, fluffy bread. Finally, fold in the chocolate chips, saving a few for the top. Pour the batter into the prepared loaf pan. Smooth the top with a spatula. Sprinkle the reserved chocolate chips on top for extra chocolate goodness. Bake in your preheated oven for 60-65 minutes. Check doneness by inserting a toothpick into the center. If it comes out clean or with a few moist crumbs, it's done. Once baked, let the loaf cool in the pan for 10 minutes. Then transfer it to a wire rack to cool fully before slicing. Enjoy your warm, chocolate chip banana bread! For the full recipe, check [Full Recipe]. To get the right texture in your chocolate chip banana bread, use ripe bananas. Ripe bananas are sweet and soft, making the bread moist. Mash them well to avoid lumps. Mix the wet and dry ingredients gently. Overmixing can make the bread tough. Aim for a light and fluffy loaf. Many people add too much flour, which can dry out the bread. Always measure flour correctly. Another mistake is not baking long enough. A toothpick should come out with a few moist crumbs but not wet batter. Also, don't skip the cooling time before slicing. This helps the bread set properly. For extra flavor, add ground cinnamon to your batter. It pairs well with bananas and chocolate. You can also use vanilla extract for a richer taste. If you want more texture, try adding nuts like walnuts or pecans. They add crunch and depth to your bread. For the full recipe, check out the Choco-Banana Bliss Bread details! {{image_4}} Adding nuts can give your chocolate chip banana bread a nice crunch. I often use walnuts or pecans. Chop them into small pieces. Fold in about half a cup into your batter. This step adds flavor and texture. You can also toast the nuts for extra taste. Just watch them closely to avoid burning. While semi-sweet chocolate chips are classic, feel free to switch it up. Dark chocolate chips add a rich taste. Milk chocolate chips make the bread sweeter. White chocolate creates a creamy contrast with the banana flavor. Use one type or mix them for a fun twist. Just keep the total amount around a cup. You can enhance your banana bread with spices or extracts. Ground cinnamon adds warmth. A pinch of nutmeg can make it cozy. Try adding a teaspoon of almond or coconut extract for a unique twist. These small changes can make your bread special. Get creative and find your favorite combination! To keep your chocolate chip banana bread fresh, wrap it tightly in plastic wrap or store it in an airtight container. This method helps retain moisture and flavor. You can leave it at room temperature for up to three days. If you want it to last longer, consider freezing it. Freezing banana bread is easy and smart. First, let the bread cool completely. Then, slice the bread into individual pieces. Wrap each slice in plastic wrap or foil. Place the wrapped slices in a freezer bag. You can freeze them for up to three months. For best results, label the bag with the date. When you want to enjoy your banana bread again, reheating is simple. Take out a slice and let it sit at room temperature for a few minutes. You can use a microwave for quick reheating. Heat it for about 15-20 seconds. For a crispy crust, pop it in a toaster oven for a few minutes. Enjoy your slice warm with butter or cream cheese. To ripen bananas fast, place them in a paper bag. Add an apple or a ripe banana for best results. The ethylene gas they produce speeds up ripening. Check them daily until they're soft and sweet. Yes, you can use frozen bananas. Just thaw them before mashing. Drain any excess liquid to avoid soggy bread. Frozen bananas often have more flavor, making your bread even tastier. To check if your bread is done, insert a toothpick into the center. If it comes out clean or with a few moist crumbs, it’s ready. The bread should feel firm and spring back when gently pressed. You have many options for overripe bananas! Try making smoothies for a creamy texture. You can also create banana pancakes or muffins. Another idea is to freeze them for later use in baking or smoothies. In this post, we covered key ingredients and steps for making banana bread. We explored tips to perfect its texture and avoid common mistakes. You can try fun variations by adding nuts or different chocolates. We also discussed how to store leftovers and freeze your bread. Banana bread is easy to make and delicious. Now, it’s your turn to get baking!](https://joymealplan.com/wp-content/uploads/2025/05/475bee4b-eacd-4984-83f8-73c9916382a2-768x768.webp)
