Blackberry Lemon Coffee Cake Tasty and Simple Recipe

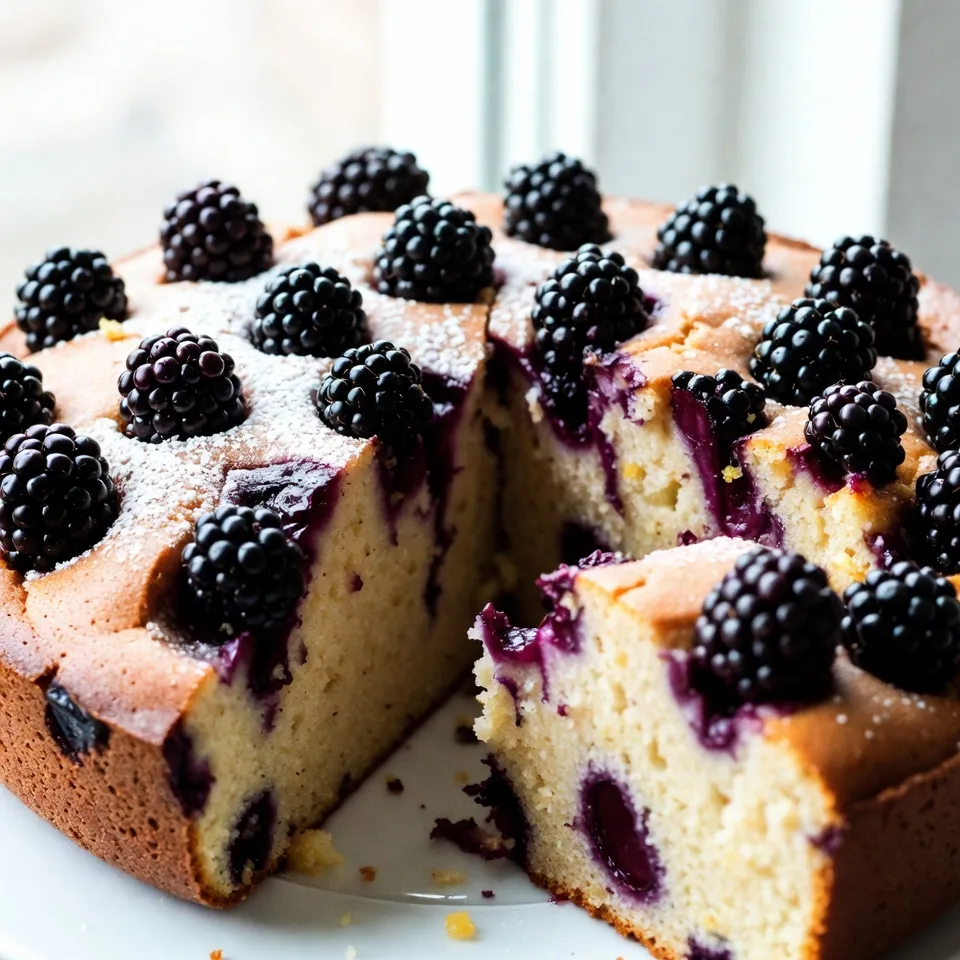
Are you ready to elevate your baking skills? This Blackberry Lemon Coffee Cake is simple, tasty, and sure to impress! With fresh blackberries and a hint of tangy lemon, it’s a delightful treat for coffee breaks or special occasions. I’ll guide you through each step, from mixing the batter to baking it to perfection. Let’s dive into this delicious recipe and bring some fresh flavor to your kitchen!
Why I Love This Recipe
- Deliciously Tangy Flavor: The combination of lemon and blackberries creates a refreshing and vibrant flavor that brightens up any occasion.
- Moist and Tender Texture: The addition of sour cream keeps the cake moist, making every bite light and fluffy, perfect for coffee time.
- Easy to Make: With simple ingredients and straightforward steps, this recipe is perfect for bakers of all skill levels.
- Beautiful Presentation: Topped with fresh blackberries and a dusting of powdered sugar, this cake is as beautiful as it is delicious, making it a showstopper for any gathering.
Ingredients
List of Ingredients
– 1 ½ cups all-purpose flour
– 1 teaspoon baking powder
– ¼ teaspoon baking soda
– ½ teaspoon salt
– ½ cup unsalted butter, softened
– 1 cup granulated sugar
– 2 large eggs
– 2 teaspoons pure vanilla extract
– 1 tablespoon freshly grated lemon zest
– ½ cup sour cream
– 1 cup fresh blackberries (plus a few extra for garnish)
– 1 tablespoon fresh lemon juice
– 1 teaspoon powdered sugar (for dusting)
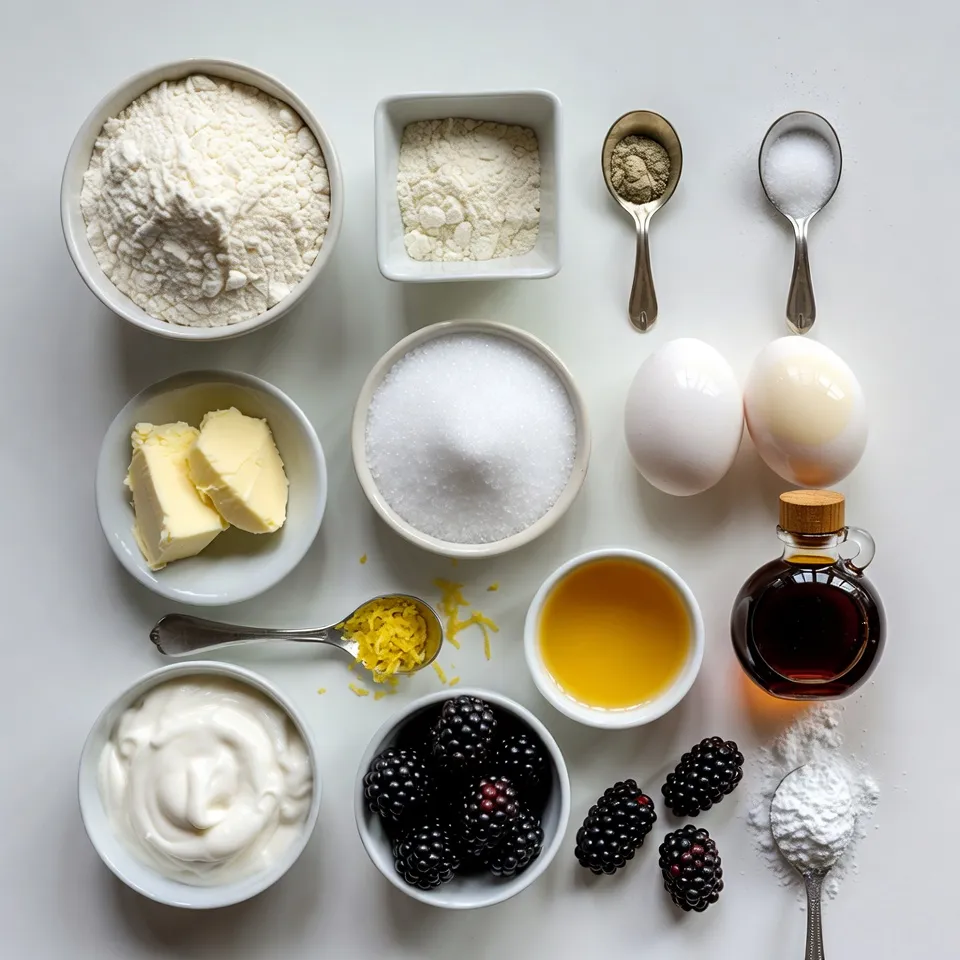
To make the best blackberry lemon coffee cake, start with these key ingredients. The all-purpose flour gives the cake structure. Baking powder and baking soda help it rise. Salt enhances the sweet flavors. Unsalted butter keeps the taste smooth and rich. Granulated sugar adds sweetness and moisture.
The eggs bind the cake, giving it a fluffy texture. Vanilla extract and lemon zest add bright flavors. Sour cream keeps it moist and gives a slight tang. Fresh blackberries bring bursts of juicy goodness, while lemon juice gives a zesty kick. Finally, powdered sugar adds a lovely finish.
Gather these ingredients to ensure a perfect bake. Each plays a vital role in creating a delicious treat. Prepare to impress your family and friends with this delightful cake!

Step-by-Step Instructions
Preparation Steps
1. Preheat the oven and prepare the cake pan: Start by preheating your oven to 350°F (175°C). This step is key for even baking. Next, take a 9-inch round cake pan. Grease it with butter or oil. Lightly dust it with flour to stop the cake from sticking.
2. Mixing dry ingredients: In a medium bowl, whisk together 1 ½ cups of all-purpose flour, 1 teaspoon of baking powder, ¼ teaspoon of baking soda, and ½ teaspoon of salt. This mix will help the cake rise and taste great.
3. Creaming butter and sugar: In a large bowl, use an electric mixer. Beat ½ cup of softened unsalted butter with 1 cup of granulated sugar. Mix on medium speed for about 3-4 minutes. You want the mix to be light and fluffy. This step adds air to the batter.
Mixing and Baking
4. Incorporating eggs and flavorings: Add 2 large eggs one at a time. Make sure each egg mixes in before adding the next. Then, add 2 teaspoons of pure vanilla extract and 1 tablespoon of freshly grated lemon zest. Mix until smooth.
5. Combining dry and wet ingredients: Gradually add the dry flour mixture to the wet mix. Alternate this with ½ cup of sour cream. Start and end with the flour mix. Stir gently until just combined. This keeps the batter light.
6. Folding in blackberries and transferring to the pan: Carefully fold in 1 cup of fresh blackberries and 1 tablespoon of fresh lemon juice. Be gentle to keep the berries intact. Pour the batter into the prepared pan. Use a spatula to smooth the top. Add a few extra blackberries on top for flair.
Baking Process
7. Baking time and checking for doneness: Place the pan in the center of your preheated oven. Bake for about 30-35 minutes. To check if it’s done, use a toothpick. Insert it in the center; it should come out clean or with a few crumbs.
8. Cooling the cake and final presentation: Once baked, let the cake cool in the pan for about 10 minutes. Carefully remove the cake and place it on a wire rack to cool completely. Before serving, dust the top with 1 teaspoon of powdered sugar for a lovely finish.
Tips & Tricks
Baking Success Tips
– Ensuring proper ingredient temperature: Use room temperature butter and eggs. This helps create a fluffy cake. Cold ingredients can cause the batter to be dense and heavy.
– Avoiding overmixing the batter: Mix until just combined. Overmixing can make the cake tough. It’s okay if some flour remains visible.
– Tips for folding in blackberries without breakage: Gently fold the blackberries in the batter. Use a spatula and turn the bowl. This way, the berries stay whole and juicy.
Presentation Tips
– Garnishing ideas with mint and blackberries: Place a few mint leaves on top. Add extra blackberries for color. This makes the cake look fresh and inviting.
– Suggestions for serving styles: Serve slices on individual plates. Drizzle lemon glaze over each slice. This adds a nice touch and enhances the flavor.
Pro Tips
- Choose Ripe Blackberries: Select blackberries that are plump and dark for the best flavor. Avoid berries that are soft or moldy for a fresher taste.
- Room Temperature Ingredients: Ensure your butter, eggs, and sour cream are at room temperature for easier mixing and a smoother batter texture.
- Don’t Overmix: When combining the dry ingredients and the wet mixture, mix just until combined to keep your cake light and fluffy.
- Cool Before Serving: Let the cake cool completely before slicing to avoid a crumbly texture and to enhance the flavors.

Variations
Flavor Variations
You can make this cake even more fun by adding different flavors. Try mixing in nuts like walnuts or almonds for crunch. You could also sprinkle in spices like cinnamon or nutmeg for warmth. These small changes can bring new life to the cake.
If you want to switch up the fruits, consider using other berries. Raspberries and blueberries work great in this recipe. They add a different taste and nice color. Just be gentle when folding them in, so they stay whole and juicy.
Dietary Adjustments
If you need to make this cake gluten-free, you can swap the all-purpose flour for almond flour or gluten-free flour blends. This keeps it light and tasty. Just be sure to check the ratios since gluten-free flours can vary in absorbency.
For those who avoid dairy, you can replace the butter with coconut oil or a dairy-free butter alternative. Use dairy-free yogurt or a plant-based sour cream in place of regular sour cream. These swaps work well without losing flavor.
Storage Info
Best Storage Practices
To keep your blackberry lemon coffee cake fresh, store it in an airtight container. If you keep it at room temperature, it will stay good for about three days. If you want to keep it longer, place it in the fridge. This will help it last up to a week. Make sure it’s fully cooled before wrapping it up. For even better results, you can freeze the cake. Just slice it first and wrap each piece in plastic wrap. Then, place the slices in a freezer bag. This way, you can enjoy a slice anytime!
Reheating and Serving
If you have leftover cake, you might want to warm it up a bit. The best method is to use the microwave. Heat a slice for about 10 to 15 seconds. This will make it soft and delicious again. Another option is to reheat it in the oven. Preheat the oven to 350°F (175°C) and warm the cake for about 5 to 10 minutes.
For serving, try adding a sprinkle of powdered sugar on top. You can also serve it with a dollop of whipped cream or a scoop of vanilla ice cream. If you have extra blackberries, toss them on the plate for a lovely touch. Enjoy your cake in style!
FAQs
Common Questions about Blackberry Lemon Coffee Cake
– Can I use frozen blackberries instead of fresh?
Yes, you can use frozen blackberries. They may release more juice during baking. This can make the cake a bit wetter. If you use frozen berries, do not thaw them. Add them straight from the freezer.
– How can I make this recipe ahead of time?
You can prepare the cake batter a day in advance. Store it in the fridge. Just remember to bring it to room temperature before baking. You can also bake the cake ahead. Let it cool, then wrap it tightly. Store it at room temperature for up to three days.
– What is the best way to ensure the cake stays moist?
To keep the cake moist, do not overmix the batter. Overmixing can lead to a dry cake. Adding sour cream also helps with moisture. You can also cover the cake with plastic wrap after it cools. This keeps the moisture in.
– Can I use whole wheat flour instead of all-purpose flour?
Yes, you can use whole wheat flour. However, it may change the texture slightly. The cake might be denser and less fluffy. You can mix half whole wheat and half all-purpose flour for a lighter result.
– How do I know when the cake is done baking?
To check if the cake is done, insert a toothpick into the center. If it comes out clean or with a few crumbs, the cake is ready. If it has wet batter on it, bake a few more minutes. Always check around the 30-minute mark.
You now have a simple, tasty recipe for Blackberry Lemon Coffee Cake. We covered the key ingredients and gave step-by-step instructions to make it easy for you. I shared helpful tips to ensure your cake bakes perfectly, along with fun ways to present it. Remember, you can switch up the flavors and make it your own! Store any leftovers to enjoy later. With this guide, you’re ready to impress your family and friends. Happy bakin

Blackberry Lemon Coffee Cake
Ingredients
- 1.5 cups all-purpose flour
- 1 teaspoon baking powder
- 0.25 teaspoon baking soda
- 0.5 teaspoon salt
- 0.5 cups unsalted butter, softened to room temperature
- 1 cup granulated sugar
- 2 large eggs
- 2 teaspoons pure vanilla extract
- 1 tablespoon freshly grated lemon zest
- 0.5 cups sour cream at room temperature
- 1 cup fresh blackberries
- 1 tablespoon fresh lemon juice
- 1 teaspoon powdered sugar for dusting
Instructions
- Preheat your oven to 350°F (175°C). Prepare a 9-inch round cake pan by greasing it with butter or oil and lightly dusting it with flour to prevent sticking.
- In a medium-sized mixing bowl, whisk together the all-purpose flour, baking powder, baking soda, and salt until evenly combined. Set this mixture aside.
- In a large mixing bowl, use an electric mixer to beat the softened butter and granulated sugar together on medium speed until the mixture becomes light and fluffy, approximately 3-4 minutes.
- Introduce the eggs to the mixture, adding them one at a time and ensuring each is well incorporated before adding the next. After the eggs, mix in the vanilla extract and fresh lemon zest until the mixture is smooth and fully combined.
- Gradually fold in the dry flour mixture, alternating with the sour cream, starting and ending with the flour mixture. Mix until just combined to maintain lightness in the batter.
- Carefully fold in the fresh blackberries and the fresh lemon juice, ensuring minimal breakage of the berries for a delightful texture throughout the cake.
- Pour the prepared batter into the greased cake pan, smoothing the top with a spatula. For added visual appeal, scatter a few extra blackberries on top of the batter.
- Bake in the center of the preheated oven for approximately 30-35 minutes, or until a toothpick inserted into the center of the cake comes out clean or with a few crumbs, indicating doneness.
- Once baked, allow the cake to cool in the pan for about 10 minutes. Afterward, remove it from the pan and transfer it to a wire rack to cool completely. Before serving, lightly dust the top with powdered sugar for a beautiful finish.


![- 1 cup rolled oats - 2 ripe bananas - 1 cup almond milk - 1 teaspoon baking powder - 1 teaspoon vanilla extract - 1 tablespoon honey or maple syrup (optional) - 1/2 teaspoon ground cinnamon - Pinch of salt - Coconut oil or cooking spray for greasing Using rolled oats is key. They give your pancakes a hearty texture. Bananas add natural sweetness and moisture. Almond milk keeps it light and dairy-free. If you want sweetness, use honey or maple syrup. A touch of cinnamon gives warmth and flavor. Coconut oil or cooking spray is important to keep the pancakes from sticking. Choose either based on your preference. This recipe is simple. You can find the full recipe above to guide you through the steps. Enjoy making these delicious pancakes! Start by blending 1 cup of rolled oats. You want to blend them until they are fine and powdery. This oat flour acts as the main ingredient. Next, add 2 ripe bananas that you have mashed well. Then, pour in 1 cup of almond milk. This mix gives your pancakes a nice texture. Now it’s time to make the batter. Add 1 teaspoon of baking powder, 1 teaspoon of vanilla extract, and 1 tablespoon of honey or maple syrup if you want them sweeter. Don’t forget to add 1/2 teaspoon of ground cinnamon and a pinch of salt. Blend everything together until it is smooth and uniform. The batter should look nice and creamy. Let the batter rest for about 5-10 minutes. This helps it thicken. While the batter rests, heat a skillet over medium heat. Grease it with coconut oil or cooking spray to prevent sticking. Once hot, pour about 1/4 cup of batter for each pancake. Cook until bubbles form on top, which takes about 2-3 minutes. Then, flip them over. Cook for another 2-3 minutes until they are golden brown. Repeat this with the rest of the batter. You can find the full recipe [here]. To get the best texture, let the batter rest for 5-10 minutes. This helps it thicken. A thicker batter makes fluffier pancakes. Adjust the heat on your skillet. Cook on medium heat to avoid burning. If the pan is too hot, the outside cooks fast while the inside stays raw. You can change the sweetness. Instead of honey, try maple syrup or agave. Each will give a unique taste. For more flavor, think about adding spices. Nutmeg and ginger are great choices. They add warmth and depth. A pinch of each can really enhance the pancakes. For a beautiful plate, stack your pancakes high. Top them with fresh banana slices. A drizzle of honey or syrup makes them shine. You can also sprinkle crunchy nuts on top. For a creamy touch, serve with Greek yogurt. It adds richness and pairs well with the pancakes. {{image_4}} You can easily make these pancakes gluten-free. Use certified gluten-free oats. This ensures you avoid cross-contamination. Many brands offer oats that fit this need. If you are lactose intolerant, try almond milk or coconut milk. Both options work great in this recipe. They add a nice creaminess without the dairy. Want to add more fun to your pancakes? Toss in some chocolate chips or nuts. They give a sweet crunch that’s hard to resist. You can also use walnuts or pecans for added texture. You might like to incorporate fruit purees too. Applesauce or pumpkin puree can boost flavor and moisture. Vanilla or almond extract can add depth to the taste. Meal prep is easy with these pancakes. You can make a big batch and freeze extras. Just stack them with parchment paper between each pancake. This keeps them from sticking together. These pancakes pair well with yogurt or fresh fruit. A dollop of Greek yogurt adds protein. Fresh berries or banana slices on top make a lovely presentation. For the full recipe, check it out above. Enjoy your delicious and healthy banana oat pancakes! To keep your pancakes fresh, store them properly. If you have leftover pancakes, place them in an airtight container. You can refrigerate them for up to three days. This keeps them soft and tasty. For longer storage, freeze your pancakes. Lay them flat on a baking sheet. Once they freeze, transfer them to a freezer bag. This way, they won't stick together. You can freeze them for up to three months. When you're ready to enjoy your pancakes again, reheating is simple. The best way is to use a toaster or a skillet. If you choose a skillet, heat it on low. Add a tiny bit of coconut oil or spray. Place the pancakes in the skillet for about one minute on each side. This keeps them warm and fluffy. If you're in a hurry, you can use the microwave. Heat the pancakes for about 20-30 seconds. But be careful, as this may make them a bit chewy. For the best taste, always try to reheat them gently. Enjoy your Healthy Banana Oat Pancakes! For the full recipe, check out the details above. Yes, you can use quick oats. Quick oats are thinner and cook faster. This can affect the texture of your pancakes. Rolled oats give a heartier feel. If you use quick oats, your pancakes may be softer. You might also need less liquid since quick oats absorb liquid differently. Experiment and see what you like best. To make these pancakes vegan, swap out the milk and honey. Use almond milk or any plant-based milk. For sweetness, try maple syrup instead of honey. You can skip the egg, as this recipe is already egg-free. These changes keep the pancakes tasty and plant-based. If the batter is too thick, add a bit more milk to loosen it. Start with one tablespoon at a time. Blend it again after each addition. This helps keep the flavor strong while adjusting the texture. A good batter should pour easily, but not be runny. These pancakes last about 3 to 5 days in the fridge. Keep them in an airtight container to stay fresh. You can reheat them in the microwave or on a skillet. Just make sure they are heated through for the best taste. Yes, you can make the batter ahead of time. Store it in the fridge for up to 24 hours. If you wait longer, the oats may absorb too much liquid. Just add a little milk before cooking to get the right consistency. This makes breakfast quick and easy! For the full recipe, check out the detailed guide. To make these healthy banana oat pancakes, start by blending the rolled oats until they turn into a fine flour. Then mix in the mashed bananas and almond milk. This creates a smooth batter. It is important to let the batter rest for 5-10 minutes. This helps thicken the batter and improves texture. Here are some key points to remember for successful pancakes: - Always blend the oats until fine for the best texture. - Use ripe bananas for natural sweetness. - Let the batter rest; it makes a big difference. - Grease your skillet well to prevent sticking. - Cook until bubbles form, then flip carefully. These tips will help you create pancakes that are light, fluffy, and full of flavor. Enjoy making them! You learned about making delicious pancakes with simple, healthy ingredients. We covered the essential items, step-by-step cooking instructions, and helpful tips. We also explored variations to fit diets and preferences. Lastly, we discussed how to store leftovers and answered common questions. With these insights, you can create tasty pancakes that everyone will enjoy. Get cooking and delight your family or friends with these easy-to-make treats!](https://joymealplan.com/wp-content/uploads/2025/07/586e6978-884d-467f-992a-f783d71f0243-768x768.webp)
![- Strawberries - Blueberries - Kiwi - Mango - Pineapple When making honey lime fruit salad, choose bright and fresh fruits. Fresh strawberries add sweetness, while blueberries offer a burst of flavor. Kiwi adds a tangy kick, and mango brings a tropical twist. Pineapple adds juicy texture and sweetness. Each fruit shines in this salad. - Pure honey - Freshly squeezed lime juice - Lime zest The honey and lime mixture brightens the salad. Use pure honey for a rich flavor. Fresh lime juice offers a zesty taste, and lime zest adds a fragrant note. Mix these ingredients well to create a smooth dressing. This blend enhances the fruits and ties everything together. - Fresh mint leaves for decoration Fresh mint leaves add a pop of color and a refreshing aroma. They make the salad look beautiful and inviting. Just sprinkle them on top before serving. This final touch makes the dish feel special and fun. For the full recipe, check out the details above. Start by cleaning the fruits well. Rinse strawberries in cold water and hull them. Slice them into thin pieces. For blueberries, just rinse them off and set them aside. Peel the kiwi and dice it into small chunks. Next, peel the mango and cut it into cubes. Finally, chop the pineapple into bite-sized pieces. Using fresh fruits makes the salad taste better and look bright. Fresh fruits add flavor and nutrition to your dish. Grab a small bowl and add two tablespoons of pure honey. Next, squeeze two tablespoons of fresh lime juice into the bowl. Then, use a zester to add the zest from one lime. Using a whisk, mix these three ingredients together. You want the honey to blend smoothly with the lime juice and zest. This dressing brings a sweet and tangy flavor to your fruit salad. Now, pour the honey lime dressing over the bowl of fruits. Use a large spoon to gently toss everything together. Be careful! You want to coat the fruits without bruising them. After mixing, let the salad rest for about 10 minutes. This time helps the flavors blend together. Just before serving, stir the salad again. If you wish, add a bit more honey to sweeten it. Enjoy this refreshing dish served in bowls or on a platter. When picking fruits, go for seasonal options. They taste best and are often cheaper. Seasonal fruits are ripe and ready to eat. Off-season fruits can be harder and less sweet. Always check for ripeness. Squeeze the fruit gently; it should feel slightly soft. Look for bright colors, which show freshness. Avoid fruits with bruises or dark spots. To make your salad even better, adjust the sweetness. If you want it sweeter, add more honey. A little goes a long way. You can also add a small pinch of salt. It may seem odd, but salt brings out the natural sweetness. Just a touch can make a big difference. How you serve the fruit salad matters. You can use bowls for individual servings or a platter for a group. A platter looks nice and allows everyone to help themselves. To make it more appealing, use fresh mint leaves. They add color and a fresh scent. Just sprinkle a few on top right before serving. For a full guide on making this dish, check the [Full Recipe]. {{image_4}} You can mix in many fruits for more flavor. Try adding bananas for creaminess. Apples give a nice crunch. You can also use grapes or pomegranate seeds. These fruits add color and taste. They can also change the texture, making it fun to eat. Adding nuts or seeds brings a crunchy twist. Chia seeds are a great choice. They add fiber and healthy fats. Walnuts or almonds give a rich, nutty flavor. Just sprinkle them on top before serving. This will make your salad even more satisfying. You can turn your fruit salad into a meal. Adding protein makes it hearty. Greek yogurt is a tasty option. It adds creaminess and protein. Cottage cheese is another great choice. Both give a nice balance to the sweetness of the fruits. You can serve it in a bowl or mix it right in. Enjoy your Honey Lime Fruit Salad Delight! For the full recipe, check the section above. To keep your Honey Lime Fruit Salad fresh, use airtight containers. These containers help lock in moisture and flavors. Glass or plastic containers work well. If you don’t have these, a bowl covered tightly with plastic wrap can also be a good option. To prevent browning in fruits like apples or bananas, use lemon juice. You can also add extra lime juice to the salad. The acidity slows down oxidation. Keep your fruit salad in the fridge to stay crisp and tasty. For the best taste, eat the salad within three days. After this, the fruits may lose their texture. If you store it properly, it can last up to five days. However, the fresher, the better! Enjoy it while it's full of flavor. For the full recipe, check out the earlier section. Yes, you can use other sweeteners. Some good options are maple syrup and agave nectar. Each sweetener has a unique flavor. Maple syrup adds warmth, while agave is mild. Adjust the amount based on your taste. Use the same amount of these sweeteners as honey. This keeps the balance of flavors intact. You can prepare this salad ahead, but keep some tips in mind. Cut the fruits and store them separately. This helps keep them fresh. Mix the honey lime dressing and store it in the fridge. Combine everything just before serving. This keeps the fruits from getting mushy and preserves the crunchiness. Certain fruits may not mix well with lime. Avoid bananas, as they brown quickly and can turn mushy. Apples may also not hold up well with lime juice. Citrus fruits like oranges can overpower the salad. Stick to fruits that stay fresh and vibrant for the best taste. This blog post showed you how to create a delightful fruit salad. We covered the best fresh fruits like strawberries and mangoes, and the sweet honey-lime dressing. You learned how to prepare and combine the ingredients for a tasty dish. We shared tips on choosing fruits, enhancing flavors, and presentation tricks. In the end, you can make this salad your own by adding nuts or different fruits. With these steps, your salad will be fresh and enjoyable every time. Now, you’re ready to impress with your new skills!](https://joymealplan.com/wp-content/uploads/2025/06/73b51031-810e-4f51-94b6-bb966ad7c4ea-768x768.webp)
![- 1 ½ cups all-purpose flour - 1 teaspoon baking powder - ½ teaspoon baking soda - ¼ teaspoon salt - ½ cup unsalted butter, softened - 1 cup granulated sugar - 2 large eggs, room temperature - Zest of 1 lemon - 2 tablespoons lemon juice - ½ teaspoon vanilla extract - ½ cup Greek yogurt - 1 cup fresh blueberries - 1 tablespoon flour (for coating blueberries) Gather these ingredients before you start baking. They are the stars of this loaf. The butter gives it a rich taste while the lemon adds brightness. The blueberries bring sweetness and color. Make sure your butter is softened. It helps mix well with sugar. Room temperature eggs also blend better. The Greek yogurt adds moisture and keeps the loaf fluffy. The flour, baking powder, baking soda, and salt work together to give the loaf structure. The lemon zest and juice infuse a fresh, zesty flavor. Coating the blueberries in flour helps them stay suspended in the batter. This step is key to a beautiful loaf. You will love how all these flavors come together. For the full recipe and instructions, check out the [Full Recipe]. - Preheat your oven to 350°F (175°C). - Grease a 9x5-inch loaf pan with butter or cooking spray. - Lightly dust the pan with flour, or line it with parchment paper. - In a medium bowl, whisk together 1 ½ cups of all-purpose flour, 1 teaspoon of baking powder, ½ teaspoon of baking soda, and ¼ teaspoon of salt. - In a large bowl, cream together ½ cup of softened butter and 1 cup of granulated sugar until light and fluffy, about 2 to 3 minutes. - Add 2 large eggs, one at a time, mixing well after each. Stir in the zest of 1 lemon, 2 tablespoons of lemon juice, and ½ teaspoon of vanilla extract until well combined. - Gradually add the dry mixture to the wet ingredients, alternating with ½ cup of Greek yogurt. Start and end with the flour mixture. Mix gently to combine without overmixing. - In a small bowl, toss 1 cup of fresh blueberries with 1 tablespoon of flour to coat them. - Fold the blueberries into the batter gently, ensuring they are spread evenly throughout. - Pour the batter into your prepared loaf pan, smoothing the top if needed. Bake for 50 to 60 minutes, or until a toothpick inserted in the center comes out clean. - If the top browns too quickly, cover it with aluminum foil. Allow the loaf to cool in the pan for about 10 minutes. Then, transfer it to a wire rack to cool completely. For more details on the ingredients and instructions, check the Full Recipe. To make a great loaf, avoid overmixing the batter. This keeps your loaf light and fluffy. When you mix the wet and dry ingredients, do it gently. Also, use eggs and butter at room temperature. This helps them blend better and gives your loaf a nice rise. For a beautiful presentation, slice the loaf neatly. Dust each slice with powdered sugar. Add a few lemon slices beside the loaf. This adds color and a fresh look. Serve your loaf with tea or coffee. The flavors of lemon and blueberry pair well with these drinks. If your loaf is overcooked, it may be dry. Lower the oven temperature next time. Check it a few minutes earlier to avoid this. If it’s undercooked, bake it longer. Insert a toothpick into the center; it should come out clean. For a moist loaf, make sure to measure your ingredients correctly. Adding Greek yogurt helps keep it tender. Follow the Full Recipe for detailed steps and tips. {{image_4}} You can make this loaf even more fun! Try adding other fruits like raspberries or strawberries. These fruits will give a nice twist to the flavor. Spices like cinnamon or nutmeg can also add warmth. Just a pinch can change the whole taste. If you need a gluten-free version, use almond flour or coconut flour instead of all-purpose flour. For a dairy-free option, swap Greek yogurt with coconut yogurt. You can also use vegan butter instead of regular butter. These small changes still keep the loaf tasty. In summer, add more citrus flavors. Try using orange zest or juice for a bright note. For the holidays, consider adding cranberries or spices like ginger and cloves. These seasonal changes will make your loaf fit the time of year. Mix and match these ideas to create your perfect buttery lemon blueberry loaf. For the complete recipe, check out the Full Recipe. Enjoy baking! To keep your buttery lemon blueberry loaf fresh, store it in an airtight container. This prevents moisture loss and keeps the loaf soft. You can also wrap it in plastic wrap before placing it in the container for extra protection. If you have leftover slices, I suggest placing parchment paper between them. This helps avoid sticking. For the best storage, use a glass or plastic container with a tight seal. Avoid metal containers, as they can affect the loaf's flavor. Keep the container at room temperature, away from direct sunlight. If you want to freeze the loaf, wrap it tightly in plastic wrap. After that, place it in a freezer-safe bag. Make sure to remove as much air as possible to prevent freezer burn. You can freeze the loaf for up to three months. When you're ready to enjoy it, thaw the loaf in the fridge overnight. For the best texture, let it sit at room temperature for a few hours after thawing before slicing. This helps restore the moisture lost during freezing. At room temperature, the buttery lemon blueberry loaf stays fresh for about three days. If you store it properly, it can last up to a week in the fridge. Watch for signs of spoilage, such as an off smell or mold. If you notice any changes in texture, it’s best to discard the loaf. Enjoy every slice while it’s fresh for the best flavor! Yes, you can use frozen blueberries. They add great flavor. Just follow these tips for best results: - Do not thaw them before adding to the batter. This helps keep the color bright. - Coat them in flour before mixing in. This keeps them from sinking to the bottom. - Reduce baking time slightly. Frozen berries can add moisture, so check for doneness a few minutes early. If you don’t have Greek yogurt, here are some great options: - Sour cream works well and gives a nice tang. - Plain yogurt can be used, but choose a thicker variety if possible. - Cottage cheese blended smooth can also work as a substitute. You can check for doneness using these signs: - The top should be golden brown and spring back when touched. - A toothpick inserted in the center should come out clean or with a few moist crumbs. - The loaf should pull away from the sides of the pan slightly. Absolutely! Here’s how to adjust: - For mini loaves, divide the batter into smaller pans. Bake for about 25-30 minutes. - For muffins, fill each muffin cup about 2/3 full. Bake for 18-22 minutes. Keep an eye on them as baking times may vary. Serving this loaf can elevate your experience: - Slice it neatly and place it on a wooden board for a rustic look. - Dust with powdered sugar for a sweet touch. - Add lemon slices or fresh blueberries on the side for color. Pair it with tea or coffee for a delightful treat. Try the Full Recipe to create your own buttery lemon blueberry loaf! This blog post covered everything you need for a delicious lemon blueberry loaf. We went through the simple ingredients, step-by-step instructions, and helpful tips. You learned about variations, storage methods, and common questions. Baking this loaf is easy and fun. Enjoy the fresh taste and share it with others. Dive in and let your baking journey begin!](https://joymealplan.com/wp-content/uploads/2025/07/6f5180c5-8cb8-4276-b09e-ab74a4ecf0f2-768x768.webp)

