Blackstone Chicken Fried Rice Flavorful Griddle Dish

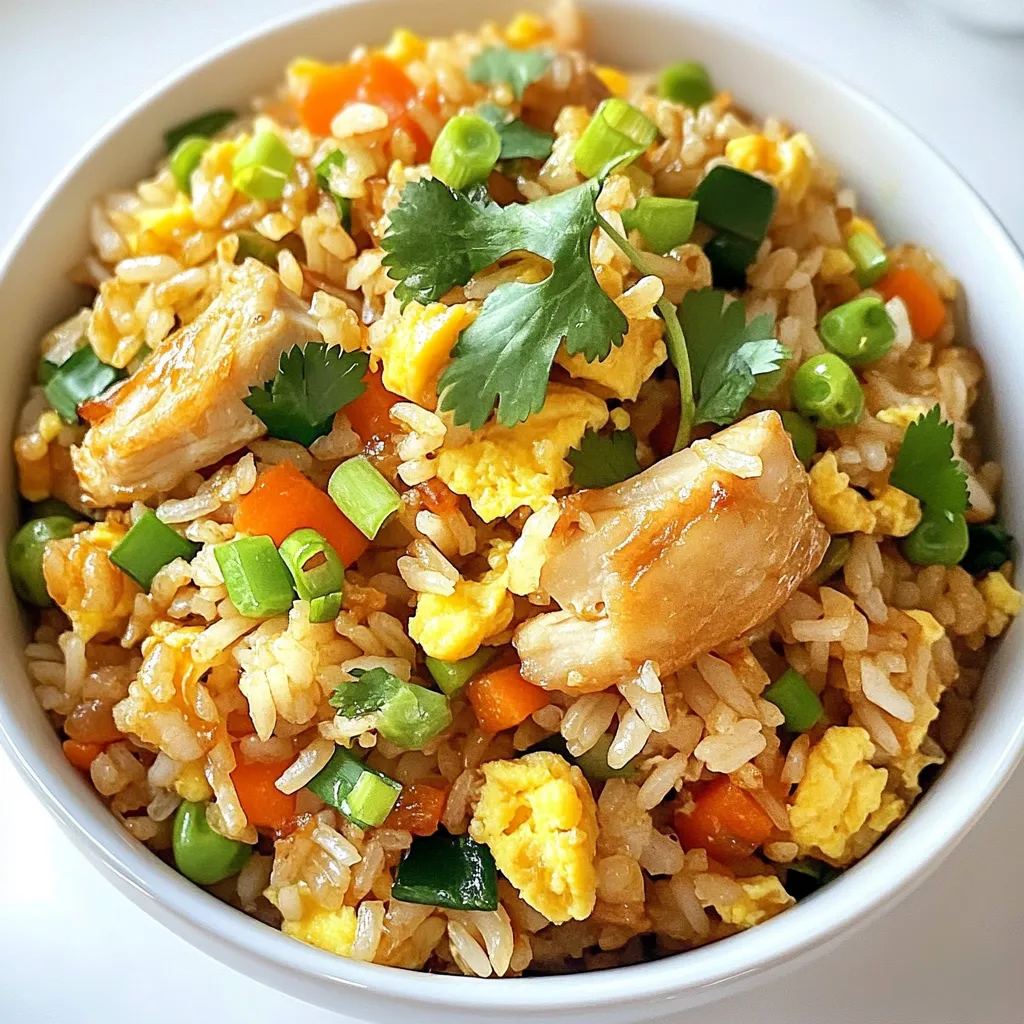
Are you ready to elevate your mealtime with a simple yet delicious dish? Blackstone Chicken Fried Rice is the perfect blend of flavors, cooking, and fun on the griddle. With just a handful of ingredients, including juicy chicken and fresh veggies, you can create a quick meal that satisfies. Let me show you how to master this flavorful griddle dish that will have everyone coming back for seconds!
Why I Love This Recipe
- Quick and Easy: This recipe comes together in just 20 minutes, making it perfect for busy weeknights or last-minute meals.
- Customizable: You can easily swap out the vegetables or protein to suit your preferences, making it versatile for any taste.
- Deliciously Flavorful: The combination of garlic, ginger, and sesame oil creates an aromatic and savory dish that is sure to please.
- Perfect for Leftovers: This fried rice is an excellent way to use up leftover rice and other ingredients, reducing waste while creating a tasty meal.
Ingredients
Main Ingredients
– 2 cups cooked jasmine rice
– 1 pound chicken breast
– 2 tablespoons soy sauce
– 2 tablespoons sesame oil
– 1 cup mixed vegetables
– 2 eggs
– 3 cloves garlic
– 1 teaspoon fresh ginger
– Salt and pepper
Optional Garnishes
– Sliced green onions
– Fresh cilantro leaves
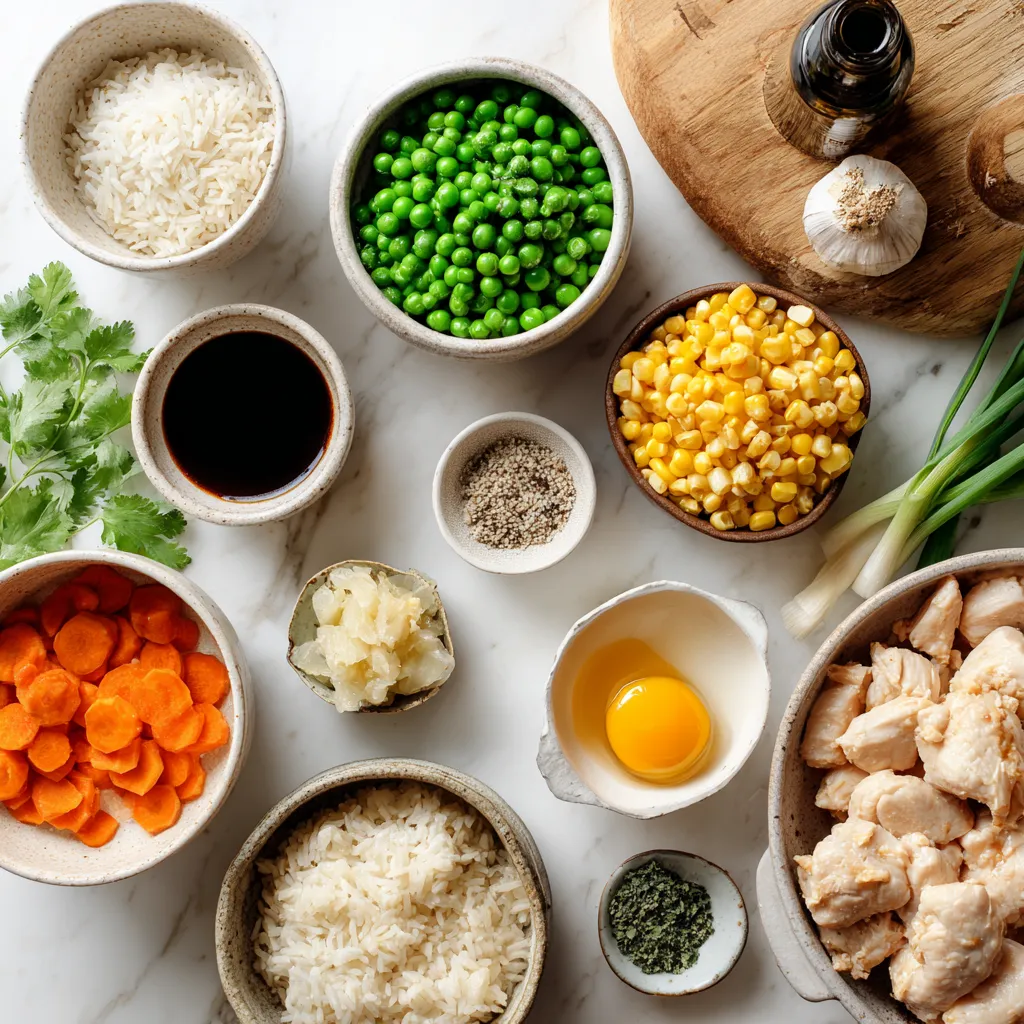
For Blackstone Chicken Fried Rice, you need simple and fresh ingredients. Start with cooked jasmine rice. Day-old rice works best. It stays firm and mixes well. Next is chicken breast. Cut it into small pieces. This makes it cook evenly.
You’ll also need soy sauce for that savory punch. Sesame oil brings a lovely nutty flavor. Don’t forget mixed vegetables! Peas, carrots, and corn are great choices. They add color and nutrition.
For a tasty base, use eggs to create fluffiness. Garlic and fresh ginger give depth to the dish. Finally, season with salt and pepper to taste.
For garnish, you can use sliced green onions and fresh cilantro leaves. They add freshness and look great on the plate.

Step-by-Step Instructions
Preparing the Chicken
First, I season the diced chicken with salt and pepper. This simple step adds flavor. I heat one tablespoon of sesame oil on the griddle. Once hot, I add the chicken and cook it for about 5-7 minutes. The chicken should be cooked through and nicely browned. After cooking, I remove it from the griddle and keep it warm on a plate.
Using day-old rice is key for this dish. Fresh rice can be too sticky. Day-old rice has dried slightly, making it perfect for frying. It separates better, creating a nice texture in the fried rice.
Cooking the Eggs
Next, I pour the beaten eggs onto the griddle. I use a spatula to scramble them until fully cooked. This usually takes about 2-3 minutes. Once cooked, I mix the eggs with the chicken. This step combines the flavors before adding the other ingredients.
Sautéing Aromatics and Vegetables
Now, I shift to the other side of the griddle. I heat the remaining tablespoon of sesame oil. I add the minced garlic and ginger, sautéing them for about 30 seconds. This step fills the air with a lovely aroma. I then toss in the mixed vegetables and stir them for 2-3 minutes. They should be heated through and tender.
Combining All Ingredients
After the vegetables are ready, I add the day-old jasmine rice. I break apart any clumps to ensure even cooking. I pour the soy sauce over the rice and mix everything well. This is where the magic happens!
Finally, I return the chicken and scrambled eggs to the griddle. I mix everything together, ensuring the chicken and eggs are evenly distributed. I taste the mixture, adjusting with salt and pepper if needed. I let it cook for another 2 minutes to let the flavors meld together. The result is a delicious, colorful dish ready to enjoy!
Tips & Tricks
Griddle Temperature Management
To cook Blackstone Chicken Fried Rice well, the right griddle heat is key. Start by preheating your griddle to medium-high. This heat helps cook the chicken evenly. Too low heat can make the chicken soggy. Too high can burn your food.
– Keep an eye on the chicken. It needs to cook for about 5-7 minutes.
– Remove it when it’s golden brown. This gives great flavor.
– When adding garlic and ginger, lower the heat to avoid burning.
Ingredient Substitutions
You can switch up ingredients based on what you have. If you don’t have chicken, try tofu or shrimp. Both add great flavor. For veggies, use what you enjoy. Bell peppers or broccoli work well too.
– If you don’t have jasmine rice, white or brown rice can work. Just make sure it’s cooked. Day-old rice is best as it’s drier and fries better.
Flavor Enhancements
For added flavor, consider spices or sauces. A dash of chili oil can give it a kick. Soy sauce adds depth and saltiness. Fresh ingredients make a big difference too.
– Use fresh garlic and ginger for the best taste.
– Fresh herbs like cilantro add brightness and color.
– Always taste your dish and adjust salt and pepper as needed.
Enjoy playing with these tips to make your dish even better!
Pro Tips
- Use Day-Old Rice: For the best texture and flavor, use rice that has been cooked and refrigerated overnight. This helps to prevent the rice from becoming mushy when stir-fried.
- Proper Chicken Seasoning: Make sure to season the chicken well with salt and pepper before cooking. This enhances the overall flavor of the dish and ensures the chicken is delicious.
- High Heat Cooking: Cooking on a high heat allows the ingredients to fry quickly, helping to develop that signature fried rice texture and flavor. Keep everything moving in the pan to avoid burning.
- Customize Your Veggies: Feel free to mix and match your choice of vegetables based on what you have on hand. Fresh or frozen veggies can work well, adding color and nutrition to your dish.

Variations
Vegetarian Option
You can easily make a vegetarian version of Blackstone chicken fried rice. Instead of chicken, use tofu. Firm tofu works best. Press it to remove extra moisture, then dice it into small cubes. Sauté it until it’s golden brown. This adds a nice texture and flavor.
You can also use more vegetables. Try bell peppers, broccoli, or snap peas. Adding different colors makes the dish look vibrant. Plus, it boosts the nutrition. Use whatever fresh veggies you enjoy.
Seafood Option
If you prefer seafood, swap the chicken for shrimp or scallops. Both cook quickly and add a tasty twist. When adding shrimp, cook until they turn pink. For scallops, sear them until they are golden brown.
Adjust your cooking times slightly. Shrimp take about 3-4 minutes, while scallops usually need 2-3 minutes per side. Keep an eye on them to avoid overcooking.
Spicy Variation
For those who enjoy heat, add chili oil or sriracha. Start with a teaspoon and adjust to your taste. Mix it into the soy sauce for a spicy kick.
Adjust heat levels by adding ingredients slowly. Always taste as you go. This way, you control the spice and make it just right for you.
Storage Info
Refrigeration Guidelines
To keep your Blackstone Chicken Fried Rice fresh, store it in airtight containers. Make sure it cools down to room temperature before sealing. This helps lock in moisture and flavor. Store it in the fridge for up to four days. If you want to enjoy it longer, consider freezing it.
Freezing Instructions
To freeze your chicken fried rice, let it cool completely first. Then, divide it into portions and place them in freezer bags. Squeeze out as much air as possible before sealing. You can freeze it for up to three months. When you want to eat it, thaw it in the fridge overnight. Reheat it on the griddle, stirring often, until it is hot throughout.
Shelf Life
Blackstone Chicken Fried Rice stays fresh in the fridge for about four days. After that, its quality declines. Look for signs of spoilage, like off smells or changes in texture. If you see any mold, throw it out. Always trust your senses when deciding if food is still good.
FAQs
Can I use frozen vegetables?
Yes, you can use frozen vegetables. They save time and add color.
– Advantages: Frozen veggies are quick and easy. They often have good nutrients. They also cook fast on the griddle.
– Preparation tips: No need to thaw them first. Just toss them in while cooking the garlic and ginger. Cook for 2-3 minutes until hot. Stir often for even cooking.
How do I make this recipe gluten-free?
To make Blackstone Chicken Fried Rice gluten-free, you can swap a few items.
– Potential substitutions: Use gluten-free soy sauce or tamari. This keeps the flavor while avoiding gluten.
– Sauces: Check labels on sauces to ensure they are gluten-free. Some brands have gluten-free options that taste great.
Can I make Blackstone Chicken Fried Rice without a griddle?
Yes, you can still make this dish without a griddle.
– Alternative cooking methods: Use a large skillet or frying pan. A wok also works well for this recipe.
– Equipment: Just make sure your pan has a good non-stick surface. This will help prevent sticking and make cleanup easier.
You learned how to make delicious chicken fried rice using simple ingredients. We discussed the main ingredients, optional garnishes, and handy tips for perfect results. Remember, you can customize this dish with various proteins and spices. Store leftovers properly to keep them fresh. Follow these steps, and you’ll create a tasty meal that everyone will love. Enjoy the process and don’t be afraid to experiment. Happy cookin

Blackstone Chicken Fried Rice
Ingredients
- 2 cups cooked jasmine rice
- 1 pound chicken breast, diced
- 2 tablespoons soy sauce
- 2 tablespoons sesame oil, divided
- 1 cup mixed vegetables
- 2 pieces green onions, sliced
- 2 pieces eggs, beaten
- 3 cloves garlic, minced
- 1 teaspoon fresh ginger, minced
- Salt and pepper to taste
- Fresh cilantro leaves for garnish
Instructions
- Preheat your Blackstone griddle to a medium-high heat. Once hot, add 1 tablespoon of sesame oil to one side of the griddle, allowing it to warm up slightly.
- While the oil heats, season the diced chicken breast generously with salt and pepper. Carefully add the seasoned chicken to the hot oil on the griddle. Sauté the chicken for approximately 5-7 minutes, or until it is cooked through and beautifully browned on the outside. Once done, remove the chicken from the griddle and place it on a plate or in a bowl to keep warm.
- In the same area of the griddle, pour the beaten eggs. Using a spatula, scramble the eggs until they are fully cooked and set. Once cooked, gently mix the scrambled eggs with the cooked chicken to combine.
- Shift to the other side of the griddle and add the remaining tablespoon of sesame oil. Toss in the minced garlic and ginger, sautéing them together for about 30 seconds until fragrant, being careful not to burn them.
- Next, add the mixed vegetables to the fragrant garlic and ginger. Sauté for an additional 2-3 minutes, stirring occasionally, until the vegetables are heated through and tender.
- Gradually add the day-old jasmine rice to the vegetable mixture, breaking apart any clumps to ensure even distribution. Pour the soy sauce over the rice mixture and stir thoroughly to combine all the ingredients.
- Reintroduce the cooked chicken and scrambled eggs to the griddle with the rice and vegetables. Mix everything together well, ensuring the chicken and eggs are evenly incorporated throughout the rice.
- Finish by tossing in the sliced green onions and tasting the mixture for seasoning. Adjust with additional salt and pepper if necessary.
- Continue to cook the entire mixture for another 2 minutes, allowing it to heat through while ensuring all flavors meld beautifully.


![To make a vibrant Greek pasta salad, gather these key ingredients: - 8 oz whole grain pasta (fusilli or penne work well) - 1 cup cherry tomatoes, halved - 1 medium cucumber, diced - 1 bell pepper, diced - ½ red onion, chopped - 1 cup Kalamata olives, pitted and halved - 1 cup feta cheese, crumbled - ¼ cup fresh parsley, chopped - 2 tablespoons extra virgin olive oil - 1 tablespoon red wine vinegar (or lemon juice) - 1 teaspoon dried oregano - Salt and pepper to taste These ingredients create a mix that bursts with flavor and color. Whole grain pasta adds fiber and nutrients. Fresh vegetables bring crunch and vitamins. Feta cheese adds a creamy touch and saltiness. This salad is not just tasty; it is also packed with nutrition. Whole grain pasta gives you energy and fiber. Fresh veggies like tomatoes and cucumbers offer vitamins and antioxidants. Kalamata olives are rich in healthy fats. Feta cheese provides protein and calcium. Each serving contains: - High fiber content from whole grain pasta - Vitamins A and C from tomatoes and bell peppers - Heart-healthy fats from olives and olive oil This salad is a great choice for a healthy meal that keeps you full and satisfied. You can customize your salad with these optional add-ins: - 1 cup cooked chickpeas for extra protein - Grilled chicken for a heartier option - Artichoke hearts for a tangy twist - Spinach or arugula for more greens - Avocado for creaminess and healthy fats These add-ins allow you to make the dish your own. Mix and match based on your taste and dietary needs. Each addition brings its own flair to this delightful Greek pasta salad. For detailed preparation steps, check the Full Recipe. Start by boiling water in a large pot. Add a pinch of salt for flavor. Once the water boils, add 8 ounces of whole grain pasta. I like using fusilli or penne. Cook the pasta according to the package instructions until it’s al dente. This usually takes about 8 to 10 minutes. After cooking, drain the pasta and rinse it under cold water. This stops the cooking and cools it down. While the pasta cooks, grab your knife and cutting board. Chop 1 cup of cherry tomatoes in half. Dice 1 medium cucumber into bite-sized pieces. Chop 1 bell pepper, any color you like. Finely chop ½ of a red onion. Finally, cut 1 cup of Kalamata olives in half. Place all these colorful veggies into a large mixing bowl. They add great flavor and texture. In a small bowl, whisk together 2 tablespoons of extra virgin olive oil and 1 tablespoon of red wine vinegar. You can use lemon juice if you prefer a zippier taste. Add 1 teaspoon of dried oregano for a nice aroma. Season with a pinch of salt and pepper. Mix well until the dressing is smooth and blended. Next, gently add the cooled pasta to the mixing bowl with the veggies. Toss everything together carefully with your hands or a spatula. This ensures that every piece is coated in flavor. Now, sprinkle 1 cup of crumbled feta cheese and ¼ cup of fresh parsley on top. Drizzle the dressing over the salad and toss once more. This is where all the flavors come together! For the best taste, cover the salad and chill it in the fridge for at least 30 minutes before serving. If you want the full recipe, check out the details above. To cook pasta perfectly, start with a large pot of water. Add a good amount of salt to the water. This helps the pasta taste better. Bring the water to a rolling boil before adding the pasta. Use whole grain pasta for a healthy touch. Cook it until it is al dente, which means it should still have a firm bite. After cooking, drain the pasta and rinse it under cold water. This stops the cooking process and cools it down quickly. Chilling your pasta salad is key to enhancing the flavors. Once you mix all the ingredients, cover the bowl with plastic wrap or a lid. Place it in the refrigerator for at least 30 minutes. This time lets the flavors blend well. If you have more time, chill it for an hour or more. Just remember, the longer you chill, the tastier it gets! Fresh herbs make a big difference in your salad's taste. Parsley adds a fresh touch and brightens the dish. You can also try fresh basil or mint for a new twist. Chop the herbs finely and sprinkle them over the salad just before serving. This keeps them vibrant and aromatic. The fresh herbs will bring your Healthy Greek Pasta Salad to life. They offer a burst of flavor that will impress everyone at the table. For the complete recipe, check out the [Full Recipe]. {{image_4}} You can change the whole grain pasta for gluten-free pasta. Gluten-free pasta works well with this salad. It gives you a similar taste and texture. Just follow the cooking time on the package. You will still have a healthy and tasty meal. For more protein, add canned chickpeas or grilled chicken. Chickpeas add fiber and nutrients. Rinse and drain them before mixing into the salad. For grilled chicken, cook it until it’s golden. Then, chop it into small pieces. This will make your salad heartier and keep you full. To make this salad vegan, skip the feta cheese. You can use avocado for creaminess. Another option is to add a vegan cheese. It provides a similar taste without dairy. Ensure you check the ingredient list to keep it plant-based. These simple swaps keep the salad fresh and flavorful. Try these variations to make your Healthy Greek Pasta Salad unique and fun! For the complete recipe, check out the [Full Recipe]. To store leftover Greek pasta salad, first, let it cool to room temperature. Then, place it in an airtight container. This helps keep the salad fresh and prevents it from drying out. You can store it in the fridge for up to three days. Be sure to label the container with the date. This way, you’ll know when to use it. Freezing Greek pasta salad isn’t recommended. The veggies and feta may lose their texture and taste when thawed. However, if you must freeze it, leave out fresh ingredients like tomatoes and cucumbers. Store the base of the salad in a freezer-safe container. It can last for up to two months. When ready to eat, thaw it overnight in the fridge. Reheating Greek pasta salad is simple. If you prefer it warm, add it to a pan over low heat. Stir gently until it warms through. Avoid high heat to keep the veggies crunchy. If the salad has been in the fridge, you can enjoy it cold as well. Just give it a good toss with a little olive oil to freshen it up. For the full recipe, check out the vibrant Greek-inspired whole grain pasta salad! To make a gluten-free version, choose gluten-free pasta. There are many options, like rice or quinoa pasta. Cook it just as you would regular pasta. Use the same ingredients for the salad. This way, you still enjoy the fresh flavors without gluten. Yes, you can prepare this salad a day ahead. Make the salad and store it in the fridge. The flavors will blend well overnight. Just remember to add the feta just before serving for the best taste. If you want a feta substitute, try goat cheese. It adds a nice creaminess. You can also use vegan feta for a dairy-free option. Crumbled tofu can work too, giving a similar texture without the dairy. Absolutely! This salad is perfect for meal prep. It keeps well in the fridge for several days. You can pack it in individual containers for easy lunches. Just ensure you store the dressing separately for freshness until you're ready to eat. For the full recipe, follow the details provided above! In this blog post, we explored the ingredients for a Healthy Greek Pasta Salad. We discussed key ingredients, nutritional highlights, and optional add-ins. I shared step-by-step instructions, tips for cooking, and variations for dietary needs. Finally, I covered storage methods and answered common FAQs. Making this salad is simple and fun. Whether you’re enjoying it fresh or storing leftovers, this dish is a tasty choice. Enjoy the flavors and nourish your body with this healthy recipe.](https://joymealplan.com/wp-content/uploads/2025/06/b0373296-86bf-4053-9c3f-2e765b8fd918-768x768.webp)


. First, fill a large pot with water. Add a good amount of salt. Bring the water to a rolling boil. Once it boils, add the spaghetti. Cook it until it’s al dente, which usually takes about 8 to 10 minutes. Don't forget to check the package for exact times. After cooking, drain the pasta. Make sure to save about half a cup of the starchy water for later. Set the pasta aside. While the pasta cooks, it’s time to make the sauce. Grab a food processor. Add the ripe avocado flesh, minced garlic, lemon juice, basil, and olive oil. Blend everything together until it’s smooth and creamy. If your sauce looks too thick, don’t worry. Just add a bit of the reserved pasta water. Blend again until you reach your desired consistency. Now that the pasta is ready, return it to the pot. Keep the heat low. Pour the creamy avocado sauce over the warm pasta. Gently toss everything together. Make sure every strand of spaghetti gets coated in the sauce. To make your creamy avocado pasta shine, use ripe avocados. Ripe avocados blend smoothly and offer a rich texture. They should feel soft but not mushy. Next, gradually add pasta water when blending your sauce. This step helps to reach your desired creaminess. Start with a little, then add more as needed. Salt and pepper play a key role in flavor. Always taste before serving. If it feels bland, add more salt or pepper. You can also adjust with Parmesan cheese. This cheese adds a savory note and enhances the dish's richness. If you prefer a vegetarian option, skip the cheese and rely on the avocados for flavor. First impressions matter, especially in food. Garnish with cherry tomatoes for a pop of color. Their sweetness pairs well with the creamy sauce. Next, sprinkle some red pepper flakes for heat. This touch not only looks good but adds a nice kick. Remember, we eat with our eyes first, so make it beautiful! {{image_4}} If you want a gluten-free dish, you can swap regular pasta for gluten-free options. Look for pasta made from brown rice, quinoa, or lentils. These types work well and keep the same great taste. Cook them according to the package directions. This way, everyone can enjoy this creamy avocado pasta. To make this dish vegan, skip the Parmesan cheese. Instead, you can add nutritional yeast. It gives a cheesy flavor without the dairy. Just mix in about 1/4 cup of nutritional yeast into the avocado sauce. This keeps your dish creamy and rich while staying plant-based. You can boost protein by adding grilled chicken or shrimp. Cook the proteins separately until done. Then, slice the chicken or toss the shrimp in with the pasta. The added protein makes this dish heartier and more filling. It’s a great way to turn a light meal into a satisfying feast. For the full recipe, check out the Creamy Avocado Pasta Delight. After making creamy avocado pasta, you may want to save some for later. Store any leftovers in airtight containers. This keeps the pasta fresh and avoids any unwanted odors. Place it in the fridge within two hours of cooking. Enjoy the leftovers within three days for the best taste. If you want to freeze the sauce, that's an option too. To do this, pour the creamy avocado sauce into freezer-safe bags or containers. Make sure to remove as much air as possible to prevent freezer burn. The sauce will stay fresh for about three months. When you’re ready to use it, thaw it in the fridge overnight. When it's time to enjoy your leftovers, reheating is key. The best way to reheat creamy avocado pasta is on the stove. Place the pasta in a pan over low heat. Add a splash of water or olive oil to help loosen the sauce. Stir gently until warm. Avoid the microwave if you can, as it can make the sauce grainy. Enjoy your meal! For the full recipe of creamy avocado pasta, check the earlier section. Yes, you can use frozen avocado. Frozen avocado is convenient and often cheaper. It may not have the same taste as fresh, but it still works well. Just thaw the avocado before blending. This way, you get a creamy sauce without waiting for ripe avocados. If you want a dairy-free option, try nutritional yeast. It adds a cheesy flavor without dairy. You can also use a vegan cheese blend. These substitutes keep the dish tasty while catering to different diets. Feel free to experiment with flavors until you find what you love. Creamy avocado pasta stays fresh for about 2 days in the fridge. Store it in an airtight container. To prevent browning, cover the pasta tightly. If you notice any changes in color or smell, it’s best to toss it. Enjoy your leftovers quickly for the best taste! This recipe combines ripe avocados, pasta, and garlic for a creamy dish. You can adjust ingredients to fit your taste. Adding cheese or protein can enhance flavors. Don't forget to store leftovers properly to enjoy later. Cooking can be fun and simple. Now it's your turn to make this delicious pasta! Enjoy every bite.](https://joymealplan.com/wp-content/uploads/2025/06/e38e2670-4076-4ca9-b5ff-23e6aadb6cf7-768x768.webp)

