Blueberry Oatmeal Breakfast Bars Nutritious Snack Idea

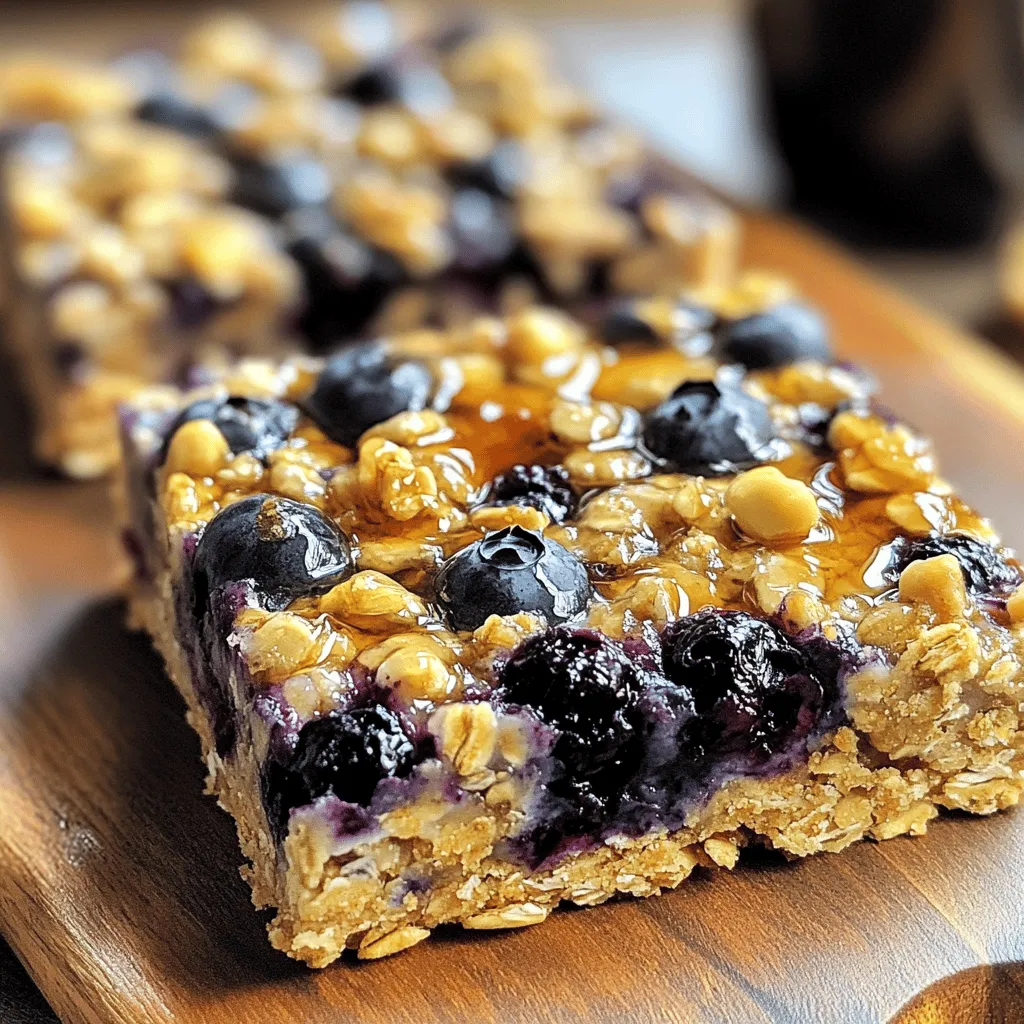
Looking for a tasty and nutritious snack? These Blueberry Oatmeal Breakfast Bars are filled with wholesome ingredients and bursting with flavor. I promise you’ll love how easy they are to make and how great they taste! Packed with oats, blueberries, and nuts, they offer the perfect balance of energy and satisfaction. Let’s dive into this simple recipe and get you ready to whip up a batch today. Your new favorite snack is just a bake away!
Ingredients
Main Ingredients
– 2 cups rolled oats
– 1 cup almond flour
– 1/2 cup ripe bananas, mashed
– 1/4 cup honey or maple syrup
– 1/2 cup almond milk
– 1 teaspoon vanilla extract
– 1 teaspoon baking powder
– 1/2 teaspoon ground cinnamon
– 1 cup fresh or frozen blueberries
– 1/4 cup chopped nuts
Optional Ingredients
– You can use agave nectar or coconut sugar instead of honey.
– Different types of milk like soy or coconut work great too.
Nutritional Overview
– Each serving has about 150 calories.
– The bars have 25 grams of carbs, 3 grams of protein, and 5 grams of fat.
– They also provide around 3 grams of dietary fiber.
These ingredients come together to create a wholesome snack. The oats and bananas give you energy, while the blueberries add vitamins. I love how you can adjust the sweeteners to fit your taste. If you want a nutty crunch, the chopped nuts add texture and healthy fats. You’ll love these blueberry oatmeal breakfast bars for breakfast or a snack.
Step-by-Step Instructions
Preparation Steps
– Preheat the oven to 350°F (175°C).
– Prepare the baking dish with parchment paper.
Mixing Instructions
– Combine the dry ingredients in a bowl.
– Whisk wet ingredients until smooth.
To start, preheat your oven. I find that 350°F (175°C) is perfect for these bars. Next, take your 8×8 inch baking dish and line it with parchment paper. This helps with easy removal after baking.
Now for the mixing! In a large bowl, combine the dry ingredients. This includes the rolled oats, almond flour, baking powder, ground cinnamon, and chopped nuts. Stir them well. This step ensures that every bite is packed with flavor.
In another bowl, whisk the wet ingredients together. Take your ripe bananas and mash them up. Then add honey or maple syrup, almond milk, and vanilla extract. Make sure this mixture is smooth. It should blend perfectly.
Once you have both mixtures ready, pour the wet mix into the dry bowl. Gently stir until just combined. Be careful not to overmix. Now, fold in the blueberries. This adds that juicy burst of flavor.
Baking Steps
– Transfer mixture to the baking dish.
– Bake for 25-30 minutes.
Now you can pour the mixture into your prepared baking dish. Use a spatula to spread it evenly. Make sure the top looks nice and smooth.
It’s time to bake! Place the dish in the oven and let it bake for about 25-30 minutes. You’ll know it’s done when the edges turn golden brown. A toothpick inserted in the center should come out clean.Enjoy the process!
Tips & Tricks
Baking Tips
– How to check for doneness: To check if your bars are ready, look for a golden edge. You can also insert a toothpick in the center. If it comes out clean, they are done.
– Adjusting baking time for different ovens: Every oven is unique. If your bars need more time, add 5-minute checks. Keep an eye on the edges. They should not burn.
Ingredient Substitution Tips
– Alternatives for almond flour: If you need a substitute for almond flour, try oat flour or whole wheat flour. Both will work well in this recipe.
– Dairy-free options: Use coconut milk or soy milk instead of almond milk. They add creaminess without dairy.
Presentation Tips
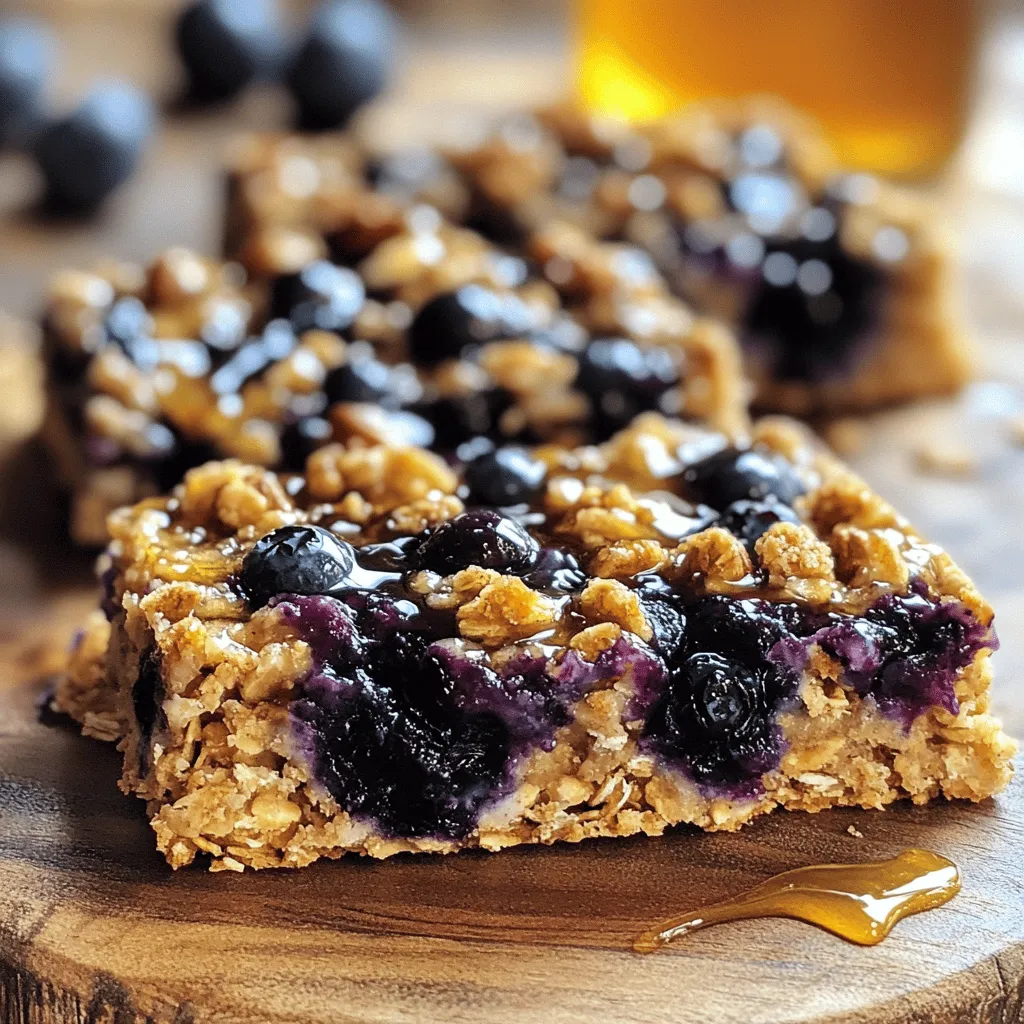
– Suggestions for serving and garnishing: Cut the bars into squares. You can serve them plain or sprinkle with a bit of cinnamon for flair. Fresh blueberries on top add a nice touch.
– Storing leftovers in the fridge: Keep any leftover bars in an airtight container. They stay fresh for up to one week in the fridge.

Variations
Flavor Variations
You can easily change the flavor of your Blueberry Oatmeal Breakfast Bars. Adding spices can bring warmth and depth. Try using nutmeg or cardamom for a unique twist. Both spices add a cozy note to the bars. You can also mix in different fruits. Strawberries and raspberries work great too. They add a fresh taste and vibrant color. Feel free to get creative with your choices!
Texture Variations
For a different texture, consider using various nuts. Walnuts and almonds are excellent options. They add crunch and healthy fats to your bars. You can also boost the nutrition by adding seeds. Chia seeds and flaxseeds provide fiber and protein. They are easy to mix into the batter. These small changes can make a big difference in how your bars feel.
Dietary Variations
If you need gluten-free options, swap rolled oats for certified gluten-free oats. This keeps your bars safe for those with gluten sensitivities. For vegan modifications, replace honey with maple syrup. This simple switch keeps the sweetness while making the recipe plant-based. You can also use almond milk or any milk of your choice. These adjustments ensure everyone can enjoy your nutritious snack.
Storage Info
Short-term Storage
Once you bake your Blueberry Oatmeal Breakfast Bars, let them cool completely. Then, store them in the fridge. Use an airtight container to keep them fresh. This helps maintain their taste and texture. You can also layer the bars with parchment paper. This prevents them from sticking together.
Long-term Storage
If you want to keep your bars longer, freezing is a great option. Wrap each bar in plastic wrap or aluminum foil. Place them in a freezer-safe bag or container. This keeps them protected from freezer burn. When you are ready to eat, take them out and let them thaw in the fridge overnight.
Shelf Life
In the fridge, these bars last about one week. If you freeze them, they can last up to three months. Just remember to check for any signs of spoilage before eating. Enjoy these tasty bars anytime you want a nutritious snack!
FAQs
Common Questions
How to make Blueberry Oatmeal Breakfast Bars vegan?
To make these bars vegan, simply replace honey with maple syrup. Use plant-based milk, like almond or oat milk. Ensure any add-ins, like chocolate or nuts, are also vegan-friendly.
Can I use quick oats instead of rolled oats?
Yes, you can use quick oats. They will change the texture slightly, making the bars softer. If you prefer chewier bars, stick with rolled oats.
Recipe Clarifications
What can I use instead of almond flour?
You can use all-purpose flour or oat flour as a substitute. If you want a nut-free option, try using coconut flour. Adjust the liquid as needed since coconut flour absorbs more moisture.
Can I make these bars in advance?
Absolutely! You can prepare the bars a day or two ahead. Store them in the fridge for best freshness. They also freeze well for longer storage.
Ingredients & Substitutions
Is it okay to use frozen blueberries?
Yes, frozen blueberries work great! They add a nice burst of flavor. Just fold them in gently to avoid breaking them too much.
What sweeteners can I substitute for honey?
You can use agave nectar, maple syrup, or brown sugar. Adjust the amount based on your taste. Each sweetener may change the flavor slightly, so feel free to experiment!
These blueberry oatmeal breakfast bars are easy and fun to make. You can mix simple ingredients, bake, and enjoy a tasty treat. Remember, you can change flavors and textures with different fruits and nuts. Store them well, and they will stay fresh.
Making these bars lets you explore different options. Vegan or gluten-free, the choice is yours! Enjoy breakfast your way and share with family. Let the kitchen be your playground.


![- 1 ¾ cups all-purpose flour - 1 teaspoon baking soda - ½ teaspoon baking powder - ½ teaspoon salt - 1 teaspoon ground cinnamon - ½ teaspoon ground nutmeg - ½ teaspoon ground ginger - ½ cup granulated sugar - ½ cup brown sugar, packed firmly - 2 large eggs - 1 cup pumpkin puree - ½ cup vegetable oil - 1 teaspoon pure vanilla extract - 1 cup semi-sweet chocolate chips - ½ cup chopped walnuts (optional) To make Chocolate Chip Pumpkin Bread, you need simple ingredients. You’ll want to gather flour, sugars, eggs, and pumpkin puree. Pumpkin puree gives the bread moisture and flavor. The spices, like cinnamon and nutmeg, add warmth and depth. You can use canned pumpkin or make your own from fresh pumpkins. Using two types of sugar helps balance the flavor. Granulated sugar adds sweetness, while brown sugar adds a rich, caramel taste. Don’t forget the chocolate chips! They melt into gooey pockets of joy. If you like nuts, add walnuts for crunch. They complement the sweet and spicy flavors. - 9x5-inch loaf pan - Mixing bowls (medium & large) - Whisk or electric mixer - Spatula or wooden spoon - Parchment paper For baking, you’ll need some tools. A 9x5-inch loaf pan is perfect for this bread. Mixing bowls, both medium and large, will help you combine ingredients. A whisk or electric mixer makes it easy to blend. Use a spatula or wooden spoon to fold in the chocolate chips. Parchment paper is a must for easy removal after baking. This is your list of ingredients and tools to create a cozy fall treat. You can find the full recipe in the previous sections to guide you through the steps. Enjoy the process of baking and the delightful smell that fills your kitchen! - Preheat oven to 350°F (175°C). - Grease and line the loaf pan with parchment paper. To start, you need your oven hot. Preheating helps the bread rise well. Greasing the pan is key. It keeps the bread from sticking. Lining it with parchment paper makes removal easy. You’ll thank yourself later! - Whisk together flour, baking soda, baking powder, salt, and spices. - Set aside for later use. Next, grab a mixing bowl. Add the flour, baking soda, and baking powder. Toss in the salt, cinnamon, nutmeg, and ginger. Whisk them together until mixed well. This step ensures even flavors in your bread. Set this bowl aside for now. - Beat sugars and eggs until fluffy. - Stir in pumpkin puree, oil, and vanilla extract. In a large bowl, mix granulated and brown sugars with the eggs. Use an electric mixer or a whisk. Beat until it’s light and fluffy. Then, stir in the pumpkin puree, vegetable oil, and vanilla. Mix until it’s smooth. This creates the moist base for your bread. - Gradually add dry ingredients to wet mixture. - Fold gently to avoid overmixing. Now, slowly add the dry mix to the wet mix. Use a spatula for this step. Gently fold the ingredients together. Be careful not to overmix. This keeps your pumpkin bread light and airy. - Fold in chocolate chips and optional walnuts. Time for the fun part! Gently fold in the chocolate chips. If you like nuts, add the walnuts now. This gives your bread an amazing crunch and flavor. Ensure they are evenly distributed. - Pour batter into loaf pan and smooth the top. - Bake for 55-65 minutes and check for doneness. Pour your batter into the prepared loaf pan. Smooth the top with a spatula. Place it in the oven. Bake for 55 to 65 minutes. Check doneness with a toothpick. It should come out clean or with a few moist crumbs. Enjoy the aroma filling your kitchen! This step brings you closer to a delicious treat. For the full recipe, refer to the entire guide. Checking for doneness is easy. Insert a toothpick into the center of the bread. If it comes out clean or with a few moist crumbs, the bread is ready. This method helps ensure you don’t overbake. If you live at a high altitude, you may need to adjust the baking time. Start checking at the 50-minute mark to see if it is done. To keep your chocolate chip pumpkin bread light, avoid overmixing. Mix the wet and dry ingredients just until combined. This small tip makes a big difference! Also, using ingredients at room temperature helps them blend better. Eggs and oil mix more smoothly when they are warm. For a lovely presentation, serve the bread warm with butter. This adds a rich flavor that everyone loves. You can also dust the top with powdered sugar for a sweet touch. Fresh mint leaves make a nice garnish and add a pop of color. Arrange the slices on a wooden board for a rustic feel. This will impress your guests! {{image_4}} You can make this bread gluten-free. Just substitute all-purpose flour with a gluten-free flour blend. This change keeps the taste and texture similar. Look for a blend that contains xanthan gum to improve the bread's structure. Want a vegan option? You can replace the eggs with flaxseed meal or applesauce. For flaxseed, mix one tablespoon with three tablespoons of water. Let this sit until it thickens. Applesauce works well too; use ¼ cup instead of one egg. Also, choose plant-based oils and sugars for a fully vegan treat. Adding fruits like raisins or cranberries gives the bread a fruity twist. These add a burst of flavor and chewiness. You can also swap chocolate chips for white chocolate or caramel. These options create a different taste and make the bread even more exciting. Try mixing and matching for your perfect loaf! To keep your chocolate chip pumpkin bread fresh, store it in two ways. At room temperature, wrap the bread tightly in plastic wrap or place it in an airtight container. This method helps maintain its soft texture. You can also refrigerate it to extend its shelf life. In the fridge, it will stay good for about one week. If you want to save some for later, freezing is a great option! First, wrap the bread tightly in plastic wrap, then place it in a freezer-safe bag. This will help keep it fresh. When you’re ready to enjoy it, just take it out and let it thaw in the fridge overnight. To warm it up, pop slices in the microwave for a few seconds or use a toaster. Chocolate chip pumpkin bread tastes amazing with drinks! Pair it with coffee or tea for a cozy treat. The warm flavors of the bread go well with hot beverages, making it a perfect snack for fall. You can also serve it with a bit of butter or cream cheese for extra richness. Yes, you can use fresh pumpkin puree instead of canned. Using fresh pumpkin can add a deeper flavor. To make fresh puree, cut a pumpkin in half and remove the seeds. Bake the halves at 350°F for about 45 minutes, or until soft. Let them cool, then scoop out the flesh. Blend until smooth for your recipe. Look for a golden-brown top. The bread should spring back when touched gently. For the best test, insert a toothpick into the center. If it comes out clean or with a few moist crumbs, the bread is done. If it has wet batter, bake it a bit longer. Yes, you can add more chocolate chips! This will make the bread sweeter and richer. Just remember that too many chips can make the bread dense. Start with an extra half cup if you want more chocolate flavor. Use a sharp serrated knife for clean slices. Wait until the bread has cooled completely. This helps prevent the bread from squishing. Start at one end and slice straight down for even pieces. At room temperature, this bread lasts about 3 to 5 days. Keep it in an airtight container. If you put it in the fridge, it can last up to a week. Just remember that refrigeration can change the texture a bit. Sure! You can use nutmeg, allspice, or cardamom. Each spice brings a new twist to the flavor. Try mixing in a teaspoon of nutmeg for warmth or allspice for a hint of sweetness. Adjust the amount to your taste for a new fall delight. For the full recipe, check the [Full Recipe]. You now have a complete guide to making Chocolate Chip Pumpkin Bread. From the key ingredients to equipment and steps, you can easily whip up this tasty treat. Don't forget the tips for storage and variations to customize your bread. Whether you try a gluten-free version or add fruits, the options are endless. Enjoy your baking journey and share this delicious bread with family or friends!](https://joymealplan.com/wp-content/uploads/2025/06/f538d1de-de93-4194-9f26-14cc05263462-768x768.webp)
