Buffalo Ranch Chicken Dip Flavorful and Easy Recipe

Are you ready to spice up your snack game? This Buffalo Ranch Chicken Dip is not just delicious; it’s also quick and easy to make. Whether you’re hosting a party or simply craving a cheesy treat, this dip will be the star of the show. I’ll guide you through simple steps, tips, and fun variations to create a crowd-pleaser that everyone will love. Let’s get started!
Ingredients
Required Ingredients for Buffalo Ranch Chicken Dip
To make a tasty Buffalo Ranch Chicken Dip, gather these key ingredients:
– 2 cups cooked chicken, shredded (use rotisserie for flavor)
– 1 cup cream cheese, softened
– 1/2 cup ranch dressing (homemade or store-bought)
– 1/2 cup buffalo sauce (adjust for heat)
– 1 cup shredded sharp cheddar cheese
– 1/4 cup green onions, chopped
Optional Ingredients for Customization
You can add some fun twists to your dip:
– 1/2 cup blue cheese crumbles (for tangy flavor)
– Extra green onions for garnish
Tools and Equipment Needed
To prepare your dip, you’ll need these tools:
– Mixing bowl
– Hand mixer or spatula
– Baking dish
– Oven
– Serving platter or skillet
Step-by-Step Instructions
Preheat and Prepare the Oven
First, set your oven to 350°F (175°C). This will get it hot and ready. A hot oven cooks the dip evenly. While it heats, grab a baking dish and grease it lightly. This helps the dip not stick later.
Mixing the Ingredients
In a big bowl, add the softened cream cheese, ranch dressing, and buffalo sauce. Use a hand mixer or a spatula to blend them well. You want a smooth and creamy mix. Next, gently fold in the shredded chicken, sharp cheddar cheese, and half of the chopped green onions. Ensure everything mixes evenly. If you love blue cheese, now’s the time to add it. Carefully fold it in to keep some texture.
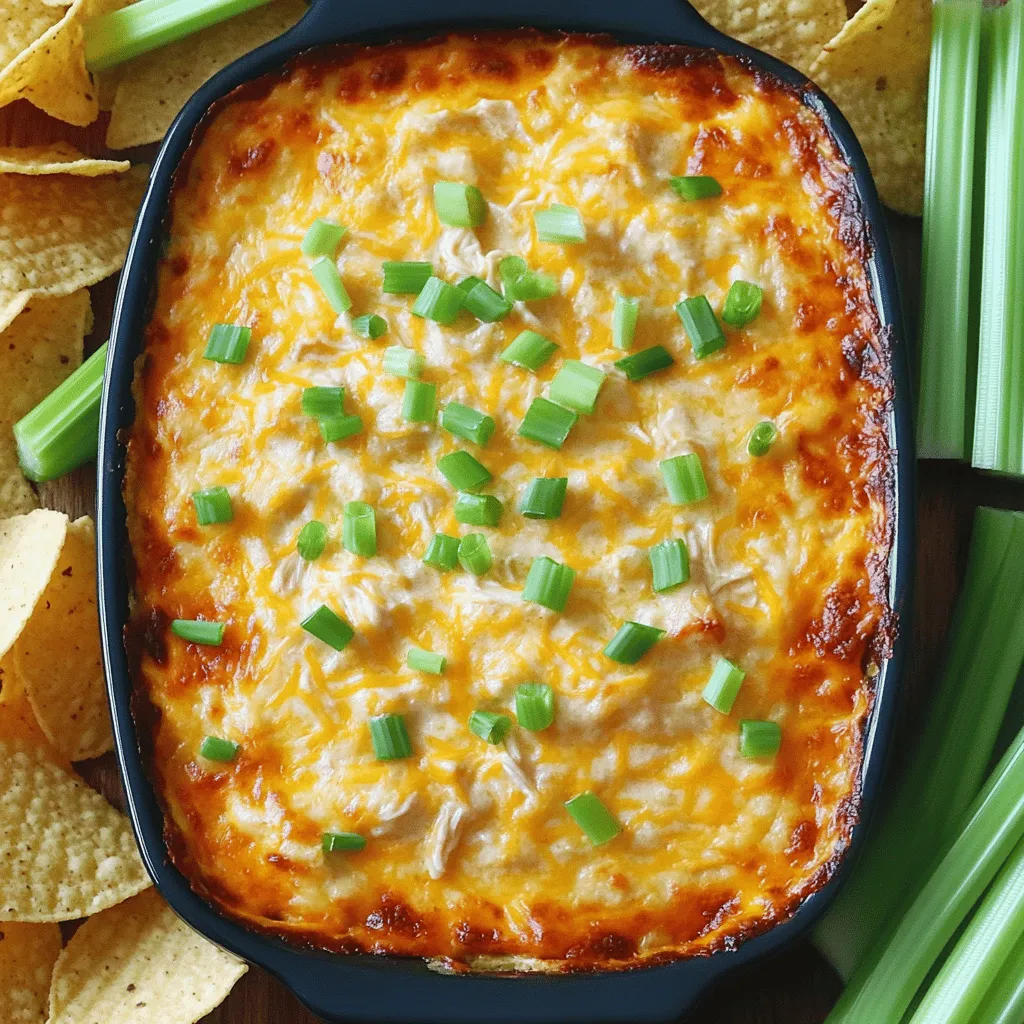
Baking the Buffalo Ranch Chicken Dip
Now, transfer your mixture into the greased baking dish. Spread it out evenly with a spatula. Place the dish in the oven and bake for 20 to 25 minutes. Look for it to bubble and the edges to turn golden. When it’s ready, take it out and let it cool for a few minutes. This cooling helps avoid burns. Finally, sprinkle the reserved green onions and more blue cheese on top. Serve it warm with tortilla chips or crunchy veggies. Enjoy your tasty dip!
Tips & Tricks
Tips for Perfect Texture and Flavor
To get the best texture, use room-temperature cream cheese. It blends easily with the ranch and buffalo sauce. I suggest shredded rotisserie chicken for added flavor. If you like it spicy, add more buffalo sauce. For a creamy dip, mix in more cheddar cheese. Blue cheese adds a tangy kick, but it’s optional. Don’t forget to fold in the green onions for a fresh taste. This mix of flavors makes every bite a delight.
Presentation Ideas for Serving
For a charming display, serve the dip in a cast-iron skillet. It keeps the dip warm and looks great. Top it with extra green onions and blue cheese crumbles for a pop of color. You can also arrange fresh celery sticks upright in the dip. This gives a fun and vibrant look. Adding a colorful platter with chips and veggies makes it even better!
Recommended Dipping Options
Tortilla chips are a classic choice and add a nice crunch. You can also use celery sticks for a fresh taste. Carrot sticks offer a sweet touch that pairs well. For a twist, try pita chips or crunchy crackers. Each option brings a unique flavor that makes the dip even more enjoyable. Choose your favorite or mix them up for variety!

Variations
Spicy Buffalo Ranch Chicken Dip Alternatives
Do you love heat? You can add jalapeños or diced hot peppers. This will boost the flavor. For a smoky twist, use chipotle sauce instead of regular buffalo sauce. It gives a nice depth. If you want a sweet touch, try adding a bit of honey. It balances the heat well. You can even mix different hot sauces to find your best combo!
Vegetarian or Vegan Options
Want to make it meat-free? Use shredded jackfruit or tofu instead of chicken. Both soak up flavors well. For a vegan dip, swap cream cheese with cashew cream or a plant-based cream cheese. Use a vegan ranch dressing too. If you want a cheesy taste, add nutritional yeast. It gives a nice flavor and keeps it vegan!
Different Cooking Methods (e.g. Slow Cooker, Instant Pot)
You can also make this dip in a slow cooker. Simply mix all the ingredients in the cooker. Set it on low for 2-3 hours. Stir it occasionally until heated through. If you have an Instant Pot, you can make it there too. Use the sauté mode to mix the ingredients, then set it to pressure cook for 5 minutes. Both methods keep the dip creamy and delicious!
Storage Info
Storing Leftover Buffalo Ranch Chicken Dip
Store any leftover Buffalo Ranch Chicken Dip in an airtight container. Make sure to cool it first. This will keep it fresh and tasty. The dip can last in the fridge for up to four days. If you want to enjoy it later, freezing is a great option too.
Reheating Tips for Best Results
When it’s time to eat your dip again, reheat it gently. Use a microwave or an oven. If using a microwave, heat it in 30-second bursts. Stir in between to avoid hot spots. In the oven, cover the dish with foil to keep it moist. Heat at 350°F (175°C) for about 15 minutes or until warmed through.
Freezing Buffalo Ranch Chicken Dip for Later
To freeze the dip, place it in a freezer-safe container. Make sure to leave some space at the top. The dip will expand as it freezes. You can freeze it for up to three months. When you’re ready to eat, thaw it in the fridge overnight before reheating.
FAQs
What is the best way to serve Buffalo Ranch Chicken Dip?
Serve Buffalo Ranch Chicken Dip warm. Use tortilla chips, celery sticks, or carrot sticks. This makes for a fun and tasty snack. Arrange the dip in a cast-iron skillet for a rustic look. Add fresh celery sticks for a pop of color. This dip pairs well with drinks at parties or game days.
Can I make Buffalo Ranch Chicken Dip in advance?
Yes, you can prepare this dip ahead of time. Mix all the ingredients and store them in the fridge. Just cover the dish tightly with plastic wrap or foil. When you’re ready to serve, bake it straight from the fridge. This saves you time and stress when hosting.
What can I substitute for cream cheese in this recipe?
You can use Greek yogurt as a substitute for cream cheese. It adds creaminess without being too heavy. Another option is cottage cheese, blended smooth for a lighter dip. You can also try vegan cream cheese for a plant-based option. These swaps keep the dip tasty and enjoyable for everyone.
You now have all the tools for making delicious Buffalo Ranch Chicken Dip. We covered the key ingredients, easy steps, and helpful tips for the perfect dip. Customize it to fit your taste, whether you like it spicy or creamy. Remember to store leftovers properly for later enjoyment. This dip is perfect for parties or a movie night. Dive in and impress your friends with your cooking skills! Enjoy every cheesy bite of your creation.


![- 4 large portobello mushrooms, stems removed - 1 cup cooked quinoa - 1 small zucchini, finely diced - 1/2 cup feta cheese, crumbled - 2 cloves garlic, minced - 1 teaspoon dried oregano - 1 red bell pepper, finely diced - 1 small red onion, finely chopped - Fresh parsley, for garnish Using these ingredients, you will create a dish that is both tasty and simple. The portobello mushrooms serve as a perfect base. They have a meaty texture and a rich flavor. You will stuff them with a mix of cooked quinoa and fresh vegetables. The quinoa adds protein and texture, making this dish satisfying. The feta cheese brings a creamy saltiness that balances the flavors. Garlic and oregano add depth. You can also add a red bell pepper and red onion for sweetness and crunch. Finishing with fresh parsley gives a burst of color and freshness. This recipe is easy to follow and uses ingredients you can find at any grocery store. You can even customize it with your favorite veggies or cheese. For a full recipe, check out the [Full Recipe]. - Preheat oven to 375°F (190°C). - Clean portobello mushrooms gently. Use a damp cloth to wipe off dirt. Place them gill-side up on a baking sheet. This helps with the filling later. - Sauté onions and garlic until translucent. Heat olive oil in a skillet over medium heat. - Add zucchini and red bell pepper, sauté until softened. Stir for about five minutes. - Incorporate fresh spinach until wilted. This takes about two minutes. The spinach adds flavor and color. - Mix quinoa and sautéed vegetables in a bowl. This is where the magic happens! - Spoon mixture into the portobello mushrooms. Press down gently with a spoon for even filling. - Bake for 25-30 minutes until golden. The mushrooms will get tender and delicious. Check them often to avoid overcooking. Try this recipe for a tasty meal. For the full recipe, visit the recipe section. To make your stuffed portobello mushrooms really pop, add fresh herbs. Basil and thyme work great. They bring a lovely aroma and zest. You can also try different cheeses. Goat cheese adds tang, while mozzarella offers creaminess. Each cheese gives a unique taste to the dish. When serving your stuffed mushrooms, think about fresh salads. A light, crisp salad pairs well. It balances the rich flavors of the mushrooms. You can also add some dipping sauces. Try a tangy vinaigrette or a garlic aioli. For presentation, place the mushrooms on greens like arugula. A drizzle of balsamic reduction looks fancy and adds flavor. One mistake is overcooking the mushrooms. They should be tender but not mushy. Keep an eye on the time as they bake. Another common error is not seasoning the filling. Adding enough salt and pepper makes a big difference. Taste as you go to find the right balance. Following these tips will help you create perfect stuffed portobello mushrooms. For the full recipe, check out the instructions above. {{image_4}} You can make stuffed Portobello mushrooms even more exciting. Start by using different vegetables in your filling. Try using eggplant, asparagus, or carrots for unique tastes. Each veggie adds its own flavor and texture. You can also switch out quinoa for brown rice or couscous. Brown rice gives a nutty flavor, while couscous offers a fluffy texture. Both options work well in these stuffed mushrooms. If you want to add meat, you have great options. You can include cooked ground meat or sausage in your stuffing. This adds a savory richness that meat lovers will enjoy. Another choice is to use chicken or turkey for a protein boost. Cooked and shredded chicken offers a wonderful taste that pairs well with the mushrooms. For those with dietary needs, there are easy swaps. If you need gluten-free options, make sure to use gluten-free grains. Quinoa is already gluten-free, but you can also use rice. For vegan adaptations, simply omit the cheese. You can replace feta with a nut-based cheese or nutritional yeast for a cheesy flavor without dairy. These changes help everyone enjoy the dish! To keep your stuffed portobello mushrooms fresh, store leftovers in an airtight container. This helps seal in flavors and moisture. Place the container in the fridge. The mushrooms will stay good for about three days. To keep them tasty, don’t stack them too high. This prevents squishing the filling. You can also freeze stuffed mushrooms for future meals. First, allow them to cool completely. Then, wrap each mushroom in plastic wrap and place them in a freezer bag. Make sure to remove as much air as possible. They can last for up to three months in the freezer. When you're ready to eat, thaw them overnight in the fridge. This helps maintain texture. When it’s time to reheat, you have two good options: oven or microwave. For the oven, preheat it to 350°F (175°C). Place the mushrooms on a baking sheet and cover with foil. Heat for about 15 minutes. This ensures they warm evenly without drying out. If you use a microwave, place the mushrooms on a microwave-safe plate. Heat in short bursts of 30 seconds until warm. This method is quick but can make them a bit soggy. Enjoy your stuffed mushrooms just like they were fresh! You can tell stuffed mushrooms are done when they feel tender. The tops should be lightly golden. If you see a nice brown color on top, that's a good sign! The mushrooms will shrink slightly as they cook, so check for softness. Yes, you can prepare stuffed mushrooms ahead of time! Here’s how: Make the filling and stuff the mushrooms. Then, cover them and put them in the fridge. You can keep them there for a day or two. When you’re ready, just bake them as usual. This saves time on busy days! Stuffed Portobello mushrooms go well with many sides. Here are some ideas: - A light salad with mixed greens - Roasted vegetables for extra flavor - Quinoa or rice to match the filling - A glass of white wine or sparkling water Pair these to make your meal even better! For more ideas, check out the Full Recipe for serving tips. Stuffed portobello mushrooms are a tasty and healthy dish. We covered the main ingredients, like quinoa and feta cheese, to create a flavorful filling. I shared step-by-step instructions to guide you through prepping, cooking, and assembling. You also learned tips for enhancing flavor and avoiding common mistakes. Finally, we explored variations for different diets and storage methods. These mushrooms offer endless possibilities. Enjoy making them your way and savor the delicious results.](https://joymealplan.com/wp-content/uploads/2025/06/f2d78041-f354-4b2f-8927-65aa38224e9e-768x768.webp)
![This Zesty Lemon Tahini Dressing is a bright and tasty addition to many dishes. It takes just 10 minutes to make and serves four people. You can use it on salads, grain bowls, or as a dip for veggies. The balanced mix of flavors will make your meals pop! - 1/4 cup tahini paste - 1/4 cup freshly squeezed lemon juice (approximately 2 medium lemons) - 2 tablespoons extra virgin olive oil - 1 garlic clove, finely minced - 1 tablespoon maple syrup or honey (to taste) - 2-3 tablespoons filtered water (adjust for desired consistency) - Sea salt and freshly cracked black pepper, to taste - Zest of 1 lemon (for an aromatic finish) - Tahini paste provides healthy fats and protein, making it creamy and rich. - Lemon juice adds vitamin C and a bright, zesty flavor that lifts your dishes. - Extra virgin olive oil is a heart-healthy fat with a smooth taste that enhances the dressing. - Garlic brings flavor and has health benefits like boosting immunity. - Maple syrup or honey adds a hint of sweetness, balancing the tang of lemon. - Sea salt and black pepper enhance all the flavors, making every bite enjoyable. - Lemon zest gives an aromatic finish that deepens the lemon taste. This dressing is not only simple to make, but it also packs a punch of flavor and nutrition. You can easily adjust the sweetness and thickness to fit your taste. To make Zesty Lemon Tahini Dressing, start with the right ingredients. Gather your tahini paste, lemon juice, olive oil, garlic, maple syrup, water, salt, pepper, and lemon zest. Use fresh lemons for the best taste. Squeeze enough juice to fill 1/4 cup. A good juicer helps extract the juice easily. In a medium mixing bowl, add the tahini paste first. This helps create a smooth base. Pour in the lemon juice, extra virgin olive oil, and minced garlic. Next, add the maple syrup or honey for sweetness. Use a whisk to mix these ingredients together until smooth. Make sure there are no lumps left in the tahini. This step is key for a creamy dressing. Once the mixture is smooth, it’s time to adjust the consistency. Slowly add filtered water, one tablespoon at a time. If you want a thinner dressing, add more water. For a thicker dip, use less. Taste your dressing and decide if you need more salt, pepper, or lemon juice. The zest adds a nice aromatic touch. For best results, chill the dressing for about 10 minutes before serving. This enhances the flavors. This recipe makes about four servings of a fresh and zesty dressing. Enjoy experimenting with it on salads or as a dip! To make the best Zesty Lemon Tahini Dressing, I focus on balance. Each ingredient plays a role. The tahini brings creaminess, while the lemon adds bright zest. Use fresh lemon juice for the best taste. The garlic gives a nice kick, and sweet maple syrup rounds it out. Taste your dressing as you mix. Adjust the sweetness or tartness as needed. If it's too thick, add more water slowly. This dressing shines on salads. It pairs well with leafy greens or roasted veggies. I love to drizzle it over grain bowls with quinoa or farro. Use it as a dip for fresh veggies or pita chips. You can even spread it on wraps for extra flavor. The options are endless, so get creative with your meals! How you present the dressing matters. I like to serve it in a small, stylish bowl. Drizzle a little extra olive oil on top for shine. Sprinkle sesame seeds for texture and a nice look. You can also add lemon slices around the bowl for a colorful touch. This makes it eye-catching and fun to enjoy. For a truly gourmet touch, pair it with your favorite dishes and watch everyone enjoy! {{image_4}} You can tweak this recipe to suit your tastes. Try using sunflower seed butter in place of tahini. This adds a nutty flavor without sesame. If you're allergic to nuts, sunflower butter is a good choice. You can also use lime juice for a different citrus kick. It gives the dressing a unique twist. For a creamier texture, try adding Greek yogurt. This will thicken the dressing and add protein. Want to boost the flavor? Add fresh herbs like parsley, cilantro, or dill. These herbs bring freshness and color. For a spicy kick, mix in red pepper flakes or a dash of hot sauce. This adds heat and complexity. If you love garlic, increase the amount or add roasted garlic for a sweeter taste. A pinch of cumin can also deepen the flavor profile. This dressing works with many cuisines. It pairs well with Mediterranean dishes like falafel or grilled vegetables. Drizzle it over a fresh Greek salad for a zesty touch. You can also use it in Asian dishes, like a cold noodle salad. The lemon tahini dressing complements sesame flavors well. It is perfect for drizzling on grain bowls filled with quinoa or brown rice. For a fun twist, use it as a dip for fresh spring rolls. Explore the [Full Recipe] for all the delicious details! Store your Zesty Lemon Tahini Dressing in an airtight container. Glass jars work great. Make sure the lid is tight. This keeps the flavors fresh. Always use a clean spoon to scoop out the dressing. This way, you avoid adding germs. Keep your dressing in the fridge. It helps maintain its zesty flavor. If you leave it out, it can spoil quickly. Always chill it right after you make it. The colder it is, the better it tastes. Your dressing lasts up to a week in the fridge. After that, it may not taste good. Watch for changes in color or smell. If it smells sour or looks odd, throw it away. Trust your senses; they guide you well. This dressing is already vegan! It uses tahini, lemon juice, and maple syrup or honey. If you prefer, just stick with maple syrup. It gives a sweet touch and keeps everything plant-based. I don’t recommend freezing this dressing. Freezing can change its texture. When thawed, it may separate and lose its creamy feel. Instead, store it in the fridge for fresh use. This dressing shines on salads, grain bowls, and roasted veggies. Try it with fresh greens, quinoa, or as a dip for crisp veggies. It adds a zesty kick to any meal. To cut calories, reduce the olive oil or use less tahini. You can also add more water for a thinner dressing. This keeps the flavor while lowering the calorie count. For the full recipe, check the details above. In this post, we explored the key ingredients, step-by-step instructions, and helpful tips for Zesty Lemon Tahini Dressing. You learned about the benefits of each ingredient and how to achieve the perfect flavor balance. We also discussed variations and storage tips. To wrap up, this dressing is versatile and easy to make. With the right approach, you can impress your guests and enjoy tasty meals. Use this dressing often to enhance your dishes.](https://joymealplan.com/wp-content/uploads/2025/06/f654f103-f68b-4d89-afc0-0ab326df6c5a-768x768.webp)

