Caramel Apple Cheesecake Dip Savory and Simple Treat

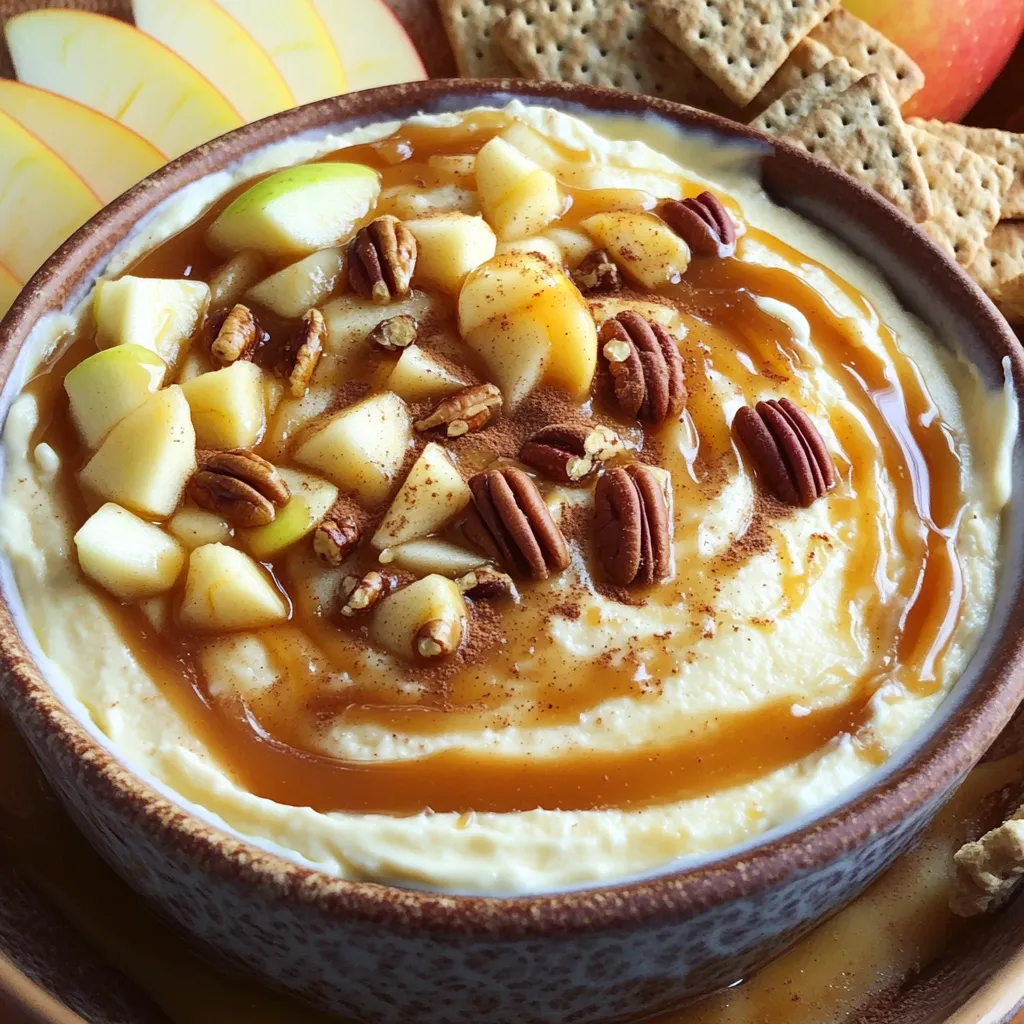
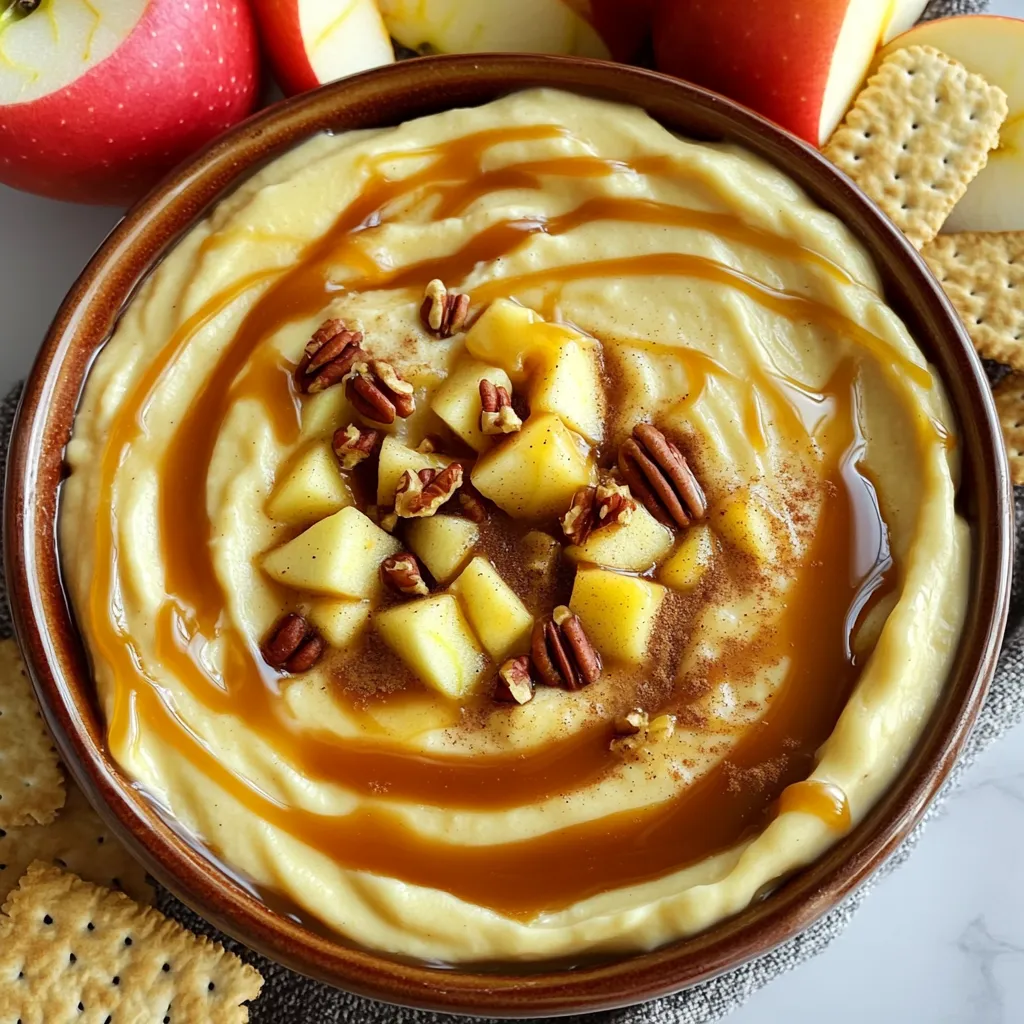
Ready for a treat that’s both sweet and simple? My Caramel Apple Cheesecake Dip brings together creamy goodness and the rich flavors of caramel and apple. In just a few easy steps, you’ll create a delightful dip that pairs perfectly with fresh apple slices or graham crackers. Whether you’re hosting friends or craving a snack, this recipe is sure to please. Let’s dive into the details and whip up this tasty delight!
Ingredients
To make your Caramel Apple Cheesecake Dip, gather these tasty ingredients:
– 8 oz cream cheese, softened to room temperature
– 1/2 cup powdered sugar, sifted
– 1/2 cup packed brown sugar
– 1 teaspoon pure vanilla extract
– 1/2 cup sour cream
– 1 cup apples, diced (Granny Smith or Honeycrisp for tartness)
– 1/2 cup caramel sauce (plus extra for decorative drizzling)
– 1/2 teaspoon ground cinnamon
– 1/4 cup pecans, chopped (optional for crunch)
– Fresh apple slices and graham cracker pieces for serving
These ingredients mix together to create a sweet, creamy dip. You can enjoy it with fresh apple slices or graham crackers. The combination of flavors works well, making it a favorite for parties or snacks. Plus, using tart apples adds a nice bite. If you want extra crunch, the pecans are a great choice.
Step-by-Step Instructions
Preparation Overview
First, let’s set up your mixing area. Make sure it’s clean and tidy. Gather your tools: a large mixing bowl, an electric mixer, and a spatula. This will help you make the dip smoothly.
Detailed Cooking Instructions
1. Start by beating the cream cheese in the mixing bowl. Use the electric mixer on medium speed. Mix it for about 2-3 minutes until it’s smooth and creamy.
2. Next, add in the sifted powdered sugar and the packed brown sugar. Keep mixing for another 2 minutes. You want it to be fluffy and well combined.
3. Now, pour in the vanilla extract and sour cream. Mix these in until the mixture feels light and airy. This takes about 1-2 minutes more.
4. Carefully fold in the diced apples and ground cinnamon using your spatula. Make sure the apples are evenly spread throughout the dip.
5. Drizzle in 1/2 cup of caramel sauce. Gently fold it into the mixture. This creates a lovely swirl effect, so don’t over-mix.
6. If you like, add the chopped pecans for a nice crunch. Fold them in gently.
7. Spoon the dip into a stylish serving dish. Drizzle extra caramel sauce on top for flair and sweetness.
8. Serve right away with fresh apple slices and graham cracker pieces. Enjoy the creamy goodness!
Tips & Tricks
Serving Suggestions
– Serve with fresh apple slices and graham cracker pieces for a crunchy bite.
– Try using a hollowed-out apple as a fun serving bowl. It looks great and adds flavor!
– Use decorative bowls to make the dip more inviting. A little style goes a long way!
Storage Tips
– Store leftovers in an airtight container to keep it fresh.
– Place it in the fridge if you plan to eat it later. It stays good for 3 days.
– Use a glass or plastic container that seals well to avoid spills.
Common Mistakes to Avoid
– Do not over-mix the dip. This can make it too runny. Mix just until combined.
– Avoid using soft apple varieties like Red Delicious. They can turn mushy in the dip.
– Always choose apples with some tartness, like Granny Smith or Honeycrisp. They balance the sweetness!

Variations
Flavor Variations
You can easily mix things up with this dip. Adding chocolate chips gives a sweet twist. You can also stir in peanut butter for a nutty flavor. Both add depth and excitement to the dip. If you want crunch, try using different nuts. Almonds or walnuts can give a nice texture. They also bring their unique flavors to the dish.
Dietary Adaptations
If you need to make this dip gluten-free, it’s simple. Just use gluten-free graham crackers or serve with fruit. For vegan options, swap the cream cheese for a plant-based version. Use coconut cream or cashew cream for a great taste. These swaps keep the flavor while meeting dietary needs.
Seasonal Twists
You can change the flavor based on the season. In fall, add spices like nutmeg or allspice for warmth. These spices enhance the apple flavor, making it cozy. During the holidays, consider adding candy corn or dried fruit. These add a festive touch and extra sweetness. Enjoy the dip any time of year with these variations!
Nutritional Information
Caloric Breakdown
Each serving of Caramel Apple Cheesecake Dip has about 250 calories. The dip contains around 20 grams of sugar and 10 grams of fat. These values can vary based on specific brands and ingredients used.
Health Considerations
To make this dip a bit healthier, you can try using low-fat cream cheese. Greek yogurt is a great swap for sour cream. You can also reduce the amount of sugar or use a sugar substitute. Serving sizes should be around 1/4 cup per person to keep portions in check.
Potential Allergens
This recipe has some common allergens. The dip contains dairy from cream cheese and sour cream. It also has pecans, which may cause nut allergies. To make it allergen-friendly, you can skip the nuts and use dairy-free cream cheese. Always check labels for allergen warnings to ensure safety.
FAQs
How long does the Caramel Apple Cheesecake Dip last?
The Caramel Apple Cheesecake Dip stays fresh for about three days in the fridge. Make sure to place it in an airtight container. This helps keep it from drying out or picking up other flavors from the fridge.
Can I make this dip ahead of time?
Yes, you can make this dip a day before you plan to serve it. Just store it in the fridge. This time will let the flavors blend well. When you’re ready to serve, give it a quick stir and add more caramel on top for extra sweetness.
What type of apples are best for this recipe?
I recommend using Granny Smith or Honeycrisp apples. Granny Smith offers a nice tartness that pairs well with the sweet dip. Honeycrisp apples are sweet and crunchy, adding a pleasant texture. Both types hold up well when diced.
Can I use store-bought caramel sauce?
Absolutely! Store-bought caramel sauce works perfectly in this dip. It saves time and still tastes great. Just make sure to choose a quality brand for the best flavor. You can drizzle extra caramel on top for a fancy touch.
What can I use as a dip besides graham crackers?
You can use fresh apple slices, pretzels, or vanilla wafers. Each option adds a different flavor and texture. You can also try cookies or even cut-up fruit like bananas or pears for a fun twist.
This blog post covers how to make a tasty Caramel Apple Cheesecake Dip. We reviewed the ingredients, preparation steps, and helpful tips. You can experiment with flavors and make it fit your diet. Remember to avoid common mistakes for the best taste.
Enjoy this dip with your favorite snacks, and don’t forget to share it! With simple adjustments, you can personalize this treat. Try new variations and enjoy making it your own! Happy dipping!


![- Strawberries - Blueberries - Kiwi - Mango - Pineapple When making honey lime fruit salad, choose bright and fresh fruits. Fresh strawberries add sweetness, while blueberries offer a burst of flavor. Kiwi adds a tangy kick, and mango brings a tropical twist. Pineapple adds juicy texture and sweetness. Each fruit shines in this salad. - Pure honey - Freshly squeezed lime juice - Lime zest The honey and lime mixture brightens the salad. Use pure honey for a rich flavor. Fresh lime juice offers a zesty taste, and lime zest adds a fragrant note. Mix these ingredients well to create a smooth dressing. This blend enhances the fruits and ties everything together. - Fresh mint leaves for decoration Fresh mint leaves add a pop of color and a refreshing aroma. They make the salad look beautiful and inviting. Just sprinkle them on top before serving. This final touch makes the dish feel special and fun. For the full recipe, check out the details above. Start by cleaning the fruits well. Rinse strawberries in cold water and hull them. Slice them into thin pieces. For blueberries, just rinse them off and set them aside. Peel the kiwi and dice it into small chunks. Next, peel the mango and cut it into cubes. Finally, chop the pineapple into bite-sized pieces. Using fresh fruits makes the salad taste better and look bright. Fresh fruits add flavor and nutrition to your dish. Grab a small bowl and add two tablespoons of pure honey. Next, squeeze two tablespoons of fresh lime juice into the bowl. Then, use a zester to add the zest from one lime. Using a whisk, mix these three ingredients together. You want the honey to blend smoothly with the lime juice and zest. This dressing brings a sweet and tangy flavor to your fruit salad. Now, pour the honey lime dressing over the bowl of fruits. Use a large spoon to gently toss everything together. Be careful! You want to coat the fruits without bruising them. After mixing, let the salad rest for about 10 minutes. This time helps the flavors blend together. Just before serving, stir the salad again. If you wish, add a bit more honey to sweeten it. Enjoy this refreshing dish served in bowls or on a platter. When picking fruits, go for seasonal options. They taste best and are often cheaper. Seasonal fruits are ripe and ready to eat. Off-season fruits can be harder and less sweet. Always check for ripeness. Squeeze the fruit gently; it should feel slightly soft. Look for bright colors, which show freshness. Avoid fruits with bruises or dark spots. To make your salad even better, adjust the sweetness. If you want it sweeter, add more honey. A little goes a long way. You can also add a small pinch of salt. It may seem odd, but salt brings out the natural sweetness. Just a touch can make a big difference. How you serve the fruit salad matters. You can use bowls for individual servings or a platter for a group. A platter looks nice and allows everyone to help themselves. To make it more appealing, use fresh mint leaves. They add color and a fresh scent. Just sprinkle a few on top right before serving. For a full guide on making this dish, check the [Full Recipe]. {{image_4}} You can mix in many fruits for more flavor. Try adding bananas for creaminess. Apples give a nice crunch. You can also use grapes or pomegranate seeds. These fruits add color and taste. They can also change the texture, making it fun to eat. Adding nuts or seeds brings a crunchy twist. Chia seeds are a great choice. They add fiber and healthy fats. Walnuts or almonds give a rich, nutty flavor. Just sprinkle them on top before serving. This will make your salad even more satisfying. You can turn your fruit salad into a meal. Adding protein makes it hearty. Greek yogurt is a tasty option. It adds creaminess and protein. Cottage cheese is another great choice. Both give a nice balance to the sweetness of the fruits. You can serve it in a bowl or mix it right in. Enjoy your Honey Lime Fruit Salad Delight! For the full recipe, check the section above. To keep your Honey Lime Fruit Salad fresh, use airtight containers. These containers help lock in moisture and flavors. Glass or plastic containers work well. If you don’t have these, a bowl covered tightly with plastic wrap can also be a good option. To prevent browning in fruits like apples or bananas, use lemon juice. You can also add extra lime juice to the salad. The acidity slows down oxidation. Keep your fruit salad in the fridge to stay crisp and tasty. For the best taste, eat the salad within three days. After this, the fruits may lose their texture. If you store it properly, it can last up to five days. However, the fresher, the better! Enjoy it while it's full of flavor. For the full recipe, check out the earlier section. Yes, you can use other sweeteners. Some good options are maple syrup and agave nectar. Each sweetener has a unique flavor. Maple syrup adds warmth, while agave is mild. Adjust the amount based on your taste. Use the same amount of these sweeteners as honey. This keeps the balance of flavors intact. You can prepare this salad ahead, but keep some tips in mind. Cut the fruits and store them separately. This helps keep them fresh. Mix the honey lime dressing and store it in the fridge. Combine everything just before serving. This keeps the fruits from getting mushy and preserves the crunchiness. Certain fruits may not mix well with lime. Avoid bananas, as they brown quickly and can turn mushy. Apples may also not hold up well with lime juice. Citrus fruits like oranges can overpower the salad. Stick to fruits that stay fresh and vibrant for the best taste. This blog post showed you how to create a delightful fruit salad. We covered the best fresh fruits like strawberries and mangoes, and the sweet honey-lime dressing. You learned how to prepare and combine the ingredients for a tasty dish. We shared tips on choosing fruits, enhancing flavors, and presentation tricks. In the end, you can make this salad your own by adding nuts or different fruits. With these steps, your salad will be fresh and enjoyable every time. Now, you’re ready to impress with your new skills!](https://joymealplan.com/wp-content/uploads/2025/06/73b51031-810e-4f51-94b6-bb966ad7c4ea-768x768.webp)

![- 1 cup glutinous (sticky) rice - 1 ½ cups coconut milk - 1 ripe mango, peeled and thinly sliced - ¼ cup granulated sugar - ¼ teaspoon salt Glutinous rice gives Mango Sticky Rice its unique texture. It sticks together and becomes chewy when cooked. The coconut milk adds a rich and creamy flavor to the dish. Using ripe mango is key; its sweetness and juiciness balance the rice. - 1 tablespoon sesame seeds (toasted, optional) - Fresh mint leaves for garnish (optional) Toasted sesame seeds provide a nice crunch. Fresh mint leaves add a pop of color and a refreshing taste. Both are great if you want to elevate your dish. - Calories per Serving: Approximately 300 calories - Key Nutrients: Carbohydrates, fats, fiber, vitamin C, and iron Mango Sticky Rice is a delightful dessert. While it is not low-calorie, it offers some nutrients. The rice provides energy, and mango adds vitamins. Enjoy it as an occasional treat! For the complete recipe, check out the Full Recipe. Rinsing and Soaking the Rice Start by rinsing the sticky rice under cold water. Keep rinsing until the water runs clear. This step removes excess starch. It's key for the right texture. After rinsing, soak the rice in water for 4 hours. If you can, soak it overnight. This helps the rice absorb water and cook better. Steaming Process After soaking, drain the rice. Place it in a steamer lined with cheesecloth or a steaming basket. Steam the rice over simmering water for 25 to 30 minutes. You want it to become translucent and tender. This process makes the rice fluffy and sticky, perfect for the dish. Combining Ingredients While the rice steams, prepare the coconut milk mixture. In a medium saucepan, mix coconut milk, sugar, and salt. Stir the mixture over low to medium heat. Keep stirring until the sugar dissolves. Be careful not to boil it; you want a smooth texture. Cooking Technique Once the sugar is dissolved, take the saucepan off the heat. This step ensures the coconut milk stays creamy. Set it aside until the rice is ready. This coconut milk will add a rich flavor to the sticky rice. Mixing Rice and Coconut Milk When the sticky rice is cooked, transfer it to a large bowl. Gradually pour in about 1 cup of the warm coconut milk mixture. Use a gentle folding motion to mix it in. Make sure every grain of rice is coated. Let it sit for 15 to 20 minutes. This allows the rice to absorb the coconut flavor. Plating Suggestions To serve, scoop a generous amount of sticky rice onto a plate. Arrange thin slices of ripe mango on top. Drizzle some extra coconut milk over it. For added crunch, sprinkle toasted sesame seeds on top. You can also garnish with fresh mint leaves for a pop of color. This makes the dish look as good as it tastes! For the complete method, check the Full Recipe. Appearance and Aroma Indicators When choosing mangoes, look for smooth skin. The color should be bright and rich. A ripe mango feels slightly soft when gently squeezed. It should also have a sweet aroma near the stem. This smell tells you it's ready to eat. Ideal Varieties for the Dish For this dessert, I recommend using the Ataulfo or Haden mango. Ataulfo mangoes have a creamy texture and sweet taste. Haden mangoes are juicy and fragrant, adding great flavor to your dish. Both work well with the sticky rice. Toasting Sticky Rice Option Toasting the sticky rice can bring out a nutty taste. Before soaking, heat it in a pan over low heat. Stir it for a few minutes until it turns golden. This step adds depth to the flavor of your dessert. Alternative Sweeteners While granulated sugar is common, you can try other sweeteners. Honey or agave syrup can add unique flavors. Coconut sugar offers a caramel-like taste. Each option can change the dish’s final taste, so feel free to experiment. Serving Style Variations For a fun twist, try serving the sticky rice in small bowls. You can layer the mango slices on top. This makes each serving look special. You can also use a ring mold to shape the rice for a more elegant look. Creative Garnishing Tips Garnishing can elevate your dessert. Sprinkle toasted sesame seeds for crunch. Add fresh mint leaves for color and flavor. You can also drizzle a bit of coconut milk on top for a beautiful finish. These small touches make your dish more appealing. For the complete recipe, check out the [Full Recipe]. {{image_4}} Mango sticky rice shines in Thai cuisine. Each region has its own twist. In northern Thailand, you might find a version with black sticky rice. This adds a nutty flavor and a stunning dark color. Southern styles often emphasize sweetness with extra coconut milk. Other cuisines influence this dish too. In Vietnam, they serve a similar treat called "xôi xoài." It features a sweeter coconut sauce and often includes mung beans. Exploring these variations lets you enjoy mango sticky rice in new ways. If you want vegan options, just use coconut milk. This recipe is already dairy-free. You can also make it gluten-free, since glutinous rice has no gluten. For low-sugar options, try using a sugar substitute. Many people enjoy using stevia or monk fruit. These keep the sweetness without the added calories. Want to make your mango sticky rice unique? You can add food coloring to the rice. This gives it a fun pop of color. Just a few drops will do! Incorporating fruits and nuts is another way to change up the flavor. Add some chopped mango or berries for extra fruitiness. You could also sprinkle in some toasted coconut or nuts for crunch. This adds texture and makes your dish even more delightful. For the full recipe, check out the Mango Paradise Sticky Rice section. When you have leftover mango sticky rice, you want to keep it fresh. Here are some tips: - Refrigeration Tips: Store the sticky rice in an airtight container. It will stay good in the fridge for about 3 to 4 days. Always let the rice cool to room temperature before sealing it to avoid condensation. - Freezing Sticky Rice: If you want to keep it longer, consider freezing. Wrap the sticky rice tightly in plastic wrap. Then place it in a freezer bag. This way, it can last up to 3 months. You can enjoy your mango sticky rice again with these methods: - Microwave vs. Stovetop: The microwave is quick and easy. Place the rice in a bowl, add a splash of water, and cover it. Heat in short bursts until warm. The stovetop can be better for texture. Add a little coconut milk to a pot, then heat the rice gently over low heat. - Maintaining Texture and Flavor: When reheating, stir the rice often. This helps it warm evenly. Adding coconut milk will also keep it creamy and flavorful. You should know how long your mango sticky rice lasts: - How Long Can You Store It? In the fridge, it lasts 3 to 4 days. In the freezer, it can be good for up to 3 months. - Signs of Spoilage: Check for off smells or a change in color. If you see mold or a strange texture, it’s best to throw it away. Always trust your senses! Mango sticky rice is a sweet dessert from Thailand. It features glutinous rice cooked in creamy coconut milk. This dish is very popular in Thai cuisine, often enjoyed as a treat during festivals or special occasions. The soft, sweet rice pairs perfectly with ripe mango slices. The dish represents a delightful mix of flavors and textures. You should not use regular rice. Regular rice will not give the same sticky texture. Glutinous rice is key to achieving that chewy bite. If you cannot find glutinous rice, look for sushi rice as an alternative. It has a similar texture but may not be as sticky. You can easily change the sweetness of your mango sticky rice. To do this, modify the amount of sugar you use. Start with less sugar and add more to taste. If you want alternatives to granulated sugar, try using honey or maple syrup. These can add unique flavors while still sweetening your dish. Mango sticky rice is a simple, yet delicious dessert. It requires just three main ingredients: sticky rice, coconut milk, and fresh mango. You can add garnishes like sesame seeds or mint for that extra touch. Follow the easy steps for preparation and assembly to create this flavorful dish. Remember to choose ripe mangoes for the best taste. With tips on storage and variations, you can enjoy this treat anytime. Experiment with flavors and enjoy the process. Your mango sticky rice will shine with every bite!](https://joymealplan.com/wp-content/uploads/2025/06/5d335504-2931-49f8-8062-6f7285d5d66d-768x768.webp)


