Caramel Apple Overnight Oats Tasty Breakfast Boost

Start your day with a tasty boost! Caramel Apple Overnight Oats are simple and delicious. They blend sweet apples and caramel with the wholesome goodness of oats. You’ll love how easy they are to make and enjoy. Just mix a few ingredients, chill overnight, and breakfast is ready when you are. Let’s dive into the world of creamy, caramel goodness!
Ingredients
Main Ingredients
– 1 cup rolled oats
– 1 ½ cups almond milk (or any milk of your choice)
– 1 medium apple, diced (opt for a sweet variety like Fuji or Honeycrisp)
– 2 tablespoons caramel sauce (plus extra for drizzling)
These main ingredients form the heart of your caramel apple overnight oats. Rolled oats soak up the milk, making them creamy. Almond milk adds a nutty flavor. Sweet apples bring a fresh taste, while caramel sauce gives that sweet touch.
Optional Ingredients
– 1 tablespoon maple syrup (optional for added sweetness)
– Chopped nuts (such as pecans or walnuts) for topping
Optional ingredients can enhance the dish. Maple syrup can add extra sweetness. Chopped nuts provide a nice crunch and extra flavor.
Seasoning
– 1 tablespoon chia seeds
– 1 teaspoon ground cinnamon
– A pinch of salt
Seasoning is key for flavor. Chia seeds help thicken the oats. Ground cinnamon adds warmth, and a pinch of salt balances the sweetness.
Step-by-Step Instructions
Preparing the Base
Combine 1 cup of rolled oats, 1 ½ cups of almond milk, and 1 tablespoon of chia seeds in a large bowl. Stir the mixture well. The chia seeds will help thicken the oats. Let it rest for about 5 minutes. This time allows the chia seeds to absorb some liquid and enhances the texture.
Incorporating Flavor
After the chia seeds have thickened the mix, fold in 1 diced apple and 2 tablespoons of caramel sauce. You can use sweet apples like Fuji or Honeycrisp for a delicious bite. Add 1 teaspoon of ground cinnamon and a pinch of salt. Stir everything until it blends nicely. The cinnamon adds warmth, while the caramel brings sweetness.
Refrigeration and Serving
Divide the oat mixture into individual jars. Make sure to share the diced apples evenly. Seal the jars tightly and place them in the fridge. Chill overnight or for at least 4 hours. This allows the oats to soak up the milk and the flavors to meld.
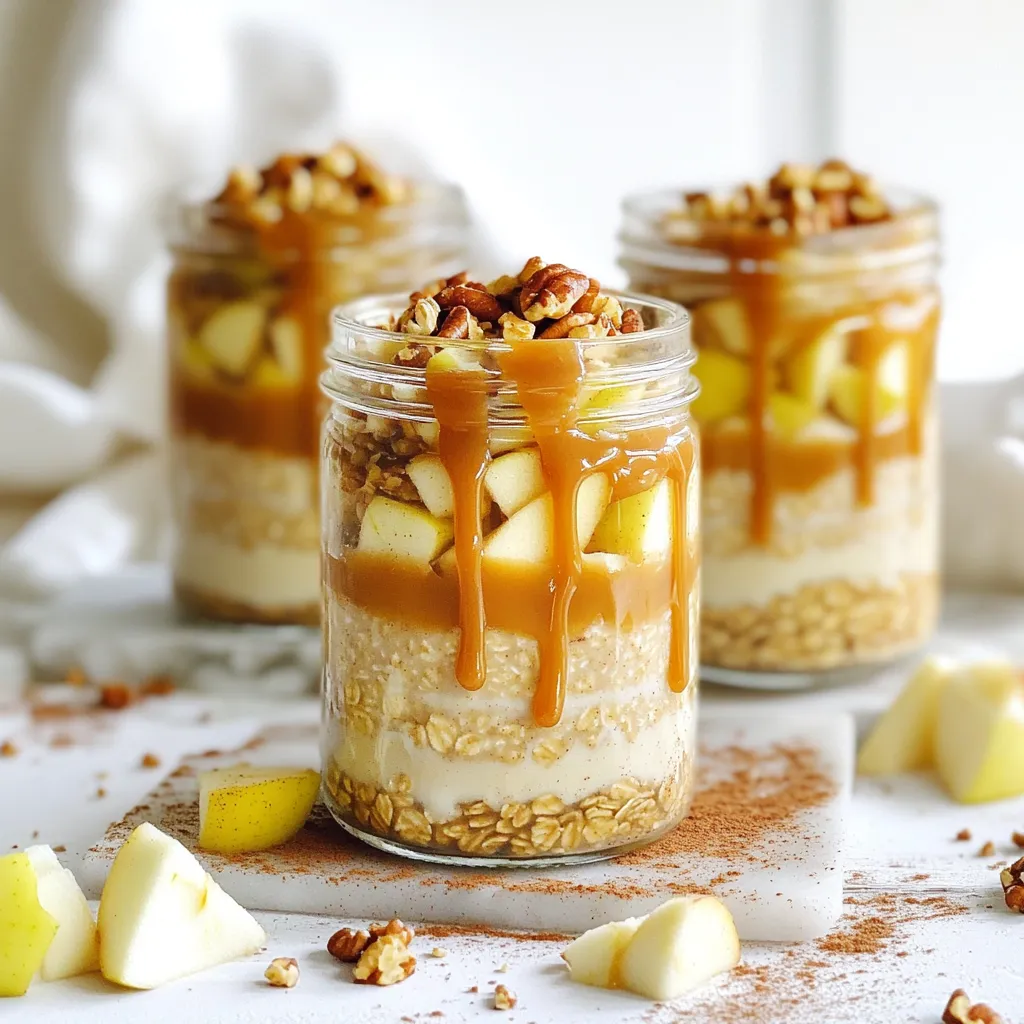
In the morning, give the oats a good stir. Top each jar with more caramel sauce and a sprinkle of chopped nuts. Pecans or walnuts add a lovely crunch. For a pretty presentation, serve in clear glass jars. Enjoy your tasty breakfast boost!
Tips & Tricks
Perfecting the Texture
To get the best texture, you should soak your oats well. Combine rolled oats, almond milk, and chia seeds in a bowl. Stir everything together. Let the mixture sit for about five minutes. This allows the chia seeds to absorb liquid and thicken the mix. When you add the diced apple and caramel, make sure to fold it gently. This helps keep the oats soft and creamy.
Enhancing Flavor
To boost the flavor, consider adding a dash of nutmeg or a drop of vanilla. These spices blend well with the apple and caramel. If you want a healthier option, try using date syrup or a homemade caramel made with dates. These options give you that sweet taste without the extra sugar.
Serving Suggestions
Get creative when serving your oats! You can layer them in clear jars to show off the colorful layers. For a nice touch, garnish with extra apple slices and a drizzle of caramel on top. You can also pair your oats with fresh fruits or a dollop of yogurt. This adds more texture and flavor to your breakfast.

Variations
Flavor Combinations
You can add nuts or seeds for extra crunch. Chopped pecans or walnuts work well. They add a nice texture and flavor. You can also try sunflower seeds or pumpkin seeds for a fun twist.
Other fruit options include pears or berries. Diced pears add sweetness and a soft bite. Berries like blueberries or strawberries bring a tart flavor. Experiment with different fruits to find your favorite mix.
Dietary Substitutions
Making this dish vegan or dairy-free is easy. Just swap almond milk for any plant-based milk you prefer. Options like soy, oat, or coconut milk are great choices.
If you need gluten-free oats, look for certified gluten-free rolled oats. They provide the same great taste without the gluten. Always check labels to ensure your choices fit your needs.
Seasonal Twists
Fall-inspired variations can include pumpkin spice. Just add a teaspoon of pumpkin spice to the mix. It gives a warm, cozy flavor perfect for autumn.
For holiday-themed oats, try adding cranberries. Dried cranberries add a sweet-tart flavor. Mix them in before refrigerating to enjoy a festive treat. These simple twists can make your breakfast exciting all year round!
Storage Info
Refrigeration Tips
To keep your caramel apple overnight oats fresh, store them in airtight containers. Glass jars or plastic containers work well. Make sure to seal them tightly to prevent air from getting in. This keeps your oats tasty and safe to eat.
Shelf Life
You can store these oats in the fridge for up to five days. Check for signs of spoilage before eating. If you see any mold or if they smell sour, throw them out. Fresh oats taste best, so aim to eat them within a few days.
Meal Prep Suggestions
Preparing overnight oats in bulk saves time. Make a few servings at once and store them. You can also freeze them for longer storage. Just make sure to leave some space in the container, as the oats will expand. When you’re ready to eat, thaw them overnight in the fridge.
FAQs
What type of oats are best for overnight oats?
Rolled oats are the best choice for overnight oats. They absorb liquid well and become soft overnight. Quick oats cook faster but may turn mushy. Steel-cut oats are chewier and require longer to soak. They are less ideal for overnight recipes.
Can I use water instead of milk?
Yes, you can use water instead of milk. However, milk adds creaminess and flavor. If you want more taste, try almond milk, oat milk, or soy milk. Each option brings a different flavor to your oats.
How can I make this recipe healthier?
To make this recipe healthier, you can reduce the caramel sauce. Use less or choose a sugar-free version. Adding nuts boosts protein and healthy fats. You can also add seeds or fresh fruit for extra nutrients.
Can I prepare these oats without chia seeds?
You can make these oats without chia seeds. If you skip them, use mashed banana or yogurt to thicken the mix. Both options add creaminess and flavor to the oats, keeping them delicious.
What’s the best way to heat overnight oats?
To heat overnight oats, place them in a microwave-safe bowl. Heat for 30 to 60 seconds. Stir the oats halfway through to ensure even heating. Add a splash of milk if they seem dry. Enjoy warm for a cozy breakfast!
This blog post outlined how to make delicious overnight oats. We discussed the main ingredients like oats, almond milk, and sweet apples. I shared tips to enhance flavor and texture. You learned about variations and dietary substitutions to suit your needs.
Now, you have the knowledge to create your own tasty overnight oats, perfect for any meal. Enjoy experimenting with flavors and make this recipe your own! Your breakfast can be both healthy and fun. Get creative and enjoy every bite!


![- Ripe avocados: Choose avocados that feel soft but not mushy. Ripe avocados add creaminess. They bring healthy fats and nutrients to the mousse. When selecting avocados, look for dark green skin. A little give when pressed is a good sign. Avoid avocados with large dark spots or cracks. - Cocoa powder: The type of cocoa powder you use matters. Choose high-quality, unsweetened cocoa for the best flavor. Dutch-processed cocoa has a smooth taste. Regular cocoa has a rich chocolate flavor. Both are great choices. - Sweeteners: Maple syrup and agave syrup are both tasty options. Maple syrup gives a unique flavor. It adds a slight caramel note. Agave syrup is milder and sweeter. It blends well without changing the taste much. You can adjust the sweetness based on your preference. - Non-dairy milk options: You can use almond, coconut, or oat milk. Almond milk is light and nutty. Coconut milk adds creaminess and a hint of tropical flavor. Oat milk is thick and wholesome. Any of these choices work well to create a smooth texture. - Flavor enhancers: Vanilla extract adds warmth and depth. A little cinnamon gives an extra layer of flavor. Both options are simple and enhance the chocolate taste. You can try adding a pinch to see what you like best. - Garnish suggestions: Dark chocolate shavings are a rich topping. They add elegance and extra chocolate flavor. Fresh berries like raspberries or strawberries bring brightness. Their color and tartness balance the rich mousse perfectly. These garnishes make the dish even more appealing. You can find the full recipe at the beginning of this article. First, you need to prepare your avocados. To peel and pit them easily, slice the avocado in half. Twist the halves apart. Use a spoon to scoop out the pit. Then, scoop the green flesh into a bowl. Next, measure your ingredients. For this mousse, you will need: - 2 ripe avocados, peeled and pitted - 1/2 cup unsweetened cocoa powder - 1/3 cup maple syrup (or agave syrup) - 1/4 cup almond milk (or any non-dairy milk of your choice) - 1 teaspoon vanilla extract - 1/4 teaspoon sea salt - A pinch of cinnamon (optional) Combine all these ingredients in a food processor. Now, let’s blend for that creamy texture. Start blending on high speed. Stop occasionally to scrape down the sides. This ensures everything mixes well. Blend until it’s smooth. Taste your mousse after blending. If you desire more sweetness, add extra maple syrup. Blend again to mix in the syrup. Adjust to your liking for the best flavor. Chilling the mousse is very important. It allows the flavors to develop and the mousse to thicken. Cover the individual dishes with plastic wrap. Chill them in the fridge for at least 30 minutes. For serving, get creative! Garnish your mousse with dark chocolate shavings or fresh berries. This adds a pop of color and texture. You can serve it in small bowls or glasses for a fun touch. Enjoy your rich and creamy vegan chocolate avocado mousse! - Over-blending the mousse: Blending too long makes it thin. Blend just until smooth. You want a creamy texture, not soup. - Using unripe avocados: Unripe avocados are hard and bitter. Always pick ripe ones. They should feel slightly soft. - Balancing sweetness: Taste your mousse before serving. If it's too bitter, add more maple syrup. Start with a little more. Keep tasting until it’s just right. - Experimenting with additional flavorings: You can try adding a pinch of espresso or a drop of peppermint extract. These flavors can make the mousse even more exciting. - Best food processors for smooth blending: Look for a powerful food processor. A 600-watt model works well. It blends the ingredients evenly and quickly. - Storage containers for chilling the mousse: Use small bowls with lids. This keeps the mousse fresh. Glass containers are a great choice. They help keep the mousse cool and tasty. For the full recipe, check out the [Full Recipe]. {{image_4}} You can make your Vegan Chocolate Avocado Mousse even more fun by adding nut butters. Try almond or peanut butter for a rich and creamy taste. These nut butters enhance the texture and add healthy fats. You can also infuse flavors like coffee or mint. A splash of coffee brings a deep, bold taste. Mint adds a refreshing twist that brightens up the dessert. Both options create a unique mousse that surprises and delights. For those with dietary needs, gluten-free variations are easy to make. All the ingredients in this mousse are naturally gluten-free. This makes it a great choice for anyone avoiding gluten. You can also opt for sugar-free alternatives. Using stevia or monk fruit keeps the mousse sweet without added sugar. These substitutes do not change the creamy texture. You can enjoy a guilt-free treat that still tastes amazing. Transform your mousse into parfaits for a stunning dessert. Layer the mousse with fresh fruits or granola in clear cups. This adds color and texture, making your dessert look beautiful. You can use the mousse as a filling for cakes or other desserts. It works well between layers of cake or as a filling for tart shells. This gives you a chance to be creative with your presentation. For the complete recipe, check out the Full Recipe section. To keep your Vegan Chocolate Avocado Mousse fresh, follow these steps: - Chill the mousse: After making it, cover your mousse with plastic wrap or a lid. This helps prevent air from getting in. - Use airtight containers: Store the mousse in airtight containers. This keeps it from absorbing other flavors in the fridge. - Refrigerate promptly: Place it in the fridge as soon as it's ready. This helps maintain its creamy texture. The mousse stays fresh for about 3 to 5 days in the fridge. Always check for any changes in smell or texture before serving. Can you freeze Vegan Chocolate Avocado Mousse? Yes, you can! Freezing is a great option if you want to store it longer. - Portion it out: Divide the mousse into small portions before freezing. This makes it easy to thaw only what you need. - Use freezer-safe containers: Make sure to use containers that are safe for freezing. This prevents freezer burn. When you're ready to enjoy it again, follow these steps to thaw: - Thaw in the fridge: Place the frozen mousse in the fridge overnight. This keeps it at a safe temperature while it thaws. - Stir before serving: After thawing, give the mousse a quick stir. This helps regain its smooth texture. By following these storage and freezing tips, you can enjoy your Vegan Chocolate Avocado Mousse at its best. For the complete recipe, check out the Full Recipe section. Yes, you can use different sweeteners. Honey or agave syrup works well too. Each sweetener changes the taste slightly. Honey adds a floral note, while agave is milder. You can experiment to find your favorite. Just keep the amount similar to maple syrup for the best results. This mousse stays fresh for about three days in the fridge. Store it in an airtight container to keep it from drying out. The mousse may thicken as it sits, so stirring it gently can help restore its creamy texture. Enjoy it within this timeframe for the best flavor and quality. Yes, this dessert is quite healthy! Avocados are full of good fats and nutrients. They can boost heart health and provide fiber. Cocoa powder is also rich in antioxidants, adding to the health benefits. This mousse is a guilt-free treat that satisfies your sweet tooth while nourishing your body. Absolutely! To make it nut-free, choose oat milk or soy milk instead of almond milk. Both options work well and keep the mousse creamy. Ensure your cocoa powder is also nut-free. With these swaps, you can enjoy this tasty dessert without any nut allergy concerns. Vegan Chocolate Avocado Mousse is simple and fun to make. You learned about key ingredients like ripe avocados, cocoa powder, and sweeteners. I shared tips on preparation, blending, and storing your mousse. Mixing in flavors or making parfaits adds creativity. Remember, use ripe avocados for the best taste. This mousse is healthy and easily customizable for different diets. Enjoy your tasty treat, and don't hesitate to share your own variations!](https://joymealplan.com/wp-content/uploads/2025/06/f08f53b2-ba89-49fb-bc73-48bd2b3a08b2-768x768.webp)