Caramel Apple Upside Down Cake Delightful Treat

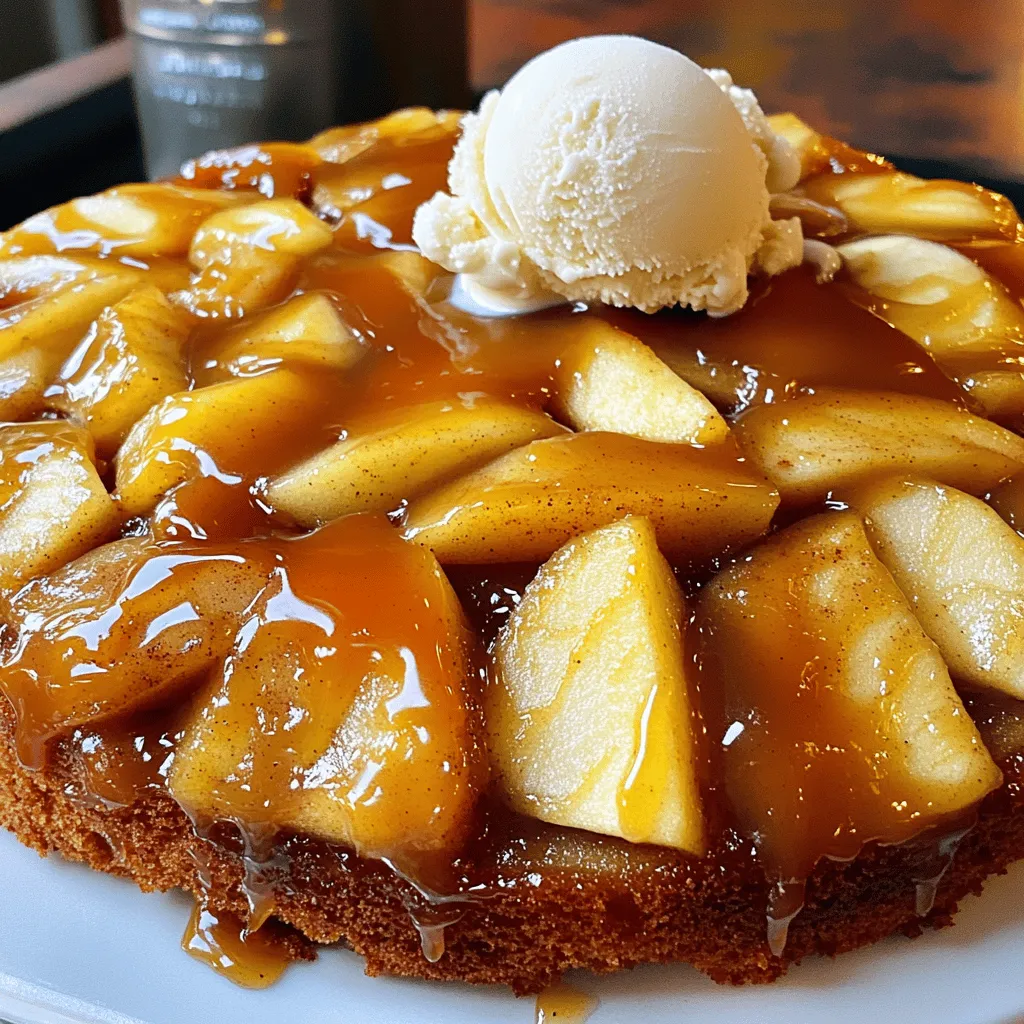
Craving a sweet twist on a classic dessert? This Caramel Apple Upside Down Cake is your answer! It combines gooey caramel and tender apples baked right into a soft cake. You’ll learn how to prepare this delightful treat step-by-step. Whether you’re hosting a party or enjoying a cozy night in, this cake will impress. Let’s dive into the sweet magic of this recipe together!
Ingredients
Main Ingredients for Caramel Apple Upside Down Cake
To make this delicious cake, gather these main ingredients:
– 3 medium apples, peeled, cored, and sliced into thin wedges
– 1 cup packed brown sugar
– 4 tablespoons unsalted butter, plus extra for greasing
– 1 teaspoon ground cinnamon
– 1 ½ cups all-purpose flour
– 1 teaspoon baking powder
– ½ teaspoon baking soda
– ½ teaspoon fine salt
– ½ cup granulated sugar
– 2 large eggs, at room temperature
– ½ cup buttermilk, at room temperature
– 1 teaspoon pure vanilla extract
These ingredients combine to create a rich, flavorful cake. The apples bring sweetness, while the brown sugar adds a deep caramel taste.
Recommended Tools and Equipment
You will need some basic tools to make this cake:
– 9-inch round cake pan
– Small saucepan
– Large mixing bowls
– Whisk
– Electric mixer
– Spatula
– Knife
These tools help you mix, bake, and serve your cake with ease. Make sure your cake pan is non-stick, or grease it well to avoid any sticking.
Optional Garnishes
To make your cake even more special, consider these garnishes:
– A scoop of creamy vanilla ice cream
– Fresh apple slices
– A sprinkle of cinnamon
– Extra caramel sauce
These toppings enhance the look and taste of your cake. They add a fun touch that everyone will enjoy.
Step-by-Step Instructions
Prepping the Oven and Cake Pan
First, set your oven to 350°F (175°C). Take a 9-inch round cake pan and grease it well with butter. This step helps the cake come out easily after baking.
Making the Caramel Layer
In a small saucepan, melt 4 tablespoons of unsalted butter over medium heat. Add in 1 cup of packed brown sugar and 1 teaspoon of ground cinnamon. Stir until the sugar dissolves and bubbles form. Pour the warm caramel into the greased cake pan and spread it evenly.
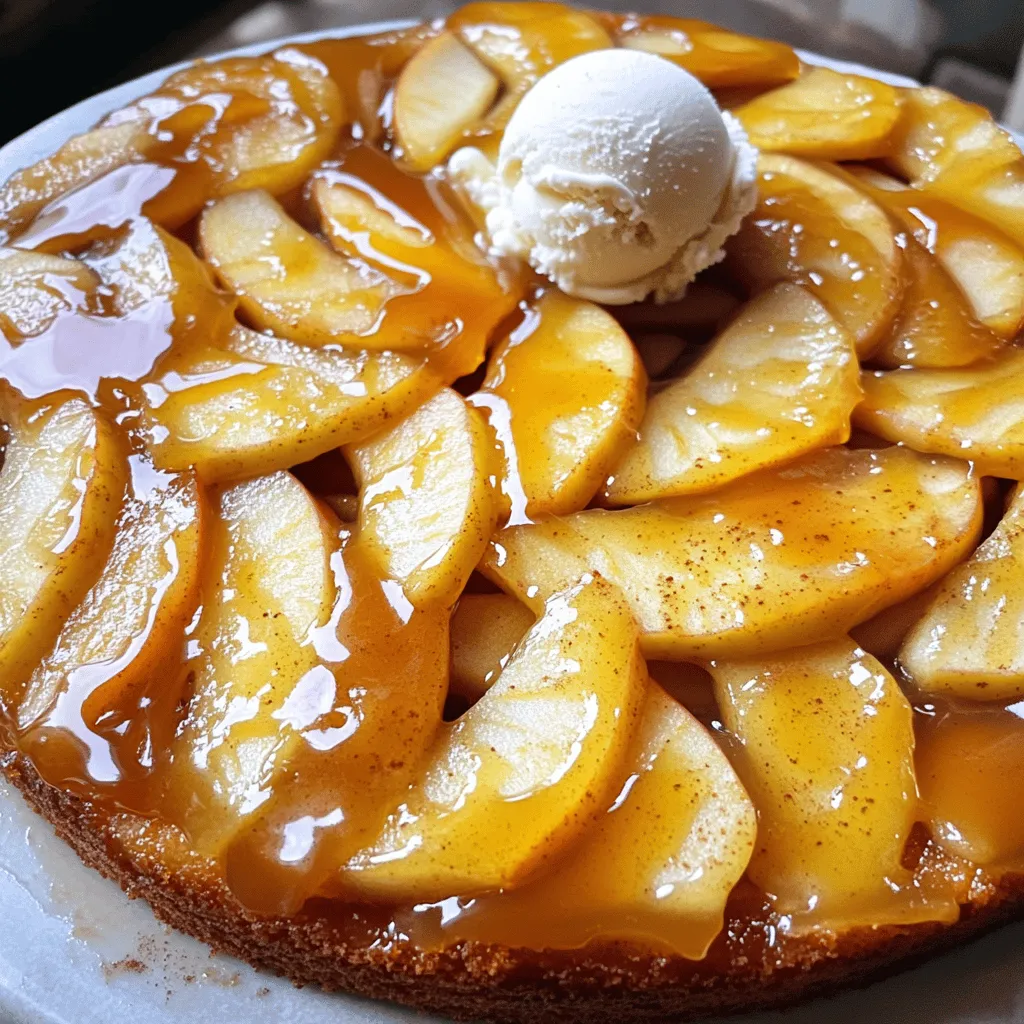
Arranging the Apples
Next, take 3 medium apples and slice them into thin wedges. Arrange these apple slices over the caramel layer in a pretty pattern. Overlapping the slices a bit makes it look even nicer.
Preparing the Cake Batter
In a large bowl, mix 1 ½ cups of all-purpose flour, 1 teaspoon of baking powder, ½ teaspoon of baking soda, and ½ teaspoon of fine salt. In another bowl, beat ½ cup of granulated sugar and 2 large eggs together until light and fluffy. Add in ½ cup of room temperature buttermilk and 1 teaspoon of pure vanilla extract. Mix until smooth. Gradually add the dry mix to the wet mix, stirring gently.
Baking the Cake
Pour the cake batter over the apples in the pan. Make sure it covers them well. Bake the cake for 35–40 minutes. Check if it’s done by inserting a toothpick into the center. It should come out clean or with a few moist crumbs.
Inverting and Cooling the Cake
Once baked, let the cake cool in the pan for 10 minutes. Use a knife to loosen the edges. Carefully turn the cake onto a serving plate, keeping in mind that the caramel will be hot! Allow the cake to cool for another 10 minutes before slicing and serving.
Tips & Tricks
Perfecting the Caramel Texture
To get the right caramel texture, use medium heat. Melt the butter slowly. Mix in the brown sugar and cinnamon. Stir until it bubbles gently. Avoid rushing this step. If the caramel is too thin, it won’t hold the apples well. If it’s too thick, it may burn. Look for a nice, smooth mixture.
Ensuring a Moist Cake
To keep the cake moist, use room temperature ingredients. Room temperature eggs and buttermilk mix better. Overmixing can lead to a dry cake, so stir gently. A few lumps in the batter are okay. Also, bake the cake just until a toothpick comes out clean. Checking early helps prevent overbaking.
Serving Suggestions
This cake is best served warm. Pair it with a scoop of vanilla ice cream. Drizzle extra caramel sauce on top for a treat. You can also add fresh apple slices or a sprinkle of cinnamon. This adds a nice touch to your plate. Enjoy it with family and friends for a delightful dessert.

Variations
Adding Nuts or Dried Fruits
You can add nuts or dried fruits to your cake for extra flavor. Chopped walnuts or pecans work well. They add a nice crunch. Dried cranberries or raisins can also enhance the sweetness. Just mix them into the batter before pouring it over the apples. This step gives the cake a unique twist.
Using Different Types of Apples
Using different types of apples can change the taste. Tart apples like Granny Smith offer a sharp flavor. Sweet apples like Fuji or Honeycrisp add more sweetness. You can mix and match the apples for a balanced taste. Each apple type brings its own charm to this cake.
Gluten-Free Option
To make a gluten-free version, swap the all-purpose flour. Use a gluten-free flour blend instead. Ensure the blend contains xanthan gum for proper texture. This option allows more people to enjoy the cake. You won’t lose any flavor, and the cake will still be delicious!
Storage Info
How to Store Leftover Cake
To keep your leftover cake fresh, place it in an airtight container. You can also cover it tightly with plastic wrap. Store it at room temperature for up to three days. If you want it to last longer, refrigerate it. Just remember, the cake might dry out a bit in the fridge.
Reheating Instructions
When you’re ready to enjoy your cake again, preheat your oven to 350°F (175°C). Place a slice of cake on a baking sheet. Heat it for about 10 minutes. This warms the cake and makes the caramel nice and gooey again. You can also use the microwave. Heat it for about 15-20 seconds, but watch it closely.
Freezing Tips
If you have extra cake, you can freeze it. First, let the cake cool completely. Then, wrap it tightly in plastic wrap. After that, place it in a freezer-safe bag or container. It can last in the freezer for up to three months. When you’re ready to eat it, thaw it in the fridge overnight. Enjoy your tasty treat!
FAQs
Can I use different fruits in this cake?
Yes, you can use other fruits. Pears, peaches, or plums work well. Just slice them thinly and arrange them like the apples. This adds a new twist to your cake.
How do I know when the cake is done baking?
Check the cake at 35 minutes. Insert a toothpick in the center. If it comes out clean or with a few moist crumbs, it’s done. If not, bake for a few more minutes.
What can I substitute for buttermilk?
You can mix milk with vinegar or lemon juice. Use 1 cup of milk and 1 tablespoon of vinegar. Let it sit for 5 minutes. This creates a buttermilk-like texture.
How long does the cake last at room temperature?
The cake lasts about 2 to 3 days at room temperature. Store it in an airtight container to keep it fresh. Avoid direct sunlight to prevent drying out.
Can I make this cake ahead of time?
Absolutely! You can bake the cake a day ahead. Just wrap it well in plastic wrap. When ready to serve, warm it up in the oven for a few minutes.
In this blog post, we explored how to make a delicious Caramel Apple Upside Down Cake. We covered key ingredients, the best tools, and optional garnishes. The step-by-step instructions guided you through each part, from making the caramel to baking the cake. I shared tips for a perfect texture and moist cake. You also learned tasty variations and smart storage methods. Now, you can impress your friends and family with this sweet treat. Dive into your kitchen and enjoy making this cake!


![The ingredients for Raspberry Almond Thumbprint Cookies are simple and delightful. Each one plays a key role in creating the perfect cookie. - 1 cup unsalted butter, softened to room temperature - 3/4 cup granulated sugar - 1 cup almond flour - 2 cups all-purpose flour - 1/2 teaspoon fine sea salt - 1 teaspoon pure vanilla extract - 1/4 teaspoon pure almond extract - 1/2 cup raspberry jam - Optional: Sliced almonds for garnish Using high-quality ingredients makes a big difference. The unsalted butter gives a rich flavor and smooth texture. Granulated sugar adds sweetness and helps the cookies spread just right. Almond flour brings a nutty taste that pairs well with raspberry jam. The fine sea salt balances the sweetness and enhances all the flavors. Vanilla and almond extracts add depth to the cookies. Raspberry jam gives that burst of fruity goodness, making each bite a treat. If you want a bit of crunch, sliced almonds add a lovely touch. For the complete recipe, check out the Full Recipe. Make sure you have everything ready before you start. Happy baking! - Preheat the oven to 350°F (175°C). This step ensures your cookies bake evenly and rise well. While the oven heats, line two baking sheets with parchment paper. This prevents cookies from sticking. - Cream the butter and sugar. In a large bowl, mix the softened butter and sugar until light and fluffy. This takes about 2-3 minutes. - Combine the dry ingredients and mix in the flavorings. Gradually add almond flour, all-purpose flour, and sea salt. Stir until a soft dough forms. Then, pour in vanilla and almond extracts and mix until smooth. - Roll the dough into balls. Use your hands to shape 1-inch balls and place them on the baking sheets. Make sure to space them about 2 inches apart, so they have room to spread. - Create indentations in each ball. Use your thumb or a small spoon to press down in the center of each dough ball. This creates a well for the jam. - Fill each indentation with raspberry jam. Carefully add about 1 teaspoon of jam to each well. Be careful not to overfill, or it may spill during baking. - Optional: For a crunchy texture, press sliced almonds around the edges of the filled indentations. - Bake the cookies. Place the baking sheets in the oven and bake for 12 to 15 minutes. Look for lightly golden edges. - Cooling instructions: After baking, let the cookies sit for about 5 minutes on the baking sheets. This helps them firm up. Then, transfer them to a wire rack to cool completely. - Presentation tips: Once cooled, dust the cookies lightly with powdered sugar. Arrange them on a decorative platter with fresh raspberries and mint leaves for a vibrant look. Check out the Full Recipe for more details and tips! Achieving the perfect texture To get soft and chewy cookies, use softened butter. This helps create the right mix of air and fat. Make sure to cream it well with the sugar. Mixing should take about 2 to 3 minutes. If you want a slight crunch, use finely ground almond flour. This gives the cookies a nice bite. Ensuring even cooking For even baking, space the cookie balls well on the baking sheet. Place them about 2 inches apart. This helps prevent them from sticking together. Additionally, rotate the baking sheets halfway through the baking time. This ensures all cookies bake evenly. Recommended amendments for enhanced flavor To boost the almond flavor, add a bit more almond extract. Just a few extra drops can make a big difference. You can also add a pinch of cinnamon for warmth. It pairs well with the raspberry jam and adds depth to the taste. Alternative fillings for the thumbprint While raspberry jam is great, try other flavors too! Strawberry, apricot, or even lemon curd can work well. Each jam gives a unique twist to the cookies. You can also use chocolate ganache for a rich, sweet center. Avoiding overfilling the jam When filling the cookie indentations, use about 1 teaspoon of jam. If you add too much, it can overflow during baking. This can make a mess on your baking sheet. Stick to the recommended amount for best results. Preventing dough from spreading too much in the oven If your dough spreads too much, try chilling it for about 30 minutes before baking. This helps firm up the butter. You can also bake on parchment paper, which helps maintain shape. Keeping your dough cold is key to keeping those lovely thumbprint shapes! {{image_4}} You can play with flavors in Raspberry Almond Thumbprint Cookies. Using different fruit jams can change the taste. Try strawberry, apricot, or blueberry jam for a fun twist. Each jam brings its unique flavor, making each bite special. You can also add chocolate or citrus flavors. Mix in some cocoa powder for a chocolatey touch. Or, add a hint of lemon zest for a fresh kick. These small changes can give your cookies a new vibe. Making these cookies gluten-free is easy. Substitute regular flour with gluten-free flour blends. Look for blends that include almond or coconut flour. These options keep the cookies soft and chewy. To maintain the right texture, watch the moisture levels. Gluten-free flour often absorbs more liquid. You may need to adjust the butter or add a bit of milk. This keeps the cookies from being too dry or crumbly. You can make these cookies vegan too. Replace butter with coconut oil or vegan butter. Both options keep the cookies rich and tasty. For eggs, use flaxseed meal or applesauce. These act as great binding agents. Flaxseed meal is simple to use. Mix one tablespoon with three tablespoons of water. Let it sit for a few minutes until it thickens. This blend works well and keeps the cookies together. To keep your Raspberry Almond Thumbprint Cookies fresh, store them in an airtight container at room temperature. This helps prevent them from getting stale. I recommend enjoying them within 5 to 7 days for the best taste. If you want to save some cookies for later, you can freeze them. For baked cookies, let them cool completely. Then, place them in a freezer-safe bag or container. They will stay good for up to three months. If you prefer to freeze the dough, wrap it tightly in plastic wrap, then place it in a freezer bag. When ready, thaw the dough in the fridge overnight for the best results. Reheating your cookies is easy! To keep their soft texture, preheat your oven to 300°F (150°C). Place the cookies on a baking sheet and warm them for about 5 to 8 minutes. This method helps restore their fresh-baked taste. Enjoy them warm, and they will feel like new! To make these cookies, follow these key steps: 1. Preheat your oven to 350°F (175°C). 2. Cream butter and sugar until fluffy in a bowl. 3. Combine dry ingredients: mix almond flour, all-purpose flour, and salt. 4. Add extracts: stir in vanilla and almond extracts. 5. Shape dough into 1-inch balls and place on a baking sheet. 6. Create indentations in the dough using your thumb. 7. Fill with jam: add raspberry jam to each well. 8. Bake cookies for 12 to 15 minutes until edges are golden. 9. Cool cookies on a wire rack after baking. This simple process leads to delicious treats. For the full recipe with detailed instructions, check the [Full Recipe]. Yes, you can use different nuts! If you are allergic to almonds, consider these options: - Pecans: Their rich flavor pairs well with fruit jams. - Walnuts: They add a nice crunch and depth to the cookies. - Cashews: These nuts give a creamy texture and mild taste. Feel free to experiment with your favorite nuts. Just chop them finely to mix into the dough or use them as a garnish. Many fun variations exist for thumbprint cookies. Here are some popular adaptations: - Different jams: Try strawberry, apricot, or blueberry for a twist. - Chocolate filling: Use chocolate ganache instead of jam for a rich flavor. - Citrus zest: Add lemon or orange zest to the dough for a fresh taste. These variations keep the recipe interesting. Mixing flavors can lead to delightful surprises! This blog post covered how to make delicious Raspberry Almond Thumbprint Cookies. We explored the ingredients, preparation steps, and tips for the best results. You learned about variations, storage methods, and common mistakes to avoid. Remember, baking is fun and rewarding. Try these cookies with different jams or flavors for new twists. Keep practicing to refine your skills. Enjoy baking and sharing these tasty treats with others. You now have the tools to impress your friends and family with your cookie-making expertise.](https://joymealplan.com/wp-content/uploads/2025/07/587afd51-3098-4c90-9a32-308dc83d9cb5-768x768.webp)


