Caramel Pecan Pumpkin Cheesecake Bars Delightful Treat

Get ready to indulge in a heavenly dessert with my Caramel Pecan Pumpkin Cheesecake Bars! With creamy pumpkin, crunchy pecans, and rich caramel, these bars blend autumn flavors perfectly. Not only are they easy to make, but they also impress at any gathering. So, grab your apron and let’s dive into this delicious recipe that will leave everyone craving more!
Ingredients
List of Ingredients
– 1 ½ cups graham cracker crumbs
– ½ cup unsalted butter, melted
– 1 cup cream cheese, softened to room temperature
– 1 cup pumpkin puree (canned or fresh)
– 1 cup powdered sugar
– 2 large eggs
– 1 teaspoon pure vanilla extract
– 1 teaspoon ground cinnamon
– ½ teaspoon ground nutmeg
– ¼ teaspoon ground ginger
– 1 cup pecans, chopped roughly
– ½ cup caramel sauce (store-bought or homemade, for drizzling)
For these caramel pecan pumpkin cheesecake bars, I love using simple, fresh ingredients. Each one plays a key role. The graham cracker crumbs make a crispy base. The melted butter helps hold it together. Cream cheese gives the bars a rich texture. Pumpkin puree adds a warm flavor.
Powdered sugar sweetens the mix, while eggs help it all set. The vanilla extract adds a lovely aroma. Spices like cinnamon, nutmeg, and ginger bring autumn to your kitchen. Lastly, chopped pecans add crunch and a nutty taste.
You can drizzle caramel sauce on top for extra sweetness. This mix creates a dreamy treat that is hard to resist!
Step-by-Step Instructions
Preparation
– Preheat Oven and Line Baking Dish
Set your oven to 350°F (175°C). Grab an 8×8-inch baking dish. Line it with parchment paper. Let some paper hang over two sides for easy removal later.
– Combine Graham Cracker Crumbs with Butter
In a bowl, mix 1 ½ cups of graham cracker crumbs with ½ cup of melted unsalted butter. Use a fork or your hands to mix until the crumbs look like damp sand.
– Press Crust into Baking Dish and Bake
Press the crumb mixture into the bottom of your lined dish. Make it even and firm. Bake for 8-10 minutes until it turns golden brown. Let it cool slightly.
Make the Pumpkin Cheesecake Filling
– Beat Cream Cheese and Add Remaining Ingredients
In a large bowl, beat 1 cup of softened cream cheese until smooth. Gradually add 1 cup of pumpkin puree, 1 cup of powdered sugar, and 2 large eggs. Mix in 1 teaspoon of vanilla extract, 1 teaspoon of ground cinnamon, ½ teaspoon of nutmeg, and ¼ teaspoon of ginger. Keep mixing until everything blends well.
– Fold in Chopped Pecans
Gently fold in 1 cup of roughly chopped pecans. Set aside a handful for later.
Assemble and Bake the Bars
– Pour Filling Over Crust
Pour the creamy pumpkin mixture onto the cooled crust. Use a spatula to spread it evenly.
– Bake and Cool
Bake the bars for 30-35 minutes. They should be set in the center but still jiggle a bit. After baking, let them cool at room temperature. For best results, cover and refrigerate for at least 2 hours.
Now, you’re ready to drizzle with caramel and enjoy your delicious bars!
Tips & Tricks
Common Baking Tips
How to Prevent Overbaking
To keep your cheesecake bars moist, check them before the timer ends. They should jiggle slightly in the center. If you see cracks, it means you baked too long. This can ruin the creamy texture. Keep an eye on them around the 30-minute mark.
Ensuring Smooth Filling Consistency
For a smooth filling, make sure your cream cheese is at room temperature. Cold cream cheese can create lumps. Beat it well before adding other ingredients. Mix until everything is fluffy and well combined. This helps create a silky texture that melts in your mouth.
Serving Suggestions
Presentation Tips for Serving
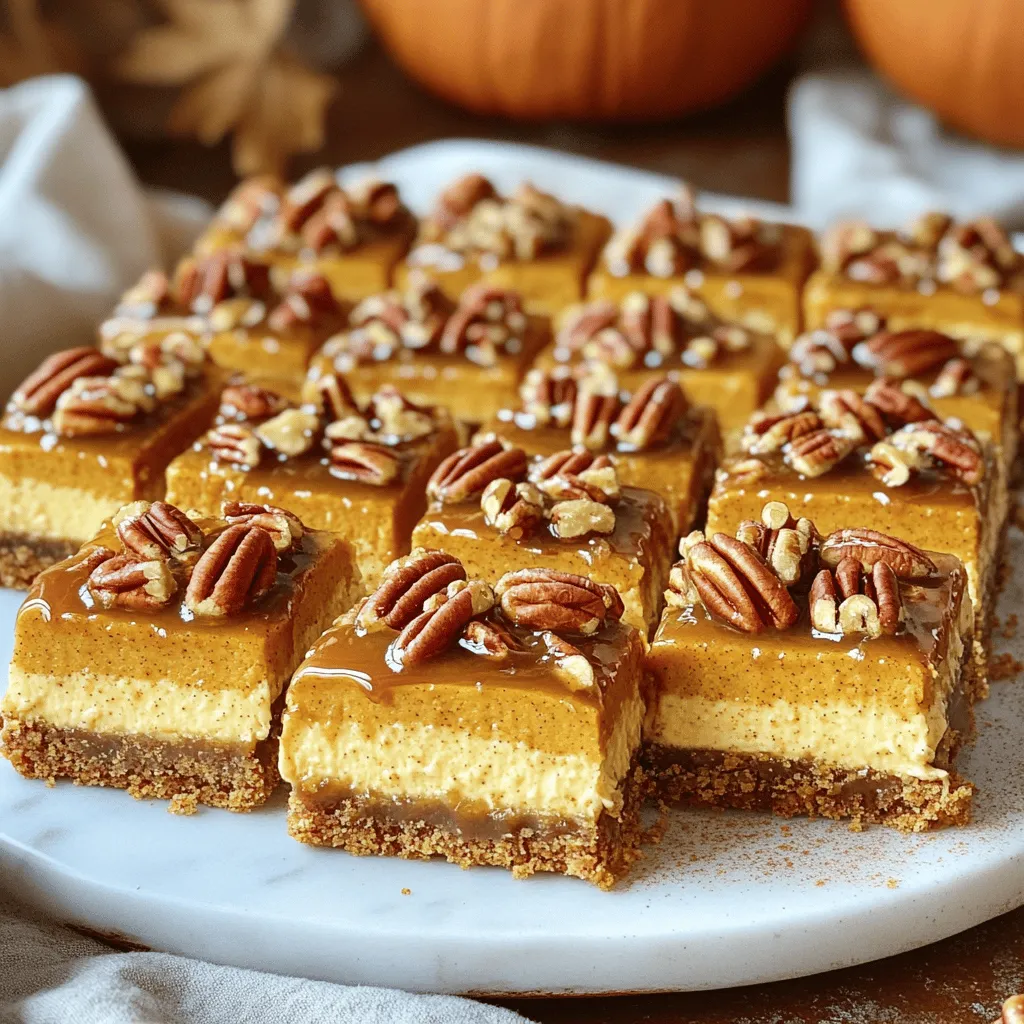
Cut the bars into neat squares and place them on a pretty platter. For a nice touch, sprinkle some cinnamon on top. A dollop of whipped cream beside each bar adds an extra layer of flavor. It looks beautiful and makes your dessert pop.
Recommended Pairings
Serve these bars with a warm cup of coffee or tea. The flavors blend well together. You can also add a scoop of vanilla ice cream for a cool contrast. This adds richness and balances the spices in the cheesecake.

Variations
Flavor Variations
You can change the flavor of these bars easily. Try adding different nuts, like walnuts or almonds. These will add a nice crunch and taste. If you want more spice, consider allspice or cloves. These spices can give your bars a unique twist.
Substitutions
Some may need to adjust the recipe for health reasons. You can use alternative sweeteners, like stevia or honey. These options can keep the sweetness while reducing sugar. If you need a gluten-free option for the crust, use almond flour or gluten-free graham crackers. This allows everyone to enjoy the treat, no matter their needs.
Storage Info
How to Store Leftovers
Refrigeration Guidelines
To keep your caramel pecan pumpkin cheesecake bars fresh, store them in the fridge. Place the bars in an airtight container. They will last up to five days. If you slice them, use parchment paper between layers to prevent sticking.
Freezing Instructions for Longer Storage
For longer storage, you can freeze the bars. Wrap each bar tightly in plastic wrap. Then, place them in a freezer bag or container. They will stay fresh for up to three months. Thaw them overnight in the fridge before serving.
Recommended Storage Containers
Best Types of Containers for Keeping Freshness
Use glass or plastic containers with tight-fitting lids. These keep moisture in and air out. If you prefer, use a baking dish covered with aluminum foil. This helps keep the bars fresh while making them easy to serve later.
FAQs
Can I use fresh pumpkin instead of canned?
Yes, you can use fresh pumpkin. Make sure to cook it and puree it first. You want the puree to be smooth and thick. Fresh pumpkin gives a nice flavor. Just be sure to measure one cup for the recipe.
How long do the cheesecake bars last in the fridge?
These cheesecake bars last about five days in the fridge. Store them in an airtight container. This keeps them fresh and tasty.
Can I make these bars ahead of time?
Absolutely! You can make these bars one or two days ahead. This helps the flavors blend well. Just remember to chill them in the fridge after baking.
Is it necessary to chill the bars before serving?
Yes, chilling is key. It helps the bars set up well. This makes them easier to cut and serve. Aim for at least two hours in the fridge before you enjoy them.
You now have a clear path to making delicious pumpkin cheesecake bars. We covered the key ingredients needed, step-by-step instructions for preparation, and handy tips to ensure a smooth bake. Remember to get creative with flavors and storage tips to keep your treats fresh. Enjoy experimenting and serving these bars to friends and family. With these methods, your pumpkin cheesecake bars will impress every time!


![To make these no-bake lemon cheesecake bites, gather the following ingredients: - 1 cup graham cracker crumbs - 1/4 cup unsalted butter, melted - 2 tablespoons granulated sugar - 8 oz cream cheese, softened to room temperature - 1/2 cup powdered sugar - 1/4 cup plain Greek yogurt - 2 tablespoons freshly squeezed lemon juice - Zest from 1 lemon - 1/2 teaspoon pure vanilla extract - Fresh berries (such as strawberries, blueberries, or raspberries) for garnish (optional) These ingredients create a creamy and zesty treat. The graham cracker crumbs form a delightful crust, while cream cheese adds richness. Greek yogurt gives a light tang, balancing the sweetness. Fresh lemon juice and zest provide a bright flavor that makes these bites so refreshing. The optional berries add color and a burst of fruitiness, making each bite even more tempting. For the complete recipe, check out the [Full Recipe]. - Start by combining the graham cracker crumbs, melted butter, and granulated sugar in a bowl. - Mix until it feels like damp sand and holds together. - Press this mixture firmly into the bottom of mini muffin tins or silicone molds. - Chill the crust in the fridge for about 10 minutes to set. - In a clean bowl, beat the softened cream cheese with powdered sugar until smooth. - Add in plain Greek yogurt, freshly squeezed lemon juice, lemon zest, and vanilla extract. - Mix these ingredients until you have a creamy and fluffy filling. - Spoon the lemon cheesecake filling into each crust. - Use a spatula to smooth the tops for an even look. - Return the molds to the fridge and chill for at least 2 hours, or until firm. You can find the Full Recipe for precise measurements and tips! Softened cream cheese is key for smooth cheesecake bites. If it’s too cold, it will clump. Let your cream cheese sit out for 30 minutes before mixing. Chilling helps the bites set and firm up. I recommend at least 2 hours in the fridge. This makes them easy to pop out and enjoy. Want a bolder lemon taste? Add extra lemon zest to the filling. This little trick brightens the flavor. You can also swap plain Greek yogurt for flavored yogurt. Lemon or vanilla yogurt adds a fun twist, making these bites even more delicious. Garnishing makes your cheesecake bites stand out. Fresh berries on top add color and taste. Drizzling honey brings out sweetness and shine. You can sprinkle extra lemon zest for a pop of brightness. Use a decorative platter to showcase your treats for friends and family. {{image_4}} You can easily change the flavor of your no-bake lemon cheesecake bites. Here are two fun ideas: - Berry cheesecake bites: Swap the lemon juice for mixed berry puree. Use strawberries, blueberries, or raspberries. This adds a sweet and fruity twist. The berry flavor pairs well with the creamy filling. - Chocolate lemon cheesecake bites: Mix in cocoa powder with the cream cheese. This gives a rich chocolate flavor. You still get the bright lemon taste, but with a chocolatey touch. Making these bites fit different diets is simple. Here’s how: - Gluten-free alternatives for crust: Use gluten-free graham cracker crumbs. You can also blend nuts or oats to make a crust. Just mix them with melted butter and sugar. - Substituting dairy for vegan options: Use vegan cream cheese instead of regular cream cheese. You can also replace yogurt with coconut yogurt. These swaps keep the bites creamy and delicious. Feel free to experiment with these variations. You can create a cheesecake treat that fits your taste and dietary needs. Enjoy! To keep your No-Bake Lemon Cheesecake Bites fresh, refrigeration is key. Store them in an airtight container. This helps to lock in moisture and keeps them from drying out. If you want to freeze them, place the bites in a single layer on a baking sheet. Once frozen, transfer them to a freezer-safe container or bag. Make sure to label it with the date. They are easy to grab for a quick treat later! How long do they last in the fridge? These cheesecake bites can last up to 5 days when stored properly in the refrigerator. After that, they may lose their taste and texture. Always check for freshness. Signs of spoilage to watch for include an off smell, discoloration, or an unusual texture. If you notice any of these signs, it’s best to toss them out. For the full recipe, check out the recipe section. No-Bake Lemon Cheesecake Bites need at least 2 hours to chill. This time lets them firm up. If you want them extra cold, you can chill them longer. Just ensure they are firm to the touch before serving. This helps create that perfect bite! Yes, you can use different cheeses! Cream cheese gives the best flavor and texture. However, you might try mascarpone for a richer taste. Cottage cheese can work too, but blend it well to avoid lumps. Each cheese adds a unique twist to these bites. If you don't have graham crackers, try crushed cookies or oat flour. Digestive biscuits work great too! For a gluten-free option, use gluten-free cookies or almond flour. These swaps can change the flavor, but they still make a good crust. Absolutely! These cheesecake bites are great to make a day ahead. Just chill them overnight. This allows the flavors to meld nicely. Be sure to cover them well to keep them fresh. They will taste even better the next day! To make these bites vegan, substitute cream cheese with a vegan cream cheese. For the crust, use coconut oil instead of butter. Replace Greek yogurt with a plant-based yogurt. You can also use maple syrup instead of powdered sugar. These changes keep the flavor while making it vegan-friendly. For the full recipe, check out the [Full Recipe]. You now have the steps to make delicious No-Bake Lemon Cheesecake Bites. We covered all ingredients, from graham cracker crumbs to fresh berries. I shared helpful tips for perfect texture and exciting flavor ideas. Variations let you adapt these bites for any taste or diet. Remember to store them properly for the best quality. Enjoy creating these treats, and don't hesitate to get creative!](https://joymealplan.com/wp-content/uploads/2025/07/839985c9-ca67-4b01-8b72-ff6921bf99fe-768x768.webp)

![To make S’mores Cookie Bars, gather these key ingredients: - 1 cup unsalted butter, softened - 1 cup packed brown sugar - 1/2 cup granulated sugar - 2 large eggs - 1 teaspoon pure vanilla extract - 2 1/4 cups all-purpose flour - 1 teaspoon baking soda - 1/2 teaspoon salt - 1 cup semi-sweet or milk chocolate chips - 1 cup mini marshmallows - 3/4 cup crushed graham crackers - Additional chocolate chips and mini marshmallows for topping If you need swaps, here are a few ideas: - Use margarine instead of butter if needed. - Coconut sugar can replace brown sugar for a unique taste. - For a dairy-free option, try a plant-based butter and dairy-free chocolate chips. - You can also use large marshmallows cut into smaller pieces if mini ones are not available. When choosing your ingredients, consider these tips: - Select fresh butter for the best flavor. - Look for chocolate chips with a high cocoa content; they taste richer. - Check for freshness on your baking soda and flour. - Choose mini marshmallows that are soft and fluffy for the best texture. - For crushed graham crackers, buy a brand with simple, natural ingredients for the best taste. These ingredient insights will help you create the best S’mores Cookie Bars. Happy baking! 1. Preheat your oven to 350°F (175°C). 2. Prepare a 9x13 inch baking pan. You can grease it or line it with parchment paper for easy removal. 3. In a large bowl, cream 1 cup of softened butter, 1 cup of packed brown sugar, and 1/2 cup of granulated sugar. Beat until light and fluffy. 4. Add 2 large eggs, one at a time, and mix well after each addition. Stir in 1 teaspoon of pure vanilla extract. 5. In another bowl, mix together 2 1/4 cups of all-purpose flour, 1 teaspoon of baking soda, and 1/2 teaspoon of salt. 6. Gradually add the dry mix to the wet mix, stirring gently. Be careful not to overmix. 7. Fold in 1 cup of chocolate chips, 1 cup of mini marshmallows, and 3/4 cup of crushed graham crackers. Make sure they are evenly spread in the dough. 8. Take half of the cookie dough and spread it in the bottom of the pan. Press it down firmly. 9. Add a layer of chocolate chips and mini marshmallows over the dough. This will be your tasty filling. 10. With the remaining dough, dollop it over the filling. Gently spread it out, leaving some gaps for the marshmallows to peek through. 11. Top with extra chocolate chips and mini marshmallows. 12. Bake in the preheated oven for 25-30 minutes. Look for golden edges and a set center. 13. Once baked, let the bars cool in the pan for about 10 minutes. 14. Transfer the bars to a cutting board. Slice them into squares. 15. For the best experience, serve warm for a gooey bite or let them cool for firmer bars. You can even dust them with crushed graham crackers or serve with ice cream. This is a fun and easy way to enjoy S’mores in a cookie bar form. For the full recipe, check out the details above! To get the best texture for your S’mores cookie bars, focus on creaming the butter and sugars well. This step adds air to the dough, making it light. Don't overmix when adding the flour; this keeps the bars soft. Also, make sure to let your bars cool in the pan for a bit. This helps them set perfectly. One common mistake is overbaking. Keep an eye on the timer. The edges should look golden, but the center can be soft. Another mistake is not measuring the ingredients correctly. Use a kitchen scale when you can. Lastly, avoid pressing the dough too hard into the pan. You want a light touch for a better rise. To boost the flavor in your S’mores cookie bars, consider using dark chocolate instead of semi-sweet. It adds a richer taste. You can also mix in some toasted nuts for crunch. If you love a bit of spice, a pinch of cinnamon works wonders. Lastly, consider adding a dash of sea salt on top before baking. It enhances the sweetness and richness beautifully. For the full recipe, click here: [Full Recipe]. {{image_4}} You can elevate your S’mores cookie bars with gourmet ingredients. Try using high-quality chocolate, like dark chocolate or sea salt caramel chocolate. This gives a rich flavor that takes these bars to a new level. You can also add toasted coconut for a tropical twist. Another great idea is to sprinkle flaky sea salt on top right before serving. This adds a nice contrast to the sweetness. If you need a gluten-free option, you can easily adapt this recipe. Use gluten-free flour blends that measure cup-for-cup like regular flour. Make sure to check that your chocolate chips and graham crackers are also gluten-free. This way, everyone can enjoy these tasty bars without worry. For a fun twist, add unique flavors to your S’mores cookie bars. Swirl in Nutella or peanut butter into the dough before baking. You can also mix in chopped nuts for extra crunch. Try adding crushed peppermint candies for a festive touch during the holidays. The possibilities are endless, and you can customize these bars to fit any taste! For the complete recipe, check out [Full Recipe]. To keep your S’mores Cookie Bars fresh, store them in an airtight container. This helps avoid drying out. Place parchment paper between layers to prevent sticking. They will stay good at room temperature for about four days. If you want to keep them longer, refrigeration is a great option. Just remember to bring them to room temperature before serving for the best flavor. You can freeze S’mores Cookie Bars for up to three months. First, let them cool completely. Then, cut them into squares. Wrap each square in plastic wrap tightly. Place the wrapped bars in a freezer bag or container. Label it with the date. When you’re ready to enjoy, thaw them overnight in the fridge or for a few hours at room temperature. To reheat S’mores Cookie Bars, preheat your oven to 350°F (175°C). Place the bars on a baking sheet. Cover them loosely with foil to prevent burning. Heat for about 10 minutes or until warm. This will help restore their gooey texture and melt the chocolate again. Enjoy them warm for the best experience! For the full recipe, check out the recipe section above. S’mores cookie bars last about five days at room temperature. Store them in an airtight container. This keeps them fresh and soft. You can also refrigerate them for up to a week. Just remember to bring them to room temperature for the best taste. Yes, you can make these bars ahead of time. They are great for meal prep or parties. Bake and cool them completely. Then, cut them into squares and store them in an airtight container. You can also freeze them for up to three months. Just thaw them before serving. If you don't have mini marshmallows, you can use large marshmallows. Cut them into smaller pieces to fit. Alternatively, try using marshmallow fluff for a gooey texture. You can also skip marshmallows altogether and use caramel instead. This adds a different kind of sweetness. For the full recipe, visit the recipe section above. In this post, we covered how to make delicious s’mores cookie bars. We looked at the key ingredients and their best substitutes. You learned step-by-step how to prepare, bake, and serve these treats. We shared tips for perfect texture and flavor. You can also explore fun variations for added taste. Remember to store them well for freshness. With these tips, you're ready to create a tasty batch. Enjoy making and sharing your s’mores cookie bars!](https://joymealplan.com/wp-content/uploads/2025/07/947e80de-fe9c-4bdc-b9c7-cc0f2244d142-768x768.webp)


