Caramel Pecan Turtle Brownies Deliciously Indulgent Treat

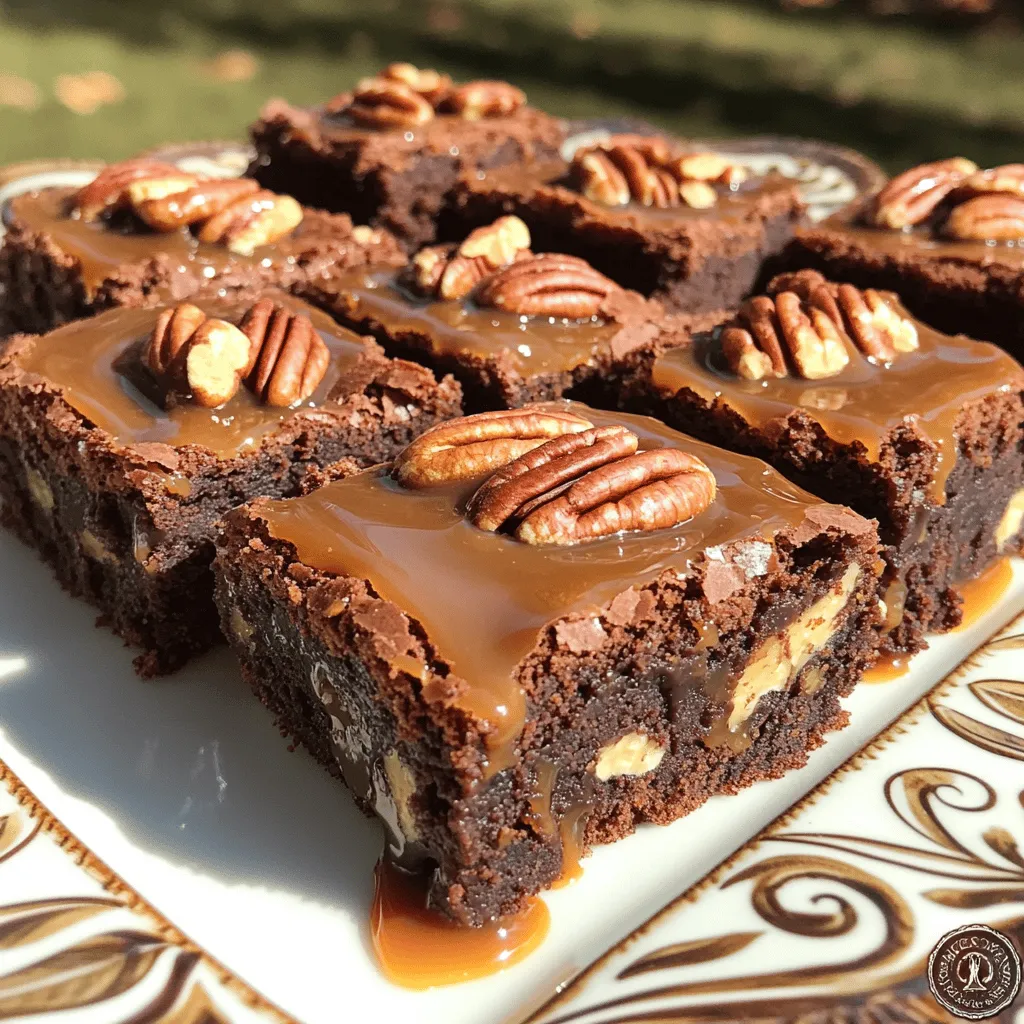
Craving a sweet treat that’s truly indulgent? Look no further! These Caramel Pecan Turtle Brownies create a perfect mix of rich chocolate, crunchy pecans, and gooey caramel. I’ll guide you step-by-step through making these mouthwatering brownies at home. With a few simple ingredients and easy instructions, you’ll whip up a dessert that your friends and family will rave about. Let’s dive into the sweet world of turtle brownies!
Ingredients
List of Ingredients
– 1 cup unsalted butter
– 2 cups granulated sugar
– 4 large eggs
– 1 teaspoon pure vanilla extract
– 1 cup all-purpose flour
– 1 cup unsweetened cocoa powder
– 1/2 teaspoon baking powder
– 1/4 teaspoon salt
– 1 cup pecans, coarsely chopped
– 1 cup caramel sauce
– 1 cup semi-sweet chocolate chips
Ingredient Substitutions
You can swap unsalted butter for coconut oil or margarine. This change keeps the brownies rich and moist. If you want a deeper flavor, use brown sugar instead of granulated sugar. It adds a hint of caramel taste. For a lighter option, use whole wheat flour or almond flour. These flours can change the texture but still taste great. You can also try gluten-free flour blends if needed. Feel free to mix and match!
Step-by-Step Instructions
Preparation Steps
1. Preheat your oven to 350°F (175°C). This helps the brownies bake evenly.
2. Prepare a 9×13 inch baking pan. Grease it with butter or line it with parchment paper. This makes removal easy later.
Mixing the Ingredients
1. Melt 1 cup of unsalted butter in a medium saucepan over low heat. Stir it gently to avoid burning.
2. Once melted, remove from heat. Add 2 cups of granulated sugar and mix well. You want it smooth.
3. Let the mixture cool for a few minutes. Then add 4 large eggs one by one. Mix well after each egg.
4. Stir in 1 teaspoon of pure vanilla extract until blended in.
Combining Dry and Wet Ingredients
1. In another bowl, whisk together 1 cup of all-purpose flour, 1 cup of unsweetened cocoa powder, 1/2 teaspoon of baking powder, and 1/4 teaspoon of salt. This step is key for good texture.
2. Gradually add the dry mix into the butter mixture. Use a spatula to stir gently. A few lumps are okay.
3. Carefully fold in 1 cup of coarsely chopped pecans and 1 cup of semi-sweet chocolate chips. This adds great flavor and crunch.
Baking Process
1. Pour half of the brownie batter into the prepared baking pan. Use a spatula to spread it evenly.
2. Drizzle half of the 1 cup of caramel sauce over the batter. Let some sauce seep in for pockets of gooeyness.
3. Spoon the remaining brownie batter on top, smoothing it out. Drizzle the rest of the caramel sauce on top.
4. With a knife or skewer, gently swirl the caramel into the brownie batter. This creates a lovely marbled effect.
5. Bake in the preheated oven for 25-30 minutes. A toothpick inserted should come out with moist crumbs, not wet.
6. Allow the brownies to cool completely in the pan on a wire rack before cutting them into squares.
Tips & Tricks
Baking Tips for Perfect Brownies
To avoid dry brownies, focus on the baking time. Start checking at 25 minutes. When a toothpick comes out with moist crumbs, they are done. Overbaking leads to dryness.
Use room temperature ingredients to help with even baking. This includes eggs and butter. Mixing them well helps create a smooth batter.
Serving Suggestions
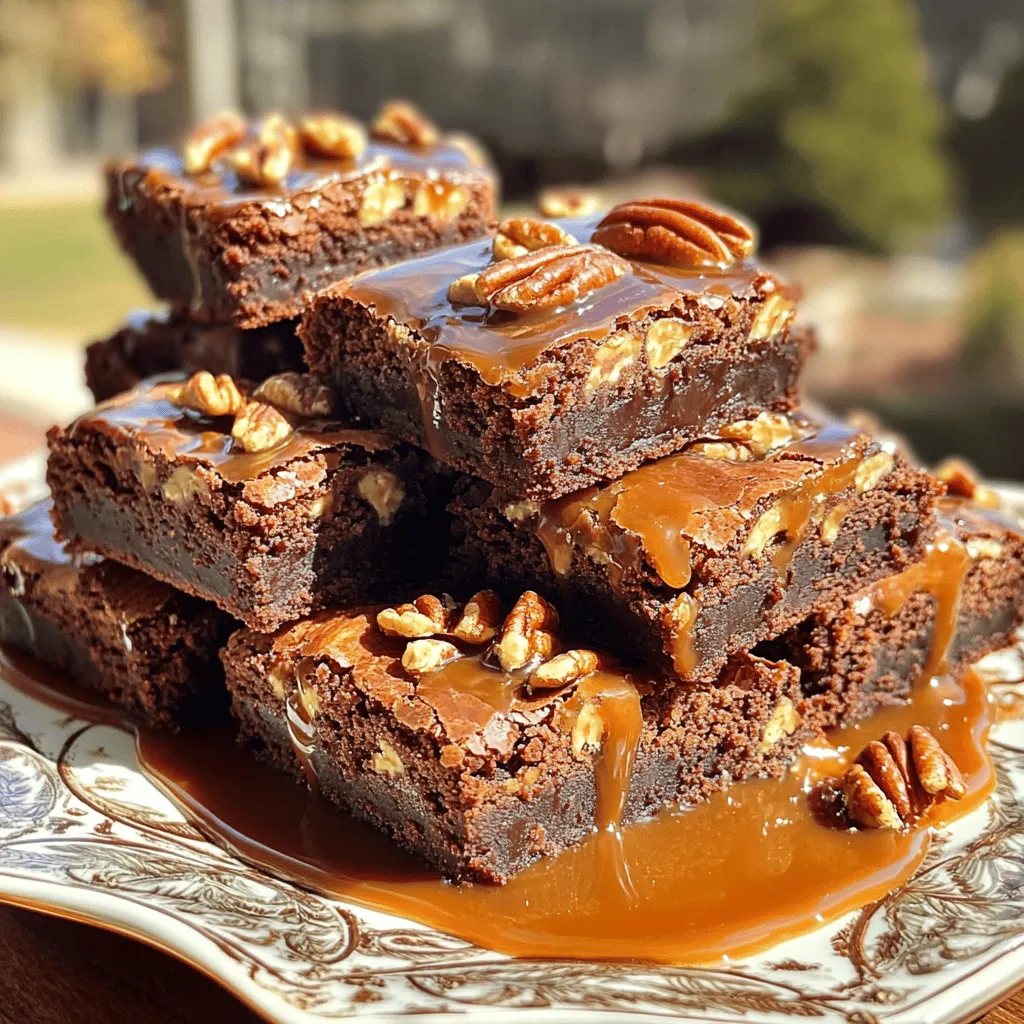
For a beautiful presentation, serve the brownies on a nice platter. Drizzle extra caramel sauce on top. This adds a rich look and taste. Sprinkle more chopped pecans for extra crunch and flair.
Pairing your brownies with a scoop of vanilla ice cream is a great idea. The cold ice cream contrasts well with warm brownies. You can also try whipped cream or chocolate sauce.
Troubleshooting Common Issues
Overmixing can lead to tough brownies. Mix until just combined for the best texture. A few lumps are okay and won’t harm your brownies.
If your brownies turn out undercooked, don’t panic. Bake them for a few more minutes. Check again with a toothpick. If it comes out clean, they are ready.

Variations
Flavor Enhancements
You can easily boost the flavor of your brownies. Adding a pinch of espresso gives them a rich depth. The coffee flavor pairs well with chocolate. Try it for a unique twist. You can also use different nuts. If you want a crunch, swap pecans for walnuts or almonds. Each nut brings its own taste and texture. Mix and match to find your favorite.
Alternative Sauces
Brownies taste great with various sauces. Instead of caramel, use chocolate or fudge sauce. This will give the brownies a rich, sweet finish. You can also try adding sea salt on top. The salt contrasts with the sweetness, creating a delicious balance. It is an easy way to elevate your treat.
Dietary Variations
If you need gluten-free options, use almond flour instead of regular flour. This keeps the brownies moist and tasty. For a vegan version, swap eggs with flax eggs or applesauce. You can also use plant-based butter and dairy-free chocolate chips. These changes make the brownies fun for everyone to enjoy!
Storage Info
How to Store Brownies
To keep your brownies fresh, store them properly. You can keep them at room temperature. Just place them in an airtight container. This way, they stay soft and tasty. They will last about three days this way. If you want them to last longer, refrigerate them. Wrap them tightly in plastic wrap or place them in a container. They will stay fresh for up to a week in the fridge.
Freezing Instructions
If you want to save brownies for later, freezing is a great option. First, cool the brownies completely. Cut them into squares for easy serving. Wrap each square in plastic wrap, then place them in a freezer bag. This keeps them fresh and prevents freezer burn. Brownies can stay frozen for up to three months.
When you’re ready to enjoy them, thaw the brownies. You can leave them in the fridge overnight. For a quicker method, place them at room temperature for about an hour. Enjoy your delicious caramel pecan turtle brownies whenever you want!
FAQs
How can I tell when brownies are done?
To check if your brownies are done, use a toothpick. Insert it into the center. If it comes out with moist crumbs, they are ready. If it comes out wet, bake a bit longer. Keep an eye on the time too. Generally, they take 25 to 30 minutes to bake.
Can I use homemade caramel sauce?
Yes, you can use homemade caramel sauce. The difference lies in flavor and texture. Store-bought sauce is often smoother and sweeter. Homemade sauce can have a richer taste and unique twist. It may also be thicker or thinner based on your recipe. Both options work well in these brownies.
What makes these brownies “turtle” brownies?
These brownies are called “turtle” brownies because they have caramel, chocolate, and nuts. The name comes from the turtle candies, which have similar flavors. The pecans add a nice crunch and flavor. The caramel gives a sweet, gooey texture, and the chocolate brings it all together.
How long do caramel pecan turtle brownies last?
Caramel pecan turtle brownies can last about 3 to 5 days. Store them in an airtight container at room temperature. For longer freshness, keep them in the fridge. You can also freeze them for up to 3 months. Just make sure to wrap them well to prevent freezer burn.
This blog post guides you through making delicious turtle brownies. We covered the key ingredients, like butter, sugar, and chocolate, along with creative substitutes. I provided step-by-step instructions for mixing, baking, and adding fun flavors. Plus, there are tips for perfect texture and serving ideas.
Enjoy experimenting with variations and storing tips for your brownies. Remember, baking is fun! Try new flavors and share your tasty results. Happy baking!


![- 1 cup pumpkin puree - 1 ½ cups crushed graham crackers - ½ teaspoon pumpkin spice - ½ cup powdered sugar - 1 teaspoon vanilla extract - 8 oz dark chocolate - 1 tablespoon coconut oil - Flaky sea salt To create chocolate covered pumpkin truffles, you need simple yet flavorful ingredients. Start with pumpkin puree, either canned or homemade. This is the base for your truffles. Next, grab crushed graham crackers. They give the truffles a unique texture and sweetness. Pumpkin spice adds warmth and flavor. You can adjust the amount if you want a stronger taste. Powdered sugar sweetens the mixture, making each bite a delight. Vanilla extract rounds out the flavor profile beautifully. For the chocolate coating, use dark chocolate. It contrasts nicely with the sweetness of the truffles. Adding coconut oil to the chocolate helps it melt smoothly. Finally, a sprinkle of flaky sea salt on top enhances the flavor, making each truffle even more irresistible. - Mixing bowl - Spoon or spatula - Measuring cups and spoons - Parchment paper - Baking sheet - Double boiler or microwave-safe bowl You will need a few tools to make these truffles. A mixing bowl is essential for combining your ingredients. A spoon or spatula helps you mix everything well. Measuring cups and spoons ensure that your ingredients are precise. Parchment paper is key for lining your baking sheet. It keeps the truffles from sticking. You also need a baking sheet to hold the truffles while they chill. Finally, a double boiler or a microwave-safe bowl helps melt the chocolate evenly. With these ingredients and tools, you're ready to create chocolate covered pumpkin truffles that everyone will love. For the complete recipe, check out the Full Recipe link. Start by mixing the pumpkin puree with the dry ingredients. In a large bowl, add: - 1 cup pumpkin puree - 1 ½ cups crushed graham crackers - ½ teaspoon pumpkin spice - ½ cup powdered sugar - 1 teaspoon vanilla extract Use a spatula or wooden spoon to blend these together. Mix until you have a smooth, dough-like consistency. The mixture should be firm enough to hold its shape. Next, it’s time to shape the truffles. With clean hands, scoop out tablespoon-sized portions. Roll each portion into a ball, about 1 inch in diameter. Place the balls on a parchment-lined baking sheet. Make sure to space them apart. This helps them keep their shape. After shaping, cover the baking sheet with plastic wrap and chill in the fridge for about 30 minutes. While the truffles chill, let’s melt the chocolate. You can use a double boiler or the microwave. If you choose the double boiler, place a heatproof bowl over a pot of simmering water. Stir the chocolate and coconut oil together until smooth. If using the microwave, heat in 20-second bursts, stirring in between. Make sure the chocolate is silky before dipping. Once the truffles are chilled, it’s time to coat them. Dip each ball into the melted chocolate. Make sure it’s fully covered. Use a fork to lift it out, letting the excess chocolate drip back into the bowl. Place the coated truffles back on the parchment-lined sheet. While the chocolate is still wet, sprinkle a pinch of flaky sea salt on each truffle. This adds a burst of flavor that balances the sweetness. Let the truffles sit at room temperature until the chocolate sets. You can speed up this process by placing them in the fridge for about 15-20 minutes. Now, your delicious chocolate-covered pumpkin truffles are ready to enjoy. You can find the full recipe above for more details on each step. Chilling the truffles is key. It helps them hold their shape better when you dip them. After you roll the truffles, place them in the fridge for about 30 minutes. This step makes a big difference in texture. To roll smooth truffles, make sure your hands are clean and dry. Use a light touch as you form the balls. If your mixture is sticky, wet your hands slightly. This helps shape them without making a mess. Melting chocolate can be tricky. To melt chocolate evenly, I recommend using a double boiler. Fill a pot with a bit of water, then place a heatproof bowl on top. Stir the chocolate as it melts. This method prevents burning. If you want a nice shine, add a tablespoon of coconut oil to the chocolate. It will make your truffles look glossy and appealing. Get creative when it comes to serving. You can sprinkle a little cinnamon on top for extra flavor. Pumpkin seeds also add a nice crunch and look great on a dessert table. These truffles pair well with coffee or a spiced chai. Consider serving them at your next fall gathering or holiday party. They will surely impress your guests! For the full recipe, check the main section. {{image_4}} You can easily change the taste of your truffles. Try adding almond extract for a nutty twist. A bit of orange zest will give your truffles a fresh, fruity kick. You can also swap out the pumpkin spice for cinnamon or nutmeg. Each spice brings a new flavor to your truffles. If you need gluten-free options, look for gluten-free graham crackers. Many brands offer these, and they work just as well. For those who prefer dairy-free treats, use dairy-free chocolate for the coating. There are great dairy-free chocolate chips available that melt nicely. Want to make your truffles extra special? Roll them in crushed nuts like pecans or walnuts. This adds a nice crunch. You can also use colorful sprinkles for a fun look. If dark chocolate isn’t your thing, try coating the truffles in white chocolate instead. It adds a sweet, creamy flavor that pairs well with pumpkin. For the full recipe, check out the [Full Recipe]. To keep your chocolate covered pumpkin truffles fresh, store them in the fridge. The cool temperature helps maintain their texture and flavor. Place the truffles in an airtight container to prevent them from drying out. This way, they can stay yummy for up to one week. If you want to enjoy them longer, try to avoid leaving them out at room temperature for too long. If you want to save some truffles for later, freezing is a great option. First, place the truffles on a baking sheet, making sure they don’t touch. Freeze them for about an hour until they are firm. Once frozen, transfer the truffles to a freezer-safe bag or container. They can last for up to three months in the freezer. When you’re ready to enjoy them, simply take out the number of truffles you want. Let them thaw in the fridge for a few hours or at room temperature for about 30 minutes. Avoid using heat to thaw, as this can ruin their texture. Now they're ready to be devoured! Chocolate covered pumpkin truffles can last about one week in the fridge. Store them in an airtight container to keep them fresh. After a week, check for signs of spoilage, such as a change in smell or texture. If they feel sticky or smell off, it's best to toss them. Yes, you can easily make these truffles vegan! Use dairy-free chocolate instead of dark chocolate. Swap the coconut oil for a plant-based butter or more coconut oil. This keeps the rich flavor while making it suitable for a vegan diet. These truffles shine at holiday gatherings and parties. They also make great gifts for friends and family. Their festive look and delicious taste fit well with autumn themes. Serve them during Halloween, Thanksgiving, or any cozy get-together. Yes, you can find chocolate covered pumpkin truffles at many bakeries. Look for local shops that specialize in gourmet treats. Some popular brands also offer these truffles online. You can enjoy them without all the fuss of making them at home. For a homemade touch, check out the Full Recipe for a delightful DIY version! Creating chocolate covered pumpkin truffles is simple and fun. We covered key ingredients like pumpkin puree, graham crackers, and dark chocolate. You learned tools needed, step-by-step instructions, and tips for easy truffle-making. We also looked at flavors, variations, storage, and common questions. These truffles make a perfect treat for any occasion. Enjoy making these delightful bites and share them with friends! You’ll impress everyone with your tasty skills.](https://joymealplan.com/wp-content/uploads/2025/07/35417da5-91a5-48e5-8a48-b090ca73d24b-768x768.webp)
