Caramelized Onion Gruyere Flatbread Delightful Dish

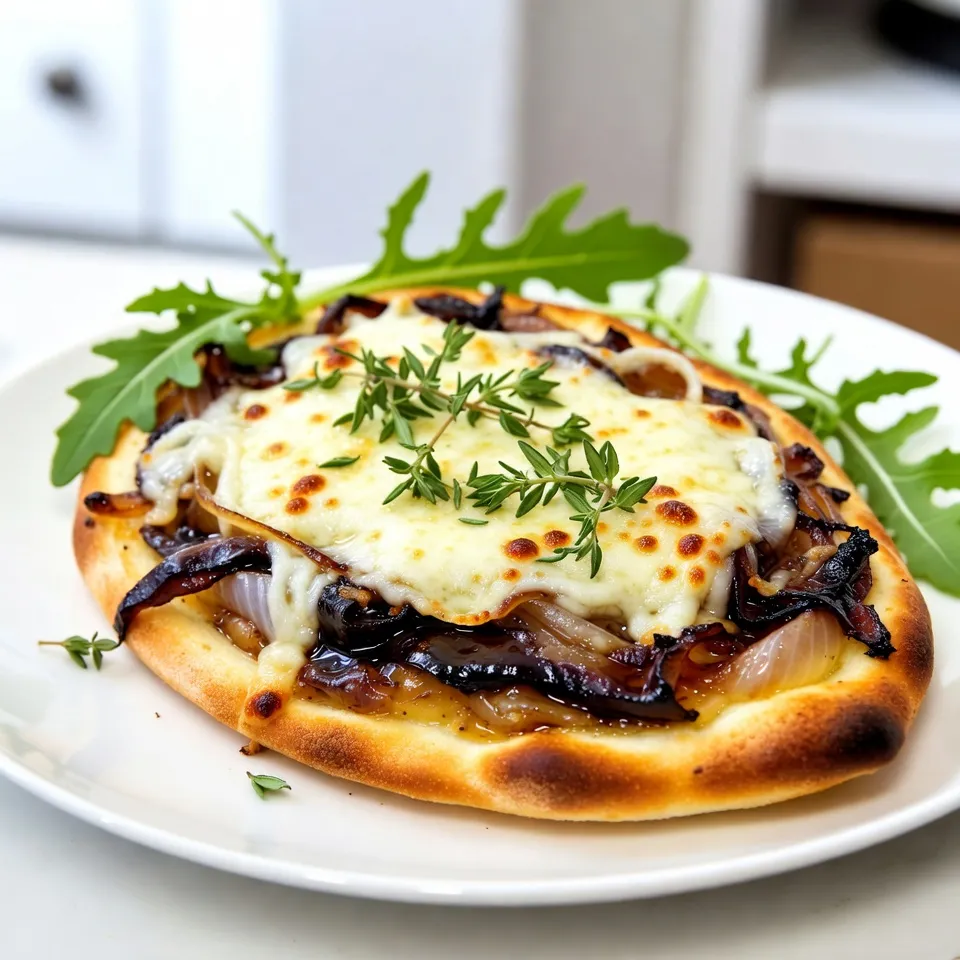
If you’re craving a tasty treat that’s both simple and satisfying, look no further. My Caramelized Onion Gruyere Flatbread is a delightful dish packed with flavor. Golden, sweet onions combine with rich Gruyère cheese on crispy flatbread for a dish that impresses every time. Join me as I guide you through this easy recipe, sharing tips that guarantee a perfect bite every single time. Let’s get started!
Why I Love This Recipe
- Simple Preparation: This recipe is incredibly easy to make, requiring minimal ingredients and just a few steps to create a delicious dish.
- Rich Flavor: The combination of caramelized onions and Gruyère cheese creates a savory and sweet flavor profile that is utterly irresistible.
- Versatile Serving: This flatbread can be served as an appetizer, a snack, or even a light meal, making it perfect for any occasion.
- Garnish Options: With the addition of fresh arugula or herbs, you can customize this dish to suit your taste and enhance its presentation.
Ingredients
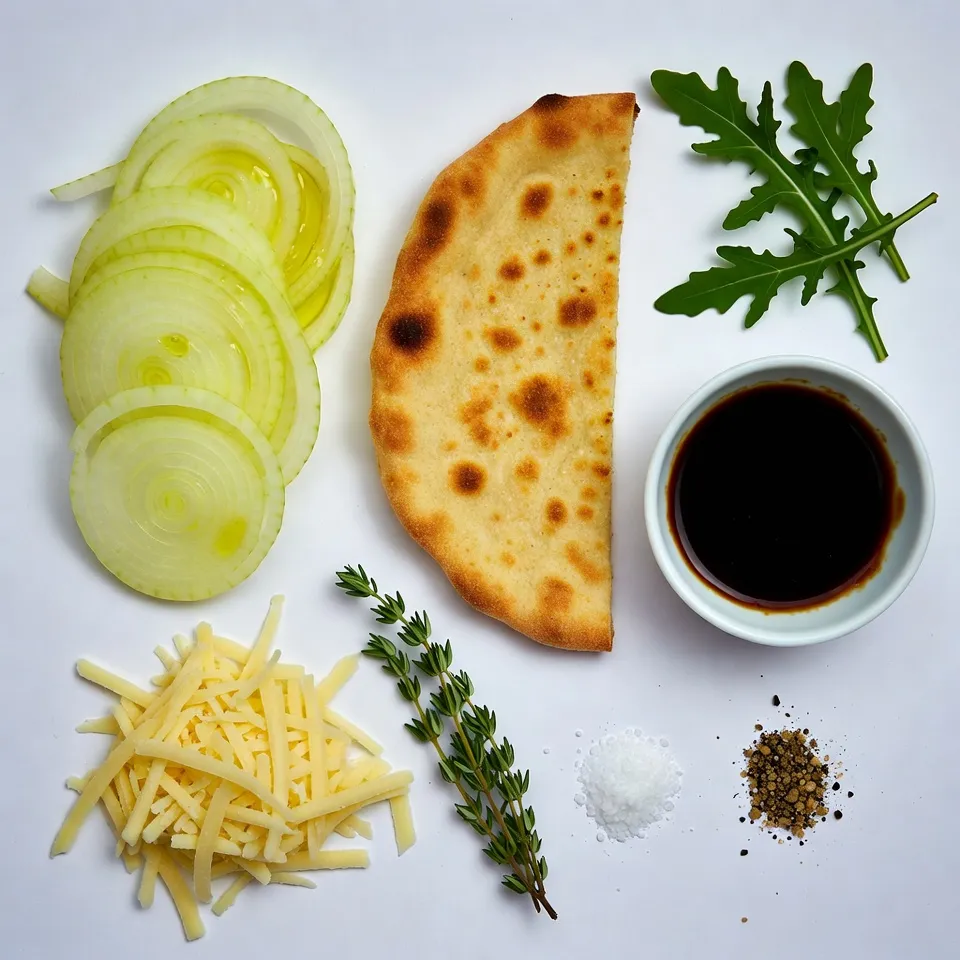
To create a delicious Caramelized Onion Gruyère Flatbread, gather these key ingredients:
– Flatbread or naan (store-bought or homemade)
– 2 large onions, thinly sliced
– 2 tablespoons olive oil
– 1 tablespoon balsamic vinegar
– 1 cup Gruyère cheese, shredded
– 1 teaspoon fresh thyme leaves (optional)
– Salt and freshly ground black pepper, to taste
– Optional toppings: fresh arugula or a medley of herbs for garnish
Each ingredient plays a role in making this dish special. The flatbread serves as a sturdy base, while the onions bring sweetness and depth. Olive oil helps caramelize the onions, enhancing their flavor. Balsamic vinegar adds a tangy kick, balancing the sweetness. Gruyère cheese melts beautifully, providing a rich, creamy texture. Fresh thyme adds a lovely aroma. Finally, the optional toppings brighten the dish and add visual appeal.

Step-by-Step Instructions
Caramelizing the Onions
To start, you need to cook the onions well. Heat 2 tablespoons of olive oil in a large skillet over medium heat. Add the 2 sliced onions and a pinch of salt. This salt helps bring out their natural sweetness. Sauté the onions for about 15 to 20 minutes. Stir them often until they turn soft and golden brown. If they cook too fast, lower the heat to medium-low. This keeps them from burning.
Seasoning is key during this step. Adding salt at the start helps enhance the flavor. You can also add a splash of balsamic vinegar and fresh thyme later. These add more depth and a tangy hint to the onions.
Assembling the Flatbread
Next, prepare your flatbread. If you use store-bought flatbread, place it on a lined baking sheet. If you prefer homemade, that works too! Now, spread the caramelized onions evenly over the flatbread. Make sure every bite has that sweet, savory taste.
After that, sprinkle 1 cup of shredded Gruyère cheese generously on top. The cheese should cover the onions fully. This will create a nice, melty finish when baked.
Baking the Flatbread
Preheat your oven to 400°F (200°C). This step is important for getting the best texture. Once the oven is ready, slide your flatbread inside. Bake it for about 10 to 12 minutes. Keep an eye on it! You want the cheese to melt and bubble, while the edges turn golden brown.
This baking time is perfect for achieving a crispy flatbread with gooey cheese. Enjoy the aroma as it fills your kitchen!
Tips & Tricks
Perfecting Caramelized Onions
To get sweet, golden onions, control your heat. Start with medium heat to soften the onions. If they cook too fast, lower the heat to medium-low. This gives them time to caramelize without burning. Stir them often to keep them from sticking.
You can add balsamic vinegar for more flavor. This gives the onions a tangy kick. Fresh thyme also adds a nice touch. Mix these in after the onions turn golden. Let them simmer for a few minutes. This enhances their taste and makes your flatbread shine.
Cheese Melting Techniques
Gruyère cheese melts beautifully. For the best melt, shred the cheese first. This helps it melt evenly and quickly. Spread it generously over the caramelized onions.
Bake the flatbread until the cheese is bubbly. Keep an eye on the edges; they should turn golden brown. That’s when you know it’s ready!
Serving Suggestions
Pair your flatbread with fresh arugula for a nice crunch. You can also use a mix of herbs for a pop of color.
To present your dish, slice the flatbread into even pieces. Arrange it on a nice platter. This makes it look tasty and inviting. Enjoy every bite of this delicious treat!
Pro Tips
- Use Low Heat for Caramelization: Cooking the onions slowly over low to medium heat helps develop their natural sweetness and prevents burning.
- Experiment with Cheese: While Gruyère is delicious, feel free to mix in other cheeses like fontina or mozzarella for different flavor profiles.
- Fresh Herbs Make a Difference: Adding herbs like basil or parsley as a garnish can elevate the dish and add a fresh burst of flavor.
- Perfect Your Baking Time: Keep an eye on the flatbread as it bakes; every oven is different, and you want it golden brown and bubbly without overcooking.

Variations
Vegetarian Options
You can easily make this flatbread vegetarian. Try adding fresh vegetables like bell peppers or spinach. Mushrooms also work great! They add a nice, earthy flavor. For cheese, if you want something different, consider using feta or goat cheese. Both will give a tangy kick to your dish.
Gluten-Free Variations
If you need a gluten-free option, choose gluten-free flatbread. Many stores sell good brands. You can also use a cauliflower crust for a fun twist! For toppings, consider sliced olives or sun-dried tomatoes. They add bold flavors to your flatbread.
Flavor Pairings
Enhance this dish with fresh herbs. Basil and oregano work well with the onions. You can also add a sprinkle of red pepper flakes for heat. For dips, a creamy garlic sauce or balsamic glaze pairs nicely. They add a new layer of taste to every bite!
Storage Info
Storing Leftovers
To keep your flatbread fresh, place it in the fridge. Use an airtight container or wrap it tightly in plastic wrap. This helps prevent it from drying out. If you have a lot of leftovers, you can slice it into pieces. This way, you can grab just what you need later.
Reheating Instructions
When it’s time to enjoy leftovers, avoid the microwave. It can make the flatbread soggy. Instead, preheat your oven to 350°F (175°C). Place the flatbread on a baking sheet and heat for about 10 minutes. This method keeps the bread crispy and the cheese melty. You can also use a skillet. Just warm it over medium heat for a few minutes.
Freezing Options
If you want to freeze your flatbread, cool it completely first. Wrap it tightly in plastic wrap, then place it in a freezer bag. This helps avoid freezer burn. For best taste, use it within three months. When you’re ready to eat, thaw it overnight in the fridge. Then, reheat it as mentioned above. Enjoy each bite as if it were freshly made!
FAQs
What is the best way to caramelize onions?
To caramelize onions, start with a large skillet. Heat olive oil over medium heat. Add thinly sliced onions and a pinch of salt. The salt helps bring out their natural sweetness. Stir the onions often. Cook for about 15 to 20 minutes. Lower the heat if they cook too fast. You want them soft and golden brown. If you want more flavor, add balsamic vinegar near the end. This method gives you sweet, rich onions for your flatbread.
Can I use a different type of cheese?
Yes, you can use different cheeses. Some great options are Swiss, Fontina, or even mozzarella. Each will give a different taste. Swiss cheese melts well and has a nutty flavor. Fontina is rich and creamy. Mozzarella is mild and stretchy. Try mixing cheeses for a unique flavor and texture. Just remember to keep the cheese melty and gooey!
How can I make this flatbread ahead of time?
You can prepare the caramelized onions in advance. Store them in the fridge for up to three days. You can also prep the flatbread. Just keep it covered to stay fresh. When you are ready to bake, preheat the oven and assemble your flatbread. Bake it right before serving. This way, you can enjoy it hot and fresh!
This blog post guides you through making a delicious flatbread topped with caramelized onions, Gruyère cheese, and fresh thyme. I shared key steps, from caramelizing onions to baking tips. You can also explore variations, like vegetarian or gluten-free options. Use these tips to create a dish that impresses. Enjoy the flavors and feel free to get creative with toppings and pairings. Cooking can be fun and satisfying; I hope you enjoy every bit

Caramelized Onion Gruyère Flatbread Delight
Ingredients
- 1 piece flatbread or naan
- 2 large onions, thinly sliced
- 2 tablespoons olive oil
- 1 tablespoon balsamic vinegar
- 1 cup Gruyère cheese, shredded
- 1 teaspoon fresh thyme leaves (optional)
- to taste Salt and freshly ground black pepper
- optional fresh arugula or a medley of herbs for garnish
Instructions
- Caramelize the Onions: In a large skillet, warm the olive oil over medium heat. Add the sliced onions along with a pinch of salt. Sauté for approximately 15-20 minutes until soft and golden brown.
- Add Flavor: Once caramelized, add balsamic vinegar and fresh thyme (if desired). Stir and simmer for 2-3 minutes, then remove from heat.
- Prepare the Flatbread: Preheat the oven to 400°F (200°C). If using store-bought flatbread, place it on a baking sheet lined with parchment paper.
- Assemble the Flatbread: Spread the caramelized onions evenly on the flatbread and sprinkle with shredded Gruyère cheese.
- Bake: Bake in the preheated oven for 10-12 minutes until the cheese melts and the edges turn golden.
- Serve: Remove from the oven, cool for a minute, and top with fresh arugula or herbs. Slice and serve warm.


![- 1 pre-made phyllo pastry sheet (about 8-10 sheets) or one ready-made pie crust - 4 medium ripe tomatoes, thinly sliced - 1 cup fresh basil leaves, roughly chopped - 1 cup ricotta cheese - 1 cup shredded mozzarella cheese - 2 tablespoons extra virgin olive oil, plus additional for brushing - 1 teaspoon garlic powder - Salt and freshly cracked black pepper to taste - Optional: Balsamic glaze for drizzling When I create this fresh tomato basil tart, I love to use simple, fresh ingredients. The star is the ripe tomatoes. They bring bright flavor and juicy texture. I choose tomatoes that are firm but not hard. Their color should be vibrant. Basil is another key player. Fresh basil adds a sweet and peppery taste. I prefer to roughly chop it to release its oils. This way, every slice of the tart bursts with flavor. For creaminess, I use ricotta cheese. It adds a rich and smooth layer. I mix it with garlic powder, salt, and pepper. This mix gives a nice seasoning base. Next, mozzarella cheese adds a lovely stretch. It melts beautifully and gives that gooey texture we crave. Together, they make the tart creamy and savory. I also use extra virgin olive oil. It not only adds flavor but helps the crust brown nicely. A drizzle before baking makes a big difference. Lastly, I sometimes add balsamic glaze. It gives a sweet and tangy touch. It’s optional, but I find it elevates the dish. Each ingredient plays a role in making this tart special. When you gather these items, you set the stage for a delightful meal. Check out the [Full Recipe] for a step-by-step guide to bring this tart to life! 1. Preheating the oven Start by preheating your oven to 375°F (190°C). This step is key to getting a nice, crispy crust. 2. Preparing the pastry If using phyllo pastry, layer 4-5 sheets in a tart pan. Brush a thin layer of olive oil between each sheet. This adds flavor and helps create a crunchy texture. If you opt for a pie crust, just place it in the tart pan and crimp the edges for a nice look. 3. Making the ricotta mixture In a mixing bowl, combine ricotta cheese, garlic powder, salt, and pepper. Use a spatula to mix until smooth. This mixture adds creaminess to the tart. 1. Layering tomatoes and cheese Spread the ricotta mixture evenly over the crust. Then, layer the sliced tomatoes on top. Overlap the slices slightly for a pretty design. After the tomatoes, sprinkle shredded mozzarella cheese over them. Finally, add the chopped basil for a fresh taste. 2. Drizzling olive oil Drizzle the remaining olive oil over the top of the tart. This helps the tart brown nicely and boosts flavor. 1. Baking duration and tips Place the tart in your preheated oven. Bake for 25-30 minutes. Look for a golden brown crust and bubbly cheese. This means it’s nearly ready! 2. Cooling period before slicing Once baked, remove the tart from the oven. Let it cool on a wire rack for a few minutes. This cooling time helps set the filling, making slicing easier. Check out the Full Recipe to get all the details you need! For the best results, set your oven to 375°F (190°C). This temperature helps the tart cook evenly and creates a nice, crisp crust. To check for doneness, look for a golden-brown crust and bubbly cheese. The cheese should be slightly browned, adding flavor and texture. If you see these signs, your tart is ready! Garnishing makes your dish pop. Slice the tart into wedges and serve on a rustic wooden board. Add fresh basil leaves on top for a vibrant touch. You can also drizzle balsamic glaze over the tart right before serving. It adds a sweet and tangy flavor that enhances the dish. One mistake is ending up with a soggy crust. To prevent this, always brush the pastry with olive oil or egg wash before adding toppings. Another common issue is uneven cheese melting. Spread the cheese evenly and avoid overloading one side. This ensures every bite is cheesy and delicious. {{image_4}} To make your Fresh Tomato Basil Tart even more exciting, try using different cheeses. Instead of ricotta, you can use goat cheese or feta. Both add a unique tang. For mozzarella, consider using provolone or a sharp cheddar. These swaps change the taste while keeping it delicious. You can also play with herbs and spices. Instead of basil, use fresh oregano or thyme for a new flavor. A pinch of red pepper flakes can add a little heat. Just remember, keep the balance so it doesn't overpower the fresh tomatoes. Seasonal vegetables can enhance your tart. In summer, add zucchini or bell peppers for a colorful twist. In fall, roasted butternut squash works well. These veggies bring new flavors and textures to your dish. Don't shy away from incorporating different flavors. For instance, a sprinkle of smoked paprika gives a lovely depth. You could even add sun-dried tomatoes for a rich, sweet touch. These tweaks keep the tart fresh and exciting all year round. If you need vegan or gluten-free options, it’s easy to adapt. For a vegan tart, swap the cheeses for cashew cream or tofu. These provide creaminess without dairy. Use gluten-free pie crust or phyllo pastry for a gluten-free option. These variations allow everyone to enjoy this dish. You can create a tart that fits any diet without losing flavor. Check out the Full Recipe for more ideas! To keep your fresh tomato basil tart tasty, store leftovers properly. First, let the tart cool completely. Wrap it in plastic wrap or place it in an airtight container. This helps keep flavors and moisture in. If you prefer, you can also use aluminum foil for wrapping. Store it in the fridge for up to three days for the best taste. When ready to enjoy your leftover tart, preheat your oven to 350°F (175°C). Place the sliced tart on a baking sheet for even heating. Bake for about 10-15 minutes until it's warm. This method keeps the crust crisp and the cheese melty. To avoid sogginess, don’t microwave it. Microwaving can make the crust soft and chewy, which isn’t ideal. Enjoy your delicious tart again! To make a tomato basil tart from scratch, you can choose between two crust options. - Homemade crust: 1. Combine flour, butter, and salt in a bowl. 2. Mix until crumbly. 3. Add cold water, one tablespoon at a time, until the dough forms. 4. Roll out the dough and fit it into your tart pan. 5. Chill the crust for about 30 minutes before filling. - Store-bought crust: Use a pre-made phyllo pastry or ready-made pie crust. This saves time and effort. Simply place it in your tart pan and crimp the edges. I often use phyllo for a crisp texture, but a pie crust works great too. Each option gives a unique taste. Yes, you can prepare the tart in advance. Here are some tips: - Make the crust: You can bake the crust a day ahead. Cool it and store it in the fridge. - Prep the filling: You can mix the ricotta with seasonings a day before. Keep it in the fridge until you're ready to assemble. - Assemble and bake: Assemble the tart a few hours before serving. Bake it fresh to enjoy the best flavors. Store leftovers in an airtight container in the fridge. They stay good for 2-3 days. This tart pairs well with various side dishes and drinks. - Complementary side dishes: - A simple green salad with vinaigrette. - Roasted vegetables for added flavor. - Garlic bread for a comforting touch. - Drinks: - A chilled white wine, like Sauvignon Blanc. - Fresh lemonade for a refreshing option. These options enhance your meal and make it even more enjoyable. Check out the Full Recipe for more details on making this dish! You can make a tasty tomato basil tart with simple steps. We covered key ingredients, like fresh tomatoes and phyllo pastry. The baking process helps bring out rich flavors, while our tips keep your crust crispy. I shared several ways to adapt the tart for diets and seasons. Lastly, proper storage keeps leftovers fresh, making them easy to enjoy later. Dive in, try this recipe, and create your own delicious variations. Enjoy the process—it’s all about making a meal you love!](https://joymealplan.com/wp-content/uploads/2025/07/c4443384-77e0-40e2-9fba-17a466e29922-768x768.webp)

![- 1 ripe mango, diced - 2 ripe avocados, diced - 1 small red onion, finely chopped - 1 sweet red bell pepper, diced - 1 jalapeño, minced - 1/4 cup fresh cilantro, chopped - Juice of 2 limes - 1 tablespoon extra virgin olive oil - Salt and black pepper to taste How to choose the perfect mango Look for a mango that feels slightly soft when you press it. The skin should have a nice golden hue. A ripe mango smells sweet at the stem end. Choosing the best avocados Pick avocados that yield to gentle pressure. The skin should be dark green or black, depending on the variety. Avoid hard or overly mushy avocados. Signs of a fresh jalapeño A fresh jalapeño should be firm and glossy. Look for bright green skin without wrinkles. A fresh pepper has a crisp feel and a spicy aroma. These tips will help you find the best ingredients for your salsa. Fresh produce makes your dish more vibrant and tasty. For the full recipe, check the details above. - Start by washing all your fresh produce. - Dice the ripe mango into small cubes. - Carefully cut the avocados into bite-sized pieces. - Finely chop the red onion for sharp flavor. - Dice the red bell pepper for sweetness. - Mince the jalapeño, adjusting to your heat preference. Next, in a large mixing bowl, combine the diced mango, avocado, chopped onion, red bell pepper, and minced jalapeño. Gently fold in the chopped cilantro, spreading the fresh herb throughout. Squeeze the juice of two fresh limes over the mix, along with a tablespoon of olive oil. This adds richness. Use a spatula to carefully toss the ingredients. Keep the avocado pieces intact to maintain texture. Season the salsa with salt and freshly cracked black pepper, mixing lightly to combine. Resting time is key for great flavor. Let the salsa sit for about 10 minutes at room temperature. This duration allows the ingredients to blend and the flavors to develop. When you let the salsa rest, the lime juice and olive oil soak in. This process enhances the taste and makes every bite burst with flavor. Enjoy this fresh, vibrant dish as a wonderful side or topping. For the full recipe, check out the details above. - How to keep avocados from browning: To stop avocados from turning brown, use lime juice. The acid in lime juice slows oxidation. Squeeze fresh lime juice right after cutting the avocado. Mix it in well to cover all the flesh. You can also store the salsa in an airtight container to keep it fresh longer. - Using lime juice effectively: Lime juice brightens the flavors in your salsa. Use freshly squeezed lime juice rather than bottled juice. It tastes better and adds a nice zing. Aim for about two limes for this recipe. Adjust based on your taste! - Importance of ingredient proportions: Balance is key to great salsa. Use equal parts of mango and avocado for a good mix. Too much onion can overpower the other flavors. Keep the jalapeño mild if you prefer less heat. Taste as you go, and adjust the ingredients to suit your own palate. - Pairing with tortilla chips: Serve your mango avocado salsa with crispy tortilla chips. The crunch of the chips pairs well with the smoothness of the salsa. It makes for a perfect snack or appetizer at parties. - Using as a topping for grilled meats: This salsa works great as a topping for grilled chicken or fish. The sweet and spicy flavors complement the meat beautifully. Just spoon it on right before serving for the best taste. - Incorporating into tacos or burritos: Use this salsa to add freshness to tacos or burritos. It enhances your meal with vibrant flavors. Just add a scoop in your taco or wrap it up in a burrito, and enjoy! For the full recipe, check out the complete method to create this delicious dish. {{image_4}} You can make mango avocado salsa even better with new flavors. Try adding tropical fruits like pineapple or papaya. These fruits bring a sweet twist and a fun texture. You can also mix in fresh herbs like mint or basil. These herbs give a fresh taste that brightens the salsa. Want more heat? You can swap out the jalapeño for a serrano or habanero pepper. These peppers can make your salsa spicy and exciting. Just remember to taste as you go! Making mango avocado salsa fit your diet is easy. If you're vegan, this recipe is already perfect. It has no animal products and is full of healthy fats. If you need a low-sodium option, skip the added salt. The fresh lime juice and other ingredients give plenty of flavor. For those with allergies, check each ingredient. You can always swap out foods that cause issues for you. This salsa is a versatile dish that everyone can enjoy. Try these ideas to make it your own! For the full recipe, check out the [Full Recipe]. To keep your mango avocado salsa fresh, put it in the fridge. Use an airtight container. This helps prevent the salsa from browning. The salsa stays good for about 2 to 3 days in the fridge. If you see browning, it’s best to toss it. Yes, you can freeze mango avocado salsa! However, know that the texture might change. For best results, freeze it without the avocado. This keeps the salsa tasting fresh. When you're ready to use it, transfer it to the fridge for a slow thaw. To freeze, use a freezer-safe container. Leave some space at the top for expansion. You can also use freezer bags. Squeeze out the air before sealing. When thawing, avoid using a microwave. This can make the salsa mushy. Instead, let it sit in the fridge overnight. Once thawed, mix it well before serving. If it seems dry, add a splash of lime juice for extra flavor. Enjoy your mango avocado salsa fresh and flavorful! How long does mango avocado salsa last? Mango avocado salsa lasts about 2 to 3 days in the fridge. To keep it fresh, store it in an airtight container. The avocado may brown, but it will still taste good. Can I make salsa ahead of time? You can make salsa ahead of time. Just prepare it a few hours before serving. This allows the flavors to mix well. If you make it too early, the avocado may brown. What can I substitute for cilantro? If you dislike cilantro, you can use parsley instead. Parsley adds a fresh taste without the strong flavor of cilantro. Green onions or basil are also good options. What are the health benefits of mangoes and avocados? Mangoes are high in vitamins A and C. They support your immune system and promote healthy skin. Avocados contain healthy fats and fiber. They help with digestion and heart health. Is mango avocado salsa good for meal prep? Yes, mango avocado salsa is great for meal prep. It adds flavor to many meals. Use it on tacos, salads, or grilled meats for a fresh twist. Can I use canned ingredients instead of fresh? You can use canned ingredients, but fresh tastes better. Canned mango or avocado may change the texture. If you must use canned, pick options with no added sugar or salt. Mango avocado salsa is fresh, tasty, and easy to make. We covered how to choose ripe ingredients, prepare them, and enhance flavors. Remember to rest your salsa for the best taste. You can adjust it to fit your diet or add new ingredients. Store leftovers properly to enjoy later. This salsa pairs well with many dishes and adds great flavor. Enjoy your cooking and try new flavor combinations!](https://joymealplan.com/wp-content/uploads/2025/07/4f0b2596-afb2-4ef7-a95d-26c50b7bed60-768x768.webp)
![- 6 large eggs - 1 cup fresh spinach, roughly chopped - 1/2 bell pepper, diced - 1/2 cup cherry tomatoes, halved - 1/4 cup red onion, finely minced - 1/2 cup feta cheese, crumbled - Seasonings and oil These ingredients make a tasty breakfast that is also healthy. The eggs provide protein, while the veggies add color and nutrients. You can use any bell pepper you like for a fun twist. You can swap out the spinach for other greens like kale or Swiss chard. Zucchini and mushrooms also work well in this recipe. If feta isn’t your favorite, try cheddar or goat cheese for a different taste. Each muffin has about 100 calories. They offer around 8 grams of protein, 7 grams of fat, and 2 grams of carbs. This makes them a great option for a filling breakfast. If you want the full recipe, check out [Full Recipe]. 1. Preheat your oven to 350°F (175°C). This ensures even cooking. 2. Grease your muffin tin using cooking spray or olive oil. This helps the muffins release easily. 1. In a large bowl, crack the 6 eggs. Whisk them vigorously until mixed well. 2. Fold in the chopped spinach, diced bell pepper, halved cherry tomatoes, and minced red onion. Make sure the veggies spread evenly. 3. Add the crumbled feta cheese for extra flavor. Mix in garlic powder, dried oregano, salt, and black pepper. Stir until everything is well combined. 1. Carefully pour the egg-veggie mix into the muffin tin. Fill each cup about three-quarters full. 2. Place the muffin tin in the oven and bake for 18-20 minutes. Check for doneness by pressing lightly on the tops. They should feel firm and slightly golden. 3. After baking, let the muffins cool in the tin for about 5 minutes. Use a butter knife to run around the edges. This helps them come out easily. Then, transfer them to a wire rack to cool completely. For the full recipe, check the earlier sections. Enjoy these tasty muffins as a quick breakfast! To get the perfect texture in your veggie muffins, cook them until they are just firm. If you bake them too long, they can become dry. Use a toothpick to check doneness. Stick it in the center, and if it comes out clean, they are ready. Do not overfill the muffin cups. Fill them about three-quarters full. This gives the muffins room to rise without spilling over. If you overfill, you will have a messy oven and uneven muffins. To keep your muffins fresh, store them in an airtight container in the fridge. They can last up to a week this way. If you want to keep them longer, consider freezing them. Wrap each muffin in plastic wrap and place them in a freezer bag. They will last for about three months in the freezer. When you want to enjoy a muffin, take it out and reheat it. You can warm it in the microwave for about 30 seconds or until hot. If you prefer a crispy edge, heat it in an oven at 350°F for 10 minutes. These muffins pair well with many toppings. Try them with fresh salsa for a zesty kick. Avocado adds creaminess and healthy fats. For a fun twist, serve them with a dollop of Greek yogurt. For a great presentation, arrange the muffins on a colorful platter. Garnish with freshly chopped herbs like parsley or basil. This adds a nice pop of color and makes the dish more inviting. Enjoy your veggie-packed egg muffins! {{image_4}} You can easily modify these muffins for different diets. For gluten-free options, just use gluten-free flour or a gluten-free muffin mix. This makes them safe for those with gluten sensitivities. If you're looking for a vegan alternative, replace eggs with chickpea flour or a plant-based egg substitute. This keeps the muffins tasty and healthy while meeting vegan needs. Want to add more flavor? Consider spices like cumin or smoked paprika. Fresh herbs like basil or parsley also work well. They can really wake up the taste of the muffins. For creative mix-ins, think about adding cooked bacon or sausage for extra protein. You can also try different cheeses, like cheddar or goat cheese, to change the taste. You can make mini muffins or standard size muffins. Mini muffins are great for snacks or kids. They bake faster, so check them at about 12-15 minutes. For standard muffins, stick to the 18-20 minute baking time. Just keep an eye on them, so they don't overcook. Adjusting the size helps you serve the muffins just how you like them. For the full recipe, you can refer back to the main section. Veggie packed egg muffins are small, baked dishes made with eggs and vegetables. They are light, nutritious, and perfect for breakfast. These muffins are easy to make and customizable. You can add your favorite veggies and cheeses. They provide protein from eggs and fiber from vegetables. This makes them a healthy choice for busy mornings. Veggie muffins last about 4 to 5 days in the fridge. Store them in an airtight container to keep them fresh. Signs of spoilage include a sour smell or mold. If you see either, throw them away. Always check before eating leftovers to ensure safety. Yes, you can freeze veggie packed egg muffins. Allow them to cool completely first. Place them in a freezer-safe bag or container. They can last up to 3 months in the freezer. To thaw, simply place them in the fridge overnight. You can also heat them in the microwave for a quick meal. Veggie packed egg muffins are easy to make and healthy. First, you prep your ingredients. The recipe takes about 10 minutes to prep and 18-20 minutes to cook. You can make 12 muffins in total. 1. Prep the oven: Preheat it to 350°F (175°C). 2. Grease the muffin tin: Use cooking spray or olive oil. 3. Whisk the eggs: Crack 6 large eggs into a bowl. Mix them well. 4. Add veggies: Mix in 1 cup of spinach, 1/2 diced bell pepper, 1/2 cup cherry tomatoes, and 1/4 cup red onion. 5. Season and add cheese: Add 1/2 cup of feta cheese, 1 tsp garlic powder, 1 tsp oregano, and salt and pepper. 6. Fill the muffin tin: Pour the mix into the cups, filling them about three-quarters full. 7. Bake: Put the tin in the oven for 18-20 minutes. Check if they are firm and golden. 8. Cool and serve: Let them cool for 5 minutes before removing them from the tin. These muffins are perfect for a quick breakfast or snack. Enjoy them warm or store them for later. This blog post covered how to make veggie-packed egg muffins. We discussed ingredients, nutritional info, and step-by-step instructions. You learned about tips for perfect muffins and various fun variations. With clear directions, you can create tasty muffins that fit your diet. I hope you feel inspired to try making these muffins. They are good for breakfast, snacks, or meal prep. Enjoy experimenting with flavors and share your results!](https://joymealplan.com/wp-content/uploads/2025/07/ffbefcb5-f112-4a21-bd30-7331a5bc5463-768x768.webp)