Caramelized Onion Gruyere Tart Flavorful Savory Dish

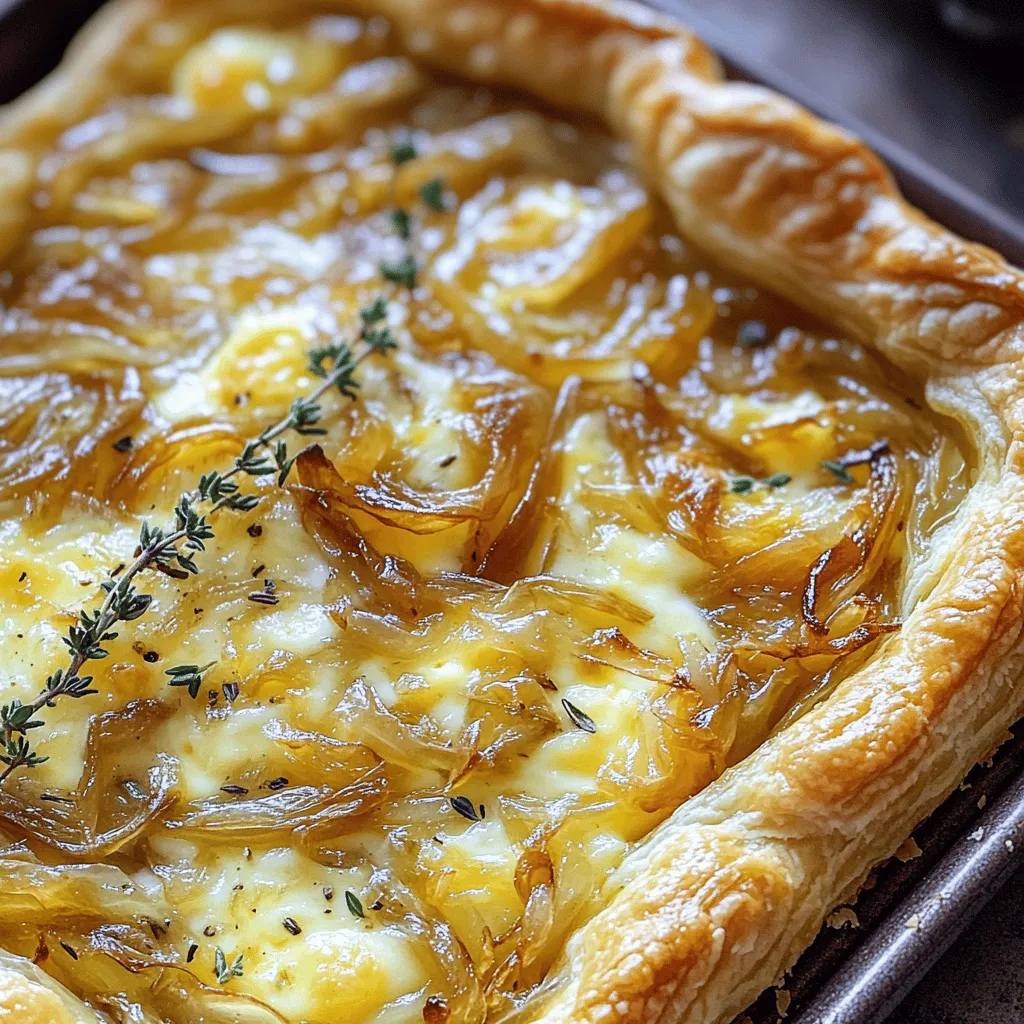
If you want to impress your friends and family with a tasty dish, this Caramelized Onion Gruyère Tart is the perfect choice. I’ll guide you through each step, from the best ingredients to handy tips. This savory tart combines sweet caramelized onions and rich Gruyère cheese, making it the star of any meal. Let’s dive in and create a dish that’s full of flavor and sure to wow your guests!
Ingredients
Main Ingredients List
– 1 sheet of puff pastry, thawed
– 3 large onions, thinly sliced
– 2 tablespoons olive oil
– 1 tablespoon unsalted butter
– 1 teaspoon granulated sugar
– 1 teaspoon salt
– 1 teaspoon fresh thyme leaves (or ½ teaspoon dried thyme)
– 1 cup Gruyère cheese, freshly grated
– 2 large eggs
– 1 cup heavy cream
– Freshly ground black pepper, to taste
These ingredients come together for a rich and savory tart. The puff pastry forms a crisp base. The onions add sweetness, while the Gruyère cheese gives depth. Eggs and cream create a light custard that binds everything.
Optional Ingredients for Variations
– Caramelized garlic for extra flavor
– Spinach or kale for added greens
– Crumbled bacon for a meaty touch
You can mix in these optional ingredients for a twist. Caramelized garlic pairs well with onions. Spinach adds color and nutrients. Bacon brings a savory crunch.
Recommended Cheese Types
– Gruyère cheese offers a nutty flavor.
– Emmental is another great choice.
– Goat cheese provides a tangy kick.
Choosing the right cheese is key. Gruyère gives the tart its classic taste. Emmental melts beautifully, while goat cheese adds creaminess. Feel free to experiment with your favorite cheeses!
Step-by-Step Instructions
Preparation Steps Overview
To make your Caramelized Onion Gruyère Tart, gather all your ingredients first. You will need:
– 1 sheet of puff pastry, thawed
– 3 large onions, thinly sliced
– 2 tablespoons olive oil
– 1 tablespoon unsalted butter
– 1 teaspoon granulated sugar
– 1 teaspoon salt
– 1 teaspoon fresh thyme leaves (or ½ teaspoon dried thyme)
– 1 cup Gruyère cheese, freshly grated
– 2 large eggs
– 1 cup heavy cream
– Freshly ground black pepper, to taste
Make sure everything is ready to go before you start cooking. This helps things flow smoothly.
Detailed Cooking Instructions
1. Preheat Your Oven: Turn your oven on to 400°F (200°C). This helps the tart cook evenly and the pastry become golden.
2. Caramelize the Onions: Heat the olive oil and butter in a large skillet over medium heat. Add the sliced onions and stir them to coat. Sprinkle with salt and sugar. Cook for 20-25 minutes, stirring often. You want the onions to be soft and caramelized. In the last few minutes, add thyme for extra flavor, then take the skillet off the heat.
3. Prepare the Puff Pastry: On a floured surface, roll out the puff pastry. Make it large enough for a 10-inch tart pan. Gently press it into the pan, making sure it fits well. Trim any extra pastry hanging over the edges.
4. Add the Gruyère Cheese: Spread the grated Gruyère cheese evenly over the bottom of the pastry shell. This adds a rich flavor.
5. Mix the Eggs and Cream: In a bowl, whisk the eggs, heavy cream, and a pinch of black pepper until it is well mixed. Pour this over the cheese in the tart shell. Ensure it covers the cheese evenly.
6. Layer the Caramelized Onions: Spoon the caramelized onions on top of the egg and cheese mix. Spread them out for even flavor in each bite.
Baking Instructions
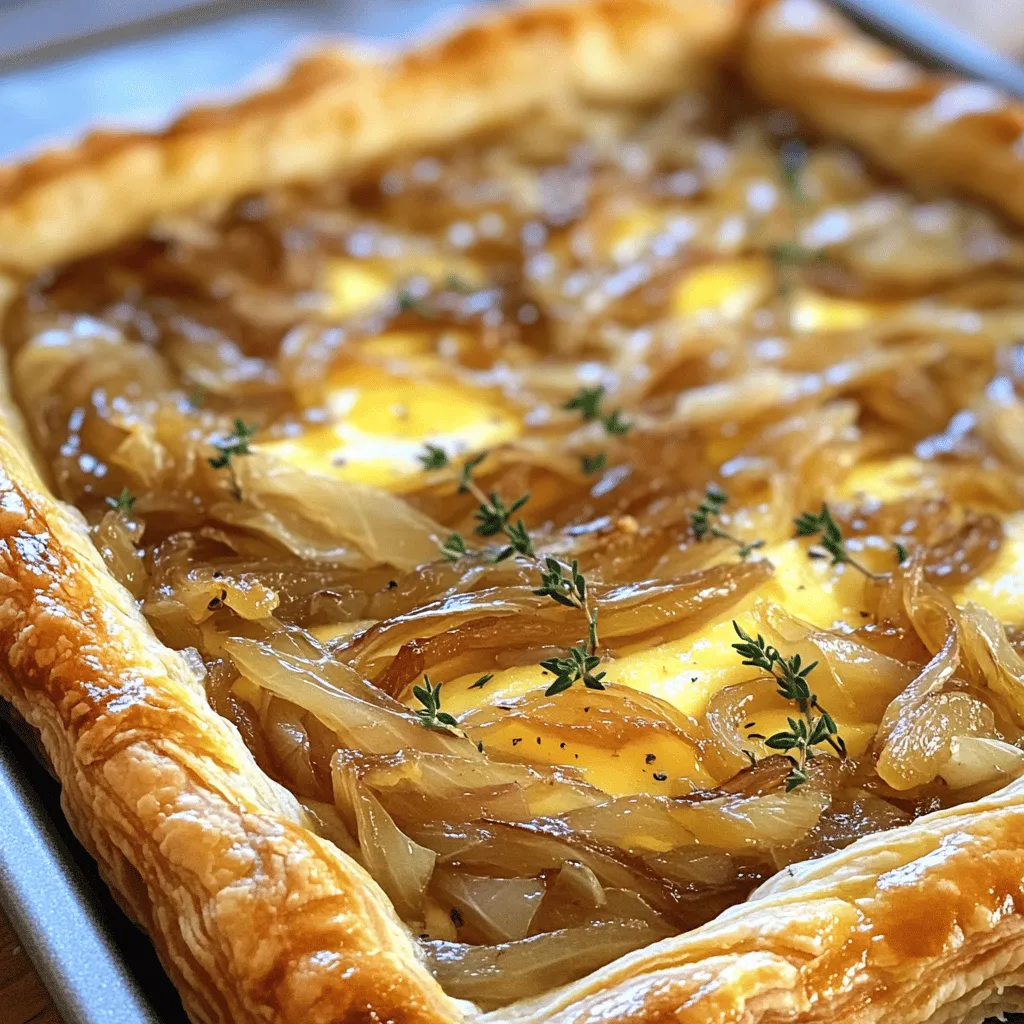
7. Bake the Tart: Place the tart into the preheated oven. Bake for 25-30 minutes. The custard should set, and the pastry should turn golden and flaky.
8. Cool and Serve: Let the tart cool slightly on a wire rack. This makes slicing easier and keeps the filling together. Serve it warm or at room temperature. It pairs well with a simple green salad for a tasty meal.
Tips & Tricks
Perfecting Caramelization of Onions
To get sweet and rich caramelized onions, follow these tips:
– Use medium heat. This helps cook the onions slowly.
– Stir often. This prevents sticking and burning.
– Add salt and sugar. This boosts flavor and speeds up caramelization.
– Cook for 20-25 minutes. The onions should be soft and golden.
– Add thyme in the last few minutes. This gives a fresh taste.
Ensuring a Flaky Puff Pastry
A flaky puff pastry makes your tart special. Here’s how to achieve that:
– Thaw your pastry completely. This helps it roll out easily.
– Roll it out on a floured surface. This prevents sticking.
– Press gently into the tart pan. Avoid stretching the dough.
– Trim excess pastry. This keeps a neat edge.
– Chill the pastry before baking. This helps it puff and stay flaky.
Common Mistakes to Avoid
Avoid these common mistakes for the best tart:
– Don’t rush the onion cooking. Patience is key for caramelization.
– Skip the cheese layer at the bottom. It adds flavor and richness.
– Forget to cool the tart. This makes slicing easier.
– Overbake the tart. Check for golden color and a firm center.
– Ignore seasoning. Freshly ground pepper adds a nice kick.

Variations
Vegetarian Variations
For a tasty vegetarian twist, you can add vegetables like spinach or mushrooms. Sauté them in olive oil before mixing with the onions. This will add more flavor and color to your tart. You can also swap out Gruyère for ricotta or feta cheese. These cheeses give a different texture and taste while keeping it meat-free.
Gluten-Free Options
To make a gluten-free tart, use gluten-free puff pastry. Many stores sell frozen options that work well. Just check the package for baking instructions. You can also make a crust from ground almonds or gluten-free flour. This lets you enjoy the tart without gluten.
Flavor Enhancements (Herbs & Spices)
You can boost the flavor of your tart with fresh herbs. Try rosemary, parsley, or basil for a fragrant touch. Adding spices like nutmeg or smoked paprika can give a warm, rich taste. If you like heat, sprinkle some red pepper flakes in the onion mix. Each of these additions can create a unique flavor profile that suits your taste.
Storage Info
How to Store Leftovers
To keep your tart fresh, let it cool completely first. Wrap it in plastic wrap or place it in an airtight container. Store it in the fridge for up to three days. This way, you can enjoy it later without losing flavor.
Reheating Instructions
When you’re ready to eat, preheat your oven to 350°F (175°C). Place the tart on a baking sheet. Heat it for about 10-15 minutes. This warms it through and helps keep the crust crispy. Avoid using the microwave, as it can make the pastry soggy.
Freezing Tips
If you want to freeze the tart, slice it first. Wrap each slice in plastic wrap, then place them in a freezer bag. Label the bag with the date. You can freeze it for up to two months. To enjoy, thaw it overnight in the fridge and reheat as mentioned above.
FAQs
Can I use other types of cheese?
Yes, you can! While Gruyère is rich and nutty, other cheeses work well too. Try aged cheddar for a sharper taste. Fontina adds creaminess, while goat cheese brings tang. Mix cheeses for more depth. Just remember to adjust the amount based on the cheese’s strength.
How do I know when the tart is done?
The tart is ready when the top is golden brown. The custard inside should be set, not jiggly. To check, gently shake the tart. If it wobbles slightly but holds, it’s good to go. Let it cool for a few minutes before slicing. This helps the filling stay firm.
What can I serve with Caramelized Onion Gruyère Tart?
This tart pairs well with a simple green salad. A mix of leafy greens and a light vinaigrette works best. You can also serve it with roasted vegetables or a bowl of soup. For a more filling meal, add grilled chicken or a side of quinoa.
To make a great Caramelized Onion Gruyère Tart, you need the right ingredients and steps. We covered the main ingredients and some tasty variations. I shared tips for perfecting your dish, like how to caramelize onions and avoid mistakes. Knowing how to store and reheat leftovers keeps your tart fresh.
This dish is easy to customize and perfect for any meal. Now, it’s your turn to create a delicious tart that everyone will love!


![To make Lemon Butter Shrimp Pasta, gather these items: - 8 oz linguine or spaghetti - 1 lb large shrimp, peeled and deveined - 4 tablespoons unsalted butter - 3 cloves garlic, minced - Zest and juice of 1 large lemon - 1/2 teaspoon crushed red pepper flakes (optional) - Salt and freshly ground black pepper, to taste - 1/4 cup fresh parsley, finely chopped - Grated Parmesan cheese for serving (optional) If you need substitutes, here are some ideas: - Use fettuccine instead of linguine or spaghetti. - Swap shrimp for scallops or chicken. - Use olive oil in place of butter for a lighter dish. - Fresh garlic can be replaced with garlic powder, but use less. To ensure great taste, focus on freshness: - Buy shrimp that smells clean, like the ocean. - Look for shrimp with a firm texture and a slight sheen. - Choose fresh parsley with vibrant green leaves. - Use fresh lemons for the best flavor, avoiding dried or bottled juice. These tips help create a dish that is as delightful as it is simple. For the complete recipe, refer to the [Full Recipe]. Start by boiling a large pot of salted water. Once it bubbles, add 8 oz of linguine or spaghetti. Cook until the pasta is al dente. This usually takes about 8 to 10 minutes. Before draining, save 1/2 cup of the pasta water. Drain the pasta and put it in a big bowl. In a large skillet, melt 2 tablespoons of unsalted butter over medium heat. When the butter bubbles, add 1 lb of peeled and deveined shrimp. Sprinkle salt, black pepper, and crushed red pepper flakes if you want some heat. Cook the shrimp for 3 to 4 minutes until they turn pink and opaque. Take the shrimp out and set them aside on a plate. In the same skillet, add 2 more tablespoons of unsalted butter. Then, add 3 cloves of minced garlic. Sauté for about a minute. You want the garlic fragrant but not browned. Next, stir in the zest and juice of 1 large lemon. Mix well until combined. Now, add the cooked pasta to the skillet with the lemon garlic sauce. Toss gently to coat the noodles. If it feels dry, add a little of the reserved pasta water. Keep tossing until the pasta reaches a creamy texture. Fold in the cooked shrimp and 1/4 cup of chopped parsley. Make sure everything is evenly mixed. Taste the dish. Adjust the flavor with extra salt or black pepper if needed. Serve the pasta hot in shallow bowls. For a nice touch, add extra parsley and a sprinkle of grated Parmesan cheese on top. To cook shrimp just right, time is key. You want shrimp to turn pink and opaque. This usually takes about 3 to 4 minutes on medium heat. If you overcook them, they become tough. Keep an eye on them while they sauté. If they curl tightly, they are likely overdone. Take them out as soon as they are done. Lemon is the star of this dish. Zest and juice both bring bright flavor. Start with just the juice of one lemon. Taste the pasta sauce before adding more. If it’s too sour, add a pinch of sugar. This helps balance the flavors. You can also add more butter to soften the lemon taste. Sometimes things don’t go as planned. If your sauce is too thick, add some of the reserved pasta water. This will help loosen it up. If the shrimp seems bland, sprinkle a little more salt. For a bit of heat, add extra crushed red pepper flakes. Just remember to adjust slowly and taste often. For the full recipe, check out the detailed instructions. {{image_4}} You can make this dish even better by adding veggies. Spinach, cherry tomatoes, and bell peppers work well. Just sauté them with the shrimp for a quick cook. For a fresh crunch, try adding arugula or zucchini at the end. This boosts flavor and nutrition. If you want to switch up the protein, consider using scallops or chicken. Scallops cook fast like shrimp. Just remember to adjust the cook time. Chicken needs a bit longer. Cut it into small pieces to ensure even cooking. You can also use tofu for a vegetarian option. If you need a gluten-free option, swap regular pasta for gluten-free pasta. Rice noodles or zucchini noodles are great choices. They absorb the sauce well and keep the dish light. Always check labels to ensure your ingredients are gluten-free. To keep your lemon butter shrimp pasta fresh, store it in an airtight container. Place it in the fridge within two hours of cooking. It will stay good for up to three days. When you’re ready to eat, check for any signs of spoilage, like a sour smell or unusual texture. You can freeze this dish for longer storage. Allow the pasta to cool completely before freezing. Use a freezer-safe container or bag, and try to remove as much air as possible. It can last in the freezer for about two months. When you are ready to enjoy it, thaw it in the fridge overnight. For reheating, use the stovetop for best results. Place the pasta in a skillet over medium heat. Add a splash of water or broth to help revive the sauce. Stir often until heated through. You can also use the microwave, but be sure to cover it to keep moisture in. Heat it in short bursts, stirring in between. This will help keep the pasta from drying out. For extra flavor, add a squeeze of fresh lemon juice before serving. For a full recipe, check out the details above! To make Lemon Butter Shrimp Pasta, start by cooking the pasta. Boil salted water, add linguine or spaghetti, and cook until al dente. Reserve some pasta water before draining. Next, melt butter in a skillet over medium heat. Add shrimp, season with salt and pepper, and sauté until pink. Remove shrimp and cook garlic in the same skillet. Add lemon zest and juice, then return the pasta and shrimp. Toss everything together, adding reserved pasta water as needed. Finish with parsley and serve hot. For the complete recipe, check the Full Recipe section. You can serve Lemon Butter Shrimp Pasta with a fresh green salad or garlic bread. A light, crisp white wine pairs well too. For added flavor, consider a side of roasted vegetables. These options enhance the meal and balance the rich flavors. Yes, you can use frozen shrimp. Just thaw them before cooking. Place the shrimp in cold water for about 15-20 minutes. After they are thawed, peel and devein if needed. This allows you to enjoy this dish even when shrimp is not fresh. To prevent pasta from sticking, use plenty of water when boiling. Stir the pasta during the first few minutes of cooking. Drain it well and toss it with a little olive oil after draining. This keeps the noodles separate and ready for the sauce. Linguine and spaghetti are the best choices for this dish. They hold the sauce well and complement the shrimp. You can also try fettuccine for a thicker noodle. Choose a pasta that you enjoy, as it can enhance your overall experience. In this blog post, I covered the key ingredients for Lemon Butter Shrimp Pasta and offered tips on making it shine. You learned how to cook shrimp perfectly and balance that bright lemon flavor. I shared variations to suit your taste and provided essential storage info for leftovers. With these steps, you can create a delicious meal. Try new ingredients or variations to keep things exciting. Enjoy making this dish and impressing your family and friends!](https://joymealplan.com/wp-content/uploads/2025/07/d5b21a26-0d28-4d5a-916e-1d45c765ab6a-768x768.webp)

![To make a tasty tomato basil soup, gather these ingredients: - 2 tablespoons extra virgin olive oil - 1 medium yellow onion, finely diced - 3 cloves garlic, minced - 2 cans (14 oz each) diced tomatoes in juice - 2 cups low-sodium vegetable broth - 1 teaspoon granulated sugar - 1 teaspoon dried oregano - Salt and freshly ground black pepper, to taste - 1 cup fresh basil leaves, roughly chopped - 1/2 cup heavy cream (optional for added creaminess) - Crusty bread or homemade croutons, for serving You can change up the flavor of your soup by adding: - A pinch of red pepper flakes for heat - Fresh lemon juice for brightness - A sprinkle of Parmesan cheese for richness - Other herbs like thyme or parsley Fresh basil and tomatoes make a big difference. Here’s how to choose the best: - Basil: Look for bright green leaves. They should be firm, not wilted. Smell the leaves; they should have a strong, sweet aroma. - Tomatoes: Choose ripe tomatoes with no bruises. They should feel heavy and firm. The color should be bright and even, depending on the type. Using high-quality ingredients will enhance the soup's flavor. Enjoy the vibrant taste of fresh basil and tomatoes in your cooking! For the full recipe, check out the [Full Recipe]. First, gather all your ingredients. You will need olive oil, onion, garlic, diced tomatoes, vegetable broth, and spices. Also, have fresh basil and cream ready if you want a richer soup. Start by chopping the onion and mincing the garlic. Dice them small for even cooking. This helps build the soup's flavor from the start. Measure out your diced tomatoes and vegetable broth, so you have them ready. In a large saucepan, heat the olive oil on medium heat. Once hot, add the diced onion. Cook it for about five minutes until it turns soft and clear. Then, add the minced garlic. Stir it for one minute. Be careful not to let it burn. Next, pour in the diced tomatoes and vegetable broth. Stir well to mix everything. Add the sugar, oregano, salt, and pepper. Let the soup come to a gentle boil. Then, reduce the heat to low. Let it simmer for 20 minutes. This helps the flavors mix together nicely. After simmering, take the saucepan off the heat. Let it cool for a few minutes. For a smooth soup, use an immersion blender to blend the soup until it's silky. If you don’t have one, transfer it in batches to a blender. Blend until smooth. Once blended, return the soup to the saucepan. Stir in the chopped basil and cream if you want it creamy. Heat it gently on low for about five minutes. This will let the basil's flavor shine through. Taste your soup before serving. Adjust the salt, pepper, or sugar to your liking. Serve it warm with bread or croutons for a tasty meal. Enjoy your delicious tomato basil soup! For a complete recipe, check the Full Recipe. To make your tomato basil soup extra tasty, focus on fresh herbs. Fresh basil adds a bright touch. You can also use other herbs, like thyme or parsley, for a twist. Seasoning is key! Start with salt and pepper to bring out the flavors. A dash of sugar balances the acidity of the tomatoes. Don’t forget to taste as you go. One common mistake is overcooking the garlic. If it burns, it can turn bitter. Add it just before the tomatoes for the best flavor. Another mistake is skipping the simmering step. This helps the flavors blend well. A quick boil won't do the trick. Lastly, don’t forget to blend the soup well. A chunky texture can be nice, but a smooth soup feels luxurious. Keep your heat at medium for sautéing the onions. This allows them to soften without burning. When it’s time to simmer, lower the heat. A gentle simmer for 20 minutes works best. If you want a silky texture, blend the soup until smooth. A few minutes of gentle heating after blending helps the basil infuse nicely. For the full recipe, check the complete guide above. Enjoy your cooking! {{image_4}} To make a creamy version of tomato basil soup, add heavy cream. This gives the soup a rich and smooth texture. Follow the original recipe and simply stir in 1/2 cup of heavy cream after blending the soup. Heat it gently over low heat for a few minutes. The cream balances the acidity from the tomatoes and adds depth. You can also use coconut cream for a dairy-free option. If you like a chunkier soup, add fresh veggies. Dice up some zucchini, bell peppers, or carrots. Sauté these with the onion at the start. This adds more color and nutrients to your dish. Keep the diced tomatoes, but don’t blend the soup completely. Just stir in the chopped fresh basil at the end for extra flavor. This version is hearty and satisfying. To make a vegan version, skip the heavy cream and use coconut milk instead. It gives a creamy texture and a hint of sweetness. Use vegetable broth and fresh basil as usual. This version keeps the dish plant-based and delicious. You’ll still enjoy all the flavors without animal products. For a kick, add crushed red pepper flakes when cooking. These variations show just how versatile tomato basil soup can be. Each version brings its own twist while keeping that classic flavor. For the full recipe, check out the complete guide. To store your tomato basil soup, let it cool first. Pour it into an airtight container. You can keep it in the fridge for 3 to 4 days. Make sure the lid seals tightly to keep it fresh. If you want to save it longer, freezing is a great option. For freezing, use freezer-safe containers. Leave some space at the top, as the soup will expand when it freezes. You can store it in the freezer for up to 3 months. Label the container with the date, so you know when you made it. It helps to freeze it in portion sizes for easy use later. When you're ready to eat, thaw the soup in the fridge overnight. To reheat, pour it into a pot over low heat. Stir often to prevent sticking. If you want a creamier texture, add a splash of cream while heating. You can also use a microwave, but stir halfway through to heat evenly. Enjoy your delicious soup! You can serve many tasty sides with Tomato Basil Soup. Here are some great options: - Crusty bread - Grilled cheese sandwiches - Homemade croutons - A fresh salad These choices add texture and flavor. For a fun twist, try a cheesy garlic bread. It pairs well with the soup's warmth. Tomato Basil Soup lasts about 3 to 5 days in the fridge. Store it in an airtight container to keep it fresh. To enjoy it longer, you can freeze it. Yes, you can make Tomato Basil Soup in advance. It tastes even better the next day! Just cook the soup, let it cool, and store it in the fridge. You can also freeze it for later use. When ready to serve, simply reheat it on the stove or in the microwave. For a full recipe, check out the Hearty Tomato Basil Delight. Making Tomato Basil Soup is simple and rewarding. We covered the key ingredients, preparation steps, and cooking tips. You can choose fresh basil and ripe tomatoes for the best taste. Variations like creamy or vegan options add more fun. Remember to store leftovers properly to keep them fresh. By avoiding common mistakes, you can create a perfect soup each time. I hope these insights inspire you to enjoy this classic dish all year round.](https://joymealplan.com/wp-content/uploads/2025/06/73c8b43a-025c-4169-ae99-725afa6fdd07-768x768.webp)
