Cheddar Jalapeño Cornbread Flavorful and Easy Recipe

Get ready to spice up your meal with my Cheddar Jalapeño Cornbread recipe! This dish packs a punch of flavor with savory cheddar and a kick of jalapeño. It’s simple to make, and perfect for any occasion. From easy ingredient swaps to expert tips on baking, I’ll guide you every step of the way. Let’s dive in and create a cornbread that will impress your guests and delight your taste buds!
Ingredients
Essential Ingredients for Cheddar Jalapeño Cornbread
To make Cheddar Jalapeño Cornbread, you need key ingredients. Here’s what to gather:
– 1 cup cornmeal
– 1 cup all-purpose flour
– 1 tablespoon baking powder
– 1 teaspoon salt
– 1 cup buttermilk
– 2 large eggs
– 1/4 cup honey
– 1/4 cup unsalted butter, melted
– 1 cup sharp cheddar cheese, shredded
– 2 jalapeños, finely chopped (seeds removed for less heat)
– 1/2 cup corn kernels (fresh or frozen)
These ingredients give the cornbread its rich flavor and nice texture. Cornmeal brings the classic taste, while the cheddar and jalapeños add a kick.
Recommended Tools for Preparation
Using the right tools makes cooking easy. Here’s what you need:
– A large mixing bowl
– A whisk
– A spatula
– A 9-inch square baking pan or a cast iron skillet
– An oven
These tools help you mix, bake, and serve the cornbread well. The cast iron skillet gives the bread a nice crust.
Ingredient Substitutions
Sometimes, you may not have all the ingredients. Here are some swaps:
– Cornmeal: You can use polenta or fine ground corn flour.
– All-purpose flour: Use whole wheat flour for a heartier taste.
– Buttermilk: You can mix regular milk with lemon juice or vinegar.
– Cheddar cheese: Try pepper jack for more spice or mozzarella for a milder flavor.
– Jalapeños: Use bell peppers for a milder option.
These substitutions keep the spirit of the dish while adjusting to what you have on hand.
Step-by-Step Instructions
Prepping the Oven and Bakeware
First, preheat your oven to 400°F (200°C). This heat helps the cornbread rise. Next, take a 9-inch square baking pan or a cast iron skillet. Grease it well with butter. This step ensures that your cornbread won’t stick to the pan. Set the pan aside as you prepare the batter.
Mixing Dry Ingredients
In a large mixing bowl, add the following dry ingredients:
– 1 cup cornmeal
– 1 cup all-purpose flour
– 1 tablespoon baking powder
– 1 teaspoon salt
Whisk these ingredients together until they blend smoothly. Make sure there are no lumps. This mix creates the base of your cornbread.
Combining Wet Ingredients
In another bowl, mix the wet ingredients:
– 1 cup buttermilk
– 2 large eggs
– 1/4 cup honey
– 1/4 cup unsalted butter, melted
Whisk these together until smooth. This mixture adds moisture and sweetness. The buttermilk helps create a tender cornbread.
Creating the Batter
Now, pour the wet ingredients into the bowl of dry ingredients. Use a spatula to stir gently. Mix until just combined; avoid overmixing. Next, fold in the extras:
– 1 cup sharp cheddar cheese, shredded
– 2 jalapeños, finely chopped (seeds removed for less heat)
– 1/2 cup corn kernels (fresh or frozen)
Make sure these flavors spread evenly through the batter.
Baking Time and Techniques
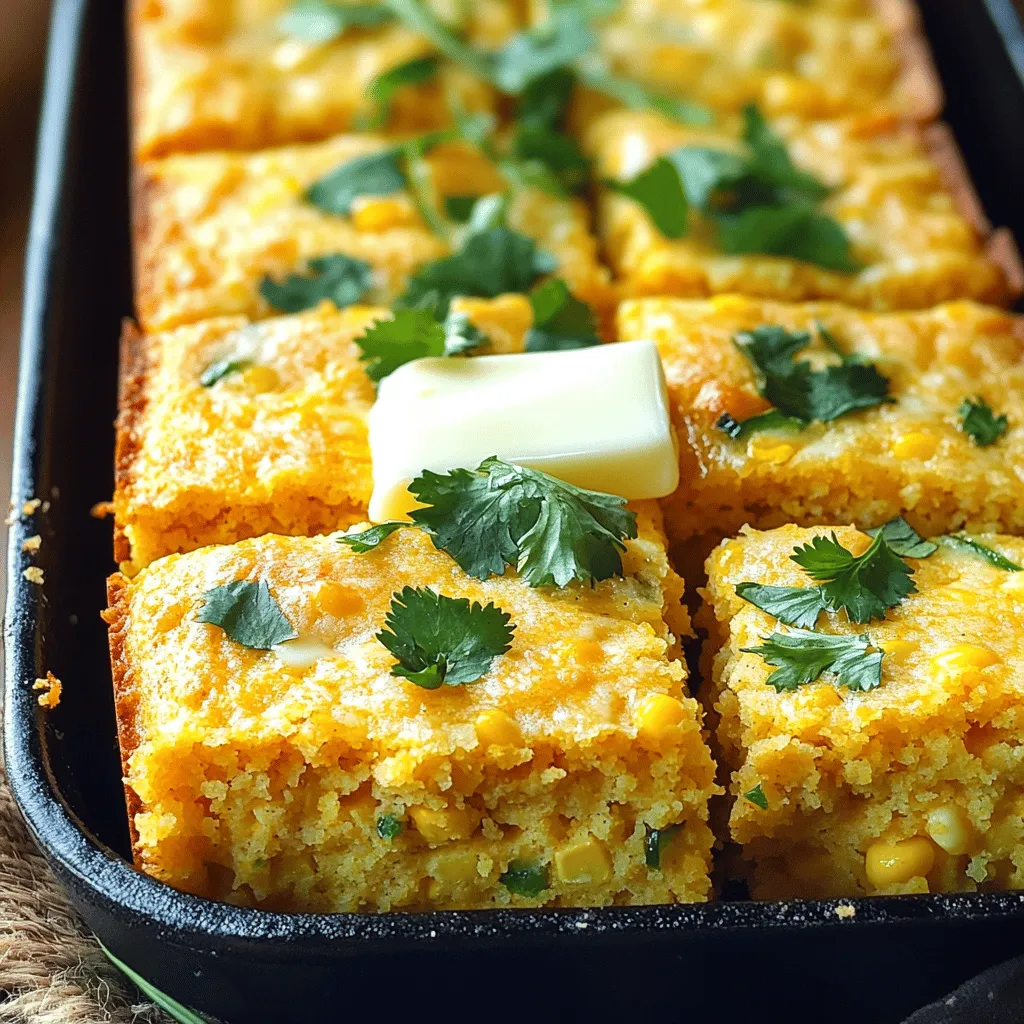
Transfer the batter into your prepared baking pan. Spread it evenly across the surface. Bake in your preheated oven for 20-25 minutes. The top should turn golden brown. To check if it’s done, insert a toothpick into the center. If it comes out clean, your cornbread is ready. Once baked, let it cool for about 10 minutes before slicing it into squares. Enjoy your warm Cheddar Jalapeño Cornbread!
Tips & Tricks
Achieving the Perfect Texture
To get the best texture, mix your dry and wet ingredients separately. This helps keep lumps out of the batter. When you combine them, stir gently. Overmixing can make the cornbread tough. You want it light and fluffy. Adding a little corn gives it a nice bite too.
How to Adjust Spiciness
Want more heat? Add more jalapeños! For less heat, remove the seeds and ribs. You can also use milder peppers like poblano. If you want a twist, try adding a pinch of cayenne for a warm kick. Taste as you go to find your perfect spice level.
Serving Suggestions and Pairings
Cornbread pairs well with many dishes. Try it with chili for a warm meal. It also works great with soups or stews. For a fun twist, serve it with honey butter on top. You can even enjoy it with a side of salsa.

Variations
Gluten-Free Versions
You can easily make a gluten-free Cheddar Jalapeño Cornbread. Swap the all-purpose flour for a gluten-free blend. Look for one that works cup-for-cup with regular flour. Ensure the baking powder is also gluten-free. This way, everyone can enjoy this tasty treat.
Different Cheeses to Use
While sharp cheddar is the star, feel free to mix it up. Try using pepper jack for a spicy kick. Aged gouda adds a rich, nutty flavor. You can even use crumbled feta for a tangy twist. Each cheese brings its own charm to the cornbread.
Additional Mix-Ins
Want to take your cornbread to the next level? Add crispy bacon for a savory crunch. Fresh herbs like cilantro or chives brighten up the flavors. You could also toss in some diced bell peppers for extra color and taste. Get creative with your mix-ins to make this recipe your own.
Storage Info
How to Store Leftover Cornbread
To keep your cornbread fresh, let it cool completely. Wrap it tightly in plastic wrap. You can also place it in an airtight container. Store it at room temperature for up to two days. If you want to keep it longer, refrigeration is a good option. Just remember, the cold can dry it out a bit.
Reheating Tips
When you’re ready to enjoy your cornbread again, reheating is easy. Preheat your oven to 350°F (175°C). Place the cornbread on a baking sheet. Cover it with foil to keep it moist. Heat for about 10-15 minutes. You can also use a microwave. Just warm it for 15-30 seconds. If you want it crispy, try a toaster oven instead.
Freezing Instructions
Freezing cornbread is a smart way to save it for later. First, cool the cornbread completely. Then, cut it into squares. Wrap each piece in plastic wrap, then in foil. This helps prevent freezer burn. Store the wrapped cornbread in a freezer-safe bag. It can last up to three months. When you’re ready to eat, thaw it in the fridge overnight before reheating. For a quick option, you can reheat it straight from the freezer. Just add a few extra minutes to your baking time.
FAQs
How do I know when cornbread is done?
You can check if cornbread is ready by inserting a toothpick into the center. If it comes out clean, your cornbread is done. You can also look for a golden brown top. The edges should pull away slightly from the pan.
Can I use milk instead of buttermilk?
Yes, you can use regular milk if you don’t have buttermilk. To mimic buttermilk, add a tablespoon of vinegar or lemon juice to a cup of milk. Let it sit for five minutes. This will create a similar tangy flavor.
What can I serve with Cheddar Jalapeño Cornbread?
Cheddar Jalapeño Cornbread pairs well with many dishes. Some great options include:
– Hearty chili
– Barbecue meats
– Soups and stews
– Fresh salads
You can also enjoy it with butter and honey for a sweet touch.
How to make it ahead of time?
You can prepare the batter ahead of time. Mix all your dry and wet ingredients separately, then store them in the fridge. Combine them just before baking. You can also bake the cornbread a day early. Just store it in an airtight container. Reheat it in the oven before serving for the best taste.
In this blog post, I covered the key ingredients and tools for cheddar jalapeño cornbread. I shared step-by-step instructions to help you bake it perfectly. You learned tips on texture, spice adjustment, and serving ideas. I also offered variations for different diets and storage tips for leftovers.
Now, it’s your turn to try this delicious recipe. Enjoy the process and the result! Happy baking!


![- Preheat the oven to 400°F (200°C). - Rinse and trim the asparagus. First, I set my oven to 400°F (200°C). This temperature roasts the asparagus just right. Next, I rinse the asparagus under cold water. I clean each stalk well. To trim, I gently bend the end until it snaps. This removes the tough part. If you prefer, use a knife for a clean cut. - Mix garlic, olive oil, lemon zest, lemon juice, and seasonings. Now, let’s make the marinade! In a small bowl, I combine minced garlic, olive oil, lemon zest, and lemon juice. I add sea salt, black pepper, and red pepper flakes for a little heat. Whisk all these together until well mixed. This marinade brings a burst of flavor to our asparagus. - Toss asparagus in marinade. - Roast asparagus for 12-15 minutes in preheated oven. Next, I lay the asparagus on a baking sheet. I drizzle the marinade over them, making sure each spear gets coated. I use my hands or a spoon to toss gently. Then, I spread them out in a single layer. I place the tray in the hot oven. I roast the asparagus for 12-15 minutes. Halfway through, I give them a stir. This helps them cook evenly. When done, they should be tender with a bit of crispness. If you want, sprinkle grated Parmesan cheese over the asparagus in the last two minutes of roasting. It melts nicely and adds richness. Once finished, I take them out and garnish with fresh parsley. This adds color and makes the dish pop! For the complete recipe, check out the [Full Recipe]. How do you tell when asparagus is done cooking? Look for a bright green color. The stalks should be tender but still firm. You can also poke them with a fork to check for tenderness. If they bend easily but don’t break, they’re perfect! Want to boost the flavor? Try adding fresh herbs like thyme or basil. You can also use spices like garlic powder or onion powder. If you like a kick, sprinkle red pepper flakes on top. Just a pinch adds great heat without overpowering the dish. How can you serve Garlic Lemon Asparagus? First, arrange the asparagus on a nice platter. Keep them in a single layer for a neat look. You can sprinkle some extra lemon zest on top for brightness. Finally, add fresh parsley for a splash of color. This makes your dish pop and look tasty! For the full recipe, check out the complete guide. {{image_4}} You can cook Garlic Lemon Asparagus in different ways. Each method gives a unique taste. - Grilling: This adds a smoky flavor. You will get nice grill marks. But you should watch it closely. It cooks fast and may burn. - Roasting: This method brings out the natural sweetness. You will get a tender inside with a slight crisp. It takes a short time at high heat, which is perfect for busy cooks. - Sautéing on the stovetop: This is quick and easy. Heat oil in a pan, add the asparagus, and cook for a few minutes. You get a fresh taste and a bright green color. You can switch ingredients to suit your taste or diet. - Cheese Options: If you want a vegan dish, skip the Parmesan. You can use nutritional yeast for a cheesy taste without dairy. Feta cheese is also a great option if you want a different flavor. - Citrus Variations: Instead of lemon, try lime or orange. Each fruit brings its own twist. Lime gives a tangy kick, while orange adds sweetness. Many people have different diets. You can easily adapt this dish. - Gluten-Free: This recipe is already gluten-free. Just make sure any added ingredients are too. - Dairy-Free: Skip the cheese or use a dairy-free alternative. This keeps the dish light and fresh. - Low-Carb: Asparagus is low in carbs, making it perfect for health-conscious eaters. You can enjoy it without worries about carbs. Try these variations to make Garlic Lemon Asparagus your own! For the complete recipe, check the [Full Recipe]. To keep your Garlic Lemon Asparagus fresh, follow these tips: - Refrigeration: Place leftovers in an airtight container. This helps keep moisture in and prevents odors from other foods. Store them in the fridge for best results. - Freezing: If you want to save them longer, consider freezing. First, blanch the asparagus in boiling water for two minutes. Then cool them in ice water. Drain and place in freezer bags. Remove air to avoid freezer burn. When it's time to enjoy them again, you should reheat properly. - Reheating: For the best taste, heat in a skillet over medium heat. Add a splash of olive oil to keep them moist. Stir occasionally for even heating. You can also reheat them in the oven at 350°F (175°C) for about 10 minutes. Garlic Lemon Asparagus lasts about 3 to 5 days in the fridge. - Check for freshness: Look for any signs of spoilage, like discoloration or a sour smell. If they seem off, it's best to toss them. To maintain texture after storage, try these tips: - Avoid overcrowding in the container. This helps air circulate and keeps them crisp. - When reheating, don't overcook them. This keeps their vibrant color and crunch. Following these steps will help you enjoy your Garlic Lemon Asparagus longer, keeping the flavors fresh and delicious! For the complete preparation guide, check the Full Recipe. What are the health benefits of asparagus? Asparagus is low in calories and high in nutrients. It is rich in vitamins A, C, E, and K. This vegetable also has folate, which helps with cell growth. Asparagus is a good source of fiber, aiding digestion. Plus, it has antioxidants that fight free radicals in the body. Can I prepare Garlic Lemon Asparagus in advance? Yes, you can prepare Garlic Lemon Asparagus in advance. You can wash and trim the asparagus a day before. Mix the marinade and store it in the fridge. When you are ready to eat, toss the asparagus in the marinade and roast them. This helps the flavors meld well. Can I use frozen asparagus for this recipe? Yes, you can use frozen asparagus for this recipe. However, fresh asparagus will taste better. If using frozen, thaw them first. Drain excess water to avoid sogginess. Then proceed with the marinade and roasting steps. How can I make this recipe spicier? To make this recipe spicier, add more red pepper flakes. You can also add sliced fresh jalapeños or a dash of hot sauce. Mix these into the marinade for an extra kick. Start with a small amount and adjust to your taste. What dishes pair well with Garlic Lemon Asparagus? Garlic Lemon Asparagus pairs well with many dishes. It complements grilled chicken, fish, or steak. You can also serve it with pasta or rice. A light salad also works nicely with this dish. How can I incorporate this recipe into a meal prep plan? Incorporate Garlic Lemon Asparagus into your meal prep by adding it to your favorite meals. Roast a big batch and store it in the fridge. Use it as a side dish throughout the week. It can add color and flavor to your meals. In this blog post, we covered a simple yet delicious Garlic Lemon Asparagus recipe. We explored fresh ingredients, step-by-step cooking instructions, and useful tips for perfecting your dish. You learned about different cooking methods and diet modifications, plus how to store leftovers. Garlic Lemon Asparagus is a versatile side that enhances any meal. Try it out and enjoy creating your own flavors!](https://joymealplan.com/wp-content/uploads/2025/07/a67e5927-9a3c-4503-bb74-543c28219cb2-768x768.webp)
![- 1 lb sirloin steak, cut into 1-inch cubes - 3 tablespoons unsalted butter - 4 cloves garlic, minced - Fresh herbs: rosemary and thyme - Olive oil, salt, and pepper When making garlic butter steak bites, you want to start with high-quality sirloin steak. This cut is tender and holds flavor well. Cut it into 1-inch cubes for even cooking. Next, unsalted butter is key. It melts beautifully, adding richness. Garlic brings a strong flavor to the dish. Use fresh cloves, and don't skip this step. Fresh herbs like rosemary and thyme brighten the taste. Seasoning with salt and pepper enhances every bite. Finally, a splash of olive oil keeps the steak from sticking. - Alternative cuts of steak - Butter alternatives for a dairy-free version - Additional spices for flavor enhancement If you don't have sirloin, ribeye or tenderloin work well too. They offer rich flavors and tenderness. For a dairy-free option, you can use olive oil or coconut oil instead of butter. This keeps the dish tasty while meeting dietary needs. Want more flavor? Try adding spices like smoked paprika or chili flakes for a kick. You can mix and match based on what you have at home. The goal is to create a dish that you enjoy. For the complete recipe, check out the [Full Recipe]. First, pat the steak cubes dry with a paper towel. This step helps the steak sear better. If the surface is wet, the steak will steam instead of brown. Next, season both sides with salt and pepper. Use enough to enhance the flavor but not too much to overpower it. Heat a large skillet over medium-high heat. Add the olive oil and wait until it shimmers. This shows the oil is hot and ready. Carefully place the steak bites in a single layer. Avoid overcrowding the pan; this helps each piece brown nicely. Sear each side for 2-3 minutes until you reach your desired doneness. For best results, medium-rare is ideal. Once you remove the steak bites, lower the heat to medium. Add the unsalted butter to the same skillet. Let it melt completely, stirring with a wooden spoon. This picks up any flavorful bits from the pan. These bits add depth to your sauce. After melting, stir in the minced garlic, rosemary, and thyme. Cook for about a minute. You want the garlic fragrant but not browned, as it can taste bitter. Return the seared steak bites to the skillet. Gently toss them in the garlic butter sauce. This ensures each piece is well-coated. Cook for another 1-2 minutes. This allows the flavors to meld beautifully. The aroma will fill your kitchen, making it hard to wait. For the full recipe, refer to the earlier section. To get a great sear on your steak bites, you need patience. Heat your skillet until it's hot. A good sear locks in flavor and keeps the meat tender. If you crowd the skillet, the steak will steam instead of sear. Cook in batches if needed. This will give you that beautiful brown crust. When cooking garlic, be careful not to burn it. Add the garlic to the butter only after it has melted. Stir it for about a minute until it smells amazing. If you want a bit of spice, add a pinch of red pepper flakes. This will give your garlic butter a nice kick. For serving, think about how to impress your guests. You can serve the steak bites in the skillet they cooked in. This adds a rustic charm. Drizzle the garlic butter over the top for a nice look. Garnish with fresh herbs like parsley. Use toothpicks for easy eating. These ideas will make your dish stand out at any gathering. {{image_4}} You can use many cuts for steak bites. Sirloin is great, but ribeye is richer. Ribeye has more fat, which adds flavor. Other choices include tenderloin and flank steak. Each cut has its own cooking time. - Sirloin: Cook for 2-3 minutes per side for medium-rare. - Ribeye: Needs about 3-4 minutes per side. - Tenderloin: A quick 2-3 minutes per side works well. - Flank Steak: Cook for 3-4 minutes, but cut against the grain. You can change the flavor by adding herbs and spices. Try fresh cilantro or basil for a twist. If you want heat, use paprika or cayenne. These spices bring a new layer of taste to your dish. - Cilantro: Add at the end for a fresh taste. - Basil: Use fresh or dried for a sweet flavor. - Paprika: Adds warmth and color. - Cayenne: Just a pinch for a spicy kick. Want to make your dish fit your diet? There are great low-carb and keto choices. Use a different type of butter for dairy-free options. You can also skip the butter and use olive oil. - Low-Carb: Stick to steak and herbs. - Keto: All ingredients are keto-friendly. - Gluten-Free: This recipe is naturally gluten-free. - Dairy-Free: Olive oil can replace butter for a lighter taste. For the Full Recipe, check out the main section. To keep your cooked steak bites fresh, store them in the fridge. Let them cool first. Place them in an airtight container. This helps keep moisture in and air out. Use glass or plastic containers with tight lids. They work best for storage. When reheating, aim to keep the steak juicy. The best method is using the skillet. Heat it on low. Add a splash of broth or water to keep moisture. Place the steak bites in the skillet for a few minutes. Stir gently to warm them up. This method helps keep the steak tender and flavorful. You can freeze cooked steak bites for later. First, let them cool completely. Then, place them in a freezer-safe bag. Squeeze out as much air as you can. This prevents freezer burn. When you’re ready to eat, thaw them in the fridge overnight. Reheat in a skillet for best taste. To check if steak bites are done, use a meat thermometer. For medium-rare, aim for 130°F. Insert the thermometer into the center of a steak bite. You can also press the meat with your finger. If it feels firm but still has some give, it's likely medium-rare. - Tips for checking doneness levels: - Use a thermometer for accurate results. - Learn the feel of different doneness levels. - Recommended meat thermometers: - Instant-read thermometers work best. - Probe thermometers are great for cooking longer cuts. Yes, you can prepare some parts ahead of time. Cut the steak and season it a few hours before cooking. This makes the flavors blend well. - Preparing ahead of time: - Cut and season the steak. - Make the garlic butter and store it. - Best storage practices: - Keep uncooked steak in the fridge. - Store garlic butter in an airtight container. Garlic Butter Steak Bites go well with many sides. Fresh salads, roasted veggies, or mashed potatoes are popular choices. - Popular side dishes like salads and vegetables: - A crisp green salad adds freshness. - Roasted asparagus or broccoli complements the steak. - Creative serving suggestions: - Serve on a bed of creamy mashed potatoes. - Add some crusty bread to soak up the garlic butter. For medium-rare steak bites, sear them for about 2-3 minutes on each side. Timing can vary with the heat of your skillet. - Timing tips for different levels of doneness: - Medium: 3-4 minutes per side. - Rare: about 1-2 minutes per side. - Common mistakes to avoid during cooking: - Don't overcrowd the pan; it lowers the heat. - Avoid flipping too often; let them sear well. You’ve learned how to make delicious garlic butter steak bites step by step. We covered essential and optional ingredients, cooking techniques, and tips for the perfect sear. You can personalize the dish with different herbs and cuts of steak. Plus, we discussed how to store and reheat leftovers properly. Now, you have the tools to impress at any meal. Enjoy experimenting with flavors while creating your own delicious variations. Happy cooking!](https://joymealplan.com/wp-content/uploads/2025/07/52ecc706-aa2d-497b-a3c5-28ea991b92c7-768x768.webp)


![To make classic deviled eggs, gather these simple ingredients: - 6 large eggs - 3 tablespoons creamy mayonnaise - 1 teaspoon Dijon mustard - 1 teaspoon apple cider vinegar - 1/4 teaspoon fine salt - 1/4 teaspoon smoked paprika (plus extra for garnish) - Fresh chives, finely chopped (for garnish) You can add some extra flavor to your deviled eggs with these fun options: - A few dashes of your favorite hot sauce - Pickle relish for a tangy twist - Chopped olives for a salty kick - Crumbled bacon for a smoky crunch Having the right tools makes cooking easier. Here’s what you’ll need: - Medium-sized saucepan - Large bowl for ice water - Sharp knife for slicing - Mixing bowl for the yolk filling - Fork for mashing yolks - Piping bag with a star tip (optional) - Serving platter for presentation These ingredients and tools will set you up for a delicious batch of deviled eggs. For the full recipe and instructions, check out the [Full Recipe]. To start, you need six large eggs. Place them in a medium saucepan. Cover the eggs with cold water by at least one inch. Set the heat to medium-high and watch for a boil. When the water bubbles, cover the pot with a lid. Turn off the heat and let the eggs sit for ten to twelve minutes. This resting time will cook the yolks just right. After that, move the eggs to a bowl of ice water. Let them cool for at least five minutes. This step makes peeling easier and keeps the eggs fresh. Once the eggs are cool, gently tap each one on a flat surface. Roll the eggs to crack the shells, then peel them under running water. This helps remove the shells cleanly. Slice each egg in half lengthwise. Carefully take out the yolks and put them in a mixing bowl. Set the empty egg whites aside on a serving platter. Now, mash the yolks with a fork until they are crumbly. Add three tablespoons of creamy mayonnaise, one teaspoon of Dijon mustard, one teaspoon of apple cider vinegar, a quarter teaspoon of fine salt, and a quarter teaspoon of smoked paprika. Mix until the filling is smooth. If you like spice, add a few dashes of your favorite hot sauce. Next, it’s time to fill the egg whites. You can use a spoon or a piping bag. If you use a piping bag with a star tip, it will look fancy. Fill each hollowed egg white with the yolk mixture. Make sure to fill them well. To finish, sprinkle extra smoked paprika on top for color. Chop some fresh chives and add them as a garnish. This adds a nice touch and fresh flavor. Now you have a perfect batch of classic deviled eggs! For more details, refer to the Full Recipe. To get the best hard-boiled eggs, start with fresh eggs. Place the eggs in a saucepan and cover them with cold water. Bring the water to a rolling boil over medium-high heat. Once boiling, cover the pot and turn off the heat. Let the eggs sit for 10 to 12 minutes. This method gives you a creamy yolk with no green ring. After cooking, cool the eggs quickly in ice water. This step makes peeling easier. For a creamy filling, mash the yolks well with a fork. The more you mash, the smoother the mix. Add the mayonnaise, mustard, vinegar, and spices slowly. Mix until everything blends perfectly. If you want a spicy twist, add hot sauce to taste. For a more gourmet touch, consider using a piping bag. It will make the filling look fancy and neat. Presentation is key for deviled eggs. Arrange them on a colorful platter for a festive look. You can sprinkle extra smoked paprika on top for color. Adding finely chopped chives gives a fresh touch. For an extra pop, consider garnishing with microgreens or edible flowers. These small touches will impress your guests and make your dish stand out. For more details on making these delightful eggs, check the Full Recipe. {{image_4}} To add heat, mix some hot sauce into the yolk filling. You can use any hot sauce you like. Sriracha gives a sweet and spicy kick. For a smoky flavor, try chipotle sauce. Adjust the amount to suit your taste. You can also add diced jalapeños for texture and extra spice. If you want to skip the classic flavors, try avocado instead of mayo. Mash ripe avocado with the yolks. This adds creaminess and a fresh flavor. You can also mix in Greek yogurt for a tangy twist. For a herbal note, add finely chopped herbs like dill or parsley. Get creative with your deviled eggs! You can mix in ingredients like bacon bits for crunch. A hint of curry powder adds warmth and a new taste. For a sweet touch, mix in a little honey or relish. Try adding lemon zest for a bright flavor boost. Each twist gives your deviled eggs a new personality. For the full recipe, check out Devilishly Delectable Deviled Eggs. Store leftover deviled eggs in an airtight container. This keeps them fresh and safe to eat. Place a piece of plastic wrap over the filling to avoid drying out. You can also place a damp paper towel on top to help maintain moisture. Consume deviled eggs within three days for the best taste. For fresh deviled eggs, follow these tips: - Keep eggs in their shells until you're ready to cook. - Use the freshest eggs possible; check the expiration date. - After making the filling, store it separately from the egg whites if you don't serve right away. This keeps both parts fresh longer. - Refrigerate eggs promptly after cooking; don’t leave them out for more than two hours. Freezing deviled eggs is not the best option. The texture changes, making them watery upon thawing. If you want to freeze the filling, do so in a sealed bag. When you're ready to use it, thaw in the fridge overnight. Then, refill fresh egg whites and serve. Enjoy your eggs fresh for the best flavor! For detailed steps, check the Full Recipe. The prep time for Classic Deviled Eggs is about 15 minutes. You can easily manage this time. While the eggs cook, you can gather your other ingredients. This helps to keep things quick and easy. Yes, you can make deviled eggs ahead of time. Prepare them a day before your event. Just store them in the fridge until you are ready to serve. This keeps them fresh and tasty. If you want to skip mayonnaise, try using Greek yogurt. It adds creaminess and a tangy flavor. Another option is avocado, which gives a smooth texture. You could also use sour cream for a rich taste. Each option brings its unique twist to the classic recipe. For the full recipe, check out my detailed instructions. Deviled eggs are easy and fun to make. We covered the classic recipe, tips, and fun variations. Remember to use fresh eggs for the best taste. You can try adding flavors like spices or herbs for a twist. Store them properly to keep them fresh. Enjoy your deviled eggs at your next gathering. They are sure to impress everyone!](https://joymealplan.com/wp-content/uploads/2025/06/26f62450-2f64-4ac8-86b4-50d05502cb9e-768x768.webp)