Cheesy Taco Potatoes Flavorful and Easy Dinner Recipe

Looking for a tasty and easy dinner idea? My Cheesy Taco Potatoes are the answer! This recipe combines fluffy potatoes, seasoned meat, and gooey cheese for a meal everyone will love. You’ll discover how to create this delightful dish step-by-step, with tips to make it just right. Plus, there are options for any dietary need. Let’s dive in and get cooking!
Why I Love This Recipe
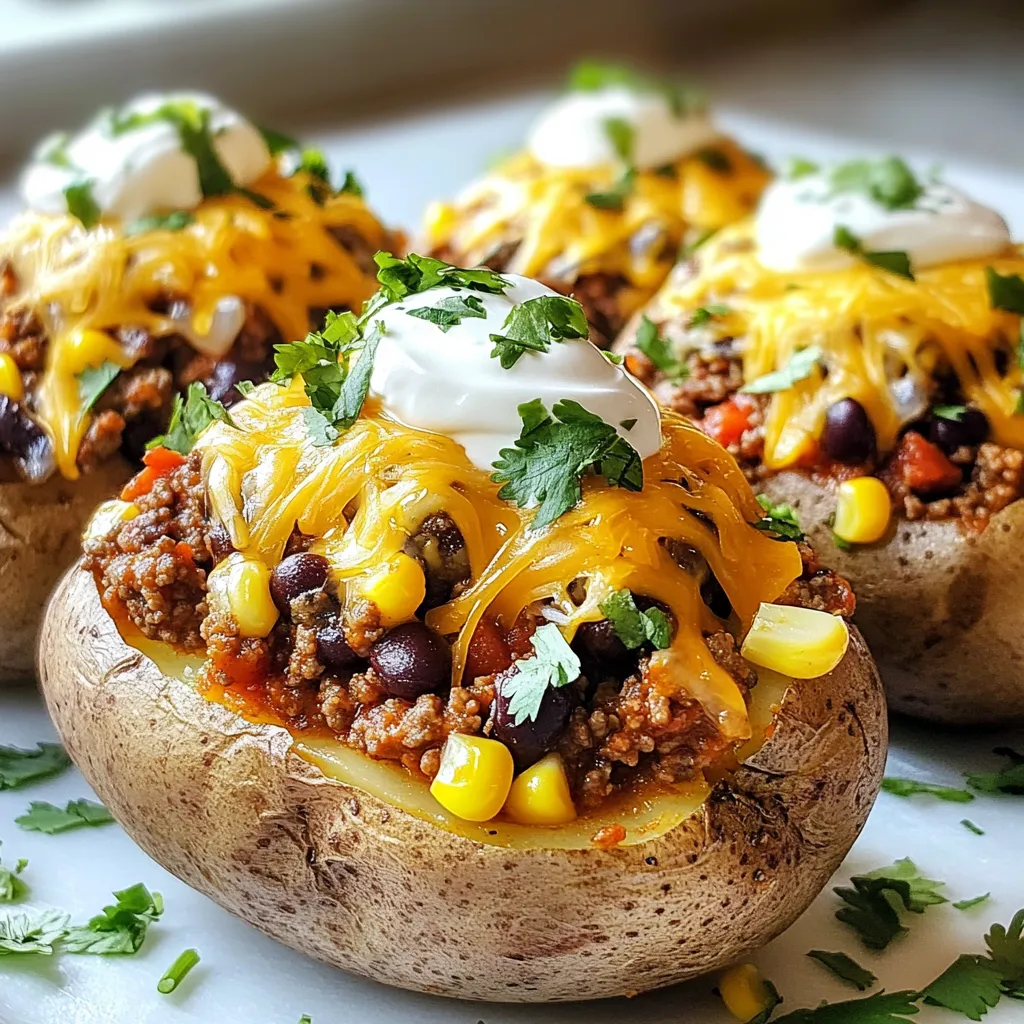
- Comfort Food Classic: This recipe combines the heartiness of baked potatoes with the bold flavors of taco seasoning, making it a comforting and satisfying meal.
- Customizable Toppings: With options like sour cream and fresh cilantro, you can easily tailor each serving to your taste preferences.
- Quick to Prepare: Despite the delicious layers of flavor, this dish can be prepared in just over an hour, making it perfect for busy weeknights.
- Family-Friendly: Kids and adults alike love the cheesy, savory filling, ensuring that everyone at the table will be happy!
Ingredients
To make Cheesy Taco Potatoes, you need a few simple ingredients. Here’s the list you’ll want to gather:
– 4 medium russet potatoes
– 1 pound ground beef or turkey
– 1 packet taco seasoning
– 1 cup shredded sharp cheddar cheese
– 1 cup canned black beans
– ½ cup corn kernels
– 1 small onion
– 1 tablespoon olive oil
– Salt and freshly ground black pepper
– ½ cup sour cream (optional)
– Fresh cilantro (for garnish)
These ingredients come together to create a hearty meal. The russet potatoes are the perfect vessel for all those tasty fillings. You can choose ground beef or turkey based on your preference. The taco seasoning adds a bold flavor that pairs well with the cheese and beans.
I love using canned black beans for their creaminess and protein. Corn adds a sweet crunch, while the onion brings warmth to the dish. Don’t forget the olive oil for sautéing the onion. It adds richness and helps with the cooking process.
For a finishing touch, I often add sour cream on top. It gives a nice creamy contrast to the cheesy filling. Fresh cilantro not only adds flavor but also makes the dish look vibrant.
Gather these ingredients, and you’re ready to create a delicious meal that everyone will love!

Step-by-Step Instructions
Preheat the Oven
Set your oven to 400°F (200°C). This temperature will help the potatoes bake well. Take four medium russet potatoes, scrub them clean, and dry them. Using a fork, poke holes in each potato. This step helps steam escape while they bake. Place the potatoes directly on the oven rack. Bake for 45-60 minutes until they feel soft when pierced with a fork.
Sauté the Onions
While the potatoes bake, grab a large skillet. Heat one tablespoon of olive oil over medium heat. Add a small onion, finely diced. Cook the onion for about 4-5 minutes. Stir occasionally until it turns translucent and gives off a nice smell.
Cook the Meat
Now it’s time for the meat. Increase the heat a bit and add one pound of ground beef or turkey to the skillet. Cook the meat for about 6-8 minutes. Crumble it with a spoon as it cooks. Make sure the meat is fully done and drain any extra fat if needed.
Combine Additional Ingredients
Next, stir in one packet of taco seasoning, one cup of canned black beans, and half a cup of corn kernels. Cook this mixture for another 3-4 minutes. This lets all the flavors mix well. Taste it and add salt and pepper if needed.
Prepare the Potatoes for Filling
Once your potatoes are baked, take them out of the oven. Be careful, as they will be hot! Let them cool for a few minutes. Cut each potato lengthwise, making a slit in the top. Use a fork to gently fluff the insides. This creates space for your filling.
Fill and Bake the Potatoes
Now it’s time to stuff the potatoes. Scoop the cheesy taco beef mixture into each potato. Fill them generously. Sprinkle one cup of shredded sharp cheddar cheese on top of each filled potato. Return them to the oven for 5-7 minutes. This time helps the cheese melt and get bubbly.
Finishing Touches
After baking, take the potatoes out of the oven. Let them cool for a couple of minutes. If you want, drizzle some sour cream on top. Finally, garnish with freshly chopped cilantro. This adds a pop of color and flavor to your dish.
Tips & Tricks
Ensuring Perfect Potatoes
To bake perfect potatoes, start by preheating your oven to 400°F (200°C). Poke each potato with a fork several times. This allows steam to escape. Bake them for 45-60 minutes. You know they are done when a fork can easily pierce through. The skin should look crisp, and the inside should feel soft.
Choosing the Right Meat
You can choose between ground beef and turkey for this recipe. Ground beef gives a rich flavor and is juicy. It works well if you enjoy a hearty meal. Ground turkey is leaner and offers a lighter option. It is great if you want something less fatty. Both options taste amazing with taco seasoning.
Enhancing Flavor
To make your Cheesy Taco Potatoes even better, think about extra seasonings. You can add garlic powder or chili powder for a kick. Fresh lime juice brings a zesty touch. Don’t forget toppings! Sour cream adds creaminess, while fresh cilantro gives color and freshness. You could also use sliced jalapeños for heat.
Pro Tips
- Choose the Right Potatoes: For the best texture and flavor, use medium russet potatoes as they become fluffy inside when baked.
- Customize Your Filling: Feel free to add other ingredients like diced bell peppers or jalapeños for extra flavor and crunch.
- Make Ahead: You can prepare the filling ahead of time and store it in the fridge. Just fill the baked potatoes when you’re ready to serve.
- Perfectly Melted Cheese: For the ultimate cheesy experience, broil the potatoes for an additional 1-2 minutes after baking to achieve a golden crust.

Variations
Vegetarian Option
You can make Cheesy Taco Potatoes vegetarian. Just swap the ground meat for plant-based options. You can use lentils, tempeh, or meatless crumbles. These choices add protein and flavor. You can also try black beans or chickpeas for more texture. Make sure to season well with taco spices for that classic taste.
Spice Level Adjustments
Want some heat? Add diced jalapeños or serrano peppers to your filling. You can also mix in your favorite hot sauce while cooking the meat. If you like it mild, skip the peppers. Taste the filling as you go to find your perfect heat level.
Cheesy Variants
Cheese lovers can get creative with their choices. Try pepper jack for a spicy kick or creamy mozzarella for a milder taste. You can even mix different cheeses together for a unique flavor blend. Cheddar adds sharpness, while queso fresco gives a fresh feel. Experiment and enjoy the cheesy goodness!
Storage Info
How to Store Leftovers
After enjoying your Cheesy Taco Potatoes, let them cool first. Place any leftovers in an airtight container. Make sure to store them in the fridge. They should stay fresh for up to three days. If you want to keep them longer, consider freezing.
Reheating Instructions
To reheat your Cheesy Taco Potatoes, you have a few options. The best method is to use the oven. Preheat it to 350°F (175°C). Place the potatoes on a baking sheet and cover them with foil. Heat for about 15-20 minutes, or until warm. You can also use a microwave. Just cover the potatoes with a damp paper towel and heat in 30-second bursts until warm.
Freezing Guidelines
If you want to freeze the Cheesy Taco Potatoes, wrap each potato tightly in plastic wrap. Then, place them in a freezer-safe bag or container. They can be frozen for up to three months. When ready to eat, thaw them in the fridge overnight before reheating. This keeps them tasty and fresh for your next meal.
FAQs
Can I use sweet potatoes instead of russet?
Yes, you can use sweet potatoes. They add a nice sweetness. However, they change the dish’s flavor. Sweet potatoes take less time to cook. You may need to adjust your baking time.
How do I reheat these potatoes without drying them out?
To reheat properly, use the oven. Preheat it to 350°F (175°C). Cover the potatoes with foil. This keeps moisture in and prevents drying. Heat for about 15-20 minutes. You can also use the microwave, but add a bit of water.
What can I serve with Cheesy Taco Potatoes?
These potatoes pair well with a fresh salad. A simple green salad with a light dressing works great. You can also serve nacho chips for crunch. Another option is guacamole or salsa for extra flavor.
How long do Cheesy Taco Potatoes last in the fridge?
Cheesy Taco Potatoes last up to four days in the fridge. Store them in an airtight container. Make sure they cool down before putting them away. If they smell off or look strange, throw them out. Always trust your senses!
You learned how to make delicious Cheesy Taco Potatoes. We covered each step, from baking potatoes to choosing toppings. Remember to select the right meat or go vegetarian for a twist. Proper storage is key to enjoying leftovers later. My final thoughts? This dish is simple, fun, and full of flavor. I hope you try it and enjoy every bite. Happy cookin


![To make Easy Chicken Shawarma, gather these items: - 500g boneless, skinless chicken thighs - 2 tablespoons extra virgin olive oil - 3 cloves garlic, finely minced - 1 tablespoon ground cumin - 1 tablespoon ground coriander - 1 tablespoon smoked paprika - 1 teaspoon ground turmeric - 1 teaspoon ground cinnamon - 1 teaspoon sea salt - ½ teaspoon freshly ground black pepper - Juice of 1 large lemon - 4 soft pita breads - Fresh parsley, finely chopped, for garnish - Tomato, cucumber, and red onion, thinly sliced, for serving - Creamy yogurt or rich tahini sauce, for drizzling This list covers all you need for vibrant flavors. You can swap chicken thighs for chicken breasts if you prefer leaner meat. If you're short on spices, try a ready-made shawarma mix for ease. To prepare this dish, you'll need: - A medium mixing bowl for the marinade - A whisk to blend the ingredients - A grill or large skillet for cooking - A meat thermometer to check doneness - Storage containers for leftovers Using a meat thermometer ensures you cook the chicken to 75°C (165°F). This keeps it juicy and safe to eat. Store any leftovers in airtight containers for up to three days. Enjoy your flavorful meal, and don't forget to check the [Full Recipe] for all the steps! To start, we need to make a tasty marinade. Take a medium mixing bowl and combine these ingredients: - 2 tablespoons extra virgin olive oil - 3 cloves garlic, finely minced - 1 tablespoon ground cumin - 1 tablespoon ground coriander - 1 tablespoon smoked paprika - 1 teaspoon ground turmeric - 1 teaspoon ground cinnamon - 1 teaspoon sea salt - ½ teaspoon freshly ground black pepper - Juice of 1 large lemon Whisk these together until mixed well. This mix makes your chicken full of flavor. Next, add the 500g boneless, skinless chicken thighs. Make sure every piece is coated in the marinade. Cover the bowl tightly with plastic wrap. For the best taste, let it sit in the fridge for at least 1 hour. If you can, leave it overnight for even better flavor. When you are ready to cook, preheat your grill or a large skillet on medium-high heat. You want it nice and hot. Take the marinated chicken out of the fridge. Let it sit at room temperature for about 10 minutes. This helps it cook evenly. Place the chicken on the hot grill or skillet. Cook for about 6-8 minutes on each side. You want the chicken to have a nice char and be fully cooked. Check that the internal temperature reaches 75°C (165°F). Once cooked, let the chicken rest for 5 minutes. Then slice it into thin strips. This gives you a tender texture. Now, it’s time to fill our pitas. Take your warm pita bread and place a good amount of sliced chicken inside. For extra crunch and color, add some fresh toppings: - Fresh parsley, finely chopped - Tomato, thinly sliced - Cucumber, thinly sliced - Red onion, thinly sliced Finish your shawarma with a drizzle of creamy yogurt or zesty tahini sauce. Wrap the pita up tight, and it's ready to eat! Enjoy your homemade shawarma delight! For a complete guide, check out the Full Recipe. To achieve the best char marks on your chicken, start with a hot grill or skillet. Make sure the grill is preheated to medium-high heat. Cook the chicken without moving it too much. Let it sit for about 6 to 8 minutes on each side. This allows those crispy, golden marks to form. Resting the chicken before slicing is also key. Once you take the chicken off the heat, let it rest for 5 minutes. This helps the juices stay inside the meat. When you slice it, the chicken will be tender and juicy. Pair your chicken shawarma with tasty side dishes. A fresh tabbouleh salad makes a great choice. You can also serve hummus or baba ganoush for dipping. These flavors complement the shawarma well. For drinks, a chilled lemonade or mint tea works nicely. These drinks balance the spices and add a refreshing touch. Want to spice things up? Try adding a pinch of cayenne pepper to the marinade. This will give your chicken an extra kick. You can also drizzle some sriracha or harissa sauce over the finished shawarma for added heat. If you prefer milder flavors, simply reduce the spices. Use less cumin or paprika in the marinade. This way, you can adjust the taste to suit your preferences. For more variety, try adding fresh herbs like mint or dill for a burst of freshness. For the full recipe, check the section above. {{image_4}} You can easily make this dish plant-based. Use chickpeas or tofu instead of chicken. For chickpeas, drain and rinse one can. Toss them with the same marinade. If you choose tofu, press it to remove water and cut it into cubes. Marinate the tofu just like the chicken. For a veggie-loaded option, try grilled vegetables. Zucchini, bell peppers, and mushrooms work great. Slice them into strips and marinate them. Grill until they are tender and slightly charred. If you do not have a grill, don’t worry! You can use an Instant Pot. Cook the marinated chicken on high pressure for about 8 minutes. This keeps the chicken juicy. You can also use an oven. Preheat it to 200°C (400°F). Place the chicken on a baking sheet and roast for 20-25 minutes. Check that the chicken reaches 75°C (165°F) inside. Another great choice is the slow cooker. Add the marinated chicken and cook on low for 6-8 hours. This makes the chicken very tender and flavorful. To make your shawarma extra special, try new toppings. Feta cheese adds a nice salty flavor. Pickled vegetables can give a tangy crunch. You can also experiment with sauces. A spicy harissa or cool tzatziki can change the flavor. Consider regional spices too. Try za'atar for a herby taste or sumac for tartness. Each spice can make your shawarma unique. For the full recipe, check out Shawarma Delight: Easy Chicken Edition. To keep your chicken shawarma fresh, store it properly. Place the leftover chicken in an airtight container. This will help maintain its flavor and moisture. For the best taste, eat leftovers within three days. If you have assembled pitas, store the chicken and veggies separately. This keeps the pita from getting soggy. You can keep the sliced chicken in the fridge for three days, too. When it's time to enjoy your leftovers, reheating is key. Use a skillet or oven to heat the chicken. This method helps keep the chicken juicy. Avoid using a microwave, as it can dry out the meat. Heat the chicken over medium heat for about five minutes. Stir it gently to keep it moist. If the chicken seems dry, add a splash of water or broth. You can freeze leftover chicken shawarma for later. Place the cooled chicken in a freezer-safe container. Make sure to remove excess air to prevent freezer burn. It can last up to three months in the freezer. When you're ready to eat, thaw the chicken in the fridge overnight. Reheat it on the stove for the best texture. You can enjoy that delicious flavor anytime! Chicken shawarma is a popular dish from the Middle East. It has roots in the Levant region. Traditionally, cooks stack marinated meat on a vertical spit. They cook it slowly, letting the juices flow down. The meat is then shaved off in thin strips. The spices in shawarma are what make it special. Common spices include cumin, coriander, and paprika. These give the chicken a warm, rich flavor. Shawarma is often served in pita bread with fresh veggies and sauce. Yes, you can prep chicken shawarma in advance. Marinate the chicken the night before. This helps the flavors mix well. When you are ready to cook, take it out of the fridge. Cook it fresh for the best taste. You can also slice the cooked chicken and store it. Place it in an airtight container in the fridge. It will last for about 3 days. Just reheat it when you are ready to eat. If you want to change things up, try these alternatives to pita bread: - Flatbreads - Tortillas - Naan bread - Lettuce wraps for a low-carb option These options work well with the chicken and veggies. You can also serve shawarma over rice or in a bowl with salad. To make a gluten-free chicken shawarma, choose gluten-free pita or flatbreads. Look for brands that clearly state they are gluten-free. You can also use lettuce as a wrap. Always check the spice blend for gluten. Some pre-made spices might contain gluten. Make your own mix using cumin, paprika, and other safe spices. The best sauces for chicken shawarma include: - Creamy yogurt sauce - Rich tahini sauce Yogurt sauce is smooth and tangy. It cools down the spices. Tahini sauce is nutty and flavorful. Both add a wonderful touch to your shawarma. Drizzle them on top or serve them on the side for dipping. For the full recipe, check out Shawarma Delight: Easy Chicken Edition. In this guide, we explored how to make Easy Chicken Shawarma from start to finish. We covered essential ingredients, tools, marinating techniques, cooking methods, and clever tips for serving and storing leftovers. You can easily customize this dish for various tastes and dietary needs, ensuring everyone enjoys it. With a little practice, you’ll master the art of shawarma. Get ready to impress your family and friends with your new skills in the kitchen!](https://joymealplan.com/wp-content/uploads/2025/07/dcd86bca-5250-4056-852d-a4436d844aa2-768x768.webp)