Chickpea avocado toast is the perfect mix of taste and health. It’s simple to make and full of flavor, making it a fantastic meal choice for any time of day. In this guide, I’ll show you how to turn ripe avocados and canned chickpeas into a delicious dish. With easy steps and tips, you’ll impress your friends and family while enjoying a nutritious and satisfying meal. Let’s get started!
Ingredients
Main Ingredients
– 1 perfectly ripe avocado
– 1 cup canned chickpeas, thoroughly rinsed and drained
– 4 slices of hearty whole-grain bread
Additional Ingredients
– 1 tablespoon creamy tahini
– 1 tablespoon fresh lemon juice
– 1 garlic clove, finely minced
Seasoning and Garnish
– Salt and freshly cracked pepper to taste
– 1 teaspoon olive oil
– Fresh cilantro or parsley, finely chopped, for garnish
This list includes all the key items for a delicious chickpea avocado toast. The ripe avocado brings creaminess, while canned chickpeas add a nutty flavor and protein. Whole-grain bread serves as a hearty base, making this meal filling and healthy. The tahini, lemon juice, and garlic enhance the taste, giving it a zesty kick. For seasoning, salt and pepper balance the flavors, and a drizzle of olive oil adds richness. Don’t forget the fresh herbs for color and freshness. This chickpea avocado toast is not just simple but also packed with nutrition.
Step-by-Step Instructions
Preparation Steps
1. Start by taking your ripe avocado. Cut it in half and remove the pit.
2. Use a fork to mash the avocado in a medium bowl. Aim for a creamy texture but keep some small chunks.
3. In another bowl, mix the rinsed chickpeas with tahini, lemon juice, minced garlic, salt, and pepper.
4. Use a fork to lightly mash the chickpeas. You want a mix that is chunky and smooth.
5. Gently fold the mashed avocado into the chickpea mix. Make sure they blend well. Taste and adjust with salt and pepper if you want.
Cooking Steps
1. Heat a non-stick skillet over medium heat. Add the olive oil to the skillet.
2. Place the slices of whole-grain bread in the skillet. Toast each side until they are golden brown, about 2-3 minutes per side.
3. Once toasted, take the bread out of the skillet.
Final Touches
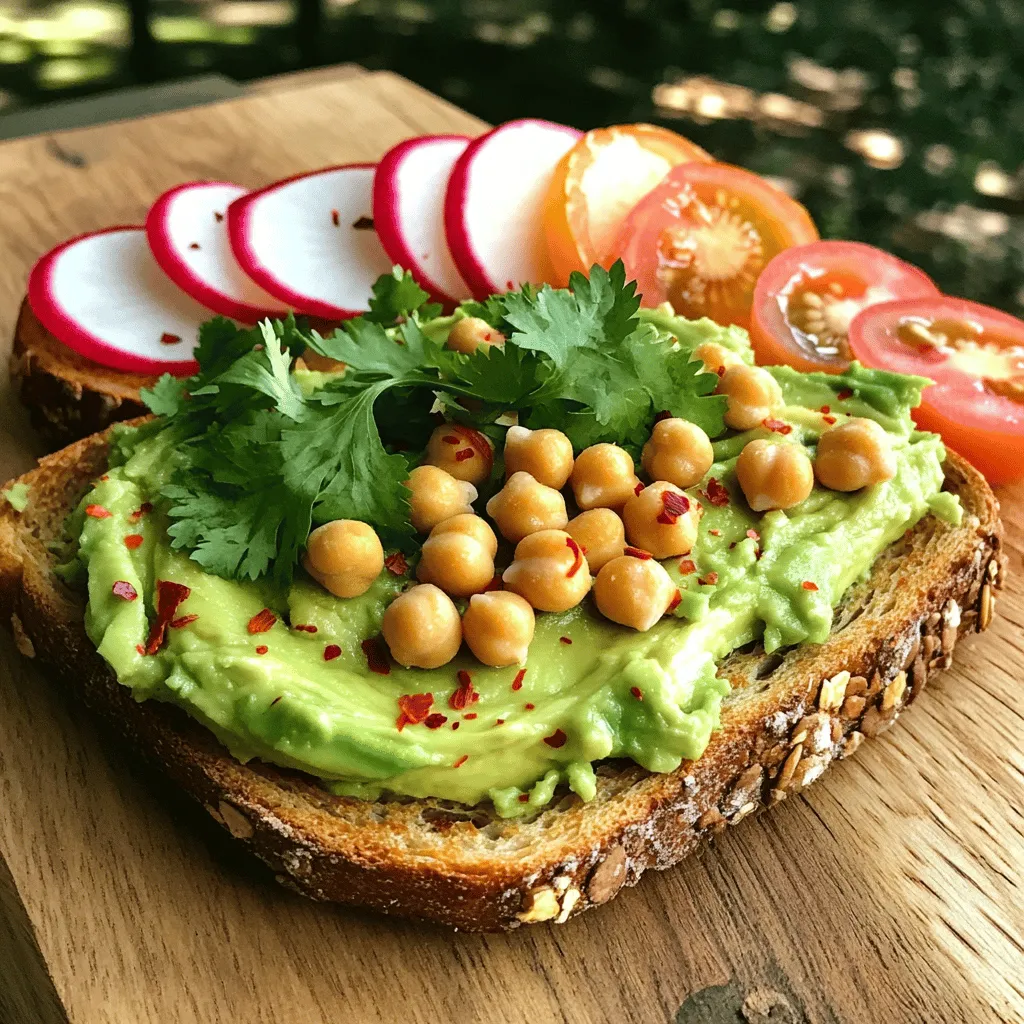
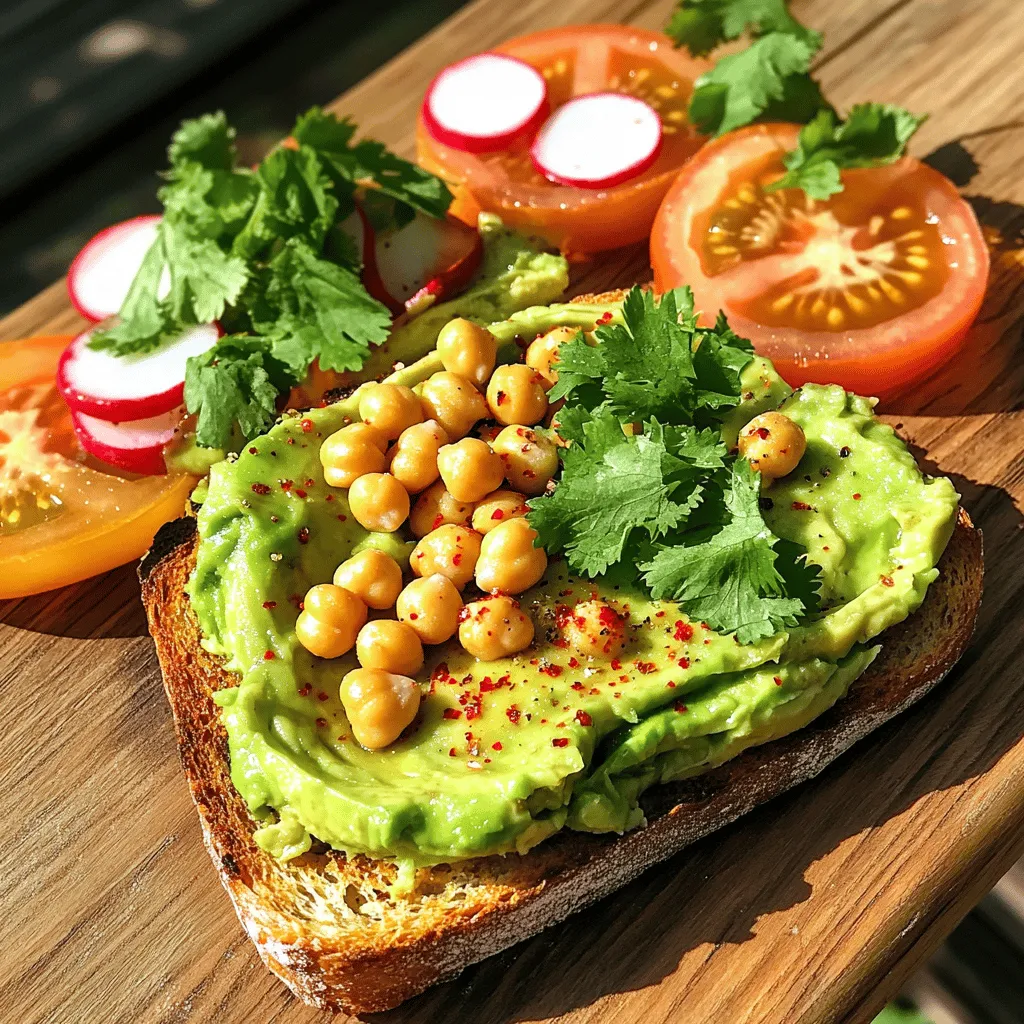
1. Spread the chickpea-avocado mixture generously on each slice of bread. Let it mound on top for a nice look.
2. If you like spice, sprinkle red pepper flakes over your toast.
3. Garnish with finely chopped cilantro or parsley for extra color and flavor.
Tips & Tricks
Perfecting the Avocado Mash
To make the best avocado mash, select a ripe avocado. Look for one that gives slightly when you press it. This means it is ready to use. Overripe avocados can taste bitter, so choose wisely.
For a perfect texture, mash the avocado with a fork. Leave some small chunks for a nice bite. The mix of smooth and chunky adds character to your toast.
Toasting Techniques
For golden toast, there are a few great methods. You can use a skillet or a toaster. If you want a crispy side, the skillet is best. Heat some olive oil and toast the bread until golden brown. This takes about 2-3 minutes per side.
If using a toaster, set it to a medium setting. Check the bread to avoid burning. The goal is a crispy outside with a soft inside.
Serving and Presentation Ideas
Presentation matters! Serve your toasts on a wooden board or a bright plate. This makes the meal look more inviting.
Add fresh tomato or radish slices on the side. They add color and freshness to the plate. For a fun touch, you can also sprinkle extra herbs on top of the toast. Enjoy your Chickpea Avocado Toast Delight with these simple yet effective serving ideas.
Variations
Flavor Enhancements
To make your chickpea avocado toast even better, add spices and herbs.
– Spices: Try cumin for a warm taste. Smoked paprika adds a smoky note. You can also add curry powder for an exotic twist. Each spice brings its own charm.
– Herbs: Fresh herbs can change the whole dish. Basil gives a sweet touch. Mint adds freshness. Chives offer a mild onion flavor. Experiment with what you love best.
Topping Variations
You can switch up the toppings to make your toast unique.
– Vegetables: Sliced radishes add crunch. Cherry tomatoes give a sweet burst. Thinly sliced cucumber keeps it refreshing. You can also add arugula for a peppery kick.
– Cheese: If you enjoy cheese, sprinkle feta for a tangy touch. Goat cheese also works well, adding creaminess. For a vegan option, try cashew cheese. It melts beautifully and tastes great.
Bread Alternatives
Choosing the right bread can change your toast game.
– Gluten-free options: If you need gluten-free bread, look for brands made from almond flour or chickpeas. They hold up well and taste good too.
– Different types of bread: Sourdough offers a tangy flavor. Rye bread has a hearty taste. Whole wheat adds fiber. Experiment with your favorites to find the best fit for your chickpea avocado toast.
Storage Info
Storing Leftovers
To keep your chickpea avocado toast fresh, store it in an airtight container. You can place it in the fridge for up to two days. Avoid stacking the toasts to prevent sogginess. Keep the chickpea-avocado mixture separate if possible. This helps maintain the texture of the bread.
Reheating Tips
When reheating, use a skillet instead of a microwave. This method helps keep the toast crispy. Heat the skillet over medium heat and place the toast in it. Warm for about one minute on each side. Check for warmth, but do not overheat, as this can make the toast tough.
Freezing Options
You can freeze the chickpea-avocado mixture, but not the toast. Place the mixture in a freezer-safe container. It can last for up to three months. When ready to use, thaw it in the fridge overnight. Mix it well before spreading on fresh toast. This method keeps the flavors intact.Enjoy your meal!
FAQs
Common Questions
What are the health benefits of chickpeas and avocados?
Chickpeas and avocados pack a punch of nutrition. Chickpeas are high in protein and fiber. They help keep you full and support digestion. Avocados are rich in healthy fats and vitamins. They boost heart health and provide energy. Together, they make a great team for a healthy meal.
How do I know if my avocado is ripe?
To check if an avocado is ripe, gently squeeze it. It should feel slightly soft but not mushy. Look for a darker skin color, but remember, not all avocados change color the same way. If the stem comes off easily and is green underneath, your avocado is ripe and ready to enjoy.
Recipe Adaptations
Can I make this recipe vegan?
Yes, this recipe is already vegan! It uses chickpeas and avocados, which are plant-based. The tahini adds creaminess without any animal products. You can enjoy this meal guilt-free.
How to adjust the recipe for larger servings?
To serve more people, simply double or triple the ingredients. For example, use two or three avocados and two cups of chickpeas. Just make sure you have enough bread for everyone. This dish is easy to scale up for gatherings or meal prep.
Ingredient Substitutions
What can I use instead of tahini?
If you don’t have tahini, you can use almond butter or sunflower seed butter. Both will add creaminess and flavor. You could also skip it entirely if you prefer a lighter taste.
Alternatives for chickpeas or gluten-free bread options?
If you cannot use chickpeas, try white beans or black beans. They offer similar texture and flavor. For gluten-free bread, look for gluten-free whole-grain options at your store. You can also use lettuce wraps for a low-carb choice.
This blog post covered how to make a tasty chickpea-avocado toast. We explored key ingredients, like ripe avocados and chickpeas, plus seasonings that add flavor. The step-by-step instructions make it easy to prepare, toast, and serve. We also shared tips for perfecting your mash and variations to try. Remember, you can store leftovers and even freeze the mixture for later. Enjoy experimenting and savoring this healthy dish! Your kitchen adventure can lead to delicious meals every time.


