Looking to spice up your grilling game? Chili Lime Grilled Corn on the Cob is a game-changer! This simple dish bursts with bold flavors that delight every bite. In this article, I’ll walk you through choosing the freshest corn, making a zesty marinade, and grilling like a pro. Get ready to impress your friends and family with this tasty and easy recipe that everyone will love!
Ingredients
List of Ingredients
– 4 ears of fresh corn, husked
– 2 tablespoons olive oil
– 1 teaspoon chili powder
– 1 teaspoon smoked paprika
– 1/2 teaspoon garlic powder
– 1 tablespoon fresh lime juice
– Zest of 1 lime
– Salt, to taste
– Fresh cilantro, finely chopped (for garnish)
– Lime wedges, for serving
Choosing the right corn is key for this dish. Look for corn that is bright and green. Fresh corn has a sweet taste that shines when grilled. I prefer sweet corn for its juicy kernels.
Seasonings bring out the best in the corn. Olive oil adds richness, while chili powder and smoked paprika give depth. Garlic powder adds a nice kick. Fresh lime juice and zest bring in a zesty punch that makes each bite pop.
If you have dietary needs, there are easy swaps. Use avocado oil instead of olive oil for a different flavor. You can skip the garlic powder if you wish. For a vegan version, just leave out the butter or cheese.
This recipe is simple and can be adjusted to fit your taste.
Step-by-Step Instructions
Preparation Steps
To prepare the corn before grilling, start by husking the ears. Remove all the green leaves and silk. Rinse the corn in cold water to clean off any dirt. Dry the corn with a towel.
Next, let’s make the chili lime marinade. In a small bowl, mix together the olive oil, chili powder, smoked paprika, garlic powder, lime juice, lime zest, and a pinch of salt. Whisk these ingredients until combined. This marinade will add a burst of flavor to your corn.
Now, it’s time to grill the corn to perfection. Brush the corn with the marinade on all sides. Make sure every part gets coated for the best flavor. Place the corn directly on the grill grates. Grill for about 10-15 minutes. Rotate the corn every few minutes. This helps cook it evenly and get those lovely char marks.
Cooking Times and Techniques
For grilling, set your grill to medium-high heat, around 400°F (204°C). This temperature is perfect for cooking corn without burning it.
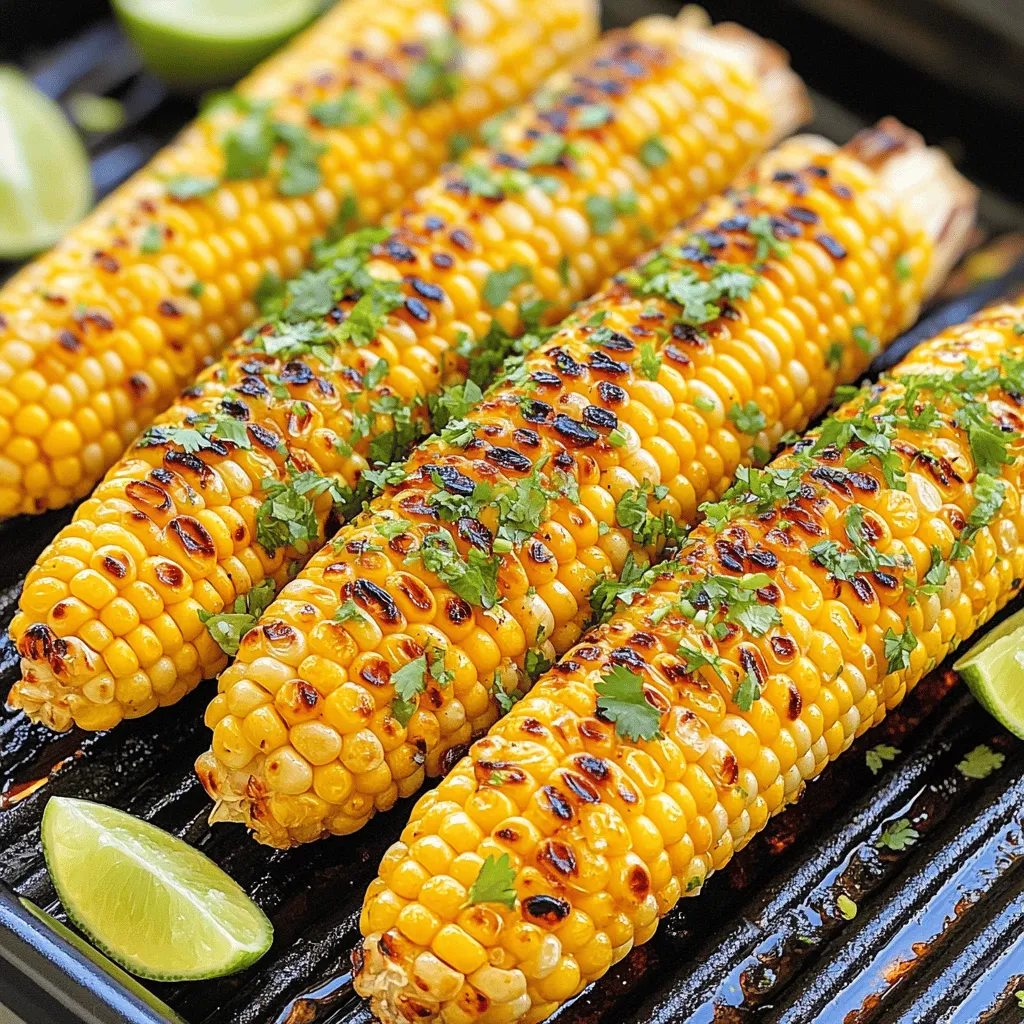
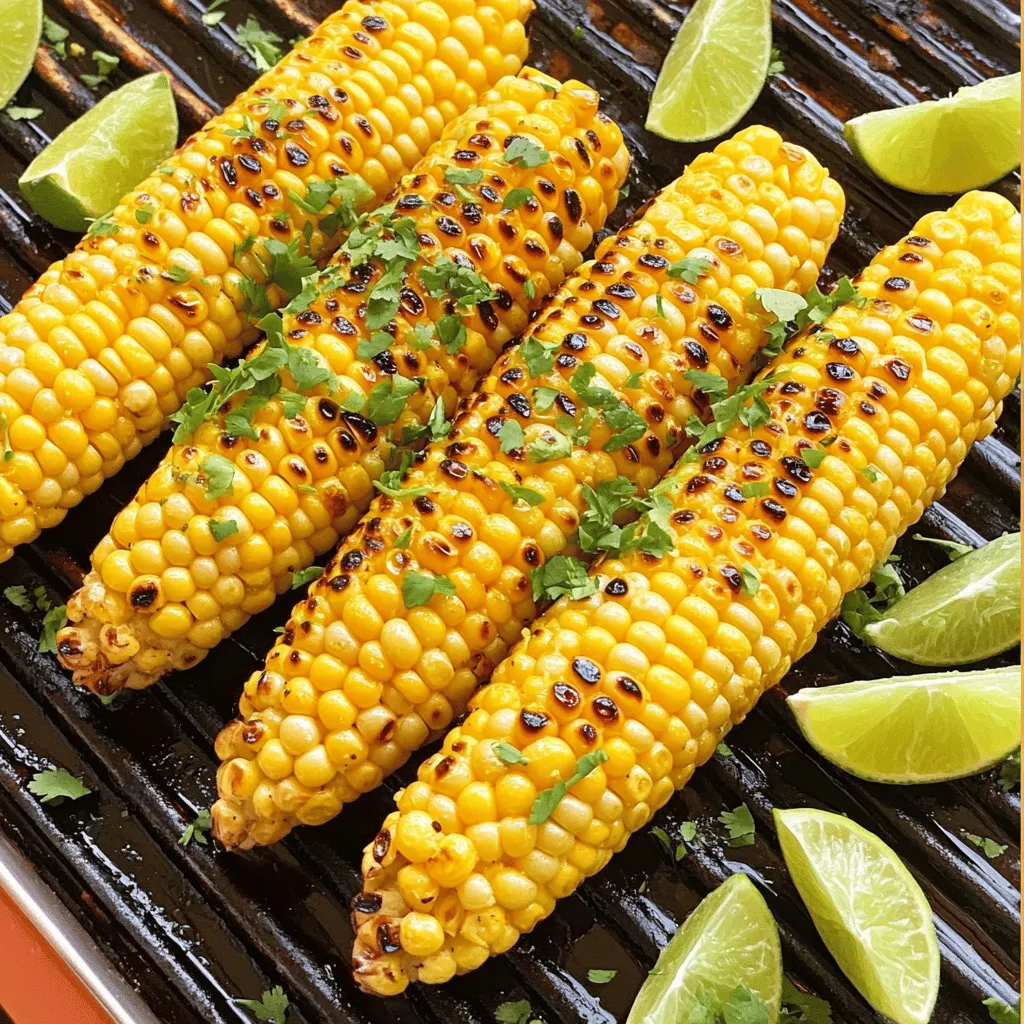
You’ll know the corn is done when the kernels are tender and have a nice char. Look for bright yellow kernels with dark grill marks. These signs show that the corn has that great grilled flavor.
To achieve the best grill marks, ensure the corn is placed directly on the hot grates. Avoid moving it too much. Let it sit for a couple of minutes before turning. This will help you get those beautiful lines that make your corn look amazing.
Tips & Tricks
Grilling Techniques
Grilling corn can be fun but also tricky. Here are some tips to avoid common mistakes:
– Don’t skip preheating: Always preheat your grill. This step helps achieve those great grill marks and caramelizes the corn’s natural sugars.
– Watch your temperature: Keep your grill at medium-high heat, around 400°F (204°C). Too hot can burn the corn, while too cold won’t cook it properly.
– Rotate often: Turn the corn every few minutes. This ensures even cooking and great charring all around.
Enhancing Flavor
Adjusting flavors can make a big difference. Here’s how to enhance your chili lime grilled corn:
– Tweak the seasonings: If you like it spicier, add more chili powder. For a milder taste, reduce it. Always taste your marinade before applying it to the corn.
– Marinating tips: Let the corn soak in the marinade for at least 15 minutes. This extra time allows the flavors to seep in well.
– Add toppings: Consider crumbled cheese or a sprinkle of chili flakes. Fresh lime juice squeezed on top can also boost the flavor.
Remember, these tips can help you create the best chili lime grilled corn on the cob.
Variations
Different Flavor Profiles
Want to spice up your Chili Lime Grilled Corn? You can easily adjust the heat. Add more chili powder or toss in some cayenne pepper. This will give your corn a fiery kick. For those who love creamy textures, sprinkle some cotija cheese on top. This cheese melts slightly and adds a rich flavor. You can also try fresh herbs. Cilantro is great, but consider basil or parsley for a twist. Each herb brings its own taste, making your corn unique.
Alternative Cooking Methods
Grilling is popular, but you can also oven-roast the corn. Preheat your oven to 400°F (204°C). Wrap the corn in foil with the marinade and roast for 25 minutes. This method gives a different texture but still keeps the flavor strong. If you own an Instant Pot, you can cook it there too. Place the corn with a cup of water and cook on high for 3-4 minutes. You can finish by broiling for a few minutes to get that charred look.
Stovetop grill pans are another option. They heat quickly and can give those beautiful grill marks. Just be sure to brush the corn with the marinade before cooking. Each method has its charm, so feel free to experiment.
Storage Info
Leftover Storage Tips
After enjoying your chili lime grilled corn, store any leftovers in the fridge. Wrap each ear of corn in plastic wrap or place it in an airtight container. This helps keep the corn fresh and tasty. Leftover grilled corn stays good for about three to five days in the fridge.
To reheat the corn, you can use the grill or the oven. If you use the grill, heat it to medium and grill for about five minutes, turning occasionally. If you prefer the oven, preheat it to 350°F (175°C) and bake the corn for about ten minutes. Both methods will help restore that delicious grilled flavor.
Freezing Techniques
If you want to save grilled corn for later, freezing is a great option. First, let the corn cool completely. Then, wrap each ear tightly in foil or plastic wrap. Place the wrapped corn in a freezer-safe bag or container. This will help keep out air and prevent freezer burn.
To defrost, take the corn out of the freezer and place it in the fridge overnight. If you need it fast, you can use the microwave. Just remove the wrap and heat in short bursts until thawed. After defrosting, you can quickly reheat it on the grill or in the oven to bring back its juicy taste. Enjoy your corn just like the first time!
FAQs
Common Questions
How long can I store grilled corn in the fridge?
You can keep grilled corn in the fridge for about 3 to 5 days. Store it in an airtight container. The corn will stay fresh and tasty for your next meal.
Can I make Chili Lime Grilled Corn ahead of time?
Yes, you can prepare the corn ahead of time. Grill it, let it cool, then refrigerate. Just reheat it before serving for the best taste.
What’s the best way to serve Chili Lime Grilled Corn?
Serve it hot right off the grill. Add fresh lime wedges on the side for a zesty kick. Chopped cilantro makes a great garnish, too!
Is it possible to use frozen corn for this recipe?
While fresh corn is best, you can use frozen corn. Just thaw and grill it until heated through. The flavor will be different, but it can work in a pinch.
Additional Queries
What can I pair with Chili Lime Grilled Corn?
Chili lime grilled corn pairs well with grilled meats, salads, or tacos. It adds a fun twist to any summer meal.
How do I make this recipe vegan?
To make this recipe vegan, simply use vegetable oil instead of olive oil. All other ingredients are already vegan-friendly!
Can I use corn on the cob that’s already cooked?
Yes, you can use pre-cooked corn. Just brush it with the marinade and grill for a few minutes to warm it up and add flavor.
Grilling corn can be easy and fun with the right steps. We covered how to select the best corn, make a tasty chili lime marinade, and grill it perfectly. I shared tips to avoid common mistakes and ways to add flavor. Try different seasonings or cooking methods for variety. Store leftovers properly to keep them fresh. With this knowledge, you can enjoy delicious grilled corn anytime. Happy grilling!


