Chocolate Chip Banana Bread Irresistible and Easy

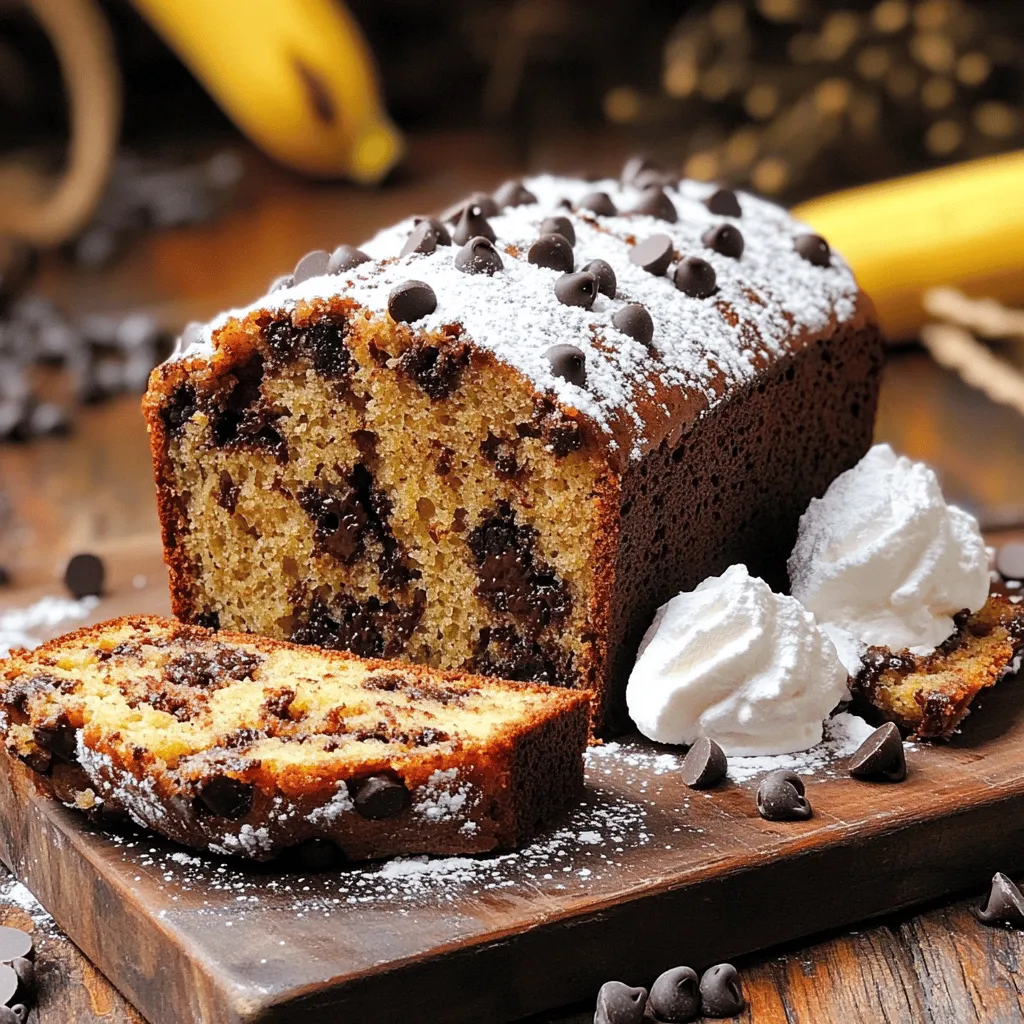
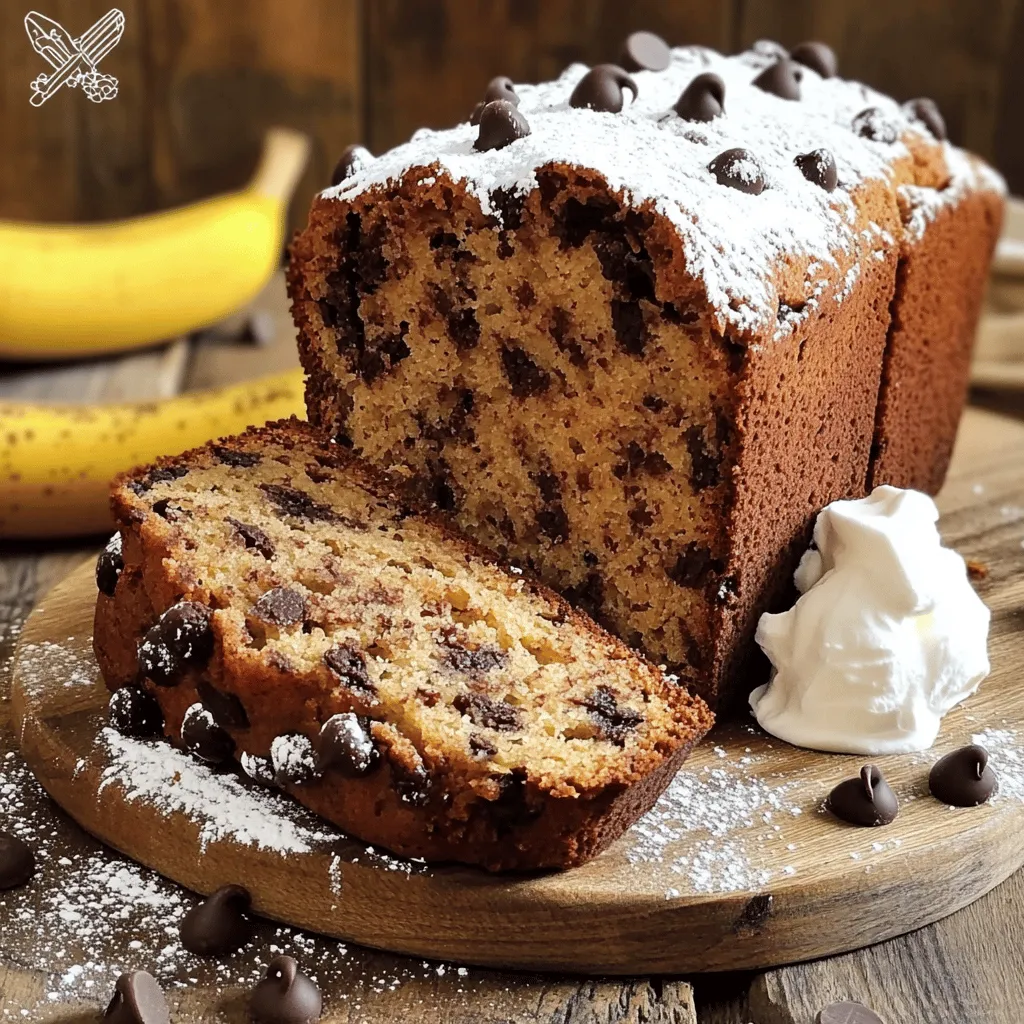
If you’ve ever craved a warm slice of banana bread packed with chocolate chips, you’re in the right place! Chocolate Chip Banana Bread is not only delicious, but it’s also so easy to make. With just a few simple ingredients like ripe bananas and butter, you can create this delightful treat. Let’s dive into the steps and tips that will make your baking experience fun and rewarding. Grab your apron, and let’s get started!
Ingredients
Main Ingredients
– 3 ripe bananas
– 1/3 cup unsalted butter, melted
– 3/4 cup granulated sugar
– 1 large egg, lightly beaten
Optional Add-ins
– 1/2 cup chocolate chips
– 1/4 cup chopped walnuts
Baking Essentials
– 1 teaspoon baking soda
– A small pinch of salt
– 1 1/2 cups all-purpose flour
– 1 teaspoon pure vanilla extract
To make this chocolate chip banana bread, you need simple ingredients. The bananas should be ripe. Ripe bananas are sweeter and softer, making the bread moist.
You will also need melted butter. This adds richness and flavor. Use unsalted butter for the best taste.
Granulated sugar adds sweetness. You can adjust the amount based on your taste. A large egg helps bind the mixture and gives rise.
Baking soda is key for leavening. It works with the acid in the bananas. A small pinch of salt enhances the overall flavor.
All-purpose flour gives the bread its structure. The vanilla extract adds a warm, sweet note.
Optional add-ins can take your banana bread to the next level. Chocolate chips add a sweet, gooey texture. Walnuts give a nice crunch and nutty flavor.You’ll find step-by-step instructions to bring this delicious treat to life!
Step-by-Step Instructions
Preparation Steps
1. Preheat your oven to 350°F (175°C). This helps the bread bake evenly.
2. Prepare your loaf pan. Grease it with butter or line it with parchment paper. This keeps the bread from sticking.
Mixing the Batter
1. In a large bowl, add your melted butter to the mashed bananas. Mix them together with a wooden spoon until they are well combined.
2. Next, stir in the baking soda and a pinch of salt. This adds flavor and helps the bread rise.
Finalizing the Batter
1. Incorporate the beaten egg and vanilla extract into your mixture. Stir until everything is smooth.
2. Gradually mix in the flour. Stir gently, so the batter stays light. Do not overmix.
3. Finally, fold in the chocolate chips and walnuts if you want some crunch. This adds a delicious surprise in every slice.
Follow these steps for a simple and tasty chocolate chip banana bread.Enjoy!
Tips & Tricks
Baking Tips
To avoid overmixing, mix the flour just until combined. Overmixing can make your bread tough. It’s okay if some lumps remain in the batter.
For perfect baking times, check your bread at 60 minutes. Insert a toothpick into the center. If it comes out clean or with a few crumbs, your bread is ready. If it’s still wet, bake for a few more minutes.
Presentation Tips
Slice your banana bread while it’s warm for a nice look. Serve it with whipped cream or a dusting of powdered sugar. Scatter a few extra chocolate chips on top for a fun touch.
Consider placing the sliced bread on a colorful plate. This makes it more inviting. You can also add fresh fruit like berries on the side for extra color.
Troubleshooting Common Issues
If your bread turns out dense, check how you mixed it. Too much mixing can lead to dense bread. If it’s dry, you might have baked it too long. Always check your bread a bit early.
For uneven baking, make sure your oven heats evenly. Rotate the pan halfway through baking. This helps the bread cook evenly. If the top browns too fast, cover it with foil. This keeps it from burning.

Variations
Gluten-Free Option
You can make this banana bread gluten-free. Just use a gluten-free flour blend. This swap works well with the other ingredients. The taste remains rich and delicious.
Vegan Option
For a vegan version, substitute the butter with coconut oil and use flax eggs. To make a flax egg, mix one tablespoon of flaxseed meal with three tablespoons of water. Let it sit for five minutes before adding it to the batter. This keeps the bread moist and tasty.
Flavor Enhancements
Spices can take your banana bread to the next level. Try adding a teaspoon of cinnamon or nutmeg for warmth. You can also mix in different types of chocolate. Dark, semi-sweet, or even white chocolate can change the flavor. These twists keep every slice interesting.
Storage Info
Short-Term Storage
To keep your chocolate chip banana bread fresh, follow these tips. First, let it cool completely. Once cooled, wrap it in plastic wrap or foil. Store it in a cool, dry place like your pantry. This helps keep it moist. It also protects it from air, which can dry it out.
Long-Term Storage
If you want to save some banana bread for later, freezing is a great option. Slice the bread before freezing. Wrap each slice in plastic wrap, then place them in a freezer bag. This makes it easy to grab just what you need. To thaw, take out a slice and leave it at room temperature for about 30 minutes. You can also use a microwave for quick thawing. Just heat it for 10-15 seconds.
Shelf Life Considerations
Chocolate chip banana bread lasts about 3-4 days at room temperature. If stored in the fridge, it can last up to a week. When frozen, it stays good for about 2-3 months. Always check for signs of mold or an off smell before eating. Enjoy your delicious creation knowing it’s safe and fresh!
FAQs
How do I ripen bananas quickly?
To ripen bananas fast, place them in a paper bag. This traps the ethylene gas they produce. You can also add an apple or a tomato for extra speed. Keep the bag in a warm spot. Check them every day until they are ripe enough for your bread.
Can I make chocolate chip banana bread in advance?
Yes, you can make chocolate chip banana bread ahead of time. Bake it, let it cool, and then wrap it tightly in plastic wrap. Store it at room temperature for up to three days. For longer storage, freeze it. Just slice it first and wrap each slice. Thaw slices as needed, and enjoy!
What can I do with leftover banana bread?
If you have leftover banana bread, don’t toss it! Use it for French toast. Just dip slices in egg and milk, then cook on a skillet. You can also toast it and spread butter or jam on top. Another idea is to make banana bread pudding, which is tasty and fun.
Is it possible to bake chocolate chip banana bread in a muffin tin?
Yes, you can use a muffin tin for this recipe. Pour the batter into greased muffin cups, filling each about two-thirds full. Bake at 350°F for about 20-25 minutes. Check with a toothpick to see if they are done. Muffins are perfect for easy snacks or breakfast on the go!
You now know how to make delicious chocolate chip banana bread. We covered the key ingredients, step-by-step methods, and helpful tips to ensure success. Remember, you can easily adapt this recipe for gluten-free or vegan needs. Store it properly to enjoy later, and don’t hesitate to experiment with flavors. Baking is all about creativity and fun. Enjoy your banana bread and share it with others. It’s a treat that spreads joy and smiles. Happy baking!


![- 1 cup unsalted butter - 2 cups granulated sugar - 4 large eggs - 1 teaspoon vanilla extract To make the best fudgy brownies, you need these core ingredients. Unsalted butter gives the brownies a rich, smooth base. Granulated sugar adds sweetness and helps create that perfect crust. The eggs provide moisture, binding everything together. Lastly, vanilla extract enhances the overall flavor with its warm notes. - 1 cup all-purpose flour - 1 cup unsweetened cocoa powder - 1 teaspoon baking powder - 1/2 teaspoon salt Dry ingredients play a key role in the texture. All-purpose flour forms the structure. Cocoa powder gives that deep chocolate flavor. Baking powder helps the brownies rise a bit, creating a tender bite. Salt balances the sweetness and brings out the chocolate flavor. - 1 cup chocolate chips - 1/2 cup chopped walnuts or pecans You can take these brownies to the next level with add-ins. Chocolate chips add extra gooeyness. You can choose milk or dark chips based on your taste. Nuts, like walnuts or pecans, add crunch and flavor. However, you can skip them if you prefer a smooth brownie. For the complete recipe, check the Full Recipe section. - Preheat oven to 350°F (175°C). - Grease or line the baking pan. Start by getting your oven nice and hot. This helps the brownies bake evenly. You can use butter or parchment paper to prepare your baking pan. This makes it easy to take the brownies out later. - Melt butter and combine with sugar. - Whisk in eggs and vanilla extract. Next, melt the butter in a medium saucepan over low heat. Once it’s melted, mix in the granulated sugar really well. It should look smooth and creamy. After that, let it cool a bit. Then, whisk in the eggs one by one. Finish by adding vanilla extract for extra flavor. - Sift and mix dry ingredients. - Fold dry into wet without overmixing. In another bowl, sift together the flour, cocoa powder, baking powder, and salt. This helps break up any lumps. Now, gently fold the dry mix into the wet mixture. Be careful not to overmix it. This step is key for that fudgy texture you want. - Incorporate chocolate chips and nuts. - Pour batter into prepared pan. Now comes the fun part! Fold in the chocolate chips and nuts if you choose to add them. They create little pockets of flavor. Once everything is mixed, pour the batter into your prepared pan. Use a spatula to spread it evenly. - Bake for 25-30 minutes. - Cool before cutting. Put the pan in the oven and bake for 25 to 30 minutes. Check if they’re done by inserting a toothpick in the center. If it comes out with a few moist crumbs, they are perfect! Allow the brownies to cool in the pan for about 10 minutes. Then, move them to a wire rack to cool completely. This helps them set up nicely for cutting. For the full recipe, check out the complete guide above. To get that fudgy texture, avoid overmixing the batter. When you mix too much, air gets in. This makes brownies more cake-like. Instead, mix just until you see no dry flour. Quality cocoa powder matters too. Choose a rich, unsweetened cocoa for deep flavor. Brands like Valrhona or Ghirardelli work great. This will give you the best taste and color. How do you check for doneness? Insert a toothpick into the center. If it comes out with a few moist crumbs, they’re ready! If it’s clean, you may have overbaked them. Ovens can vary, so adjust the baking time. If your oven runs hot, start checking at 20 minutes. This way, you’ll catch them at the right time for that fudgy finish. For a show-stopping treat, serve brownies warm. Add a scoop of ice cream on top. The warm brownie and cold ice cream create a tasty contrast. Drizzle with chocolate sauce for extra indulgence. You can also sprinkle some sea salt on top. This adds a nice flavor kick. Feel free to add toppings like nuts, caramel, or fresh berries for more fun. Want to explore more ideas? Check out the Full Recipe for more serving tips! {{image_4}} You can twist the classic fudgy brownie in fun ways. Here are some ideas: - Mint chocolate brownies: Add 1 teaspoon of mint extract to the batter. This gives a fresh taste that pairs well with chocolate. - Peanut butter swirl: Create swirls by adding 1/2 cup of creamy peanut butter. Drop spoonfuls on top and use a knife to swirl it in. - Espresso-infused brownies: Mix in 1 tablespoon of instant espresso powder. This will deepen the chocolate flavor and add a rich taste. Not everyone can eat regular brownies. Here are a few options: - Gluten-free options: Replace all-purpose flour with almond flour or gluten-free flour blend. This keeps the texture fudgy and delicious. - Vegan adaptations: Substitute eggs with 1/4 cup of applesauce or flaxseed meal mixed with water. Use dairy-free butter and dark chocolate for a great result. How you serve brownies can change the whole experience. Try these ideas: - Brownie sundaes: Serve warm brownies with a scoop of vanilla ice cream. Top it with chocolate sauce and nuts for crunch. - Brownie bites for parties: Cut brownies into small squares. Arrange them on a tray for easy snacking and sharing. Explore these fun variations to enjoy your ultimate fudgy brownies even more! For the full recipe, refer to the earlier section. To keep your brownies fresh, store them in an airtight container. This helps maintain their moisture. You can also wrap them tightly in plastic wrap. This keeps them soft and fudgy. Place the container at room temperature for up to four days. If you want to keep them longer, the fridge is a good choice. Just remember, chilling can change their texture a bit. Freezing brownies is simple. First, let them cool completely. Then, cut them into squares. Wrap each square in plastic wrap. After that, place them in a freezer-safe bag. Make sure to remove all the air. Your brownies can stay in the freezer for up to three months. When you’re ready to enjoy them, take them out. Thaw them in the fridge overnight for best results. You can also warm them in the microwave for a few seconds. Brownies last about four days at room temperature. In the fridge, they can stay fresh for a week. Look for signs of spoilage. If they smell off or have a dry texture, it’s best to toss them. Fresh brownies should be soft and have a rich chocolate smell. Enjoy your Ultimate Fudgy Brownies while they’re at their best! For the complete recipe, check the [Full Recipe]. Fudgy brownies have more fat than flour. The high fat helps create a dense texture. This means using more butter and chocolate in your mix. The key is to mix gently. This keeps the brownies moist and rich. Cakey brownies use more flour and less fat. They rise more and are lighter. Yes, you can! Feel free to swap chocolate types in this recipe. You can use dark, milk, or even semi-sweet chocolate. Each type will change the taste a bit. Dark chocolate gives a rich flavor. Milk chocolate makes it sweeter. It’s all about what you like the most. Check the brownies at 25 minutes. Insert a toothpick into the center. If it comes out with a few moist crumbs, they’re ready. Don’t worry if it’s not clean. A few crumbs mean they will be fudgy. If it’s all wet, bake for a few more minutes. Absolutely! You can add nuts like walnuts or pecans for crunch. You can also add toppings like caramel or sea salt. Get creative! Just remember to mix them in gently. This keeps the fudgy texture while adding fun flavors. To reheat brownies, use your oven. Preheat to 350°F (175°C). Place the brownies on a baking sheet. Heat them for about 10 minutes. You want them warm but not dried out. You can also microwave them for 15-20 seconds. Enjoy them warm for a gooey treat! In this blog post, we covered the key ingredients and steps to make fudgy brownies. We explored essential ingredients, optional add-ins, and tips for the perfect texture. You can try fun variations such as mint or peanut butter. Remember to store your brownies well to keep them fresh. With these tips and recipes, you can bake brownies that everyone will love. Dive in and enjoy your delicious creations!](https://joymealplan.com/wp-content/uploads/2025/06/0df86677-361d-4dfc-89fb-f08daaeec0f4-768x768.webp)


