Chocolate Covered Strawberry Yogurt Bark Delight

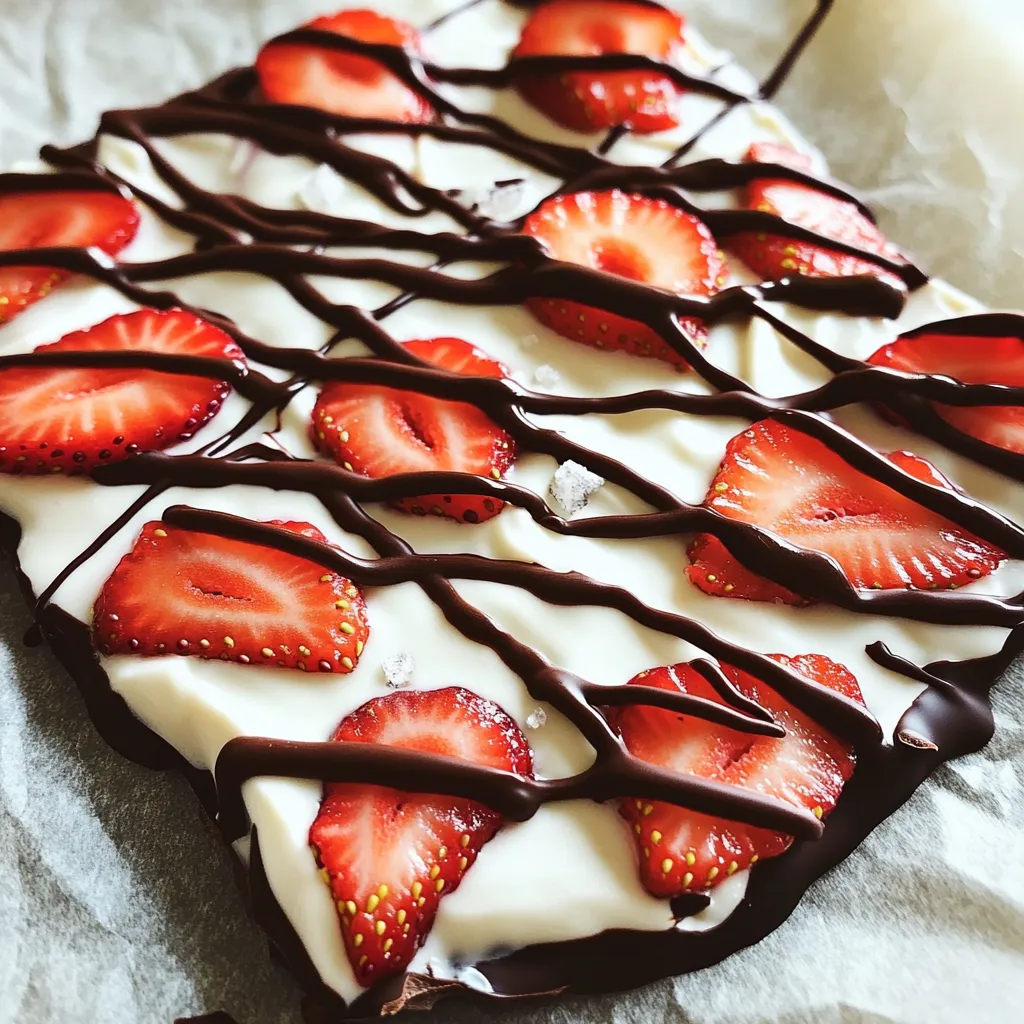
Are you ready to treat yourself with something delicious? In this guide, I’ll show you how to make Chocolate Covered Strawberry Yogurt Bark you’ll love. Made with creamy Greek yogurt, fresh strawberries, and rich dark chocolate, this sweet snack is simple and fun to make. Whether you’re looking for a tasty treat or a healthier dessert, this recipe will delight your taste buds. Let’s get started!
Ingredients
Main Ingredients
– 2 cups Greek yogurt (plain or vanilla)
– 1 cup fresh strawberries, hulled and thinly sliced
– ½ cup dark chocolate chips or ½ cup dark chocolate, chopped for melting
Optional Ingredients
– 2 tablespoons honey or maple syrup (optional, for added sweetness)
– ¼ teaspoon vanilla extract (optional, enhances flavor)
– A pinch of sea salt
For this Chocolate Covered Strawberry Yogurt Bark, I love using Greek yogurt. It gives a rich and creamy base. You can choose plain or vanilla yogurt based on your taste. Fresh strawberries add bright color and sweet flavor, making each bite a joy.
I often toss in dark chocolate chips. They melt beautifully and create a nice contrast with the yogurt. If you want a sweeter treat, add honey or maple syrup to the yogurt mix. A dash of vanilla extract boosts the flavor even more. Finally, a pinch of sea salt brings out the sweetness and adds depth to the dish.
Feel free to experiment with these ingredients. The main items are key for texture and taste, while the optional ones let you customize it to your liking.
Step-by-Step Instructions
Prepare the Yogurt Base
– In a large bowl, combine 2 cups of Greek yogurt, 2 tablespoons of honey or maple syrup, and ¼ teaspoon of vanilla extract.
– Mix until smooth and creamy. This step sets a tasty base for your bark.
Spread the Yogurt
– Line a baking sheet (about 9×13 inches) with parchment paper.
– Pour the yogurt mixture onto the sheet and spread it evenly. Aim for a thickness of about ½ inch. This helps it freeze well.
Add Strawberries
– Take 1 cup of fresh strawberries and slice them thinly.
– Carefully place the strawberry slices over the yogurt. Press them gently into the yogurt. This makes sure they stay put.
Melt the Chocolate
– In a microwave-safe bowl, add ½ cup of dark chocolate chips.
– Microwave in 20-30 second intervals, stirring after each one. Stop when the chocolate is smooth. Be careful not to overheat!
Drizzle Chocolate
– Once melted, drizzle the chocolate over the yogurt and strawberries.
– Use a spoon or piping bag to make a crisscross pattern. This adds a fun touch!
Freeze the Bark
– Place the baking sheet in the freezer.
– Allow it to freeze for 3-4 hours. It should be firm to the touch when done.
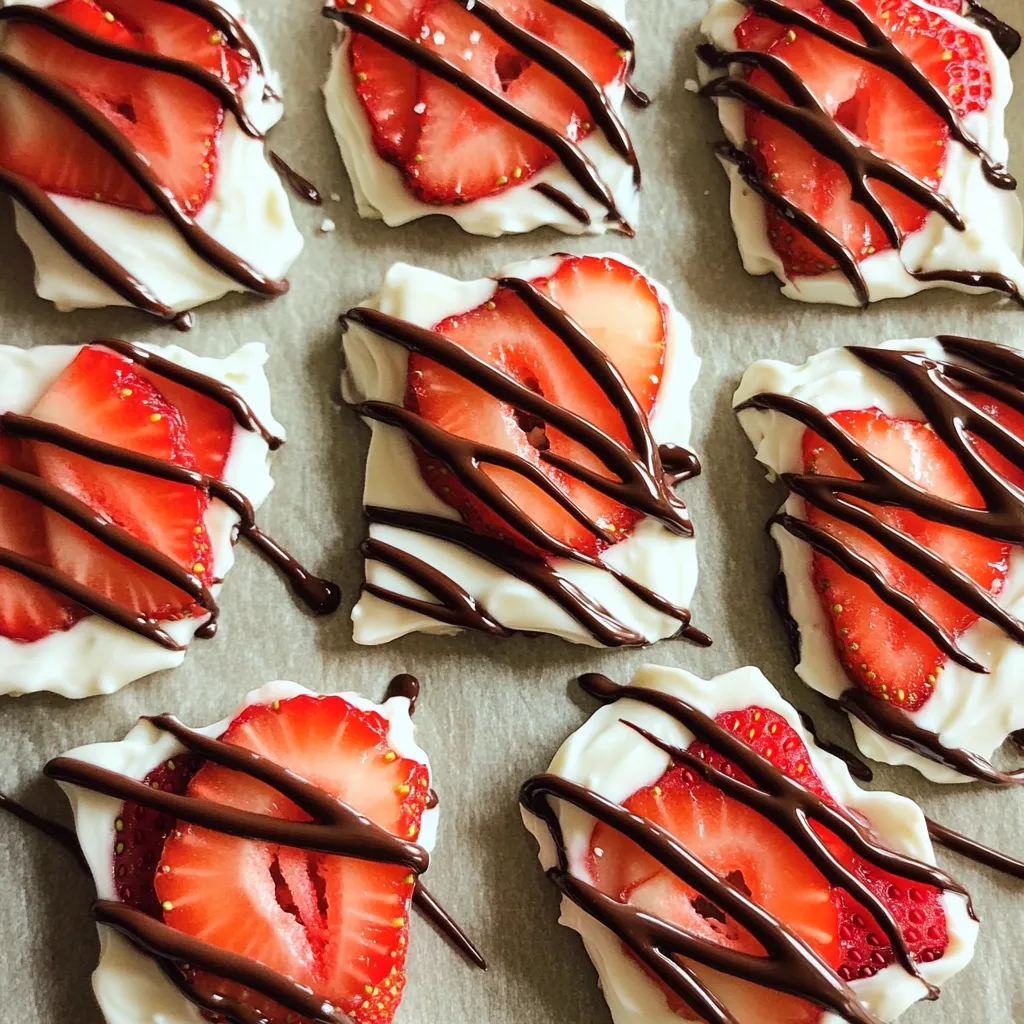
Break into Pieces
– After freezing, take the bark out and let it sit for 5 minutes at room temperature.
– Break or cut the bark into pieces. You can use your hands or a knife for this.
Serve and Enjoy
– Serve immediately for a cool treat.
– Store any leftovers in an airtight container in the freezer for later. This way, you can satisfy your sweet cravings anytime!
Tips & Tricks
How to Get Smooth Yogurt
Mixing the yogurt well is key to a great texture. When you add honey or vanilla, use a whisk or spatula. This will help break up lumps. Ensure every part of the yogurt is creamy. A smooth base makes the bark more enjoyable.
Perfectly Melted Chocolate
Melting chocolate takes care and patience. Use a microwave-safe bowl. Heat the chocolate in short bursts of 20-30 seconds. Stir it after each burst. This helps prevent overheating. If you see it starting to melt, stop heating. Smooth chocolate creates a nice drizzle.
Best Ways to Cut the Bark
Cutting the bark can be tricky. A warm knife works wonders. Run the knife under hot water, then dry it. This helps the knife glide through the frozen yogurt. If you want, you can use your hands to break the bark too. This gives a fun, rustic look.

Variations
Fruit Alternatives
You can switch up the strawberries for other fruits. Bananas work well for a creamy taste. Blueberries add a nice pop of color and flavor. You can even mix fruits for more fun. Try layering different fruits for a colorful treat!
Chocolate Choices
You don’t have to stick with dark chocolate. White chocolate gives a sweet, creamy taste. Milk chocolate adds a nice balance of sweetness. Each choice changes the overall flavor. Experiment and find your favorite!
Sweetness Level
If you want it sweeter, add more honey or maple syrup. You can also use sweeteners like agave or stevia. Adjust the sweetness to fit your taste. Just remember to mix it well so it blends evenly!
Storage Info
How to Store Yogurt Bark
To keep your yogurt bark fresh, use an airtight container. This helps prevent freezer burn. I recommend placing parchment paper between layers if you stack pieces. This way, they won’t stick together.
Freezer Tips
Freezing yogurt bark is simple. Lay the baking sheet flat in the freezer. Avoid overcrowding to keep the air circulating. This helps maintain a smooth texture without ice crystals. Check for firmness after a few hours.
Duration of Storage
Your yogurt bark will last up to two months in the freezer. After that, it may lose some flavor and texture. For the best taste, enjoy it sooner rather than later.
FAQs
Can I use non-dairy yogurt?
Yes, you can use non-dairy yogurt! Almond, coconut, or soy yogurt works well. These options can add a unique taste to your yogurt bark. Make sure to choose plain or vanilla flavors for the best results.
Can I add nuts or seeds?
Absolutely! Adding nuts or seeds can give your bark great texture. Try chopped almonds, walnuts, or sunflower seeds. They will add crunch and flavor, making each bite more exciting.
Is this treat healthy?
Yes, this treat is healthy! Greek yogurt provides protein and probiotics. Strawberries are full of vitamins and antioxidants. Dark chocolate offers heart-healthy benefits, too. The balance of these ingredients makes this bark a nutritious snack.
How do I make it more or less sweet?
To adjust sweetness, use honey or maple syrup. For a sweeter treat, add more sweetener. If you prefer less sweetness, reduce the amount. Taste the yogurt mixture before freezing to find your perfect balance!
This yogurt bark recipe is simple and fun. You mix Greek yogurt with your favorite fruits and chocolate to create a tasty snack. Remember to freeze it for a few hours before serving. You can play with flavors and toppings, too. Try different fruits or switch the chocolate.
Overall, you can make this treat to fit your taste. Enjoy a sweet and healthy snack that is easy to make!


![- 1 cup pumpkin puree - 1 ½ cups crushed graham crackers - ½ teaspoon pumpkin spice - ½ cup powdered sugar - 1 teaspoon vanilla extract - 8 oz dark chocolate - 1 tablespoon coconut oil - Flaky sea salt To create chocolate covered pumpkin truffles, you need simple yet flavorful ingredients. Start with pumpkin puree, either canned or homemade. This is the base for your truffles. Next, grab crushed graham crackers. They give the truffles a unique texture and sweetness. Pumpkin spice adds warmth and flavor. You can adjust the amount if you want a stronger taste. Powdered sugar sweetens the mixture, making each bite a delight. Vanilla extract rounds out the flavor profile beautifully. For the chocolate coating, use dark chocolate. It contrasts nicely with the sweetness of the truffles. Adding coconut oil to the chocolate helps it melt smoothly. Finally, a sprinkle of flaky sea salt on top enhances the flavor, making each truffle even more irresistible. - Mixing bowl - Spoon or spatula - Measuring cups and spoons - Parchment paper - Baking sheet - Double boiler or microwave-safe bowl You will need a few tools to make these truffles. A mixing bowl is essential for combining your ingredients. A spoon or spatula helps you mix everything well. Measuring cups and spoons ensure that your ingredients are precise. Parchment paper is key for lining your baking sheet. It keeps the truffles from sticking. You also need a baking sheet to hold the truffles while they chill. Finally, a double boiler or a microwave-safe bowl helps melt the chocolate evenly. With these ingredients and tools, you're ready to create chocolate covered pumpkin truffles that everyone will love. For the complete recipe, check out the Full Recipe link. Start by mixing the pumpkin puree with the dry ingredients. In a large bowl, add: - 1 cup pumpkin puree - 1 ½ cups crushed graham crackers - ½ teaspoon pumpkin spice - ½ cup powdered sugar - 1 teaspoon vanilla extract Use a spatula or wooden spoon to blend these together. Mix until you have a smooth, dough-like consistency. The mixture should be firm enough to hold its shape. Next, it’s time to shape the truffles. With clean hands, scoop out tablespoon-sized portions. Roll each portion into a ball, about 1 inch in diameter. Place the balls on a parchment-lined baking sheet. Make sure to space them apart. This helps them keep their shape. After shaping, cover the baking sheet with plastic wrap and chill in the fridge for about 30 minutes. While the truffles chill, let’s melt the chocolate. You can use a double boiler or the microwave. If you choose the double boiler, place a heatproof bowl over a pot of simmering water. Stir the chocolate and coconut oil together until smooth. If using the microwave, heat in 20-second bursts, stirring in between. Make sure the chocolate is silky before dipping. Once the truffles are chilled, it’s time to coat them. Dip each ball into the melted chocolate. Make sure it’s fully covered. Use a fork to lift it out, letting the excess chocolate drip back into the bowl. Place the coated truffles back on the parchment-lined sheet. While the chocolate is still wet, sprinkle a pinch of flaky sea salt on each truffle. This adds a burst of flavor that balances the sweetness. Let the truffles sit at room temperature until the chocolate sets. You can speed up this process by placing them in the fridge for about 15-20 minutes. Now, your delicious chocolate-covered pumpkin truffles are ready to enjoy. You can find the full recipe above for more details on each step. Chilling the truffles is key. It helps them hold their shape better when you dip them. After you roll the truffles, place them in the fridge for about 30 minutes. This step makes a big difference in texture. To roll smooth truffles, make sure your hands are clean and dry. Use a light touch as you form the balls. If your mixture is sticky, wet your hands slightly. This helps shape them without making a mess. Melting chocolate can be tricky. To melt chocolate evenly, I recommend using a double boiler. Fill a pot with a bit of water, then place a heatproof bowl on top. Stir the chocolate as it melts. This method prevents burning. If you want a nice shine, add a tablespoon of coconut oil to the chocolate. It will make your truffles look glossy and appealing. Get creative when it comes to serving. You can sprinkle a little cinnamon on top for extra flavor. Pumpkin seeds also add a nice crunch and look great on a dessert table. These truffles pair well with coffee or a spiced chai. Consider serving them at your next fall gathering or holiday party. They will surely impress your guests! For the full recipe, check the main section. {{image_4}} You can easily change the taste of your truffles. Try adding almond extract for a nutty twist. A bit of orange zest will give your truffles a fresh, fruity kick. You can also swap out the pumpkin spice for cinnamon or nutmeg. Each spice brings a new flavor to your truffles. If you need gluten-free options, look for gluten-free graham crackers. Many brands offer these, and they work just as well. For those who prefer dairy-free treats, use dairy-free chocolate for the coating. There are great dairy-free chocolate chips available that melt nicely. Want to make your truffles extra special? Roll them in crushed nuts like pecans or walnuts. This adds a nice crunch. You can also use colorful sprinkles for a fun look. If dark chocolate isn’t your thing, try coating the truffles in white chocolate instead. It adds a sweet, creamy flavor that pairs well with pumpkin. For the full recipe, check out the [Full Recipe]. To keep your chocolate covered pumpkin truffles fresh, store them in the fridge. The cool temperature helps maintain their texture and flavor. Place the truffles in an airtight container to prevent them from drying out. This way, they can stay yummy for up to one week. If you want to enjoy them longer, try to avoid leaving them out at room temperature for too long. If you want to save some truffles for later, freezing is a great option. First, place the truffles on a baking sheet, making sure they don’t touch. Freeze them for about an hour until they are firm. Once frozen, transfer the truffles to a freezer-safe bag or container. They can last for up to three months in the freezer. When you’re ready to enjoy them, simply take out the number of truffles you want. Let them thaw in the fridge for a few hours or at room temperature for about 30 minutes. Avoid using heat to thaw, as this can ruin their texture. Now they're ready to be devoured! Chocolate covered pumpkin truffles can last about one week in the fridge. Store them in an airtight container to keep them fresh. After a week, check for signs of spoilage, such as a change in smell or texture. If they feel sticky or smell off, it's best to toss them. Yes, you can easily make these truffles vegan! Use dairy-free chocolate instead of dark chocolate. Swap the coconut oil for a plant-based butter or more coconut oil. This keeps the rich flavor while making it suitable for a vegan diet. These truffles shine at holiday gatherings and parties. They also make great gifts for friends and family. Their festive look and delicious taste fit well with autumn themes. Serve them during Halloween, Thanksgiving, or any cozy get-together. Yes, you can find chocolate covered pumpkin truffles at many bakeries. Look for local shops that specialize in gourmet treats. Some popular brands also offer these truffles online. You can enjoy them without all the fuss of making them at home. For a homemade touch, check out the Full Recipe for a delightful DIY version! Creating chocolate covered pumpkin truffles is simple and fun. We covered key ingredients like pumpkin puree, graham crackers, and dark chocolate. You learned tools needed, step-by-step instructions, and tips for easy truffle-making. We also looked at flavors, variations, storage, and common questions. These truffles make a perfect treat for any occasion. Enjoy making these delightful bites and share them with friends! You’ll impress everyone with your tasty skills.](https://joymealplan.com/wp-content/uploads/2025/07/35417da5-91a5-48e5-8a48-b090ca73d24b-768x768.webp)