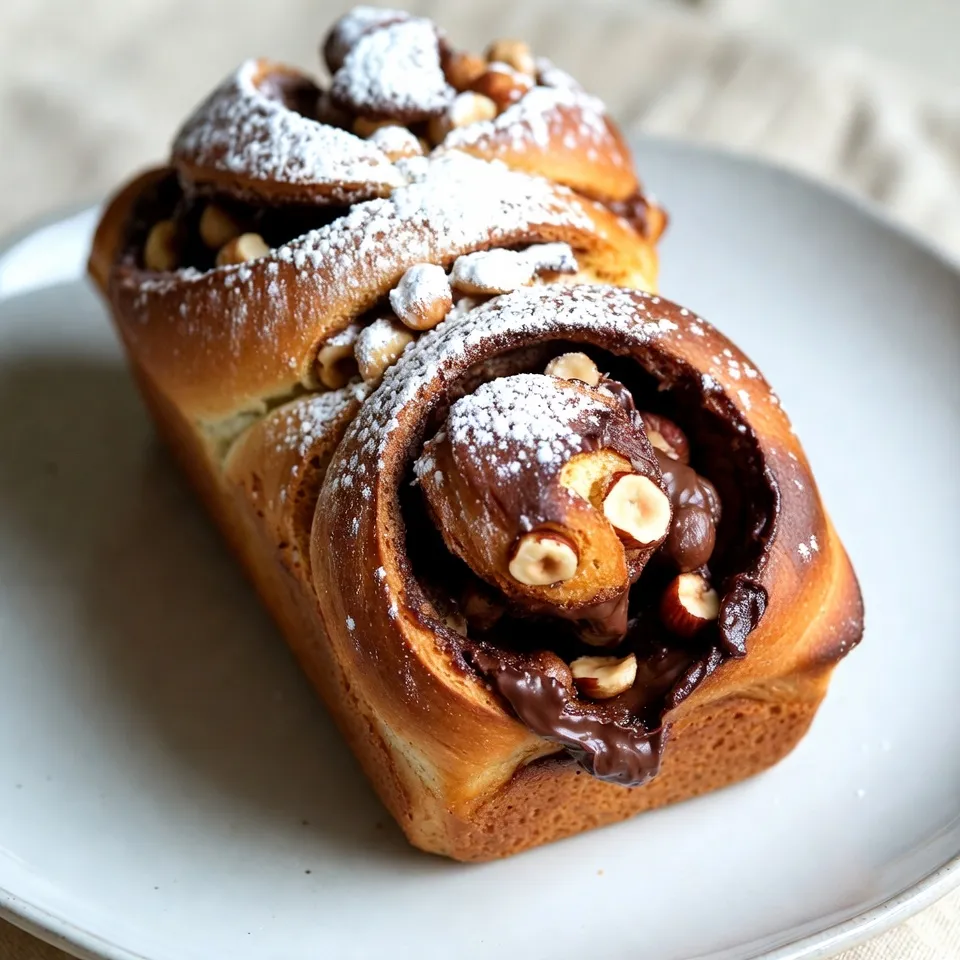
Are you ready to dive into the world of comfort baking? This Chocolate Hazelnut Babka is the irresistible treat you’ve been dreaming of. It’s a soft bread with a rich, gooey filling that will make your taste buds dance. In this guide, I’ll walk you through each step, from gathering minimal ingredients to perfecting that swirl. Get ready to impress friends and family with this simple yet decadent recipe!
Why I Love This Recipe
- Decadent Flavor: This babka combines rich chocolate and nutty hazelnut flavors, creating an indulgent treat that’s perfect for any occasion.
- Stunning Presentation: The twisted design of the babka not only looks spectacular but also reveals beautiful swirls of chocolate and hazelnuts when sliced.
- Perfect for Sharing: With 10-12 slices, this recipe is ideal for gatherings, making it easy to share and impress your friends and family.
- Versatile Enjoyment: This babka can be enjoyed warm, at room temperature, or even toasted, making it a delicious option for breakfast, dessert, or a snack.
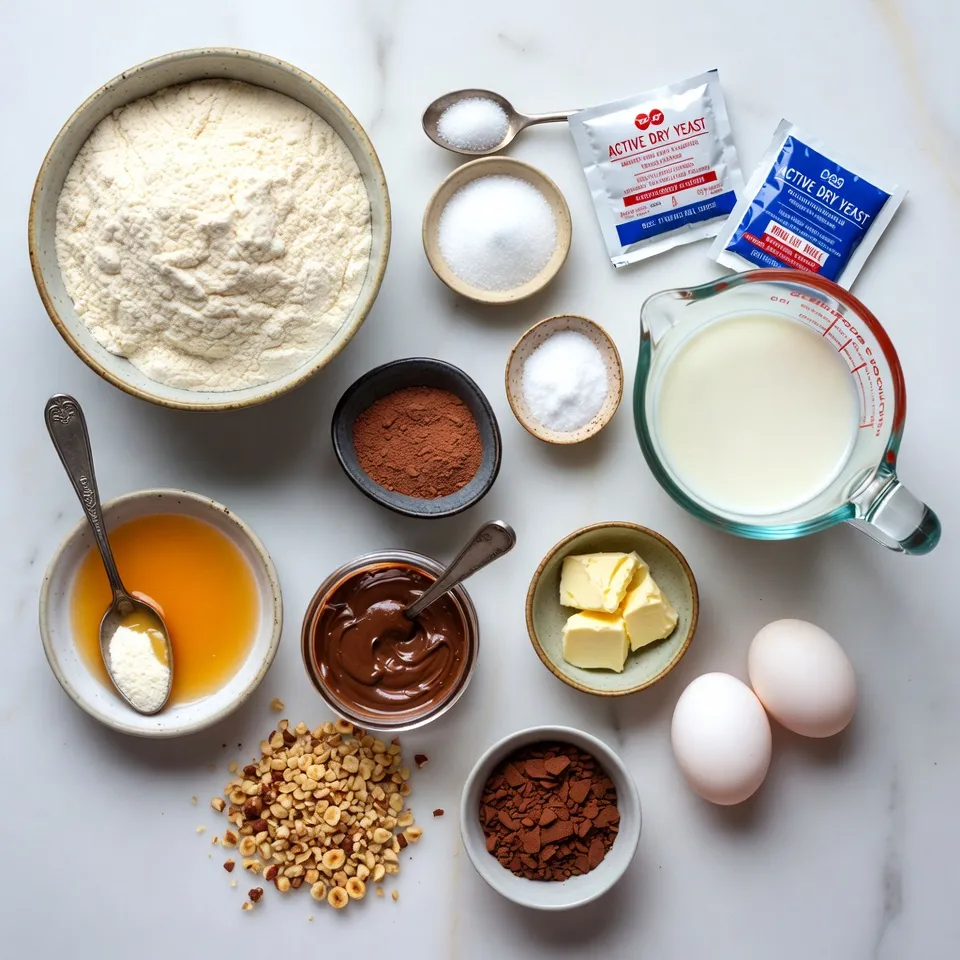
Ingredients
Main Ingredients for Chocolate Hazelnut Babka
– 4 cups all-purpose flour
– 1/2 cup granulated sugar
– 1 packet (2 1/4 teaspoons) active dry yeast
– 1 teaspoon sea salt
– 1 cup whole milk, warmed to about 110°F (43°C)
– 1/2 cup unsalted butter, melted and slightly cooled
– 2 large eggs, at room temperature
Filling Ingredients
– 1 cup chocolate hazelnut spread (such as Nutella)
– 1/2 cup hazelnuts, finely chopped
– 1/4 cup unsweetened cocoa powder
Topping and Finishing Ingredients
– 1 egg (for egg wash)
– Optional: powdered sugar for dusting
The magic of Chocolate Hazelnut Babka starts with simple ingredients. First, you need all-purpose flour. This forms the base of your dough. Granulated sugar adds a touch of sweetness. Yeast helps the dough rise, making it fluffy. Sea salt enhances the flavor of the babka.
Next, warm whole milk is key. It activates the yeast, bringing life to your dough. Melted unsalted butter gives richness and a soft texture. Room temperature eggs bind everything together.
For the filling, chocolate hazelnut spread is the star. It brings that delicious chocolatey flavor. Finely chopped hazelnuts add crunch and depth. Unsweetened cocoa powder intensifies the chocolate taste.
For the final touch, you’ll brush the top with an egg wash. This gives your babka a beautiful shine. If you like, dust with powdered sugar for a sweet finish. The right ingredients make every bite of this babka irresistible!
Step-by-Step Instructions
Preparing the Dough
1. In a large bowl, mix the warmed milk, sugar, and yeast. Stir gently. Let it sit for ten minutes. This helps the yeast activate. You want it frothy and bubbly.
2. In another bowl, whisk together the flour and sea salt. Make sure they blend well. After the yeast mixture is ready, add the melted butter and eggs. Gradually combine this with the flour mixture until it forms a dough.
3. Transfer the dough to a floured surface. Knead it for five to seven minutes. The dough should feel smooth and elastic. Shape it into a ball and place it in a greased bowl. Cover the bowl with a towel. Let it rise in a warm place for about one hour, until it doubles in size.
Shaping and Filling the Babka
1. After the dough rises, punch it down gently. Roll it out on a floured surface into a rectangle, about 12 by 18 inches.
2. Spread chocolate hazelnut filling evenly over the dough. Leave about a half-inch border on the edges. Sprinkle chopped hazelnuts and cocoa powder over the filling.
3. Starting from one long side, roll the dough tightly into a log shape. Use a sharp knife to cut the log in half lengthwise. This shows the filling inside.
4. Twist the two halves together carefully, keeping the cut sides facing up. Shape this twisted dough into a spiral. Place it into a greased loaf pan.
Baking the Babka
1. Cover the loaf pan with a towel again. Let the babka rise for another 30 to 45 minutes. Preheat your oven to 350°F (175°C).
2. For a nice finish, brush the top of the babka with a beaten egg. This gives it a golden color.
3. Bake in the preheated oven for 30 to 35 minutes. The top should be golden brown. A toothpick inserted in the center should come out clean.
4. Allow the babka to cool in the pan for ten minutes. Then transfer it to a wire rack to cool completely.
Tips & Tricks
Perfecting the Swirl
To get a great swirl, spread the filling evenly. Use a spatula to cover every corner. This ensures each bite has chocolate and hazelnut flavor. When rolling, start from one long side. Roll tightly to keep the filling inside. If you roll too loosely, the babka won’t hold its shape.
Achieving the Right Texture
Dough rising time is key for soft babka. After mixing, let it rise in a warm spot until it doubles. This usually takes about an hour. Kneading is also important. Knead for 5 to 7 minutes until smooth. This helps develop gluten for a chewy texture.
Presentation Tips
For a lovely finish, dust the top with powdered sugar. This adds a touch of elegance. When serving, slice the babka to show the beautiful swirls. A rustic wooden board makes a great display. It invites everyone to dig in and enjoy!
Pro Tips
- Check Yeast Freshness: Always ensure your yeast is fresh by checking the expiration date. Active dry yeast should bubble and foam when activated with warm milk and sugar; if it doesn’t, it may be expired.
- Room Temperature Ingredients: Using eggs and butter at room temperature helps the dough come together more smoothly, creating a better texture in your final babka.
- Perfect Rolling Technique: When rolling out the dough, ensure an even thickness to allow for uniform baking. A rolling pin with guide rings can help achieve this consistency.
- Storage Tips: Store your babka in an airtight container at room temperature for up to three days. For longer storage, wrap it well in plastic wrap and freeze for up to a month.
Variations
Flavor Variations
You can switch up the filling for your Chocolate Hazelnut Babka. Try peanut butter or almond butter. Both add a rich taste and creamy texture. You can also mix in dried fruits like cherries or cranberries. They bring a fruity twist that balances the chocolate. Different nuts can work too. Almonds or walnuts can add crunch and flavor.
Gluten-Free or Vegan Options
Want a gluten-free version? Use gluten-free flour blends. Make sure to pick one that works for baking. For a vegan babka, swap the eggs with flax eggs. Mix one tablespoon of ground flaxseed with three tablespoons of water. Let it sit until it thickens. This will help bind your dough. You can also use almond milk instead of whole milk.
Seasonal Twists
Change your babka with the seasons. Add warm spices like cinnamon or nutmeg for a cozy taste. You can also use orange zest for a fresh, zesty flavor. In fall, try adding pumpkin puree to the filling. In summer, fresh berries can add a bright twist. Each season gives your babka a new life.
Storage Info
Short-Term Storage
To store your chocolate hazelnut babka for short-term use, keep it at room temperature. Place it in an airtight container. This way, it stays soft and fresh. You can also wrap it in plastic wrap. Enjoy your babka within three days for the best taste.
Long-Term Storage
For long-term storage, freezing is a great option. Wrap the cooled babka tightly in plastic wrap. Then place it in a freezer-safe bag. This keeps moisture out and preserves flavor. You can freeze it for up to three months.
To thaw, take the babka out of the freezer and let it sit at room temperature. This can take a few hours. Once thawed, reheat it in the oven at 350°F (175°C) for about 10-15 minutes. This warms the babka and revives its soft texture.
Signs of Spoilage
To check if your babka has gone bad, look for a few signs. If you see mold or an off-smell, it’s best to toss it. You can also check the texture. If it feels dry or hard, it may not taste good anymore. Always trust your senses when it comes to food safety.
FAQs
What is Chocolate Hazelnut Babka?
Chocolate hazelnut babka is a sweet, twisted bread. It has roots in Jewish culture and Eastern Europe. Babka means “grandmother” in Polish, which hints at its cozy, homey feel. Many enjoy it for breakfast or dessert. The dough is soft and rich, filled with chocolate hazelnut spread and crunchy hazelnuts. Each slice reveals beautiful swirls of chocolate and nuts. This treat is both tasty and visually stunning, making it a favorite for gatherings.
Can I make Chocolate Hazelnut Babka in advance?
Yes, you can make chocolate hazelnut babka ahead of time. Prepare the dough and let it rise as usual. After shaping, you can wrap it tightly and store it in the fridge for up to 24 hours. When you’re ready, let it rise again for about 30 minutes before baking. For longer storage, you can freeze the unbaked babka. Just make sure to wrap it well. When you are ready to bake, thaw it in the fridge overnight and then let it rise before baking.
What can I serve with Chocolate Hazelnut Babka?
Beverages that pair well include coffee, tea, or hot chocolate. For a brunch, serve it with fresh fruits or yogurt. A drizzle of cream or a scoop of vanilla ice cream adds a nice touch. Enjoying babka with a side of whipped cream enhances its richness. Each bite can become even more delightful with these tasty additions.
In this blog post, we explored how to make Chocolate Hazelnut Babka. We covered the main ingredients, step-by-step instructions, and tips for perfecting your babka. We also shared fun variations and useful storage info to keep your babka fresh.
By following these steps, you can create a delicious treat that is sure to impress. Enjoy baking and sharing your Chocolate Hazelnut Babka with friends and family. Happy bakin


