Christmas Confetti Pancakes Festive and Fun Recipe

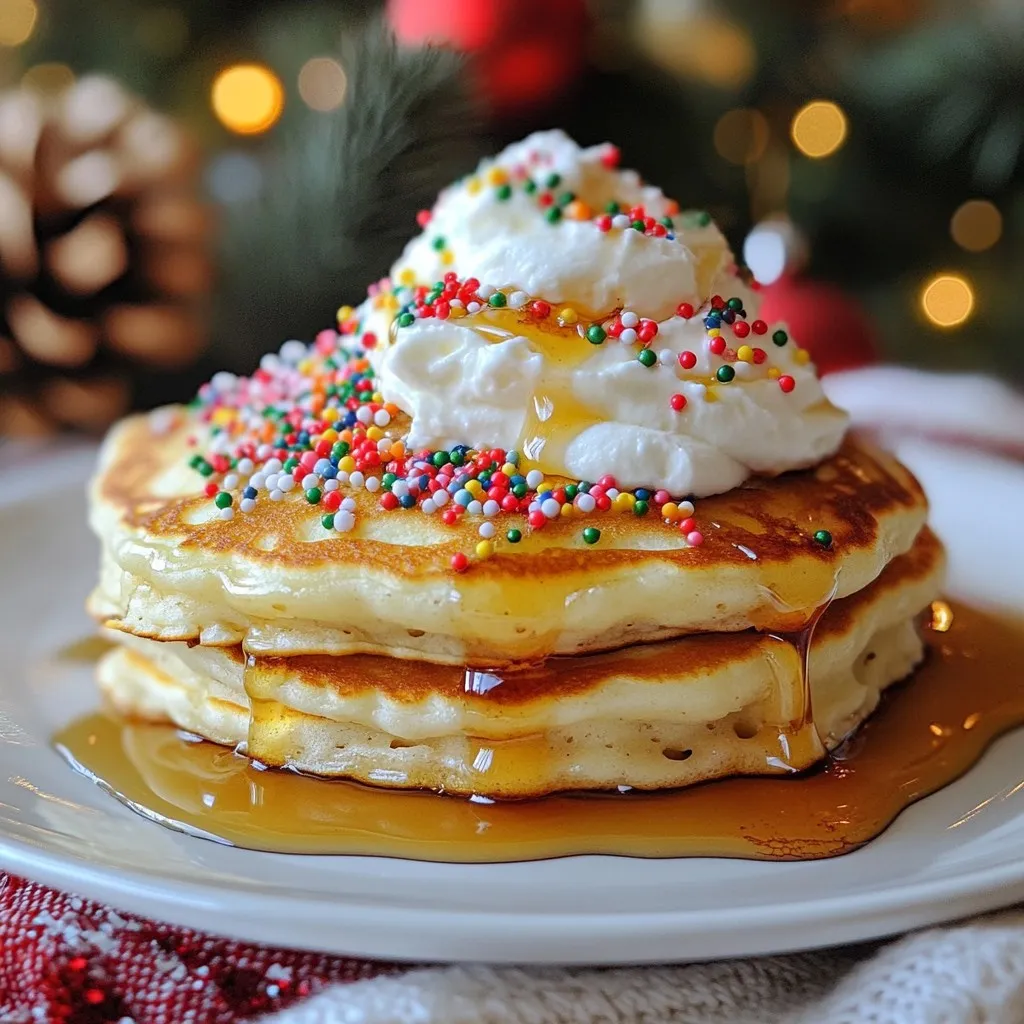
Get ready to bring joy to your holiday mornings with my Christmas Confetti Pancakes! This fun and festive recipe transforms ordinary pancakes into colorful treats that will delight both kids and adults. With colorful sprinkles and simple ingredients, you can whip up a batch in no time. Read on to discover how to make these cheerful pancakes, perfect for adding a sprinkle of magic to your holiday celebrations!
Why I Love This Recipe
- Festive Fun: These pancakes bring a splash of color and joy to your breakfast table, making every bite feel like a celebration.
- Easy to Make: With simple ingredients and straightforward steps, you can whip up a batch of these delicious pancakes in no time!
- Customizable: Feel free to switch up the sprinkles or add your favorite mix-ins like chocolate chips or fruit for a personal touch.
- Perfect for Sharing: These pancakes are great for holiday brunches, making them a delightful treat to enjoy with family and friends.
Ingredients
List of Ingredients for Christmas Confetti Pancakes
To make these fun pancakes, gather the following ingredients:
– 1 cup all-purpose flour
– 2 tablespoons granulated sugar
– 1 teaspoon baking powder
– 1/2 teaspoon baking soda
– 1/4 teaspoon fine sea salt
– 1 cup buttermilk (or regular milk with 1 tablespoon vinegar added to sour)
– 1 large egg
– 2 tablespoons unsalted butter, melted
– 1 teaspoon pure vanilla extract
– 1/2 cup colorful Christmas-themed sprinkles
– Additional butter or oil for cooking
Substitutions and Alternatives
You can swap some ingredients for others if needed. Here are a few ideas:
– Use whole wheat flour instead of all-purpose for a healthier option.
– For a dairy-free version, replace buttermilk with almond or oat milk mixed with vinegar.
– Coconut oil can replace unsalted butter for a dairy-free option.
– If you want a sweeter pancake, add a bit more sugar or use flavored syrups.
Recommended Toppings and Add-ins
Once your pancakes are cooked, you can make them even more festive. Here are some great ideas:
– Drizzle warm maple syrup over the top.
– Add a dollop of whipped cream for extra creaminess.
– Sprinkle extra colorful sprinkles for more fun.
– Fresh fruit like berries or bananas can add a burst of flavor.
– A dusting of powdered sugar can make them look extra special.
These options will make your Christmas Confetti Pancakes even more delightful and tasty!

Step-by-Step Instructions
Preparing the Dry Ingredients
Start by gathering your dry ingredients. In a large mixing bowl, add 1 cup of all-purpose flour, 2 tablespoons of granulated sugar, 1 teaspoon of baking powder, 1/2 teaspoon of baking soda, and 1/4 teaspoon of fine sea salt. Use a whisk to mix these together. Make sure there are no lumps. This step is key for fluffy pancakes.
Combining the Wet Ingredients
Next, take a separate bowl for the wet ingredients. Add 1 cup of buttermilk, or use regular milk with 1 tablespoon of vinegar. Then, crack in 1 large egg. Pour in 2 tablespoons of melted unsalted butter and 1 teaspoon of pure vanilla extract. Whisk until the mixture is smooth and well blended. This adds flavor and moisture to your pancakes.
Mixing and Cooking the Batter
Now, pour the wet mixture into the dry bowl. Use a spatula to gently fold them together. Stop mixing when everything is combined. It’s okay if you see small lumps; overmixing can make your pancakes tough. Carefully fold in 1/2 cup of colorful Christmas-themed sprinkles. This adds a festive touch.
Preheat a non-stick skillet or griddle over medium heat. Once it’s hot, add a small pat of butter or a drizzle of oil. Swirl it around to coat the bottom. For each pancake, pour 1/4 cup of batter. Cook until the edges look set and bubbles form on top, about 2-3 minutes.
Flip the pancakes carefully using a spatula. Cook the other side for another 2-3 minutes, until golden brown. Repeat with the remaining batter, adding more butter or oil as needed. Serve warm, topped with maple syrup, whipped cream, and extra sprinkles for a festive feast!
Tips & Tricks
Perfecting Pancake Texture
To get fluffy pancakes, use fresh ingredients. Old baking powder or baking soda can make your pancakes flat. Mix your dry and wet ingredients separately first. This keeps the texture light. When combining them, fold gently. It’s fine to have small lumps; overmixing can lead to tough pancakes.
Flipping Pancakes: Best Practices
Flipping pancakes can be tricky. Wait until you see bubbles on the surface. The edges should look set. Use a thin spatula to slide under the pancake. Lift it gently and flip. Do not rush; a perfect flip makes the pancake look nice and cook evenly.
Keeping Pancakes Warm Before Serving
If you have to cook in batches, keep pancakes warm. Set your oven to 200°F (93°C). Place pancakes on a baking sheet and cover them loosely with foil. This keeps them warm without getting dry. Serve the pancakes fresh with syrup and whipped cream for a festive meal!
Pro Tips
- Use Buttermilk for Extra Tenderness: Buttermilk adds a rich flavor and helps create a fluffier texture. If you don’t have buttermilk, the vinegar and regular milk mixture works well too!
- Don’t Overmix the Batter: It’s okay if there are a few lumps in the batter. Overmixing can lead to tough pancakes, so just mix until combined.
- Keep Your Skillet at the Right Temperature: Make sure to preheat your skillet and adjust the heat as needed. If the pancakes cook too fast, they may burn on the outside while remaining raw inside.
- Add Sprinkles Just Before Cooking: For the best color and texture, fold in the sprinkles right before you cook the pancakes to prevent them from bleeding into the batter.

Variations
Using Different Types of Sprinkles
You can use many types of sprinkles for Christmas Confetti Pancakes. Colorful round sprinkles add fun. Try star-shaped sprinkles for a festive touch. Holiday-themed sprinkles come in many shapes, like trees or snowflakes. You can even mix regular sprinkles with edible glitter for a sparkly look. Just remember, the sprinkles should be safe for cooking. They should not melt away too much in the heat.
Flavor Enhancements (e.g., chocolate chips, fruit)
Add chocolate chips for a sweet twist. Dark, milk, or white chocolate chips work well. You can also mix in fruits like blueberries or bananas. They add natural sweetness and flavor. If you love nuts, sprinkle in chopped pecans or walnuts. They give a nice crunch. Just keep the total mix-ins to about half a cup for the best pancake texture.
Gluten-Free and Dairy-Free Modifications
To make gluten-free pancakes, swap all-purpose flour for a gluten-free blend. Look for a mix that works cup-for-cup. For a dairy-free option, use almond or oat milk instead of buttermilk. You can add vinegar to your milk to mimic buttermilk. Use coconut oil instead of butter for cooking. These changes keep the pancakes tasty and light while meeting dietary needs.
Storage Info
Refrigeration Tips
You can store leftover pancakes in the fridge for up to three days. Place them in an airtight container. Let them cool completely before storing. This helps keep them fresh and tasty.
Freezing Pancakes for Later Use
Freezing pancakes is a great way to enjoy them later. Stack the pancakes with parchment paper between each one. Then, wrap them tightly in plastic wrap or foil. Place the wrapped stack in a freezer bag. They can last for up to two months in the freezer.
Reheating Techniques
To reheat pancakes, you have a few options. The microwave is quick. Place pancakes on a plate and cover them with a damp paper towel. Heat for 20-30 seconds. For crispy edges, use a skillet. Heat a small amount of butter in the skillet over medium heat. Add pancakes and cook for 1-2 minutes on each side. Enjoy them warm with syrup and sprinkles!
FAQs
Can I make Christmas Confetti Pancakes ahead of time?
Yes, you can make these pancakes ahead. Cook them and let them cool. Then stack them in a container. Place parchment paper between each pancake to avoid sticking. Store them in the fridge for up to three days. If you want to keep them longer, freeze them. Just follow the freezing tips in our storage section.
What type of flour works best for pancakes?
I recommend using all-purpose flour for these pancakes. It gives a nice texture. You can also try whole wheat flour for a healthier option. If you want gluten-free pancakes, use a gluten-free flour blend. This will still give you soft and tasty pancakes.
How do I make pancakes fluffier?
To make your pancakes fluffier, use buttermilk instead of regular milk. It adds a nice tang and helps the pancakes rise. Also, do not overmix the batter. Mix until just combined; lumps are okay. Lastly, let the batter rest for a few minutes before cooking. This gives the baking powder time to activate, making your pancakes light and fluffy.
These Christmas Confetti Pancakes bring joy to your table. We reviewed ingredients, step-by-step cooking, and tips for perfect pancakes. You can add sprinkles, fruits, or even go gluten-free. Store extras easily by freezing them for later.
Pancake-making is fun and creative. With practice, you can make them even better! Enjoy these festive treats with your family this holiday seaso

Christmas Confetti Pancakes
Ingredients
- 1 cup all-purpose flour
- 2 tablespoons granulated sugar
- 1 teaspoon baking powder
- 1/2 teaspoon baking soda
- 1/4 teaspoon fine sea salt
- 1 cup buttermilk (or regular milk with 1 tablespoon vinegar added to sour)
- 1 large egg
- 2 tablespoons unsalted butter, melted
- 1 teaspoon pure vanilla extract
- 1/2 cup colorful Christmas-themed sprinkles
- as needed Additional butter or oil for cooking
Instructions
- In a large mixing bowl, combine the flour, sugar, baking powder, baking soda, and salt. Whisk together until thoroughly mixed and no lumps remain.
- In a separate bowl, whisk together the buttermilk, egg, melted butter, and vanilla extract until the mixture is smooth and well blended.
- Pour the wet ingredients into the dry ingredients, and using a spatula, gently fold the mixtures together. Stop mixing as soon as everything is combined; it's perfectly fine if there are a few small lumps—overmixing can lead to tough pancakes.
- Carefully fold in the colorful sprinkles, making sure they are evenly distributed throughout the pancake batter.
- Preheat a non-stick skillet or griddle over medium heat. Once hot, add a small pat of butter or a drizzle of oil, swirling it around to coat the cooking surface.
- For each pancake, pour 1/4 cup of batter onto the skillet. Cook until the pancake edges look set and bubbles form on the surface, approximately 2-3 minutes.
- Flip the pancakes carefully using a spatula and continue to cook for another 2-3 minutes, or until the second side is golden brown.
- Continue the process with the remaining batter, adding more butter or oil to the skillet as necessary to prevent sticking.
- Serve the pancakes warm, topped with generous drizzle of maple syrup, a dollop of whipped cream, and a sprinkling of extra festive sprinkles for that holiday touch!


![The ingredients for Raspberry Almond Thumbprint Cookies are simple and delightful. Each one plays a key role in creating the perfect cookie. - 1 cup unsalted butter, softened to room temperature - 3/4 cup granulated sugar - 1 cup almond flour - 2 cups all-purpose flour - 1/2 teaspoon fine sea salt - 1 teaspoon pure vanilla extract - 1/4 teaspoon pure almond extract - 1/2 cup raspberry jam - Optional: Sliced almonds for garnish Using high-quality ingredients makes a big difference. The unsalted butter gives a rich flavor and smooth texture. Granulated sugar adds sweetness and helps the cookies spread just right. Almond flour brings a nutty taste that pairs well with raspberry jam. The fine sea salt balances the sweetness and enhances all the flavors. Vanilla and almond extracts add depth to the cookies. Raspberry jam gives that burst of fruity goodness, making each bite a treat. If you want a bit of crunch, sliced almonds add a lovely touch. For the complete recipe, check out the Full Recipe. Make sure you have everything ready before you start. Happy baking! - Preheat the oven to 350°F (175°C). This step ensures your cookies bake evenly and rise well. While the oven heats, line two baking sheets with parchment paper. This prevents cookies from sticking. - Cream the butter and sugar. In a large bowl, mix the softened butter and sugar until light and fluffy. This takes about 2-3 minutes. - Combine the dry ingredients and mix in the flavorings. Gradually add almond flour, all-purpose flour, and sea salt. Stir until a soft dough forms. Then, pour in vanilla and almond extracts and mix until smooth. - Roll the dough into balls. Use your hands to shape 1-inch balls and place them on the baking sheets. Make sure to space them about 2 inches apart, so they have room to spread. - Create indentations in each ball. Use your thumb or a small spoon to press down in the center of each dough ball. This creates a well for the jam. - Fill each indentation with raspberry jam. Carefully add about 1 teaspoon of jam to each well. Be careful not to overfill, or it may spill during baking. - Optional: For a crunchy texture, press sliced almonds around the edges of the filled indentations. - Bake the cookies. Place the baking sheets in the oven and bake for 12 to 15 minutes. Look for lightly golden edges. - Cooling instructions: After baking, let the cookies sit for about 5 minutes on the baking sheets. This helps them firm up. Then, transfer them to a wire rack to cool completely. - Presentation tips: Once cooled, dust the cookies lightly with powdered sugar. Arrange them on a decorative platter with fresh raspberries and mint leaves for a vibrant look. Check out the Full Recipe for more details and tips! Achieving the perfect texture To get soft and chewy cookies, use softened butter. This helps create the right mix of air and fat. Make sure to cream it well with the sugar. Mixing should take about 2 to 3 minutes. If you want a slight crunch, use finely ground almond flour. This gives the cookies a nice bite. Ensuring even cooking For even baking, space the cookie balls well on the baking sheet. Place them about 2 inches apart. This helps prevent them from sticking together. Additionally, rotate the baking sheets halfway through the baking time. This ensures all cookies bake evenly. Recommended amendments for enhanced flavor To boost the almond flavor, add a bit more almond extract. Just a few extra drops can make a big difference. You can also add a pinch of cinnamon for warmth. It pairs well with the raspberry jam and adds depth to the taste. Alternative fillings for the thumbprint While raspberry jam is great, try other flavors too! Strawberry, apricot, or even lemon curd can work well. Each jam gives a unique twist to the cookies. You can also use chocolate ganache for a rich, sweet center. Avoiding overfilling the jam When filling the cookie indentations, use about 1 teaspoon of jam. If you add too much, it can overflow during baking. This can make a mess on your baking sheet. Stick to the recommended amount for best results. Preventing dough from spreading too much in the oven If your dough spreads too much, try chilling it for about 30 minutes before baking. This helps firm up the butter. You can also bake on parchment paper, which helps maintain shape. Keeping your dough cold is key to keeping those lovely thumbprint shapes! {{image_4}} You can play with flavors in Raspberry Almond Thumbprint Cookies. Using different fruit jams can change the taste. Try strawberry, apricot, or blueberry jam for a fun twist. Each jam brings its unique flavor, making each bite special. You can also add chocolate or citrus flavors. Mix in some cocoa powder for a chocolatey touch. Or, add a hint of lemon zest for a fresh kick. These small changes can give your cookies a new vibe. Making these cookies gluten-free is easy. Substitute regular flour with gluten-free flour blends. Look for blends that include almond or coconut flour. These options keep the cookies soft and chewy. To maintain the right texture, watch the moisture levels. Gluten-free flour often absorbs more liquid. You may need to adjust the butter or add a bit of milk. This keeps the cookies from being too dry or crumbly. You can make these cookies vegan too. Replace butter with coconut oil or vegan butter. Both options keep the cookies rich and tasty. For eggs, use flaxseed meal or applesauce. These act as great binding agents. Flaxseed meal is simple to use. Mix one tablespoon with three tablespoons of water. Let it sit for a few minutes until it thickens. This blend works well and keeps the cookies together. To keep your Raspberry Almond Thumbprint Cookies fresh, store them in an airtight container at room temperature. This helps prevent them from getting stale. I recommend enjoying them within 5 to 7 days for the best taste. If you want to save some cookies for later, you can freeze them. For baked cookies, let them cool completely. Then, place them in a freezer-safe bag or container. They will stay good for up to three months. If you prefer to freeze the dough, wrap it tightly in plastic wrap, then place it in a freezer bag. When ready, thaw the dough in the fridge overnight for the best results. Reheating your cookies is easy! To keep their soft texture, preheat your oven to 300°F (150°C). Place the cookies on a baking sheet and warm them for about 5 to 8 minutes. This method helps restore their fresh-baked taste. Enjoy them warm, and they will feel like new! To make these cookies, follow these key steps: 1. Preheat your oven to 350°F (175°C). 2. Cream butter and sugar until fluffy in a bowl. 3. Combine dry ingredients: mix almond flour, all-purpose flour, and salt. 4. Add extracts: stir in vanilla and almond extracts. 5. Shape dough into 1-inch balls and place on a baking sheet. 6. Create indentations in the dough using your thumb. 7. Fill with jam: add raspberry jam to each well. 8. Bake cookies for 12 to 15 minutes until edges are golden. 9. Cool cookies on a wire rack after baking. This simple process leads to delicious treats. For the full recipe with detailed instructions, check the [Full Recipe]. Yes, you can use different nuts! If you are allergic to almonds, consider these options: - Pecans: Their rich flavor pairs well with fruit jams. - Walnuts: They add a nice crunch and depth to the cookies. - Cashews: These nuts give a creamy texture and mild taste. Feel free to experiment with your favorite nuts. Just chop them finely to mix into the dough or use them as a garnish. Many fun variations exist for thumbprint cookies. Here are some popular adaptations: - Different jams: Try strawberry, apricot, or blueberry for a twist. - Chocolate filling: Use chocolate ganache instead of jam for a rich flavor. - Citrus zest: Add lemon or orange zest to the dough for a fresh taste. These variations keep the recipe interesting. Mixing flavors can lead to delightful surprises! This blog post covered how to make delicious Raspberry Almond Thumbprint Cookies. We explored the ingredients, preparation steps, and tips for the best results. You learned about variations, storage methods, and common mistakes to avoid. Remember, baking is fun and rewarding. Try these cookies with different jams or flavors for new twists. Keep practicing to refine your skills. Enjoy baking and sharing these tasty treats with others. You now have the tools to impress your friends and family with your cookie-making expertise.](https://joymealplan.com/wp-content/uploads/2025/07/587afd51-3098-4c90-9a32-308dc83d9cb5-768x768.webp)


![To make a tasty Snickerdoodle Apple Cobbler, you need the following ingredients: - 4 medium-sized apples (Granny Smith or Honeycrisp), peeled and thinly sliced - 1 tablespoon fresh lemon juice - 1 cup granulated sugar, divided - 1 teaspoon ground cinnamon, divided - 1 cup all-purpose flour - 2 teaspoons baking powder - 1/2 teaspoon salt - 1/2 cup unsalted butter, melted and slightly cooled - 1 large egg - 1/2 cup milk - 1/2 teaspoon pure vanilla extract - 1 teaspoon ground nutmeg (for a unique twist) These ingredients come together to create a warm, comforting dessert that everyone loves. You can add some optional ingredients to make this dessert even better. Consider these: - Chopped nuts like pecans or walnuts for crunch - A scoop of caramel sauce for extra sweetness - A sprinkle of sea salt to enhance flavors - Dried fruits like raisins or cranberries for added texture These enhancements can take your cobbler to a new level. Sometimes, you may not have every ingredient on hand. Here are some substitutions you can use: - Use other apple varieties, like Fuji or Braeburn, if needed. - Swap granulated sugar with brown sugar for a deeper flavor. - Replace all-purpose flour with whole wheat flour for more fiber. - Use coconut oil or vegetable oil instead of butter for a dairy-free option. These alternatives will keep your cobbler delicious while fitting your needs. For the complete recipe, check out the [Full Recipe]. Start by preheating your oven to 350°F (175°C). This step is vital for even baking. Next, grab a 9x9-inch baking dish and grease it lightly with butter or cooking spray. This helps prevent the cobbler from sticking. In a large mixing bowl, take four medium-sized apples. I love using Granny Smith or Honeycrisp apples. Peel them and slice them thinly. Add one tablespoon of fresh lemon juice to keep the apples bright. Then, mix in 1/2 cup of granulated sugar and 1/2 teaspoon of ground cinnamon. Stir until the apples are well-coated. Pour this delicious mixture into the prepared baking dish, spreading it out evenly. Now, let’s make the batter. In another bowl, mix one cup of all-purpose flour, two teaspoons of baking powder, 1/2 teaspoon of salt, and the remaining 1/2 cup of granulated sugar. Add 1/2 teaspoon of cinnamon for flavor. In a separate bowl, whisk together 1/2 cup of melted unsalted butter, one large egg, 1/2 cup of milk, and 1/2 teaspoon of pure vanilla extract. Gradually pour the wet mixture into the dry ingredients. Stir gently with a spatula until just combined. Be careful not to overmix. This ensures the cobbler stays tender. Now, dollop the batter over the apple mixture in the baking dish. Spread it gently to cover most apples, leaving some peeking through. For a unique twist, combine one teaspoon of ground nutmeg with a pinch of cinnamon and sugar in a small bowl. Sprinkle this mix evenly over the top of the batter. Place the baking dish in the preheated oven. Bake for 35-40 minutes. Your cobbler is done when the top is golden brown. A toothpick inserted into the center should come out clean. Once baked, take the cobbler out of the oven. Let it cool for about 10 minutes before serving. This cooling time helps all the flavors meld together beautifully. Enjoy your Snickerdoodle Apple Cobbler! For the full recipe, check out the earlier sections. To make your snickerdoodle apple cobbler shine, I have some key tips. - Choose the Right Apples: Use tart apples like Granny Smith. They balance the sweetness well. - Don’t Skip the Lemon Juice: This keeps the apples fresh and adds a nice zing. - Mix Carefully: When combining wet and dry ingredients, mix just until combined. Overmixing leads to a tough texture. - Add a Nutmeg Boost: A sprinkle of nutmeg adds warmth and depth to your cobbler. - Keep an Eye on Baking Time: Ovens vary, so check for a golden top and a clean toothpick. Baking can be tricky, and mistakes often happen. Here are some to watch out for: - Using Cold Ingredients: Make sure butter and eggs are at room temperature. This helps the batter mix better. - Not Preheating the Oven: Always preheat your oven. This ensures even baking from the start. - Overcrowding the Dish: Don’t pack the apple filling too tightly. Allow space for the apples to soften. - Ignoring the Cooling Time: Let the cobbler cool for a bit before serving. This helps the flavors blend. Having the right tools makes baking easier. Here’s what I recommend: - 9x9-inch Baking Dish: This is perfect for even baking. - Mixing Bowls: Use at least two medium bowls for mixing ingredients. - Whisk: A good whisk is vital for combining wet and dry ingredients smoothly. - Spatula: A silicone spatula is great for folding and scraping batter. - Measuring Cups and Spoons: Precision matters in baking. Accurate measurements lead to better results. For the full recipe, check out the detailed instructions to guide you through each step. {{image_4}} You can change the flavor of your Snickerdoodle Apple Cobbler easily. Adding nuts gives it a nice crunch. Try using chopped walnuts or pecans. You can also change the spices. Instead of just cinnamon, add a pinch of cardamom. This gives it a warm and unique taste. For a sweeter twist, mix in some chocolate chips. They melt and add a rich flavor to each bite. To make a healthier version, swap all-purpose flour for whole wheat flour. This adds fiber and nutrients. You can also use sugar substitutes, like stevia or coconut sugar. These options lower the calories while keeping the sweetness. If you want to cut down on fat, use applesauce instead of butter. It keeps the cobbler moist while being lighter. Change up the fruit based on the season. In spring, use fresh berries like strawberries or blueberries. In fall, pears can add a different flavor profile. They pair well with apples and spices. You could also top the cobbler with a sprinkle of oats for a crunchy topping. This adds texture and makes a great twist on the classic recipe. For the full recipe, check out the guide we provide. To keep your Snickerdoodle Apple Cobbler fresh, store it in an airtight container. Let it cool for about 10 minutes after baking. Then, cover it tightly and place it in the fridge. This helps keep the flavors intact and prevents it from drying out. Enjoy the cobbler within 3-4 days for the best taste. Reheating is simple. Preheat your oven to 350°F (175°C). Place the cobbler in an oven-safe dish. Cover it loosely with foil. Heat for about 15-20 minutes. Check if it's warm throughout. You can also microwave individual servings for about 20-30 seconds. Add a scoop of ice cream on top for a warm treat. To freeze your cobbler, let it cool completely first. Cut it into portions and wrap each piece in plastic wrap. Then, place the wrapped portions in a freezer-safe bag. Remove air to prevent freezer burn. Your cobbler will stay good for up to 3 months. When you're ready to eat, thaw it in the fridge overnight and reheat as mentioned above. For the full recipe, check the link in the article. You can tell the cobbler is done when the top is golden brown. Also, insert a toothpick into the center. If it comes out clean, your cobbler is ready. Baking usually takes 35 to 40 minutes. Keep an eye on it. If it starts to brown too quickly, cover it lightly with foil. Yes, you can use different types of apples. Granny Smith and Honeycrisp are great choices. They add a nice balance of sweet and tart. Other good options include Fuji or Braeburn. Just make sure to peel and slice them thinly for even cooking. I love serving this cobbler warm with vanilla ice cream. The creamy ice cream melts into the warm cobbler. It creates a delicious mix of flavors and textures. You can also add a light dusting of cinnamon on top. For a fresh touch, add thin apple slices as a garnish. They look great and taste amazing! For the full recipe, please visit [Full Recipe]. In this post, we explored the delightful Snickerdoodle Apple Cobbler. We covered required and optional ingredients, plus substitutions. You learned step-by-step how to prepare the filling and batter. We shared tips to avoid common mistakes and suggested the best tools for success. Variations, including healthier options, added fun. Lastly, we discussed storage and reheating. Now, you're ready to create a comforting dessert. Enjoy baking and experimenting with your own twists!](https://joymealplan.com/wp-content/uploads/2025/07/db3ea963-82dc-410a-a54c-26a74516e24e-768x768.webp)