Cinnamon Roll Mug Cake Easy and Quick Recipe

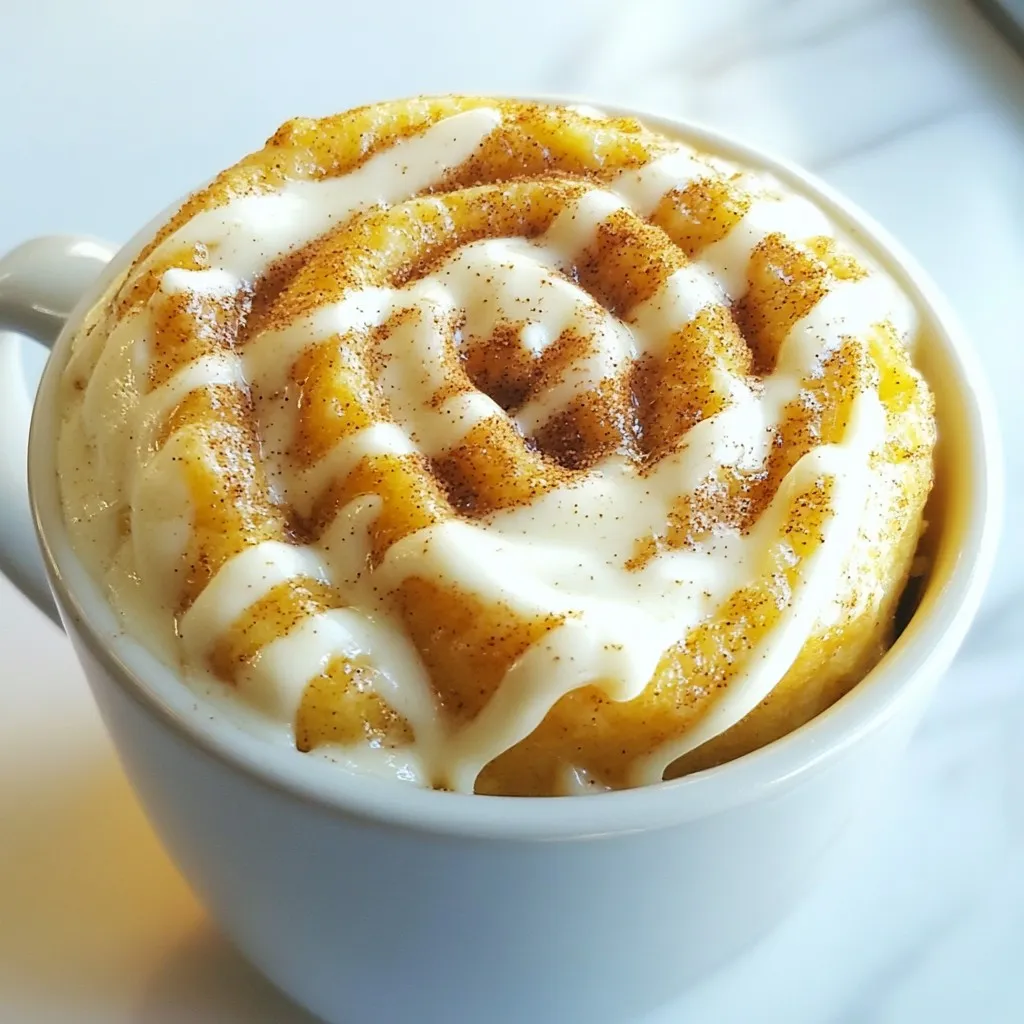
If you crave a warm, sweet treat without the fuss, I have the perfect recipe for you: Cinnamon Roll Mug Cake! In just a few minutes, you can enjoy a fluffy, cinnamon-filled delight right from your microwave. With simple ingredients and easy steps, you’ll satisfy your sweet tooth in no time. Ready to create this quick comfort food? Let’s dive into the deliciousness!
Why I Love This Recipe
- Quick and Easy: This mug cake takes only 5 minutes to prepare, making it the perfect treat for when you’re short on time.
- Single Serving: No need for leftovers! This recipe yields just one delicious mug cake, ideal for satisfying that sweet craving.
- Customizable: Feel free to add your favorite mix-ins or toppings, like nuts or chocolate chips, to personalize your mug cake.
- Warm and Comforting: There’s nothing like a warm cinnamon roll mug cake to bring comfort and joy to your day!
Ingredients
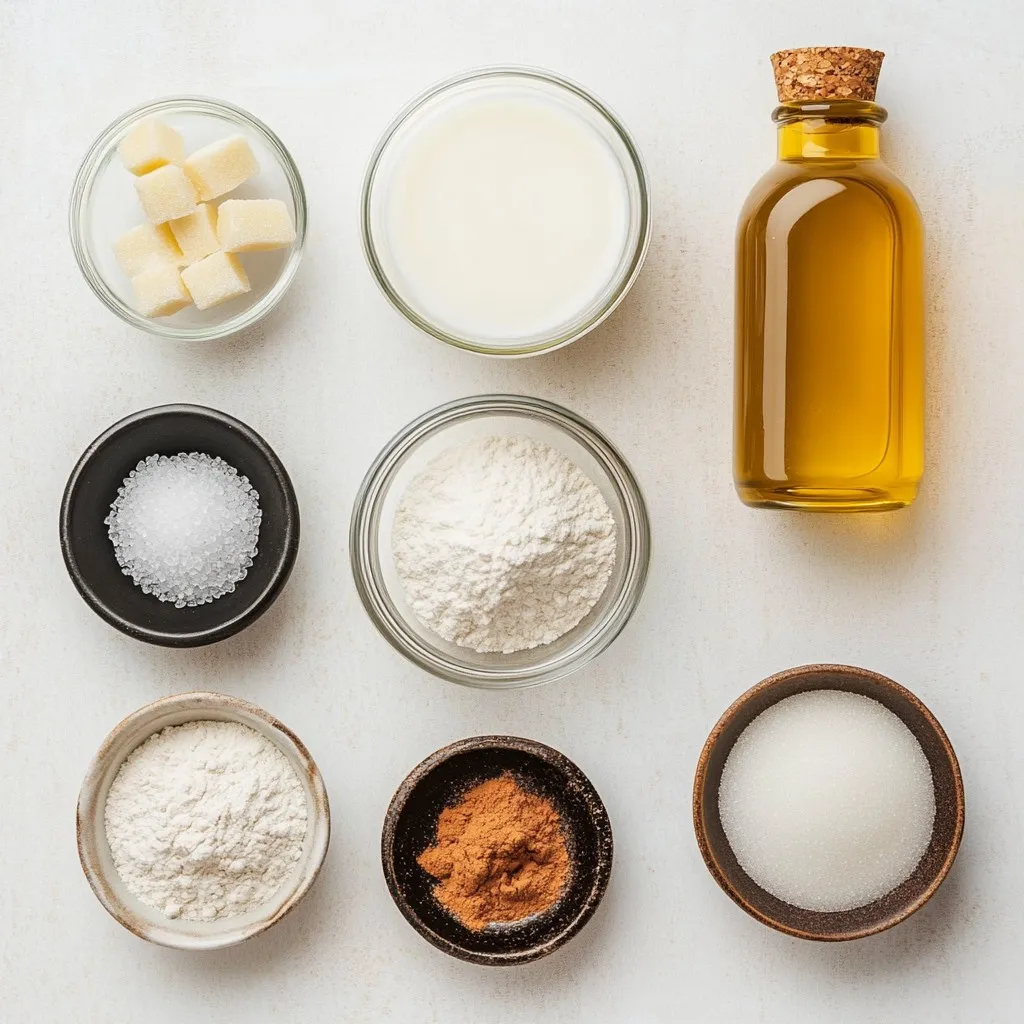
To make a delicious cinnamon roll mug cake, you’ll need a few simple ingredients. Here’s what you need:
– 4 tablespoons all-purpose flour
– 2 tablespoons granulated sugar
– 1/8 teaspoon baking powder
– 1/8 teaspoon salt
– 3 tablespoons milk
– 1 tablespoon vegetable oil
– 1/4 teaspoon pure vanilla extract
– 1 tablespoon packed brown sugar
– 1/2 teaspoon ground cinnamon
– Optional: cream cheese frosting or vanilla frosting
These ingredients create a warm, sweet treat in just minutes. The flour provides structure, while sugar adds sweetness. Baking powder helps the cake rise. Milk and vegetable oil make it moist, and vanilla gives flavor. The brown sugar and cinnamon create the lovely swirl inside.
You can top it off with cream cheese or vanilla frosting for extra sweetness. Trust me; it’s worth it!

Step-by-Step Instructions
Mixing the Dry Ingredients
Start with a microwave-safe mug. Use a 12 oz mug for best results. Add 4 tablespoons of all-purpose flour. Next, add 2 tablespoons of granulated sugar. Then, include 1/8 teaspoon of baking powder and 1/8 teaspoon of salt. Use a small whisk or fork to mix these dry ingredients well. Make sure everything is even and no lumps are left.
Adding Wet Ingredients
Now it’s time to add the wet stuff! Pour in 3 tablespoons of milk. Next, add 1 tablespoon of vegetable oil. Finally, include 1/4 teaspoon of pure vanilla extract. Stir gently until the mix is smooth and creamy. You want a nice batter without any lumps.
Swirling the Cinnamon Sugar
In a small bowl, mix 1 tablespoon of packed brown sugar with 1/2 teaspoon of ground cinnamon. This creates your sweet cinnamon swirl. Carefully dollop this mix on top of your batter. Take a fork and gently swirl it in a circular motion. Make sure to keep some of that cinnamon mix on top. This gives your cake a beautiful marbled look.
Now you’re ready to microwave!
Tips & Tricks
Microwave Cooking Tips
To cook your cinnamon roll mug cake well, follow these tips:
– Use a mug that holds at least 12 ounces.
– Check your microwave’s power. Cooking time may change based on wattage.
– Start with 1 minute, then check. If needed, add extra time in 10-second bursts.
– Let it cool for 1 minute before digging in. This helps avoid burns.
How to Customize Your Mug Cake
You can make your mug cake special by adding your favorite flavors. Here are some ideas:
– Swap out the vanilla extract for almond or maple for a new twist.
– Add nuts like walnuts or pecans for a crunchy bite.
– Try adding chocolate chips or dried fruit for extra sweetness.
– Mix in a dash of espresso powder for a coffee flavor.
Presentation Suggestions
To make your mug cake look great, try these ideas:
– Serve it right in the mug for a homey vibe.
– Dust with powdered sugar or a sprinkle of cinnamon for a pretty touch.
– Add a scoop of ice cream on top for a delightful contrast.
– Use colorful sprinkles for a fun, festive look.
Pro Tips
- Use Room Temperature Ingredients: Allow your milk and oil to come to room temperature for a smoother batter that mixes evenly.
- Microwave Wattage Matters: Different microwaves have varying wattages, so adjust cooking time accordingly to avoid undercooked or overcooked cake.
- Experiment with Toppings: Try adding chopped nuts, chocolate chips, or fresh fruits for a unique twist on your cinnamon roll mug cake.
- Don’t Overmix: Gently combine the ingredients to keep the cake light and fluffy; overmixing can lead to a dense texture.

Variations
Different Flavor Combinations
You can change the flavor of your cinnamon roll mug cake easily. Try adding cocoa powder for a chocolate twist. Just mix in 1 tablespoon of cocoa with the flour. Or, add 1 tablespoon of peanut butter to the batter for a nutty flavor. You can also mix in some pumpkin spice to make it taste like fall. Each option gives you a new and fun treat.
Gluten-Free or Vegan Adaptations
If you want a gluten-free version, swap the all-purpose flour for almond flour or a gluten-free blend. Use 1 tablespoon of ground flaxseed mixed with 3 tablespoons of water instead of milk for a vegan mug cake. This will keep it moist and help it rise. Both options make the cake just as tasty!
Alternative Toppings
Toppings can change your mug cake experience. Instead of cream cheese frosting, try whipped coconut cream. A drizzle of maple syrup adds a sweet touch. For a fruity flavor, top with fresh berries or a dollop of jam. Each topping can change the taste and make your mug cake feel new and exciting!
Storage Info
Storing Leftovers
If you have any leftover cinnamon roll mug cake, let it cool first. You can cover it with plastic wrap or place it in an airtight container. Store it in the fridge for up to two days. This keeps it fresh and tasty.
Reheating Instructions
To reheat your mug cake, take it out of the fridge. Place it in the microwave for about 10 to 15 seconds. Check if it’s warm enough. If not, heat it in small bursts. This way, it stays soft and moist.
Best Practices for Consuming Fresh
For the best taste, eat your mug cake right after making it. The texture is fluffy and warm. If you choose to add frosting, do this just before serving. It melts slightly, making each bite even better. Enjoy your treat while it’s still fresh!
FAQs
How do I know when my mug cake is done?
You will know your mug cake is done when it rises and feels firm in the center. Start checking after one minute in the microwave. If the top looks wet or jiggly, give it more time. The cake should be soft but not gooey. Everyone’s microwave is different, so adjust cooking time as needed.
Can I use a bigger mug?
Yes, you can use a bigger mug. A 12 oz mug is best for this recipe. If your mug is larger, the cake may cook unevenly. Just be aware that it might need a little extra cooking time. Always keep an eye on it to avoid overcooking.
What can I substitute for milk or oil?
If you need to substitute milk, try using almond milk or soy milk. For oil, you can use melted butter or applesauce. Both of these keep the cake moist and tasty. These swaps can help if you have allergies or dietary needs.
This recipe guide gives you all you need to make a tasty mug cake. You learned about the simple ingredients, how to mix them, and tips for the best results. I shared fun ways to switch the flavors and keep it great. Remember to store any leftovers properly for later. Making a mug cake is quick and rewarding. Enjoy your creation, and don’t hesitate to experiment with toppings and flavor

Cinnamon Roll Mug Cake Delight
Ingredients
- 4 tablespoons all-purpose flour
- 2 tablespoons granulated sugar
- 1 teaspoon baking powder
- 1 teaspoon salt
- 3 tablespoons milk
- 1 tablespoon vegetable oil
- 1 teaspoon pure vanilla extract
- 1 tablespoon packed brown sugar
- 1 teaspoon ground cinnamon
- optional Cream cheese frosting or vanilla frosting
Instructions
- In a microwave-safe mug (ideally around 12 oz), combine the all-purpose flour, granulated sugar, baking powder, and salt. Use a small whisk or fork to mix the dry ingredients thoroughly, ensuring an even distribution.
- Next, pour in the milk, vegetable oil, and pure vanilla extract. Stir the mixture gently until it becomes smooth and creamy, ensuring there are no lumps remaining in the batter.
- In a separate small bowl, blend the packed brown sugar with the ground cinnamon until evenly mixed. This will create your sweet cinnamon swirl.
- Carefully dollop the cinnamon sugar mixture on top of your cake batter in the mug. Using a fork, gently swirl it through the batter in a circular motion, creating a beautiful marbled effect — be careful not to mix it in completely.
- Place the mug in the microwave and cook on high for approximately 1 minute and 30 seconds. Keep an eye on the cake as it cooks, checking at the 1-minute mark. The cake should rise and be firm in the center when done. Cooking times may vary depending on your microwave's wattage, so adjust accordingly.
- Once finished, allow the mug cake to rest for about 1 minute to cool slightly. If desired, top with a generous drizzle of cream cheese frosting or vanilla frosting for an extra indulgent touch.


![- 3 cups unsweetened shredded coconut - 1/2 cup sweetened condensed milk - 2 large egg whites - 1/4 teaspoon vanilla extract - 1/4 teaspoon almond extract - Pinch of salt - 1/2 cup dark chocolate chips (optional) These ingredients create the base for your coconut macaroons. The unsweetened shredded coconut gives it that chewy texture. Sweetened condensed milk adds creaminess and sweetness, making each bite delightful. The egg whites are crucial for lightness and fluffiness. The extracts bring in a lovely depth of flavor. If you want to add a twist, dark chocolate chips can add a rich touch. - Gluten-free options: This recipe is naturally gluten-free, perfect for those with gluten issues. - Nut-free alternatives: You can enjoy these macaroons without nuts, making them safe for nut allergies. - Vegan substitutions: For a vegan version, try using aquafaba instead of egg whites and a plant-based condensed milk. These options help everyone enjoy this treat. Whether you have dietary needs or just want to try something new, there’s a way for you to make these coconut macaroons. You can find the full recipe above to get started! Start by preheating your oven to 325°F (160°C). This step is key to baking your macaroons evenly. While the oven heats, line a baking sheet with parchment paper. This helps prevent sticking and makes cleaning up easier later. In a large mixing bowl, combine 3 cups of unsweetened shredded coconut and 1/2 cup of sweetened condensed milk. Add 1/4 teaspoon of vanilla extract, 1/4 teaspoon of almond extract, and a pinch of salt. Stir well until everything is mixed together nicely. Now, in a separate bowl, take 2 large egg whites and whip them until they form stiff peaks. This is an important step because it gives your macaroons a light and airy texture. Next, gently fold the whipped egg whites into the coconut mixture. Use a spatula and be careful not to stir too hard. You want to keep the air in the egg whites. Fold until the egg whites are just mixed in; some lumps are okay. Using a tablespoon or a small cookie scoop, portion out the mixture onto the prepared baking sheet. Make sure to space each mound about 2 inches apart. This allows them to spread a bit while baking. Now, place the baking sheet in your preheated oven. Bake the macaroons for about 20 to 25 minutes. You want them to turn a lovely golden brown. Once done, take the tray out and let the macaroons cool for about 5 minutes on the sheet. This helps them firm up. After that, transfer them to a wire rack to cool completely. For those who love chocolate, you can melt some dark chocolate chips and dip the bottoms of each macaroon. Let the chocolate set on the parchment paper. Enjoy these delightful treats from the full recipe! To make great coconut macaroons, focus on the egg whites. Whipping them correctly is key. Use a clean bowl and beaters. Beat until stiff peaks form. This step adds lightness to the macaroons. Avoid overmixing when you fold them into the coconut mix. Gently combine the ingredients. Some lumps are okay. A light touch keeps the texture airy and nice. You can boost the flavor of your macaroons in fun ways. Try adding a pinch of cinnamon or nutmeg for warmth. These spices bring depth and richness. Another idea is to add citrus zest. Lemon or lime zest gives a fresh twist. Just a small amount can make a big difference in taste. How you serve your macaroons can impress your guests. Place them on a decorative platter to catch the eye. You can garnish with shredded coconut or fresh fruit. This adds color and flair. Arrange them in clusters for an inviting look. These small touches make your dessert stand out and look professional. For the full recipe, check out the Tropical Coconut Macaroons section. {{image_4}} You can make your macaroons even better by adding chocolate. Start by melting dark chocolate chips. Use a microwave-safe bowl. Heat in 30-second bursts, stirring after each. This helps prevent burning. Alternatively, you can use a double boiler for even heating. Once the chocolate is melted, dip the bottom of each macaroon in it. Make sure to coat it well. Place the dipped macaroons back on the parchment paper. Let the chocolate harden before serving. This adds a rich flavor that complements the coconut. Want to add some nuts? Almonds and pecans work great. Simply chop them finely and mix them in with the coconut. This adds a nice crunch to the soft macaroons. If you have nut allergies, you can skip the nuts. The recipe still tastes great without them. You can also use seeds like sunflower or pumpkin for a similar texture. Always be cautious and adjust based on your needs. There are endless flavor combinations for your macaroons. One tasty option is coconut-lime. Just add lime zest and a bit of lime juice to the coconut mixture. This gives a fresh twist. Another option is vanilla bean macaroons. Instead of vanilla extract, use the seeds from a vanilla bean. This adds a lovely fragrance and flavor. You can also mix in spices like cinnamon for a warm touch. Each variation brings a new taste to your delightful tropical treats. For the complete recipe, refer to the [Full Recipe]. Store your coconut macaroons at room temperature for the best taste. Keep them in a cool, dry place. Use an airtight container to keep them fresh. This helps avoid moisture and keeps them soft. If you live in a warm climate, consider refrigerating them. The cold can help them last longer. However, be aware that refrigeration may change their texture slightly. To freeze macaroons, let them cool completely first. Once cooled, place them in a single layer on a baking sheet. Freeze for about one hour. This step prevents them from sticking together. After they are firm, transfer them to a freezer-safe bag or container. When you want to enjoy a macaroon, take it out of the freezer. Let it thaw in the fridge overnight. For a quick thaw, leave it at room temperature for a few hours. Coconut macaroons can last up to one week at room temperature. If stored in the fridge, they can last for about two weeks. Check for signs of spoilage before eating. Look for changes in texture, color, or a sour smell. If you see any of these, it’s best to toss them out. Yes, you can make coconut macaroons without egg whites. Instead, use ground flaxseed or chia seeds mixed with water. This mixture acts as a binder. For every egg white, mix 1 tablespoon of ground flaxseed or chia seeds with 2.5 tablespoons of water. Let it sit for about 10 minutes to thicken. This will give your macaroons a nice texture while keeping them egg-free. To keep your macaroons from falling apart, mix the ingredients gently. Overmixing can cause them to break. When you fold in the egg whites, do it slowly and carefully. This helps maintain air and keeps the macaroons light. Make sure to space them well on the baking sheet. This allows them to bake evenly. A good tip is to form them tightly with your hands. This will help them hold their shape during baking. Leftover shredded coconut can be used in many ways. You can add it to smoothies for extra texture. It works well in oatmeal or yogurt for a tropical twist. Consider making coconut pancakes or muffins. You can also toast it for a crunchy topping on salads or desserts. If you enjoy baking, use it in granola or energy balls. This way, you won't waste any coconut, and you'll enjoy its rich flavor in other dishes. You now know how to make coconut macaroons from scratch. We covered the essential ingredients, step-by-step instructions, and storage tips. You learned about variations, dietary options, and how to enhance flavors. Give these tasty treats a try! They are fun to make and share. Don’t forget to experiment with flavors or coatings. Enjoy your baking, and let your creativity shine!](https://joymealplan.com/wp-content/uploads/2025/06/e4df15b8-ca64-4a89-a5eb-245e13ac6d80-768x768.webp)

