Cinnamon Sugar Pretzel Bites Tasty Delight Recipe

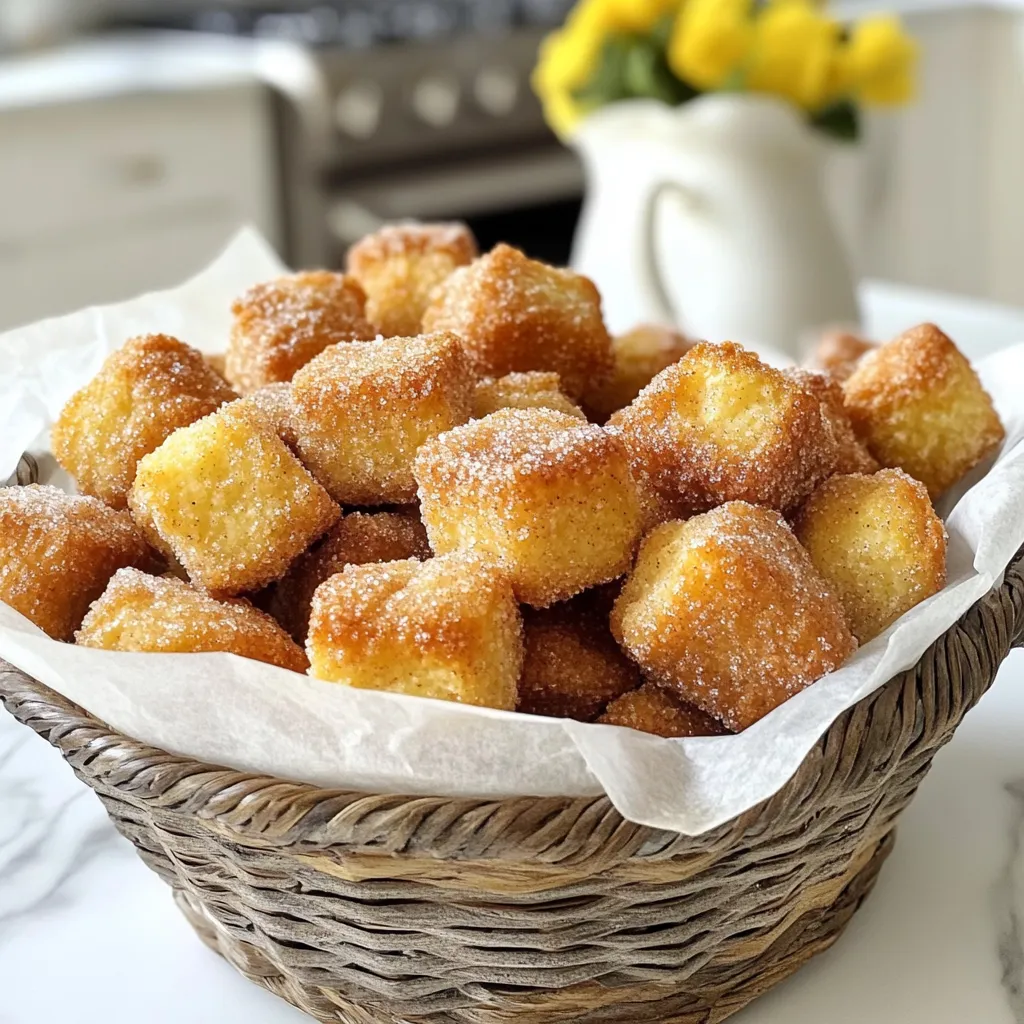
Get ready for a sweet treat! Cinnamon Sugar Pretzel Bites are fun to make and taste amazing. You can pair them with your favorite dips or enjoy them on their own. This recipe is simple and perfect for family time or a snack. I’ll guide you step-by-step, so even if you’re a beginner, you’ll create a tasty delight. Let’s get started on this fun cooking adventure!
Why I Love This Recipe
- Deliciously Sweet: The combination of cinnamon and sugar creates a delightful sweetness that is hard to resist.
- Perfectly Chewy: The baking soda bath gives these pretzel bites their signature chewy texture that complements the sweetness.
- Fun to Make: Shaping the pretzel bites is a fun activity for both kids and adults, making it a great family recipe.
- Versatile Dipping Options: These pretzel bites can be enjoyed on their own or paired with delicious dips like cream cheese frosting or chocolate sauce.
Ingredients
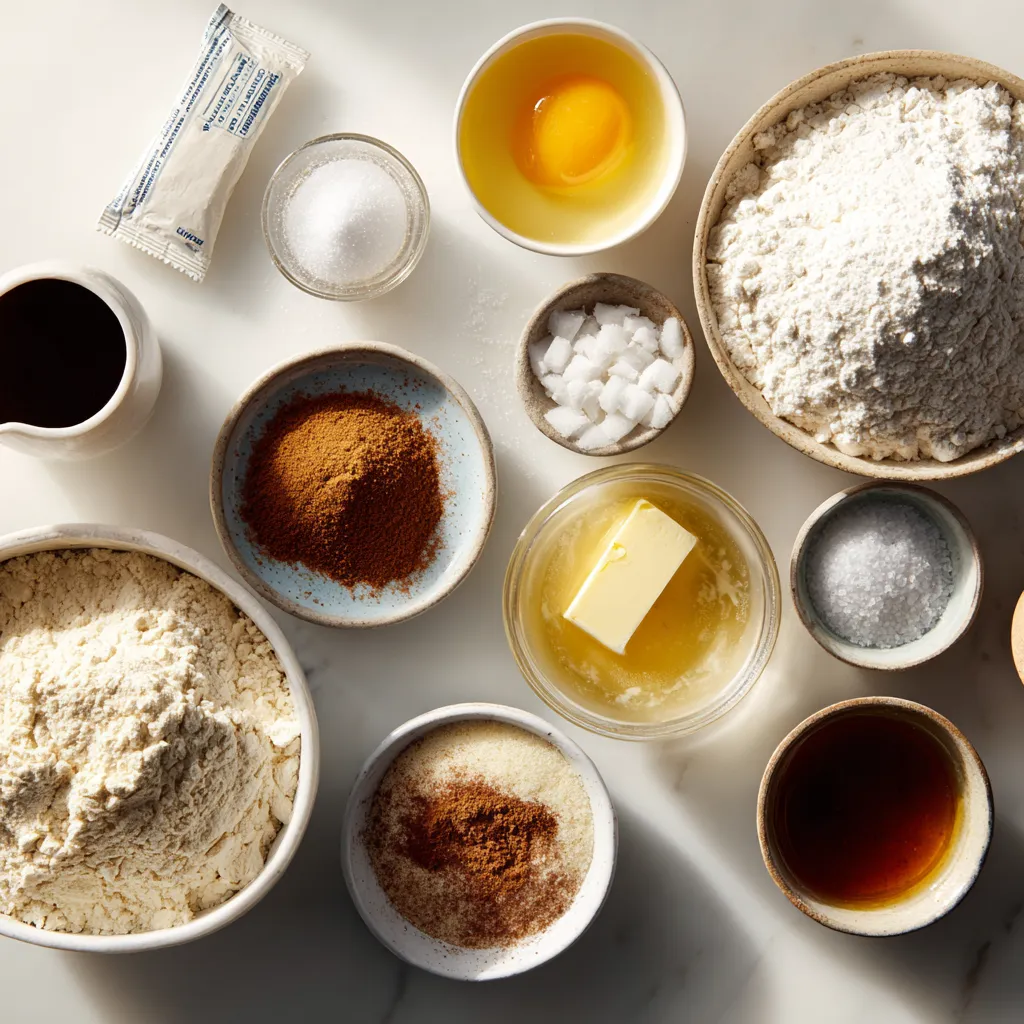
To make your cinnamon sugar pretzel bites, gather these simple ingredients:
– 1 ½ cups warm water (110°F – 115°F)
– 1 packet (2 ¼ teaspoons) active dry yeast
– ¼ cup granulated sugar (plus extra for coating)
– 4 cups all-purpose flour
– ½ teaspoon salt
– ½ cup baking soda
– 1 large egg, beaten (for egg wash)
– ½ cup unsalted butter, melted
– ¾ cup granulated sugar (for coating)
– 1 tablespoon ground cinnamon
These ingredients are easy to find. Use fresh yeast for the best rise. The warm water is key to activating the yeast. Make sure you measure the flour accurately. Too much flour can make the pretzels tough. The baking soda is vital for that classic pretzel texture. The egg wash gives a nice golden color. The cinnamon sugar mix adds a sweet touch. You can adjust the sugar and cinnamon to your taste.

Step-by-Step Instructions
Activating the Yeast
First, grab a large mixing bowl. Pour in 1 ½ cups of warm water. The water should be between 110°F and 115°F. Next, add in one packet of active dry yeast. Stir it gently with a spoon. Let this mixture sit for about 5 minutes. You will see it froth. This frothing shows the yeast is alive and ready to work.
Preparing the Dough
Now, it’s time to make the dough. Add ¼ cup of granulated sugar to the yeast mix. Stir until it dissolves completely. Gradually mix in 4 cups of all-purpose flour and ½ teaspoon of salt. Use a spoon to stir until a sticky dough forms. Once it starts to come together, turn it out onto a floured surface. Knead the dough for about 5 minutes. You want it to be smooth and elastic.
Rising and Shaping the Dough
After kneading, place the dough in a greased bowl. Cover it with a kitchen towel. Put it in a warm spot to rise. Let it sit for about 1 hour. You will know it is ready when it doubles in size. Once it has risen, gently punch it down. Turn it out onto a floured surface once more. Cut the dough into 8 equal pieces. Roll each piece into a long rope, about 1 inch thick. Cut this rope into 1-inch segments. You will have bite-sized pretzel nuggets.
Boiling and Baking
Next, we need to boil the pretzel bites. In a large pot, bring 10 cups of water to a rolling boil. Mix in ½ cup of baking soda. Carefully drop the pretzel nuggets into the water. Let them cook for about 30 seconds. Use a slotted spoon to remove them. Place the nuggets on a baking sheet lined with parchment paper. Brush the tops with a beaten egg for a golden finish. In a small bowl, mix ¾ cup of granulated sugar with 1 tablespoon of ground cinnamon. Sprinkle this mix generously over the egg-washed tops. Finally, bake the pretzel bites in a preheated oven at 425°F for 12-15 minutes. They should look beautifully golden brown when done.
Tips & Tricks
Perfecting the Texture
Kneading is key to great pretzel bites. It helps develop gluten, making the dough smooth and elastic. Knead until the dough feels soft and holds its shape. You know the dough is ready to rise when it doubles in size during the first rise. This usually takes about an hour in a warm spot.
Enhancing Flavor
After baking, brush the warm pretzel bites with melted butter. This adds a rich flavor and helps the cinnamon sugar stick. For the cinnamon sugar, mix ¾ cup of granulated sugar with 1 tablespoon of ground cinnamon. Sprinkle it on top right after baking for the best taste.
Presentation Ideas
Serve the warm pretzel bites in a rustic basket lined with parchment paper. This makes a lovely display. You can pair them with cream cheese frosting or a drizzle of vanilla glaze for a fun dipping option.
Pro Tips
- Proof Your Yeast: Make sure your water is between 110°F and 115°F to properly activate the yeast. Too hot can kill the yeast, while too cold won’t activate it.
- Perfectly Shaped Bites: For uniform pretzel bites, use a kitchen scale to weigh each piece of dough before rolling it into ropes and cutting it. This ensures even baking.
- Chill Before Baking: If you want a chewier texture, refrigerate the shaped pretzel bites for 30 minutes before boiling them in the baking soda solution.
- Experiment with Flavors: Feel free to add different spices or toppings, such as sea salt, garlic powder, or even a sprinkle of cheese before baking for a savory twist!

Variations
Gluten-Free Options
If you want to make gluten-free cinnamon sugar pretzel bites, you need to change a few ingredients.
– Use 2 cups of gluten-free all-purpose flour instead of regular flour.
– Add 1 teaspoon of xanthan gum to help with texture.
Xanthan gum helps mimic the elasticity that gluten provides. This change will keep your pretzels soft and chewy.
Vegan Alternatives
For a vegan twist, you can swap some ingredients easily.
– Instead of the egg wash, use a mixture of 1 tablespoon of flaxseed meal and 2.5 tablespoons of water. Let it sit for a few minutes to thicken.
– Use dairy-free butter, like coconut or almond butter, in place of unsalted butter.
These swaps keep your pretzel bites delicious while meeting vegan needs.
Flavor Additions
You can get creative with the flavors in your pretzel bites.
– Try adding nutmeg or cardamom to the cinnamon sugar mix for a warm twist.
– For a savory option, sprinkle garlic powder or cheese on top before baking.
These variations will keep your cinnamon sugar pretzel bites exciting and tasty.
Storage Info
Short-Term Storage
To keep your pretzel bites fresh, let them cool completely. This helps prevent sogginess. Place them in an airtight container. You can also use a resealable plastic bag. Store them at room temperature. They will stay good for up to three days.
Long-Term Freezing
If you want to save some pretzel bites for later, you can freeze them. First, let them cool completely. Then, place them in a single layer on a baking sheet. Freeze them for about an hour. After that, transfer the frozen bites to a freezer-safe bag or container. They can last up to three months in the freezer.
When you are ready to eat them, take them out and thaw them in the fridge. For reheating, place the bites on a baking sheet. Heat them in a preheated oven at 350°F (175°C) for about 10 minutes. This will make them warm and a bit crispy again. Enjoy your tasty treat!
FAQs
What can I use instead of active dry yeast?
You can use instant yeast as a great substitute. Instant yeast works faster than active dry yeast. Use the same amount, 2 ¼ teaspoons, for your dough. Just mix it directly with your dry ingredients. There’s no need to activate it in water first. This makes your prep time shorter and easier.
Can I make cinnamon sugar pretzel bites ahead of time?
Yes, you can prepare these bites ahead of time! Make the dough and let it rise. After the first rise, shape the dough into pretzel bites. Then, cover them tightly and store in the fridge for up to 24 hours. When you are ready to bake, take them out and let them come to room temperature. Boil and bake them as normal.
Where can I find the best cinnamon sugar pretzel bites?
Local bakeries often have amazing cinnamon sugar pretzel bites. Check out artisanal bakeries in your area. They may have unique twists on this classic. If you’re looking for brands, try your local grocery store’s bakery section. Many stores bake their own pretzel bites!
Making cinnamon sugar pretzel bites is fun and rewarding. We covered key ingredients, steps, and tips to help you succeed. Activating the yeast is crucial for fluffy bites. Proper kneading and shaping create the right texture. Boiling in baking soda water adds that classic taste, while cinnamon sugar elevates each bite.
Feel free to customize your recipe with gluten-free or vegan options. Store them correctly to keep them fresh. With these tricks, you’ll impress friends and family. Dive into the process, and enjoy every bit

Cinnamon Sugar Pretzel Bites
Ingredients
- 1.5 cups warm water (110°F - 115°F)
- 1 packet active dry yeast (2 ¼ teaspoons)
- 0.25 cup granulated sugar (plus extra for coating)
- 4 cups all-purpose flour
- 0.5 teaspoon salt
- 0.5 cup baking soda
- 1 large egg, beaten (for egg wash)
- 0.5 cup unsalted butter, melted
- 0.75 cup granulated sugar (for coating)
- 1 tablespoon ground cinnamon
Instructions
- In a large mixing bowl, combine the warm water and active dry yeast. Allow the mixture to sit undisturbed for about 5 minutes until it becomes frothy, indicating the yeast is activated.
- Stir in ¼ cup of granulated sugar into the yeast mixture and mix well until fully dissolved.
- Gradually add the all-purpose flour and salt to the bowl, stirring continuously until a sticky dough begins to form.
- Knead the dough on a well-floured surface for about 5 minutes until it achieves a smooth and elastic texture.
- Transfer the kneaded dough to a greased bowl, cover it with a kitchen towel, and place it in a warm environment. Allow it to rise for approximately 1 hour, or until the dough has doubled in size.
- While the dough is rising, preheat your oven to 425°F (220°C) and prepare a baking sheet by lining it with parchment paper.
- In a large pot, bring 10 cups of water mixed with the baking soda to a rolling boil.
- Once the dough has finished rising, gently punch it down to release the air, then turn it out onto a floured surface. Divide the dough into 8 equal pieces.
- Roll each piece into a long rope, approximately 1 inch thick, and cut it into 1-inch segments to create bite-sized pretzel nuggets.
- Carefully drop the nuggets into the boiling baking soda water, letting them cook for about 30 seconds. Use a slotted spoon to remove them and transfer them to the prepared baking sheet.
- Brush the tops of the pretzel nuggets with the beaten egg. Mix the remaining ¾ cup granulated sugar with 1 tablespoon of ground cinnamon and sprinkle this mixture over the egg-washed tops.
- Bake the pretzel bites in the preheated oven for 12-15 minutes, or until they are beautifully golden brown.
- Once baked, remove the pretzel bites from the oven and immediately brush them with the melted butter while they are still warm.


![- 1 cup pumpkin puree - 1 ½ cups crushed graham crackers - ½ teaspoon pumpkin spice - ½ cup powdered sugar - 1 teaspoon vanilla extract - 8 oz dark chocolate - 1 tablespoon coconut oil - Flaky sea salt To create chocolate covered pumpkin truffles, you need simple yet flavorful ingredients. Start with pumpkin puree, either canned or homemade. This is the base for your truffles. Next, grab crushed graham crackers. They give the truffles a unique texture and sweetness. Pumpkin spice adds warmth and flavor. You can adjust the amount if you want a stronger taste. Powdered sugar sweetens the mixture, making each bite a delight. Vanilla extract rounds out the flavor profile beautifully. For the chocolate coating, use dark chocolate. It contrasts nicely with the sweetness of the truffles. Adding coconut oil to the chocolate helps it melt smoothly. Finally, a sprinkle of flaky sea salt on top enhances the flavor, making each truffle even more irresistible. - Mixing bowl - Spoon or spatula - Measuring cups and spoons - Parchment paper - Baking sheet - Double boiler or microwave-safe bowl You will need a few tools to make these truffles. A mixing bowl is essential for combining your ingredients. A spoon or spatula helps you mix everything well. Measuring cups and spoons ensure that your ingredients are precise. Parchment paper is key for lining your baking sheet. It keeps the truffles from sticking. You also need a baking sheet to hold the truffles while they chill. Finally, a double boiler or a microwave-safe bowl helps melt the chocolate evenly. With these ingredients and tools, you're ready to create chocolate covered pumpkin truffles that everyone will love. For the complete recipe, check out the Full Recipe link. Start by mixing the pumpkin puree with the dry ingredients. In a large bowl, add: - 1 cup pumpkin puree - 1 ½ cups crushed graham crackers - ½ teaspoon pumpkin spice - ½ cup powdered sugar - 1 teaspoon vanilla extract Use a spatula or wooden spoon to blend these together. Mix until you have a smooth, dough-like consistency. The mixture should be firm enough to hold its shape. Next, it’s time to shape the truffles. With clean hands, scoop out tablespoon-sized portions. Roll each portion into a ball, about 1 inch in diameter. Place the balls on a parchment-lined baking sheet. Make sure to space them apart. This helps them keep their shape. After shaping, cover the baking sheet with plastic wrap and chill in the fridge for about 30 minutes. While the truffles chill, let’s melt the chocolate. You can use a double boiler or the microwave. If you choose the double boiler, place a heatproof bowl over a pot of simmering water. Stir the chocolate and coconut oil together until smooth. If using the microwave, heat in 20-second bursts, stirring in between. Make sure the chocolate is silky before dipping. Once the truffles are chilled, it’s time to coat them. Dip each ball into the melted chocolate. Make sure it’s fully covered. Use a fork to lift it out, letting the excess chocolate drip back into the bowl. Place the coated truffles back on the parchment-lined sheet. While the chocolate is still wet, sprinkle a pinch of flaky sea salt on each truffle. This adds a burst of flavor that balances the sweetness. Let the truffles sit at room temperature until the chocolate sets. You can speed up this process by placing them in the fridge for about 15-20 minutes. Now, your delicious chocolate-covered pumpkin truffles are ready to enjoy. You can find the full recipe above for more details on each step. Chilling the truffles is key. It helps them hold their shape better when you dip them. After you roll the truffles, place them in the fridge for about 30 minutes. This step makes a big difference in texture. To roll smooth truffles, make sure your hands are clean and dry. Use a light touch as you form the balls. If your mixture is sticky, wet your hands slightly. This helps shape them without making a mess. Melting chocolate can be tricky. To melt chocolate evenly, I recommend using a double boiler. Fill a pot with a bit of water, then place a heatproof bowl on top. Stir the chocolate as it melts. This method prevents burning. If you want a nice shine, add a tablespoon of coconut oil to the chocolate. It will make your truffles look glossy and appealing. Get creative when it comes to serving. You can sprinkle a little cinnamon on top for extra flavor. Pumpkin seeds also add a nice crunch and look great on a dessert table. These truffles pair well with coffee or a spiced chai. Consider serving them at your next fall gathering or holiday party. They will surely impress your guests! For the full recipe, check the main section. {{image_4}} You can easily change the taste of your truffles. Try adding almond extract for a nutty twist. A bit of orange zest will give your truffles a fresh, fruity kick. You can also swap out the pumpkin spice for cinnamon or nutmeg. Each spice brings a new flavor to your truffles. If you need gluten-free options, look for gluten-free graham crackers. Many brands offer these, and they work just as well. For those who prefer dairy-free treats, use dairy-free chocolate for the coating. There are great dairy-free chocolate chips available that melt nicely. Want to make your truffles extra special? Roll them in crushed nuts like pecans or walnuts. This adds a nice crunch. You can also use colorful sprinkles for a fun look. If dark chocolate isn’t your thing, try coating the truffles in white chocolate instead. It adds a sweet, creamy flavor that pairs well with pumpkin. For the full recipe, check out the [Full Recipe]. To keep your chocolate covered pumpkin truffles fresh, store them in the fridge. The cool temperature helps maintain their texture and flavor. Place the truffles in an airtight container to prevent them from drying out. This way, they can stay yummy for up to one week. If you want to enjoy them longer, try to avoid leaving them out at room temperature for too long. If you want to save some truffles for later, freezing is a great option. First, place the truffles on a baking sheet, making sure they don’t touch. Freeze them for about an hour until they are firm. Once frozen, transfer the truffles to a freezer-safe bag or container. They can last for up to three months in the freezer. When you’re ready to enjoy them, simply take out the number of truffles you want. Let them thaw in the fridge for a few hours or at room temperature for about 30 minutes. Avoid using heat to thaw, as this can ruin their texture. Now they're ready to be devoured! Chocolate covered pumpkin truffles can last about one week in the fridge. Store them in an airtight container to keep them fresh. After a week, check for signs of spoilage, such as a change in smell or texture. If they feel sticky or smell off, it's best to toss them. Yes, you can easily make these truffles vegan! Use dairy-free chocolate instead of dark chocolate. Swap the coconut oil for a plant-based butter or more coconut oil. This keeps the rich flavor while making it suitable for a vegan diet. These truffles shine at holiday gatherings and parties. They also make great gifts for friends and family. Their festive look and delicious taste fit well with autumn themes. Serve them during Halloween, Thanksgiving, or any cozy get-together. Yes, you can find chocolate covered pumpkin truffles at many bakeries. Look for local shops that specialize in gourmet treats. Some popular brands also offer these truffles online. You can enjoy them without all the fuss of making them at home. For a homemade touch, check out the Full Recipe for a delightful DIY version! Creating chocolate covered pumpkin truffles is simple and fun. We covered key ingredients like pumpkin puree, graham crackers, and dark chocolate. You learned tools needed, step-by-step instructions, and tips for easy truffle-making. We also looked at flavors, variations, storage, and common questions. These truffles make a perfect treat for any occasion. Enjoy making these delightful bites and share them with friends! You’ll impress everyone with your tasty skills.](https://joymealplan.com/wp-content/uploads/2025/07/35417da5-91a5-48e5-8a48-b090ca73d24b-768x768.webp)

