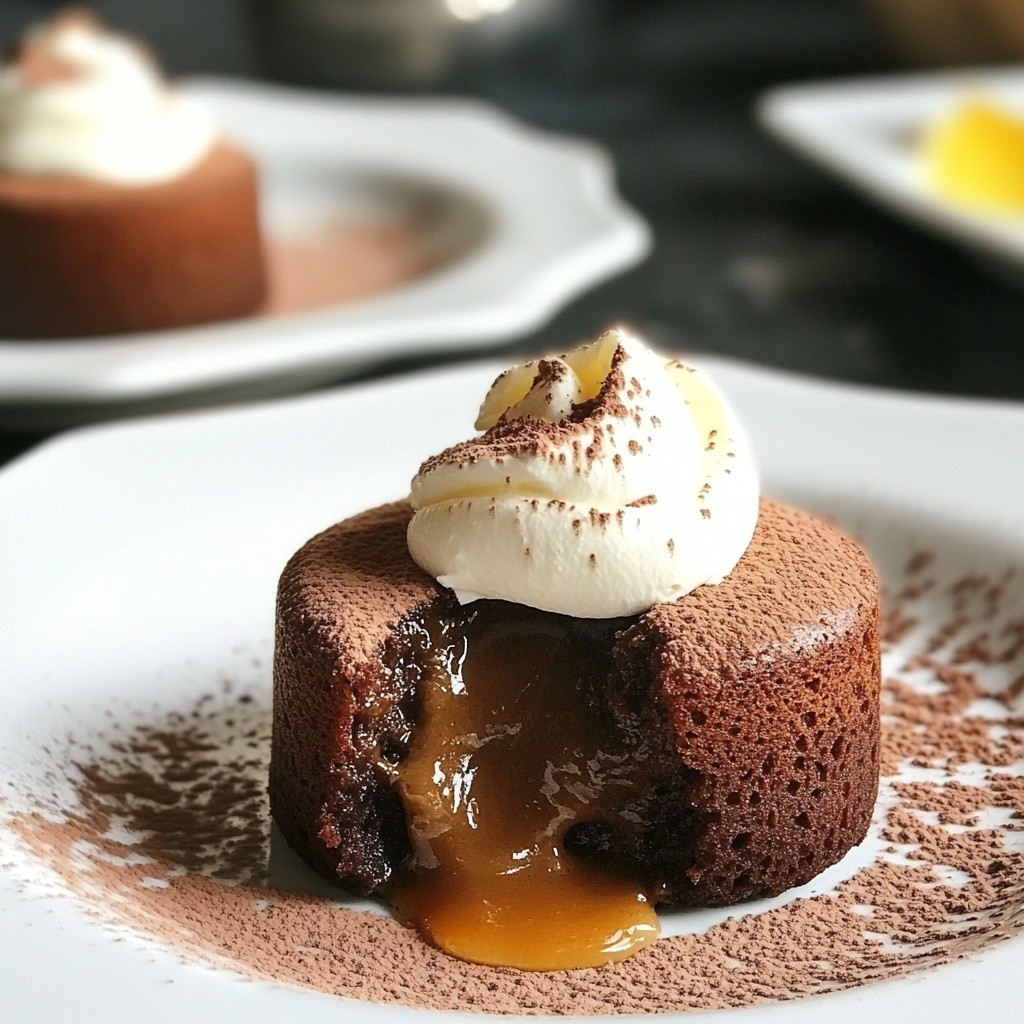
Are you craving a rich and gooey dessert that melts in your mouth? Let me introduce you to Classic Chocolate Lava Cakes—an irresistible treat that’s easier to make than you think. With just a few simple ingredients and step-by-step guidance, you’ll impress your friends and family in no time. Dive into this delightful recipe, and get ready to satisfy your sweet tooth with a luscious chocolate center!
Why I Love This Recipe
- Indulgent Flavor: The rich chocolate and warm molten center create a dessert experience that is simply unforgettable.
- Quick and Easy: With just 15 minutes of prep, you can have a gourmet dessert ready in no time.
- Perfect for Any Occasion: Whether it’s a date night or a casual family dinner, these lava cakes impress every time.
- Customizable: Add your favorite toppings like berries or ice cream to make it uniquely yours.
Ingredients
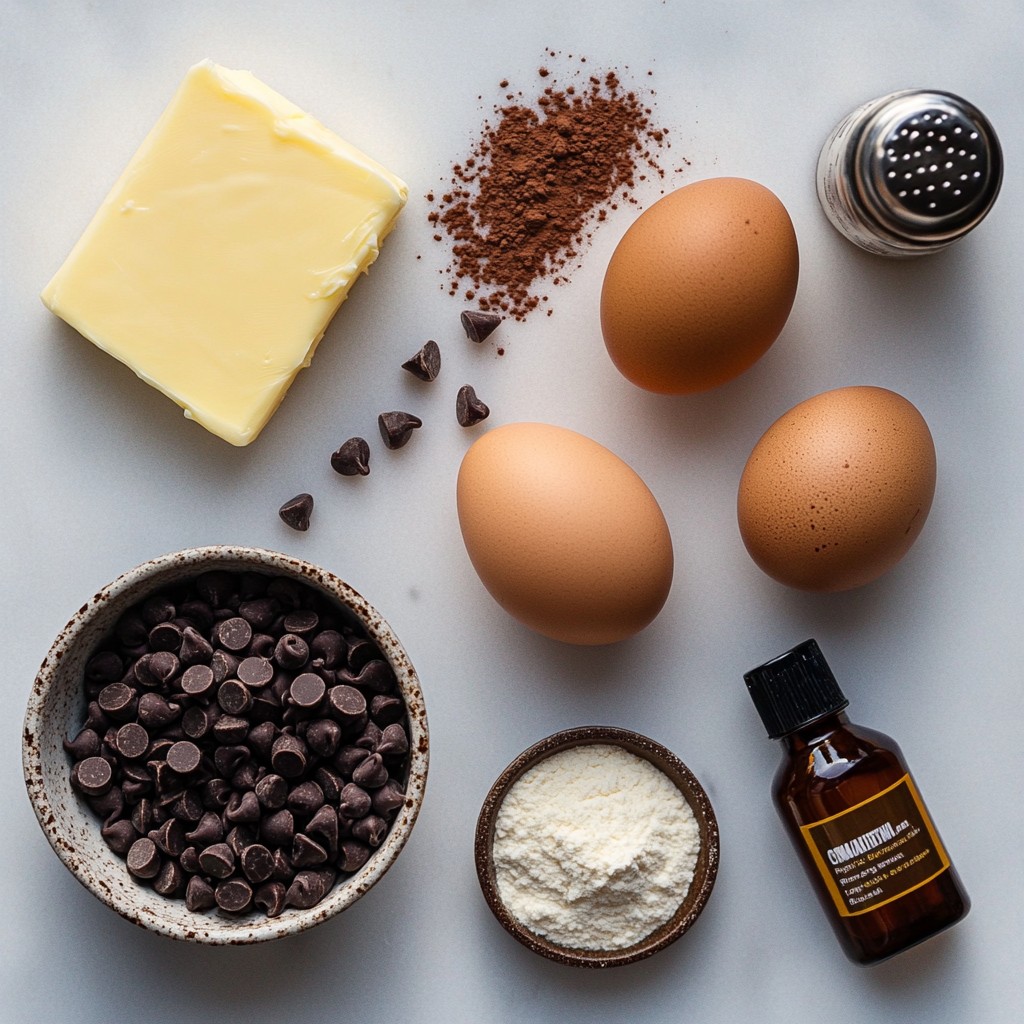
To make classic chocolate lava cakes, gather these ingredients:
- 1/2 cup unsalted butter (1 stick)
- 1 cup semi-sweet chocolate chips
- 2 large eggs
- 2 large egg yolks
- 1/4 cup granulated sugar
- 2 tablespoons all-purpose flour
- 1 teaspoon vanilla extract
- A pinch of salt
- Cocoa powder for dusting
- Optional: whipped cream or vanilla ice cream for serving
You need unsalted butter for rich flavor and to help with baking. Semi-sweet chocolate chips provide that sweet, chocolatey taste we love. The eggs and egg yolks help create a tender texture and give the cake structure. Granulated sugar adds sweetness and helps the batter rise.
All-purpose flour gives the cake its body. Vanilla extract adds warmth and depth to the flavor. A pinch of salt balances the sweetness. Cocoa powder dusting is key for easy removal from ramekins. Finally, whipped cream or vanilla ice cream gives a lovely creamy touch when serving.
With this list, you can now create your own gooey lava cakes at home!
Step-by-Step Instructions
Preparation of Ramekins
Start by preheating your oven to 425°F (220°C). You need four ramekins for this recipe. Grease each one with unsalted butter. Make sure to cover every inch. This step helps the cakes come out easily. After greasing, dust the inside with cocoa powder. Tap out any extra cocoa. This will give the cakes a nice finish. Ramekin size matters too. Use 6-ounce ramekins for the best results.
Melting the Chocolate
Now, let's melt the chocolate. In a microwave-safe bowl, combine 1/2 cup of unsalted butter and 1 cup of semi-sweet chocolate chips. Heat them in the microwave. Do this in 30-second bursts. Stir well after each interval. You want a smooth and shiny mixture. Check the consistency as you melt. It should look silky, with no lumps.
Mixing the Batter
Next, whisk the eggs. In a separate bowl, add two large eggs and two egg yolks. Pour in 1/4 cup of granulated sugar. Whisk them together for 2-3 minutes. The mixture should look fluffy and light. Now, fold the melted chocolate into the egg mixture. Use a spatula for this. Add 2 tablespoons of all-purpose flour, 1 teaspoon of vanilla extract, and a pinch of salt. Fold gently to mix well. Be careful not to overmix; this keeps the cakes soft.
Baking the Cakes
It’s time to bake! Divide the batter among your prepared ramekins, filling each about three-quarters full. Place them on a baking sheet for easy handling. Bake in your preheated oven for 12-14 minutes. Look for set edges and soft centers. The tops may puff slightly and crack. These signs show your cakes are done.
Serving Suggestions
Let the ramekins cool for about one minute after baking. To serve, run a knife around the edges of each cake. This helps them release easily. Invert each ramekin onto a plate. A gentle tap will help the cake slide out. Serve the lava cakes warm. They taste best right after baking. You can add whipped cream or vanilla ice cream for a special touch. For a nice look, garnish with fresh berries or powdered sugar. Enjoy breaking into your warm cake to find the gooey chocolate center!
Tips & Tricks
Common Mistakes to Avoid
- Overmixing batter: Mix just until combined. Overmixing makes the cakes tough.
- Incorrect baking times: Bake too long, and you lose the molten center. Aim for 12-14 minutes.
Enhancing the Lava Effect
- Filling guidelines for ramekins: Fill each ramekin three-quarters full. This allows space for the cake to rise and create that gooey center.
- Adjusting baking times: If you like a runnier center, reduce baking time by one minute. Keep an eye on them!
Best Chocolate to Use
- Recommendations for chocolate types: Use semi-sweet chocolate chips for a rich flavor. Dark chocolate works too, but it may alter the sweetness.
- Quality considerations: Always choose high-quality chocolate. It makes a big difference in taste and texture.
Pro Tips
- Use Quality Chocolate: Opt for high-quality semi-sweet chocolate chips for a richer flavor that enhances the overall taste of your lava cakes.
- Don’t Overbake: Keep a close eye on the baking time; overbaking will result in a solid center instead of a gooey lava core.
- Cooling Time Matters: Allow the cakes to cool for a minute before inverting; this helps the cakes set slightly, making them easier to release without breaking.
- Experiment with Flavors: Consider adding a splash of espresso or orange zest to the batter for an exciting twist on the classic chocolate flavor.
Variations
Flavored Lava Cakes
You can make your lava cakes more fun with flavors. Adding espresso gives a rich taste. Just mix in one tablespoon of brewed espresso when combining the melted chocolate. You can also try flavored extracts. Almond or orange extracts work wonders. Just a teaspoon adds a burst of flavor.
You can add fruit purees too. Raspberry or strawberry purees mix well in the batter. Just fold in two tablespoons before pouring into ramekins. This makes a nice fruity twist on the classic cake.
Dietary Adjustments
For those avoiding gluten, swap all-purpose flour with almond flour or a gluten-free blend. This keeps the cake moist and delicious. Just use the same amount as the original recipe.
If you need a vegan option, replace eggs with flax eggs. Mix one tablespoon of flaxseed meal with three tablespoons of water. Let it sit for five minutes to thicken. Use dairy-free chocolate and a plant-based butter. Your vegan lava cakes will be just as tasty!
Serving Pairings
These cakes shine with sides. Try pairing them with whipped cream or vanilla ice cream. The cold creaminess balances the warm chocolate. You can also serve with fresh berries for a fruity touch.
For drinks, coffee or espresso enhances the chocolate flavor. A nice red wine can also pair well. Choose a dessert wine for a sweet finish. These pairings will elevate your lava cake experience!
Storage Info
Leftover Storage Techniques
To keep your chocolate lava cakes fresh, store them in the fridge. Place each cooled cake in an airtight container. This helps keep them moist and tasty. They will last for up to three days in the fridge. When you want to enjoy them again, you can reheat them. Just place a cake in the microwave for about 20-30 seconds. Check to see if it's warm. If not, heat for a few more seconds.
Freezing Options
You can freeze chocolate lava cakes, too! First, cool them completely. Wrap each cake tightly in plastic wrap. Then, place them in a freezer-safe container. They will stay good for about three months in the freezer. When you’re ready to eat, take one out and let it thaw in the fridge overnight. To warm it up, use the microwave for about 30 seconds. Enjoy that gooey center!
FAQs
Can I make the batter ahead of time?
Yes, you can make the batter ahead of time. Mix the ingredients and fill the ramekins. Cover them with plastic wrap and store them in the fridge for up to 24 hours. When you are ready to bake, take them out and let them sit at room temperature for about 20 minutes. This helps them bake evenly.
How do I know when the cakes are done?
To know when the cakes are done, look for a few signs. The edges should be set and look slightly puffed. The center should still look soft and have a slight jiggle. You may also see small cracks on top. Baking for 12 to 14 minutes gives the best results.
Can I use different types of chocolate?
Yes, you can use different types of chocolate. Semi-sweet chocolate gives a rich flavor. Dark chocolate will make the lava cakes taste more intense. Milk chocolate adds sweetness and creaminess. Just remember that each type changes the taste and texture of the cake.
How do I prevent sticking?
To prevent sticking, grease your ramekins well with unsalted butter. Make sure to cover every inch. After greasing, dust the inside with cocoa powder. Tap out any extra cocoa. This helps the cakes slide out easily after baking.
In this post, we covered essential ingredients and step-by-step instructions for perfect lava cakes. You learned how to prepare ramekins, melt chocolate, mix batter, and bake cakes. We shared tips to avoid common mistakes and enhance your lava effect. You also discovered various flavor options and dietary adjustments. Finally, we provided storage methods for leftovers.
Making lava cakes can be fun and rewarding. With practice, you’ll impress everyone with your skills. Enjoy your baking journey!


