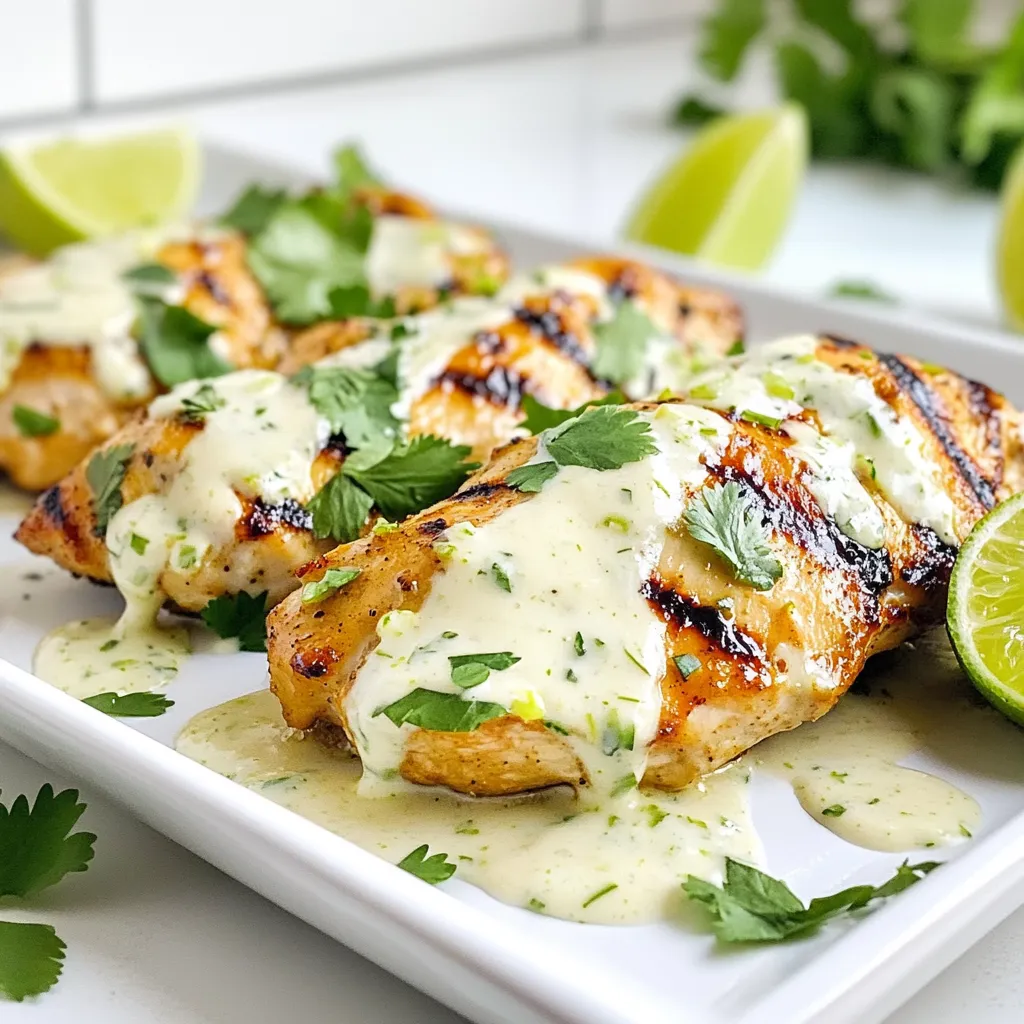
If you’re craving a burst of tropical flavor, Coconut Lime Chicken is your answer! This dish combines zesty lime and creamy coconut to create a meal that’s both simple and delicious. In this post, I’ll share an easy recipe, tips for perfect marinating, and variations to suit your taste. Let’s dive into cooking this flavorful dish that will impress your family and friends!
Why I Love This Recipe
- Bright Flavors: The combination of coconut and lime creates a refreshing and tropical taste that transports you to a sunny paradise with every bite.
- Easy Preparation: With minimal ingredients and straightforward steps, this recipe is perfect for both novice and experienced cooks looking for a quick meal.
- Versatile Dish: This chicken dish can be paired with a variety of sides, such as jasmine rice, salads, or grilled vegetables, making it adaptable for any occasion.
- Healthy and Delicious: Packed with protein and infused with wholesome ingredients, this recipe is not only tasty but also a nutritious choice for your family.
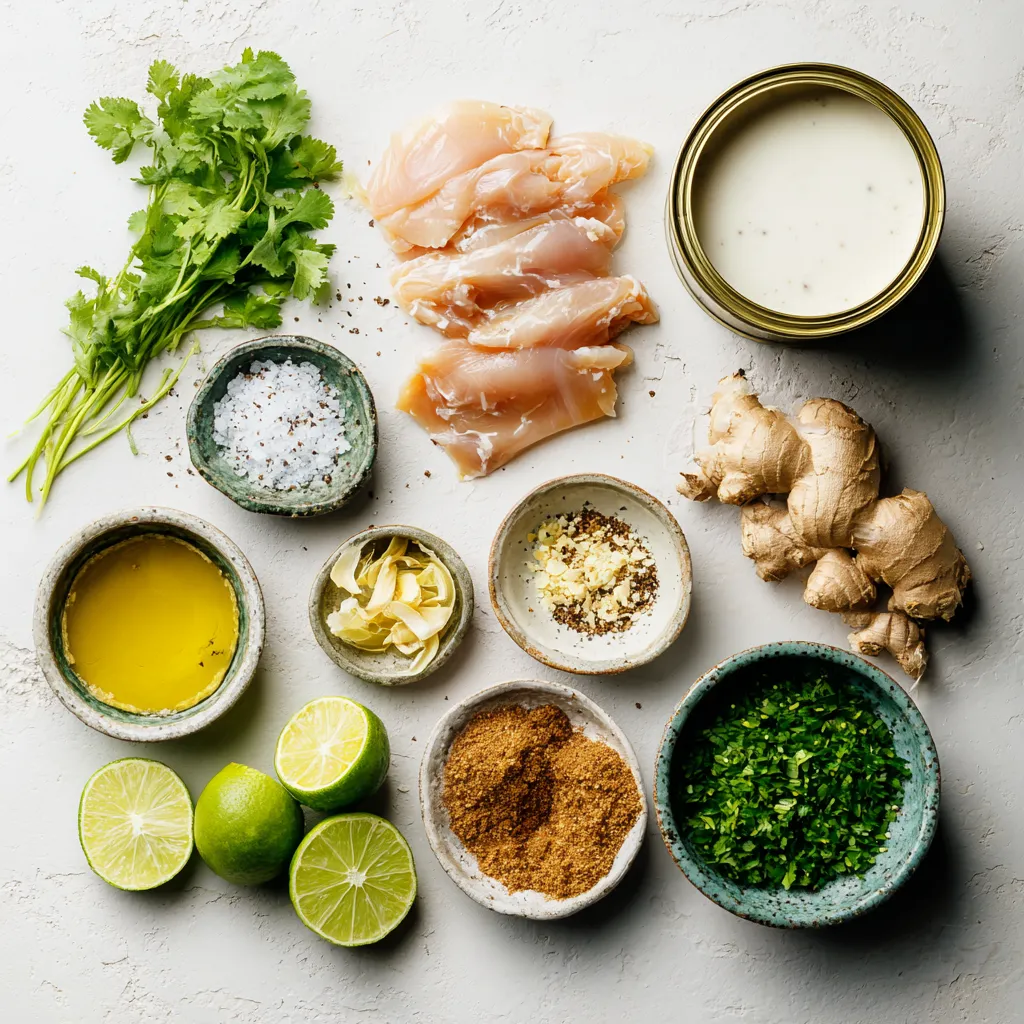
Ingredients
List of Ingredients for Coconut Lime Chicken
– 4 boneless, skinless chicken breasts
– 1 can (13.5 oz) coconut milk
– 2 tablespoons freshly squeezed lime juice
– Zest of 1 lime
– 2 cloves of garlic, minced
– 1 tablespoon freshly grated ginger
– 2 teaspoons honey
– 1 teaspoon ground cumin
– Salt and freshly ground black pepper to taste
– 2 tablespoons fresh cilantro, chopped (for garnish)
– Lime wedges (for serving)
Importance of Fresh Ingredients
Fresh ingredients make a big difference in flavor. Using fresh lime juice brightens the dish. Fresh ginger adds a warm, zesty note. Fresh cilantro gives a burst of color and taste. When you use fresh ingredients, your dish will taste much better and look appealing. Always choose the best quality. It elevates your cooking game.
Recommended Tools and Equipment
You don’t need fancy tools for this recipe. Here’s what I recommend:
– A medium mixing bowl for the marinade
– A whisk to blend the ingredients smoothly
– A large resealable plastic bag or shallow dish for marinating
– A grill or skillet to cook the chicken
– A small saucepan for thickening the sauce
– A meat thermometer to check chicken doneness
Having the right tools makes your cooking easier and more fun. Enjoy making this dish!
Step-by-Step Instructions
Preparation of Marinade
To start, gather your ingredients. You need coconut milk, lime juice, lime zest, minced garlic, grated ginger, honey, ground cumin, salt, and pepper. In a medium bowl, mix these items together. Whisk them until they blend well. This coconut lime marinade adds a bright flavor to the chicken.
Marinating the Chicken
Next, take your chicken breasts. Place them in a large resealable bag or a shallow dish. Pour the marinade over the chicken. Make sure each piece is well-coated. Seal the bag or cover the dish with plastic wrap. Place it in the refrigerator. Let it marinate for at least 30 minutes. For the best taste, allow the chicken to marinate for up to 2 hours. This helps the chicken soak up all that delicious flavor.
Cooking Methods: Grill vs. Skillet
Now it’s time to cook. Preheat your grill or skillet over medium heat. If you are using a grill, lightly oil the grates to stop the chicken from sticking. Remove the chicken from the marinade, letting the extra drip off. Set the leftover marinade aside for later. Cook the chicken for about 6-7 minutes on each side. The chicken is ready when it reaches an internal temperature of 165°F (75°C).
While cooking, pour the remaining marinade into a saucepan. Heat it gently until it simmers. Stir it occasionally for about 5 minutes, letting it thicken. After cooking, let the chicken rest for a few minutes. This helps keep it juicy. Serve the chicken with the thickened sauce on top and garnish with fresh cilantro.
Tips & Tricks
Best Practices for Marinating
Marinating chicken is key to great flavor. For Coconut Lime Chicken, the marinade needs time to work. Aim for at least 30 minutes, but two hours is best. This lets the chicken soak up all the coconut and lime goodness. Always coat the chicken well. Use a resealable bag for easy mixing. If you have time, marinate overnight for a deeper taste.
How to Ensure Chicken is Cooked Perfectly
To cook chicken well, focus on time and temperature. For this recipe, aim for 6-7 minutes per side on medium heat. Check the chicken’s inside temperature with a meat thermometer. You want it to reach 165°F (75°C). This ensures the chicken is safe to eat and juicy. Let the chicken rest for a few minutes after cooking. This helps keep the juices in.
Garnishing Ideas and Serving Suggestions
Make your Coconut Lime Chicken look great with simple garnishes. Fresh cilantro adds a nice touch. Sprinkle it on just before serving. Lime wedges are a must for extra zing. Serve the chicken on a bright plate for visual appeal. Pair it with jasmine rice or a fresh salad for a full meal. Enjoy the burst of flavors!
Pro Tips
- Marination Time: For the best flavor, marinate the chicken for at least 2 hours. This allows the flavors to penetrate deeply into the meat, making it more flavorful and tender.
- Cooking Temperature: Ensure your grill or skillet is preheated to medium heat. This helps in achieving a nice sear on the chicken, locking in juices and enhancing the overall taste.
- Thickening Sauce: When simmering the reserved marinade, stir frequently to prevent sticking and to achieve a smooth, thick consistency that clings beautifully to the chicken.
- Serving Suggestions: Pair this dish with jasmine rice or a light salad. The freshness of the accompaniments balances the richness of the coconut lime sauce.
Variations
Coconut Lime Chicken with Vegetables
You can add veggies to your coconut lime chicken. Try bell peppers, broccoli, or snap peas. Chop them into bite-sized pieces. Toss them in the marinade with the chicken. This adds color and crunch. Cook the chicken and veggies together in your skillet or on the grill. The veggies soak up the tasty coconut lime sauce. You create a one-pan meal that is healthy and fun.
Spicy Coconut Lime Chicken Twist
If you love heat, add some spice! Mix in chopped jalapeños or a splash of sriracha in the marinade. This gives your chicken a spicy kick. Be careful; start with a little and taste as you go. You can also sprinkle crushed red pepper on top after cooking. This spicy twist makes the dish exciting and vibrant.
Gluten-Free and Dairy-Free Options
This recipe is already gluten-free and dairy-free, which is great! You can enjoy it without worrying. If you need to avoid any specific brands, check your coconut milk. Look for one without additives. If you want to add a creamier texture, use coconut cream instead of milk. This keeps the dish rich while sticking to dietary needs. Enjoy these variations and make the recipe your own!
Storage Information
Proper Refrigeration Techniques
Store leftover Coconut Lime Chicken in an airtight container. This keeps the chicken fresh. Place it in the fridge right after it cools down. It is best to eat it within three days. If you do not eat it all, make sure to check for any signs of spoilage.
Freezing Coconut Lime Chicken
You can freeze Coconut Lime Chicken for longer storage. Wrap each piece tightly in plastic wrap. Then, place the wrapped chicken in a freezer bag. Write the date on the bag. It can last up to three months in the freezer. To use it, just thaw it in the fridge overnight before reheating.
Reheating Tips for Leftovers
When you’re ready to eat your leftovers, reheat them gently. You can use a skillet over low heat. This helps keep the chicken moist. Stir in some extra marinade while it heats. If you prefer, you can also use a microwave. Just cover the chicken and heat it in short bursts. Check often to avoid overcooking.
FAQs
Can I use chicken thighs instead of breasts?
Yes, you can use chicken thighs. They have more fat, which makes them juicy. Thighs also soak up the marinade well. This can add richer flavor to your dish. Just ensure they cook to 165°F (75°C) like breasts.
What can I pair with Coconut Lime Chicken?
Coconut Lime Chicken pairs well with many sides. Here are some great options:
– Jasmine rice for a fragrant touch
– A fresh salad for crunch
– Grilled vegetables for a colorful plate
– Quinoa for a healthy twist
These sides balance the rich, creamy chicken and enhance the meal.
How long can I marinate the chicken?
You can marinate chicken for at least 30 minutes. However, for the best taste, marinate it for up to 2 hours. This lets the flavors sink in deeper. Just avoid marinating too long, as the acid from lime can change the texture.
Can I make this dish ahead of time?
Yes, you can prepare it ahead. Marinate the chicken and store it in the fridge. Cook it just before serving. This saves time and lets you enjoy the flavors fresh.
Can I use a different type of meat?
Yes, you can use pork or shrimp. Both will absorb the marinade well. Adjust cooking times to ensure they are fully cooked.
What if I don’t have coconut milk?
If you lack coconut milk, use plain yogurt or sour cream. These will add creaminess but change the flavor slightly. You may want to add a bit of coconut extract to mimic the taste.
How do I store leftovers?
Store leftovers in an airtight container. They will last for 3-4 days in the fridge. To reheat, use the microwave or stovetop. Ensure they heat to at least 165°F (75°C) for safety.
Can I freeze Coconut Lime Chicken?
Yes, you can freeze it. Place it in a freezer-safe bag. It can last for about 2-3 months. Thaw it in the fridge before reheating for the best results.
Coconut Lime Chicken is tasty and easy to make. You learned about fresh ingredients, tools, and step-by-step methods. I showed you how to marinate and cook the chicken well. We explored fun variations and how to store leftovers. Remember, fresh food makes a big difference. Try these tips and share them with friends. Enjoy your meal, and trust that you can cook this dish perfectl


