Coconut Lime Rice Flavorful and Easy Recipe Guide

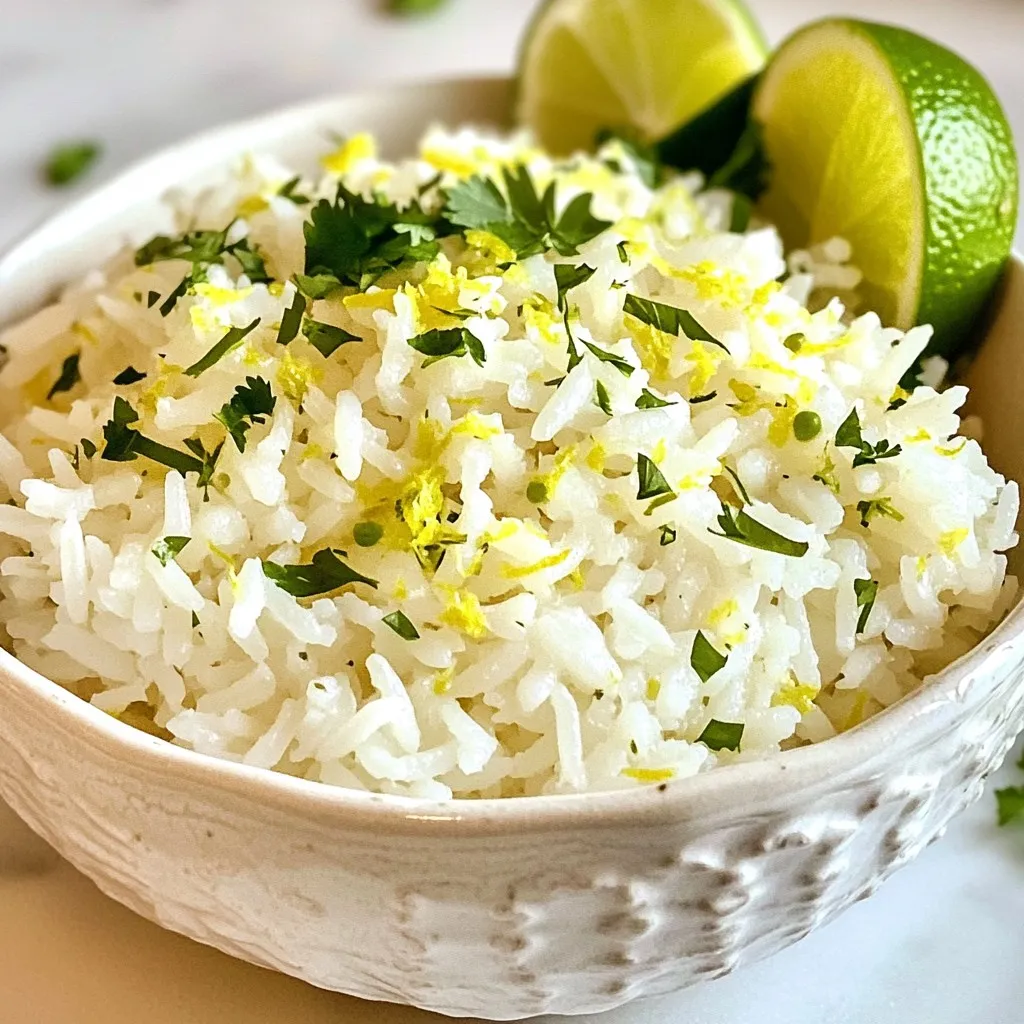
Are you ready to elevate your meal with a burst of tropical flavor? In this guide, I’ll show you how to make Coconut Lime Rice—a dish that’s as fun to prepare as it is to eat. With just a few simple ingredients, you can whip up a side that adds freshness to any plate. Let’s dive into the world of Coconut Lime Rice and discover the joy of cooking this easy recipe together!
Why I Love This Recipe
- Fresh and Zesty Flavor: The combination of creamy coconut and tangy lime creates a delightful flavor explosion in every bite.
- Easy to Prepare: This recipe is straightforward and requires minimal ingredients, making it perfect for a quick yet impressive dish.
- Versatile Side Dish: Coconut Lime Rice pairs beautifully with a variety of main courses, from grilled chicken to spicy shrimp, enhancing the meal.
- Beautiful Presentation: The vibrant green cilantro garnish and lime wedges add a pop of color, making it visually appealing for any dining table.
Ingredients
List of Ingredients
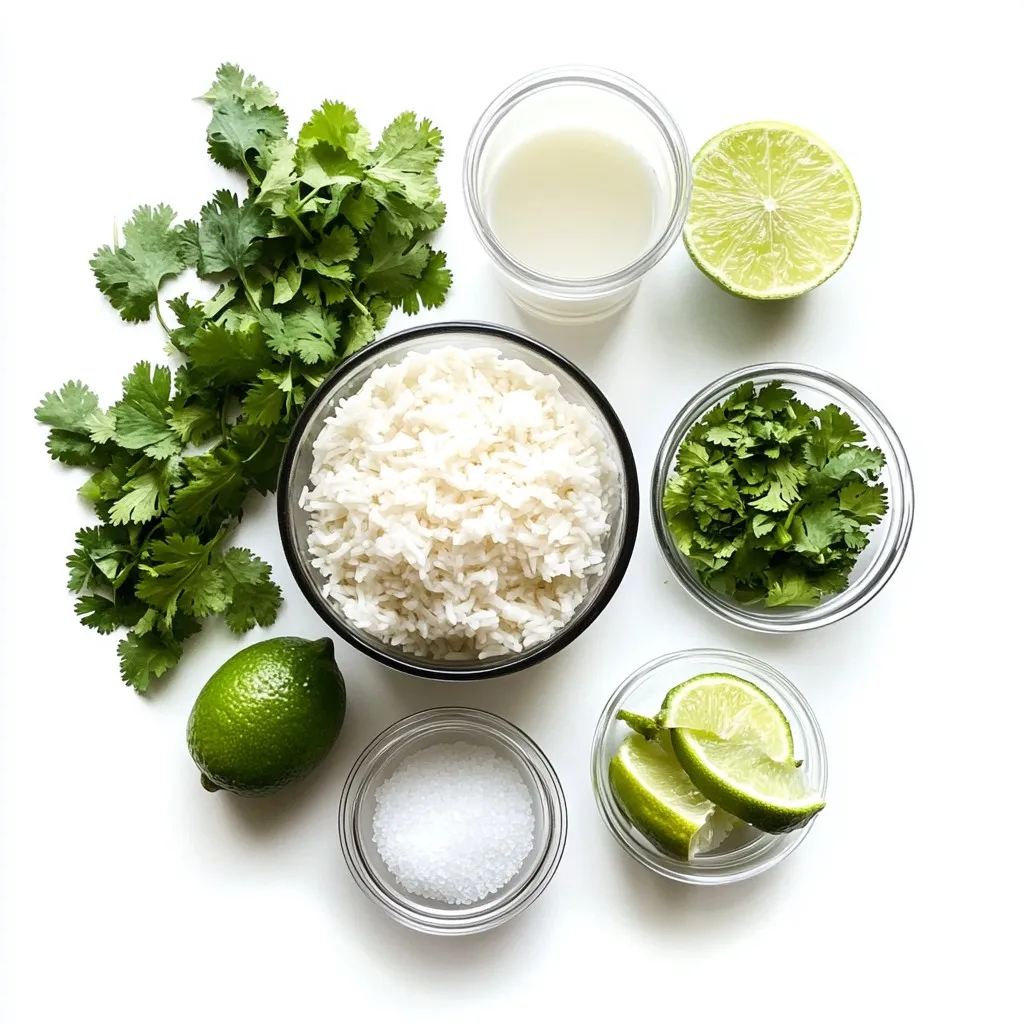
To make Coconut Lime Rice, gather these simple ingredients:
– 1 cup jasmine rice
– 1 can (400ml) creamy coconut milk
– 1 cup filtered water
– 2 tablespoons freshly squeezed lime juice
– Zest of 1 lime
– 1 tablespoon granulated sugar (optional for sweetness)
– 1/2 teaspoon fine sea salt
– 1/4 cup freshly chopped cilantro (for vibrant garnish)
– Lime wedges (for a tangy serving)
Ingredient Substitutions
You can swap some ingredients if needed:
– Use basmati rice instead of jasmine rice.
– Try light coconut milk if you want fewer calories.
– Lime juice can be replaced with lemon juice for a different twist.
– If you don’t have cilantro, parsley works well as a garnish.
Recommended Tools for Preparation
These tools will make your cooking easier:
– Medium-sized saucepan for cooking rice.
– Measuring cups and spoons for precise amounts.
– A fine mesh strainer for rinsing rice.
– A zester or grater for the lime zest.
– A fork for fluffing the rice after cooking.
With these ingredients and tools, you’re ready to create a delicious Coconut Lime Rice dish!

Step-by-Step Instructions
Preparation Steps
Rinsing the rice is key. Take 1 cup of jasmine rice and place it in a bowl. Fill the bowl with cold water. Swirl the rice with your hand. Keep rinsing until the water runs clear. This step removes extra starch. It helps the rice stay fluffy instead of sticky.
Next, gather your ingredients. You will need:
– 1 cup jasmine rice
– 1 can (400ml) creamy coconut milk
– 1 cup filtered water
– 2 tablespoons freshly squeezed lime juice
– Zest of 1 lime
– 1 tablespoon granulated sugar (optional for sweetness)
– 1/2 teaspoon fine sea salt
– 1/4 cup freshly chopped cilantro (for vibrant garnish)
– Lime wedges (for a tangy serving)
Cooking Process
In a medium saucepan, combine the rinsed jasmine rice, coconut milk, water, salt, and sugar if you want it sweeter. Stir the mixture well.
Now, place the saucepan on medium-high heat. Bring the mixture to a gentle boil. Stir occasionally to stop the rice from sticking. Once it boils, turn the heat down low. Cover the saucepan tightly with a lid.
Let the rice simmer for 15-18 minutes. It is done when the rice is tender and all the liquid is absorbed. Do not lift the lid during cooking. This keeps the steam inside, which is important for cooking.
Resting and Fluffing the Rice
After cooking, remove the saucepan from the heat. Let it sit, still covered, for 5 minutes. This resting period helps steam the rice. It makes the grains fluffier.
Now, take a fork and gently fluff the rice. This separates the grains. Add the freshly squeezed lime juice and lime zest. Mix until all the flavors blend together.
To serve, scoop the warm Coconut Lime Rice into bowls or on plates. Top it with chopped cilantro for a bright touch. Offer lime wedges on the side for that extra zing!
Tips & Tricks
Enhancing Flavor
To boost the flavor of Coconut Lime Rice, consider adding a few simple ingredients. You can mix in a pinch of garlic powder or a small amount of ginger for a warm twist. Fresh herbs like mint or basil can add a fresh note. For a spicier kick, add some diced jalapeños or chili flakes when cooking. Using a high-quality coconut milk makes a big difference, too. Look for brands that use pure coconut without added fillers.
Common Mistakes to Avoid
Avoid rinsing the rice too briefly. Rinsing helps remove excess starch, which prevents stickiness. If the rice is sticky, it will not be fluffy. Another mistake is lifting the lid while cooking. This lets steam escape and can lead to undercooked rice. Lastly, don’t skip the resting time after cooking. This step is key for fluffy grains.
Perfect Pairings
Coconut Lime Rice pairs well with many dishes. It complements grilled chicken, shrimp, or fish beautifully. You can serve it with a fresh salad or grilled veggies for a light meal. For a more filling option, try it alongside curries or stir-fries. A splash of extra lime juice right before serving adds a bright finish!
Pro Tips
- Rinse the Rice: Always rinse your jasmine rice under cold water until the water runs clear to remove excess starch, which helps in achieving fluffy rice.
- Let it Rest: After cooking, allow the rice to sit covered for an additional 5 minutes. This resting period steams the rice, enhancing its fluffiness.
- Fresh Lime Juice: For the best flavor, use freshly squeezed lime juice instead of bottled. It adds a vibrant and zesty taste to the rice.
- Cilantro Garnish: Chop cilantro just before serving to preserve its freshness and vibrant color, making your dish visually appealing and flavorful.

Variations
Vegan Coconut Lime Rice
You can easily make this dish vegan. Simply skip the sugar or use a plant-based sweetener. The creamy coconut milk already gives a rich flavor. This rice pairs well with many vegan meals. Serve it alongside grilled veggies or plant-based proteins for a full meal.
Spicy Coconut Lime Rice
For some heat, add diced jalapeños or red pepper flakes to the rice. Start by adding a small amount; you can always add more. The spice mixes well with the creamy coconut and zesty lime. This version works great with spicy grilled fish or chicken.
Coconut Lime Rice with Vegetables
Adding veggies is a fun twist. You can mix in peas, bell peppers, or carrots. Simply chop them small and stir them in during the last few minutes of cooking. The veggies add color and nutrition. Serve this rice as a side with a protein for a complete dish.
Storage Info
How to Store Leftovers
After enjoying your Coconut Lime Rice, let it cool down first. Store it in an airtight container. You can keep it in the fridge for up to four days. Be sure to label the container with the date so you can track freshness. If you have more rice than you can eat, consider freezing some.
Reheating Instructions
Reheating Coconut Lime Rice is easy. You can use a microwave or stovetop. For the microwave, place rice in a bowl, add a splash of water, and cover it. Heat in 30-second bursts, stirring in between. For the stovetop, add rice and a little water in a saucepan. Heat on low, stirring until warm. This helps keep the rice moist.
Freezing Coconut Lime Rice
To freeze Coconut Lime Rice, scoop it into freezer-safe bags. Press out any air before sealing. You can freeze it for up to three months. When ready to use, thaw overnight in the fridge. Then reheat according to the instructions above. This way, you can enjoy this tasty dish anytime!
FAQs
How to make Coconut Lime Rice from scratch?
To make Coconut Lime Rice from scratch, follow these steps:
1. Rinse 1 cup of jasmine rice under cold water. This removes extra starch.
2. In a saucepan, mix the rinsed rice with 1 can of coconut milk, 1 cup of water, and 1/2 teaspoon of salt. Add sugar if you want it sweeter.
3. Heat the mixture on medium-high until it boils. Then lower the heat to low and cover.
4. Cook for 15-18 minutes until the rice is tender.
5. Let it sit for 5 more minutes, covered. This helps make it fluffy.
6. Fluff the rice with a fork and mix in 2 tablespoons of lime juice and lime zest.
7. Serve with fresh cilantro on top and lime wedges on the side.
This simple method gives you a tasty coconut and lime flavor in every bite.
Can I use brown rice for this recipe?
Yes, you can use brown rice, but it needs longer cooking time. Brown rice takes about 40-50 minutes to cook. Adjust the water amount too. Use 1 cup of brown rice with 1 can of coconut milk and 1 1/4 cups of water. Brown rice adds a nutty taste and a chewy texture to the dish.
What can I serve with Coconut Lime Rice?
Coconut Lime Rice pairs well with many dishes. Here are some ideas:
– Grilled chicken for a nice protein boost.
– Shrimp or fish with a light sauce for a fresh meal.
– Stir-fried vegetables to add color and crunch.
– Tacos for a fun twist.
Feel free to mix and match these options to create a delicious meal!
Coconut lime rice is simple yet tasty. We covered key ingredients, helpful tools, and easy steps for making it. You learned how to enhance flavor, avoid mistakes, and try fun variations. Remember to store your leftovers properly and reheat them for the best taste. Whether you’re going for vegan or spicy, this dish can fit any meal. Now, you have all the tools to impress at dinner. Enjoy the process and savor every bit

Coconut Lime Rice Delight
Ingredients
- 1 cup jasmine rice
- 1 can (400ml) creamy coconut milk
- 1 cup filtered water
- 2 tablespoons freshly squeezed lime juice
- 1 unit zest of 1 lime
- 1 tablespoon granulated sugar (optional for sweetness)
- 1 teaspoon fine sea salt
- 1 4 freshly chopped cilantro (for vibrant garnish)
- 1 unit lime wedges (for a tangy serving)
Instructions
- Begin by rinsing the jasmine rice thoroughly under cold water. Swirl the rice with your hand until the water runs clear, which removes excess starch and prevents the rice from becoming sticky during cooking.
- In a medium-sized saucepan, combine the rinsed jasmine rice, creamy coconut milk, filtered water, salt, and sugar (if desired). Stir the mixture well until evenly combined.
- Place the saucepan over medium-high heat and bring the mixture to a gentle boil, stirring occasionally to prevent sticking. Once boiling, immediately reduce the heat to low and cover the saucepan with a tight-fitting lid.
- Allow the rice to simmer on low heat for about 15-18 minutes, or until the rice grains are tender and have absorbed all the liquid. Refrain from lifting the lid during cooking, as this can allow steam to escape and affect cooking time.
- Once the rice is fully cooked, remove the saucepan from heat and let it sit, still covered, for an additional 5 minutes. This helps to steam the rice and enhances its fluffiness.
- After resting, gently fluff the rice with a fork to separate the grains. Stir in the freshly squeezed lime juice and lime zest, mixing until the flavors are evenly incorporated.
- To serve, dish out the warm Coconut Lime Rice into bowls or onto plates. Garnish generously with the freshly chopped cilantro and offer lime wedges on the side for an added burst of tangy freshness.


. To start, you need to whisk the eggs. Take a medium bowl and crack in 4 large eggs. Add 1/2 cup of milk. Whisk them together until they are smooth. Then, season this mixture with a little salt and freshly cracked pepper. This adds flavor to your eggs. Next, we need to cook the vegetables. Heat 2 tablespoons of olive oil in a large non-stick skillet over medium heat. Once the oil is hot, add 1 small yellow onion and 1 small red bell pepper, both finely diced. Sauté them for about 4-5 minutes. You want them tender and fragrant. Now comes the fun part. Add in 1/2 cup of black beans that you’ve rinsed and drained. Sprinkle in 1 teaspoon of ground cumin for a warm flavor. Stir everything together and cook for another 2-3 minutes. This warms the beans and brings the flavors together. Then, it’s time to cook the eggs. Pour the whisked egg mixture into the skillet. Gently stir them as they begin to set. Cook for about 3-4 minutes or until the eggs are fully cooked, fluffy, and light. Once done, remove the skillet from heat. To assemble your burritos, lay a whole wheat tortilla flat on your workspace. Spoon a generous portion of the egg and bean mixture into the center. Next, top it with a few slices of avocado and a sprinkle of shredded cheese. You can choose either cheddar or pepper jack. Now, let’s fold and roll the burrito. Carefully fold the sides of the tortilla over the filling. Then, roll it up from the bottom, tucking it tightly. Repeat this with the remaining tortillas and filling. For a crispy finish, return the burritos to the skillet, seam-side down. Toast them for 1-2 minutes on each side over medium heat. This will make them golden brown and slightly crisp. Serve the burritos warm, garnished with fresh cilantro leaves and a side of salsa or hot sauce. Enjoy! Achieving Fluffy Eggs To get fluffy eggs, whisk them well with milk. Air makes the eggs rise. Cook them gently over medium heat. Stir slowly as they cook. This keeps them light and fluffy. Avoiding Overcooking Watch your eggs closely while they cook. Eggs can go from soft to dry in seconds. Remove them from heat when they are just set. They will continue to cook after being taken off the stove. Adding More Vegetables or Proteins Feel free to add more veggies like spinach or mushrooms. You can also add proteins like cooked sausage or diced ham. This makes the burrito more filling and fun. Spice Variations If you like heat, add jalapeños or a dash of hot sauce. For a different flavor, try smoked paprika or chili powder. These spices can make your breakfast so exciting. Ideal Accompaniments Serve your burritos with salsa or fresh avocado. A side of fruit adds a nice touch, too. You could even add a dollop of sour cream for creaminess. Presentation Ideas Place the burritos on a colorful plate. Add a sprinkle of cilantro on top for color. Cut them in half to show off the filling. This makes your meal look tasty and fresh. For the full recipe, check out the detailed instructions. {{image_4}} For a tasty twist, you can make vegetarian sunrise burritos. Just swap the meat for tofu or extra veggies. Tofu adds protein and absorbs flavors well. You can use bell peppers, zucchini, or spinach. This way, you still enjoy a filling meal without meat. If you want more protein, try adding sausage or bacon. Cook the sausage until it's browned and crumbled. For bacon, fry until crispy, then crumble over the eggs. This gives the burritos a hearty flavor. You can even mix both for a double protein boost. For gluten-free options, consider using corn tortillas or other gluten-free wraps. They hold the filling well and add a different taste. You can also check for store-bought gluten-free tortillas. This way, everyone can enjoy your sunrise breakfast burritos. Feel free to explore these variations to make your breakfast exciting! For the full recipe, be sure to check out the provided details. To keep your burritos fresh, follow these steps: - Refrigeration Tips: Place leftover burritos in an airtight container. Store them in the fridge. They stay good for up to three days. - Freezing Instructions: If you want to keep them longer, wrap each burrito in foil. Then, put them in a freezer bag. They can last for up to three months in the freezer. To enjoy your burritos again, use these methods: - Best Methods for Preserving Texture: The oven works best. Preheat it to 350°F. Place the burrito on a baking sheet. Heat for about 15-20 minutes. This keeps the tortilla crispy. You can also use a microwave. Wrap the burrito in a damp paper towel. Heat it for 1-2 minutes. This method is quick but may make the tortilla soft. To make Sunrise Breakfast Burritos vegetarian, just leave out the eggs. Instead, use tofu or extra veggies. You can add mushrooms, spinach, or zucchini for a tasty option. Season them well with spices like cumin and paprika to keep the flavor strong. Yes, you can make these burritos ahead of time. Prepare the filling and store it in the fridge for up to three days. You can also wrap the burritos tightly in foil and freeze them. Just reheat them in the oven or microwave when you’re ready to eat! Many sauces go well with Sunrise Breakfast Burritos. Salsa is a classic choice. It adds freshness and a bit of spice. You can also try hot sauce for heat or avocado crema for creaminess. A drizzle of ranch dressing adds a tasty twist too. To change the spice level, adjust the amount of cumin and add chili powder. For more heat, include diced jalapeños or a dash of cayenne pepper. If you prefer mild flavors, skip the spicy ingredients and focus on herbs like cilantro for freshness. Yes, there are a few good ways to warm tortillas. You can heat them in a dry skillet for about 30 seconds on each side. Alternatively, wrap them in a damp paper towel and microwave for 15-20 seconds. This keeps them soft and pliable for wrapping. In this article, we explored how to create delicious Sunrise Breakfast Burritos. You learned about essential ingredients like eggs, black beans, and fresh veggies. We broke down the steps for mixing, cooking, and assembling, plus tips for perfect eggs and custom flavors. You can also modify these burritos to fit dietary needs or preferences. Remember, these burritos are easy to store and reheat well. Enjoy your cooking journey and share your tasty results!](https://joymealplan.com/wp-content/uploads/2025/07/3ee2e162-623e-4153-8713-e8e5adb7d2c4-768x768.webp)


![To make oven-baked chicken fajitas, you will need: - 1 lb boneless, skinless chicken breasts, sliced into thin strips - 1 red bell pepper, sliced into thin strips - 1 yellow bell pepper, sliced into thin strips - 1 medium onion, sliced into thin wedges - 3 tablespoons extra virgin olive oil - 2 teaspoons chili powder - 1 teaspoon ground cumin - 1 teaspoon smoked paprika - 1 teaspoon garlic powder - 1 teaspoon onion powder - Salt and freshly ground black pepper to taste - 8 small flour or corn tortillas These ingredients come together to create a burst of flavors. The chicken brings protein, while the peppers and onion add color and crunch. Seasonings like chili powder and cumin enhance the taste, making every bite exciting. You can elevate your fajitas with these optional toppings: - Sour cream - Guacamole - Freshly chopped cilantro - Lime wedges These toppings add creaminess, freshness, and zest. Feel free to mix and match based on your preference. Here are the tools you need to prepare your fajitas: - Large baking sheet - Parchment paper - Mixing bowl - Spatula or your hands for mixing - Knife and cutting board Using these tools makes the cooking process smooth. The baking sheet helps in even cooking, while the mixing bowl keeps things clean. If you follow the [Full Recipe], you will have a delicious meal ready in no time! To start, gather your ingredients. You will need: - 1 lb boneless, skinless chicken breasts, sliced into thin strips - 1 red bell pepper, sliced into thin strips - 1 yellow bell pepper, sliced into thin strips - 1 medium onion, sliced into thin wedges - 3 tablespoons extra virgin olive oil - 2 teaspoons chili powder - 1 teaspoon ground cumin - 1 teaspoon smoked paprika - 1 teaspoon garlic powder - 1 teaspoon onion powder - Salt and freshly ground black pepper to taste - 8 small flour or corn tortillas - Optional toppings: sour cream, guacamole, freshly chopped cilantro, lime wedges Begin by preheating your oven to 400°F (200°C). Line a large baking sheet with parchment paper. This helps with easy cleanup. In a big mixing bowl, combine all the sliced chicken and veggies. Drizzle the olive oil over them. Add the spices: chili powder, cumin, smoked paprika, garlic powder, onion powder, salt, and pepper. Now, mix everything well. Use your hands or a spatula to toss the chicken and veggies. Make sure every piece gets coated in oil and spices. This step is key for flavor. Spread the chicken and veggies evenly on the prepared baking sheet. Ensure there’s space between pieces for even cooking. Bake in the oven for 25 to 30 minutes. Halfway through, stir the mixture. Check that the chicken reaches an internal temperature of 165°F (75°C). The veggies should be tender and slightly caramelized. After baking, let the mixture rest for a few minutes. While it rests, warm your tortillas. You can microwave them wrapped in a damp paper towel or heat them in a skillet. To serve, place a generous scoop of the chicken and veggie mix in each tortilla. Add sour cream, guacamole, and cilantro. A squeeze of lime juice adds a nice touch! Enjoy this easy yet delicious meal. For the complete process, refer to the Full Recipe. To get juicy chicken, use thin strips. Thin pieces cook faster and stay tender. Always check the internal temperature. It should reach 165°F (75°C) for safety. If you have time, marinate the chicken in spices and olive oil for a few hours. This adds flavor and keeps it moist. Cut the vegetables into uniform sizes. This helps them cook evenly. Use a large baking sheet. Spread the veggies out to avoid steaming. Stir them halfway through baking. This promotes even browning and caramelization. Aim for a tender texture with some charred edges for extra flavor. Warm the tortillas before serving. You can use a microwave or a skillet. For the microwave, wrap them in a damp paper towel. Heat them in short bursts for a soft finish. If using a skillet, heat on medium until they become pliable. This makes them easier to fold and fill. For the full recipe, check the section earlier in the article. {{image_4}} You can switch chicken for shrimp or tofu. Shrimp cooks fast and adds a sweet taste. Just adjust the cooking time to around 15-20 minutes. Tofu is great for a plant-based meal. Use firm tofu for the best texture. Press it to remove excess water. Then, cut it into strips and season like chicken. Feel free to mix in other veggies. You can add zucchini, mushrooms, or even corn. Each veggie brings its own flavor and texture. Try using fresh jalapeños for a spicy kick. You can also use frozen veggies if fresh ones aren’t available. Just ensure they are thawed and well-drained before mixing. Get creative with your spices! You can try taco seasoning for a different taste. Or, mix in some lime zest for brightness. If you like heat, add cayenne pepper or chipotle powder. Experimenting with these flavors makes each meal unique. Don't be afraid to try unusual combinations. This is your chance to explore new tastes. Check out the Full Recipe for more ways to spice things up! After enjoying your oven-baked chicken fajitas, you may have some leftovers. To store them well, let the fajitas cool down to room temperature. Then, place them in an airtight container. This keeps the flavors fresh and prevents sogginess. You can store them in the fridge for up to three days. If you want to keep them longer, consider freezing. When you are ready to eat your leftovers, reheating them properly is key. For the best results, use an oven. Preheat your oven to 350°F (175°C). Spread the fajitas on a baking sheet and cover them with foil. Heat for about 10 to 15 minutes, or until warmed through. This method keeps the chicken juicy and the veggies crisp. You can also use a microwave, but this may make the tortillas soft. If you want to save your fajitas for later, freezing is easy. First, make sure they are completely cool. Then, place your fajitas in a freezer-safe bag or container. Remove as much air as possible before sealing. Label the bag with the date. You can freeze them for up to three months. When ready to enjoy, thaw the fajitas in the fridge overnight before reheating. This way, they taste just as good as when you first made them. For the full recipe, check out the earlier sections. To make your oven-baked chicken fajitas healthier, you can swap some ingredients. Use skinless chicken thighs instead of breast for more flavor. Add more veggies like zucchini or mushrooms for extra fiber. You can also replace olive oil with cooking spray to cut calories. Use whole grain tortillas rather than white flour ones. This change boosts fiber and nutrients. Finally, skip the sour cream or use a low-fat version. Yes, you can prepare fajitas ahead of time. Just season the chicken and veggies the night before. Store them in the fridge in a sealed container. This helps the flavors blend nicely. Bake them when you are ready to eat. If you want to save time, you can also cook the fajitas fully. Store the cooked fajitas in the fridge for up to three days. Reheat them in the oven for best results. The best tortillas for fajitas depend on your taste. Flour tortillas are soft and easy to fold. They are a classic choice. Corn tortillas have a nice flavor and are gluten-free. They can be a bit more fragile but pair well with fajitas. You can also try whole wheat tortillas for a healthier option. Choose the type you enjoy most, and your fajitas will shine. Check out the full recipe for more tips! In this article, we explored how to make delicious oven-baked chicken fajitas. We covered the main ingredients, cooking steps, and helpful tips for perfect results. You also learned about fun variations to customize your dish and smart ways to store leftovers. Now, you can enjoy tasty fajitas at home. Get creative with your toppings and enjoy sharing this meal with friends and family. The key is to have fun and make it your own. Happy cooking!](https://joymealplan.com/wp-content/uploads/2025/06/95795fac-5c59-44b7-b221-1c1b2c95851f-768x768.webp)