Coconut Lime Rice Flavorful and Simple Recipe

Looking for a quick and tasty side dish? My Coconut Lime Rice is both flavorful and easy to make. With just a few simple ingredients, like jasmine rice and coconut milk, you can whip up a dish that makes any meal special. In this post, I’ll guide you through each step, share tips for perfecting your rice, and explore flavor variations. Get ready to elevate your dining experience with this delightful recipe!
Ingredients
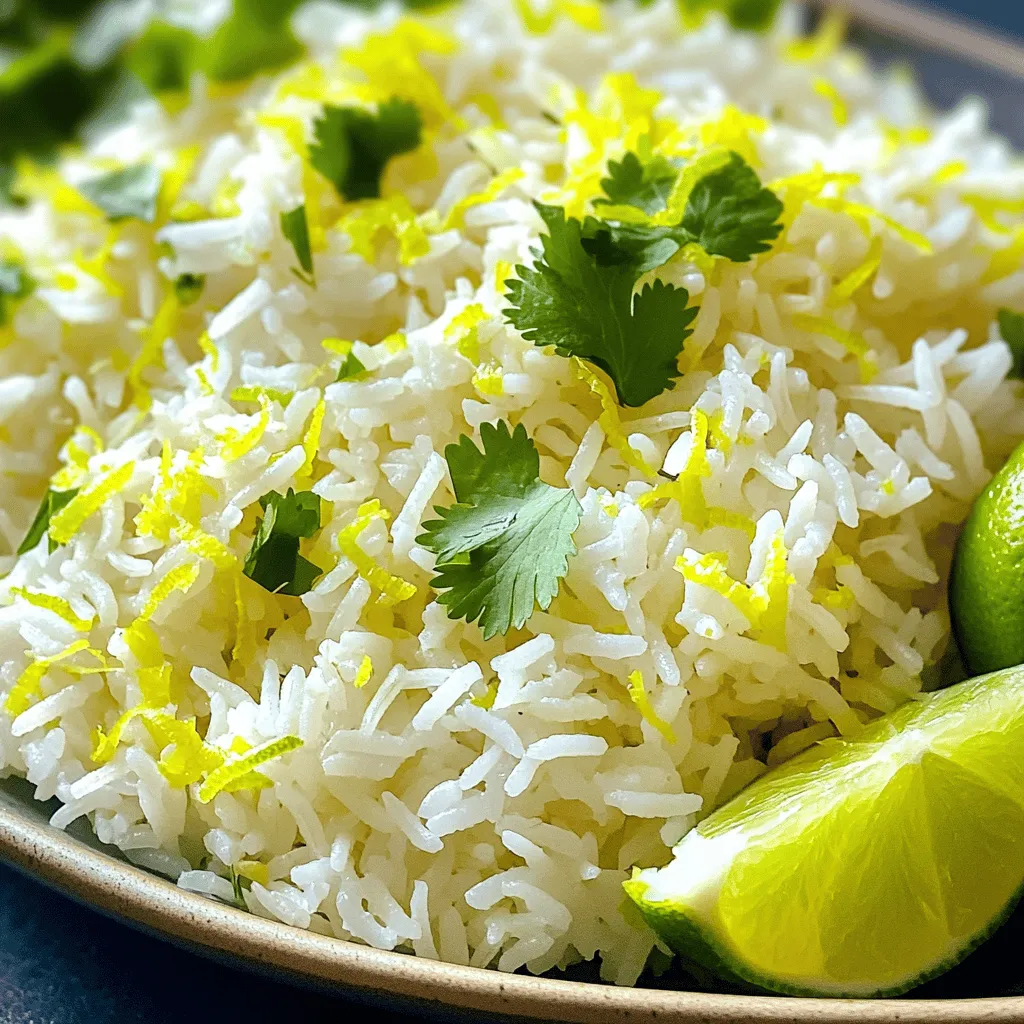
To make coconut lime rice, you need a few simple ingredients. Here’s what you’ll need:
– 1 cup jasmine rice
– 1 can (400 ml) coconut milk
– 1 cup water
– Zest of 1 lime
– 2 tablespoons fresh lime juice
– 1 tablespoon sugar (optional, for added sweetness)
– 1/2 teaspoon salt
– Fresh cilantro, chopped (for garnish)
– Lime wedges (for serving)
Jasmine rice gives a lovely aroma and fluffy texture. Coconut milk adds a rich, creamy taste. Fresh lime adds brightness. You can adjust the sugar to suit your taste, while salt enhances all the flavors. Cilantro adds a fresh touch, and lime wedges are perfect for serving. This recipe is both flavorful and simple, making it a great choice for any meal.Enjoy the tropical flavors!
Step-by-Step Instructions
Preparation Steps
Rinsing the rice
Start by rinsing the jasmine rice under cold running water. Rinse for about 2-3 minutes or until the water runs clear. This step is key. It removes extra starch. This helps your rice stay fluffy, not sticky.
Combining ingredients in a saucepan
In a medium saucepan, add the rinsed rice. Next, pour in one can of coconut milk and a cup of water. Add the zest of one lime, optional sugar, and salt. Stir gently to mix all the ingredients well.
Cooking Process
Boiling and simmering
Place the saucepan on medium-high heat. Bring the mixture to a gentle boil. Once it boils, reduce the heat to low. Cover the saucepan tightly and let it simmer for 15-20 minutes. The rice should absorb the liquid and become tender.
Steaming the rice
After 20 minutes, turn off the heat but keep the saucepan covered. Let the rice steam in its own heat for an extra 5 minutes. This step makes the texture even better.
Finishing Touches
Fluffing the rice
Once the steaming is done, use a fork to fluff the rice gently. This helps separate the grains.
Adding lime juice and seasoning
Drizzle in the fresh lime juice and mix it well. Taste your rice. You might want to add more salt or lime juice for flavor.
Tips & Tricks
Perfecting Fluffy Rice
To get fluffy rice, rinsing is key. Rinse the jasmine rice under cold water for about 2-3 minutes. Keep rinsing until the water runs clear. This step removes extra starch. Less starch means fluffier rice, not sticky.
Simmering and steaming are also crucial. After boiling, reduce the heat to a low simmer. Cover the pan tightly and cook for 15-20 minutes. This lets the rice absorb all the liquid. Once done, turn off the heat and let it steam for 5 more minutes. This extra time makes the rice light and airy.
Flavor Enhancements
You can adjust sweetness and salt to fit your taste. If you like sweeter rice, add the optional sugar. For salt, start small. You can always add more later.
Fresh herbs and garnishes make a big difference. Chopped cilantro adds color and taste. Squeeze fresh lime juice over the rice for a bright kick. You can also serve lime wedges on the side. These small changes take your rice from good to great.

Variations
Alternative Ingredients
You can switch out jasmine rice for other types. Long-grain rice works well if you want to try something different. Brown rice is another option. It takes longer to cook, so adjust the time accordingly.
You might prefer low-fat coconut milk. This option lowers the calories while still adding flavor. The rice will taste great, and you can enjoy it guilt-free.
Flavor Profiles
Let’s make your coconut lime rice even more exciting! Adding spices can elevate the dish. Fresh ginger adds warmth, while lemongrass brings a nice citrus note. Just a small amount can transform the flavor.
You can also play with other citrus fruits. Try using orange or grapefruit zest. These flavors can create a new twist, making the rice even more refreshing. Experimenting keeps your cooking fun and interesting!Enjoy the journey of flavor!
Storage Info
Short-Term Storage
To store leftover coconut lime rice, place it in an airtight container. Make sure the rice cools down to room temperature first. This helps prevent moisture buildup, which can make your rice soggy. Refrigerate the container for up to four days. When you’re ready to eat, reheat the rice in the microwave or on the stovetop. Add a splash of water to keep it moist. Remember, never leave cooked rice at room temperature for more than two hours. This can lead to harmful bacteria.
Long-Term Storage
If you want to keep coconut lime rice for a longer time, freezing is the way to go. Start by letting the rice cool completely. Then, scoop it into freezer-safe bags or containers. Flatten the bags for easier storage. Label each bag with the date. You can freeze it for up to three months. When you’re ready to enjoy it, thaw the rice in the fridge overnight. You can also reheat it straight from the freezer. Just add a bit of water to keep it fluffy and tasty.
FAQs
Common Questions
Can I use brown rice instead of jasmine rice?
Yes, you can use brown rice instead of jasmine rice. Brown rice is healthy and adds a nutty flavor. However, it takes longer to cook. Adjust cooking time to about 40-45 minutes. You will need more water too, around 1.5 cups.
What dishes pair well with coconut lime rice?
Coconut lime rice goes well with many dishes. It is great with grilled chicken, shrimp, or fish. It also pairs nicely with stir-fried vegetables or curry. You can serve it as a base for a tropical bowl with fresh fruits or greens.
How can I prevent rice from being sticky?
To prevent sticky rice, rinse the rice well before cooking. This washes away excess starch. Also, avoid overcooking. Follow the recipe closely and let the rice steam for a few minutes after cooking. This helps achieve that fluffy texture.
Nutritional Information
Caloric content per serving
Coconut lime rice has about 300 calories per serving. This can vary based on the added ingredients.
Major nutrients in coconut lime rice
This dish is rich in carbohydrates from the rice. It also provides healthy fats from the coconut milk. You get some vitamins and minerals from lime juice and fresh herbs.
This blog post covered how to make coconut lime rice using simple ingredients. You learned the steps for rinsing and cooking jasmine rice, as well as adding coconut milk and lime for flavor. Tips were shared to help you achieve the perfect fluffy texture. You also explored variations and storage methods to make it even easier.
In closing, coconut lime rice is both easy to make and delicious. Enjoy experimenting with flavors and finding the best way to serve it.


![This recipe is simple and fun to make. Here’s what you need: - 1 lb large shrimp, peeled and deveined - 4 tablespoons unsalted butter - 4 cloves garlic, minced - 1 teaspoon red pepper flakes (adjust to taste) - 1 lemon, juiced and zested - 1/4 cup chicken broth - 1/4 cup freshly chopped parsley - Salt and pepper to taste - 8 oz linguine or spaghetti - Grated Parmesan cheese for serving (optional) If you don’t have some ingredients, don’t worry! Here are some easy swaps: - Shrimp: You can use scallops or chicken instead. - Butter: Olive oil works well for a lighter touch. - Chicken broth: Vegetable broth or white wine can add nice flavor. - Parsley: Fresh basil or cilantro can give a different taste. - Lemon: Lime juice can be a zesty alternative. These substitutes keep the dish tasty and fun. You can mix and match as you like! This easy garlic shrimp scampi takes just 25 minutes to make. You will need about 10 minutes for prep and 15 minutes for cooking. It’s quick and perfect for busy nights. You can serve it to four people, so it’s great for a small family meal or a cozy dinner. 1. Cook the pasta: Start by boiling a large pot of salted water. Add 8 oz of linguine or spaghetti. Cook it according to the package directions until it is al dente. Remember to save 1/2 cup of the pasta water before you drain it. Set the pasta aside in a bowl. 2. Sauté the shrimp: In a large skillet, melt 2 tablespoons of butter over medium heat. Once it is bubbly, add 1 lb of peeled and deveined shrimp in a single layer. Sprinkle with salt and pepper. Cook for 2-3 minutes until they turn pink. Flip them and cook for another 1-2 minutes. Remove the shrimp and set them aside. 3. Make the garlic sauce: In the same skillet, lower the heat to medium-low. Add the remaining 2 tablespoons of butter and 4 cloves of minced garlic. Sauté for 1 minute until it smells great and turns lightly golden. Be careful not to burn the garlic. 4. Add flavor: Stir in 1 teaspoon of red pepper flakes, the juice and zest of 1 lemon, and 1/4 cup of chicken broth. Raise the heat a bit to bring this to a gentle simmer. Let it reduce for 2-3 minutes so the flavors blend well. 5. Combine everything: Add the shrimp back to the skillet, along with the cooked pasta and half of the 1/4 cup of chopped parsley. Toss gently, adding the reserved pasta water a little at a time until you reach a creamy sauce. It should not be too thick. 6. Finish and serve: Taste the dish and adjust with more salt and pepper if needed. Serve hot, topped with the rest of the parsley and some grated Parmesan cheese if you like. - Use fresh shrimp for the best taste. - Don’t overcrowd the pan when cooking shrimp. This helps them cook evenly. - Be careful with the garlic; it should be fragrant but not burnt. - Save some pasta water to adjust the sauce later. - Garnish with fresh parsley and lemon for a bright finish. For the full recipe, check out the [Full Recipe]. Enjoy your cooking! When making garlic shrimp scampi, avoid these common errors: - Overcooking shrimp: Cook shrimp for just 2-3 minutes on one side. Flip and cook for another 1-2 minutes. They should be pink and firm, not rubbery. - Burning garlic: Sauté garlic on medium-low heat. Brown garlic adds flavor, but burnt garlic ruins your dish. - Skipping pasta water: Reserve some pasta cooking water. It helps create a creamy sauce. To make your scampi even tastier: - Use fresh ingredients: Fresh shrimp and garlic will give the best flavor. - Add herbs: Fresh parsley brightens the dish. You can also try basil or oregano for extra flavor. - Experiment with spices: Adjust red pepper flakes for heat. A pinch of smoked paprika can add depth. Cooking pasta is simple, but there are key tips: - Use plenty of water: A large pot helps the pasta cook evenly. - Salt the water: This adds flavor to the pasta. Aim for a tablespoon of salt per gallon of water. - Don’t rinse pasta: Rinsing washes away the starch that helps the sauce stick. Keep it warm and toss it with the shrimp and sauce right away. For the full recipe, check out the [Full Recipe]. {{image_4}} You can easily add vegetables to your garlic shrimp scampi. Spinach, broccoli, or bell peppers work well. Just sauté them for a few minutes before adding the shrimp. This adds color and nutrients without changing the dish's taste much. Plus, you get a nice crunch with each bite. It’s a great way to sneak in some veggies for the kids or anyone who needs more greens. If you want to switch things up, you can use chicken or scallops instead of shrimp. For chicken, cut it into bite-sized pieces. Sauté it until golden and cooked through, just like the shrimp. For scallops, sear them for a few minutes on each side. Both options add their own unique flavor to the dish. This makes it fun to try new things while keeping the same garlic sauce. For a gluten-free version, use gluten-free pasta. There are many options available now, like rice or quinoa pasta. They cook similarly to regular pasta. Just follow the package instructions. You can also serve the garlic shrimp over zucchini noodles as a fresh twist. This gives you a light meal that is still full of flavor. To store leftover shrimp scampi, let it cool first. Place it in an airtight container. It can stay in the fridge for up to three days. Make sure to cover it well to keep flavors fresh. Avoid leaving it out for too long, as this can lead to spoilage. When reheating, do it gently to prevent overcooking the shrimp. Use a skillet over low heat and add a splash of broth or water. This keeps the dish moist. Stir often and check the shrimp closely. You want them warm but not rubbery. You can freeze shrimp scampi if needed. Use a freezer-safe container and leave some space for expansion. It can last for up to three months in the freezer. To thaw, place it in the fridge overnight. Reheat gently as described above. Enjoy your meal even after a long time! Yes, you can use frozen shrimp for this recipe. Just be sure to thaw them first. Place the shrimp in cold water for about 15-20 minutes. This helps them defrost quickly and evenly. Using frozen shrimp is a great time saver and still gives you a tasty dish. You can tell shrimp are done when they turn bright pink and curl slightly. This usually takes about 3-5 minutes of cooking. If they look opaque and firm, they are ready to eat. Overcooking can make them tough, so keep a close eye! Garlic shrimp scampi pairs well with several dishes. Here are some ideas: - A fresh green salad with lemon vinaigrette. - Garlic bread for a delicious side. - Steamed vegetables like broccoli or asparagus for color. - A glass of white wine, such as Sauvignon Blanc, to enhance the meal. Exploring these options will make your meal even better. Enjoy mixing flavors and textures! You can create a delicious Garlic Shrimp Scampi using easy ingredients and simple steps. The recipe includes cooking tips to prevent mistakes and ways to boost flavor. You can also make variations by adding veggies or using chicken. Remember to store leftovers properly and reheat them for the best taste. This dish brings joy to any meal. By following this guide, you can impress family and friends with your cooking skills. Enjoy making your own tasty Shrimp Scampi!](https://joymealplan.com/wp-content/uploads/2025/06/198ad0f3-6fc3-464f-bcc6-4256f6587cb9-768x768.webp)


![To make Easy Chicken Tikka Masala, gather these key ingredients: - 500g boneless chicken thighs, cut into bite-sized pieces - 1 cup plain yogurt - 2 tablespoons garam masala - 1 tablespoon ground cumin - 1 teaspoon ground coriander - 1 teaspoon paprika - 1 teaspoon turmeric - 1 tablespoon ginger, minced - 3 cloves garlic, minced - 1 onion, finely chopped - 1 can (400g) crushed tomatoes - 1 cup coconut milk - 2 tablespoons vegetable oil - Salt to taste - Fresh cilantro for garnish These ingredients create a rich, creamy sauce that brings the dish to life. The yogurt is key for tender chicken. The spices add depth and warmth, making every bite flavorful. You can customize your Chicken Tikka Masala with these optional ingredients: - Lemon juice for brightness - Green chili for heat - Bell peppers for crunch - Peas for color Adding these extras can change the flavor profile and make it your own. Feel free to mix and match based on your taste. If you have allergies, there are simple swaps you can use: - Use almond or soy yogurt instead of dairy yogurt. - Swap coconut milk for almond milk for a nut-free option. - Replace chicken with tofu or chickpeas for a vegan dish. These substitutions keep the dish delicious while catering to your dietary needs. Enjoy your cooking adventure! For the complete recipe, check out the Full Recipe link. First, grab a large bowl. Mix 1 cup of plain yogurt, 2 tablespoons of garam masala, 1 tablespoon of ground cumin, 1 teaspoon of ground coriander, 1 teaspoon of paprika, 1 teaspoon of turmeric, 1 tablespoon of minced ginger, 3 cloves of minced garlic, and a pinch of salt. Stir well until it’s smooth. Now, add 500g of bite-sized chicken thighs. Make sure each piece is coated well with the marinade. Cover the bowl with plastic wrap. Pop it in the fridge for at least 30 minutes. For the best taste, let it sit overnight. Next, heat 2 tablespoons of vegetable oil in a large skillet over medium-high heat. Once hot, add 1 finely chopped onion. Cook the onion for 5-7 minutes. You want it to turn golden brown and soft. This step adds a sweet flavor. After the onion is ready, add the marinated chicken. Cook it for about 8-10 minutes. Stir it occasionally to brown all sides evenly. Once the chicken is browned, it’s time to add more flavor. Pour in 1 can of crushed tomatoes. Stir gently to mix everything. Bring the mixture to a gentle simmer. Let it simmer for about 10 minutes. Stir it now and then to stop it from sticking. After that, slowly pour in 1 cup of coconut milk. Stir again to combine. Simmer for another 10 minutes. This makes the sauce thick and creamy. Taste and add more salt if needed. Finish by garnishing with fresh cilantro for a pop of color and taste. To get the best flavor in your Chicken Tikka Masala, start with fresh spices. Fresh spices give a robust taste that dried spices lack. Use whole spices when possible, and grind them yourself. This step unleashes their natural oils and aromas. Another key is the yogurt marinade. It adds tenderness and tang. Marinate your chicken for at least 30 minutes, but overnight is best. This waiting time allows the spices to soak in fully. For perfect chicken, cook it in batches. Overcrowding the pan steams the meat instead of browning it. Use medium-high heat to get a nice sear on the chicken. This creates a deep flavor that you want. Once you add the crushed tomatoes and coconut milk, let it simmer gently. This step helps the flavors meld together beautifully. You can make Chicken Tikka Masala ahead of time. Cook it fully, then let it cool. Store it in an airtight container in the fridge for up to three days. Reheat it on low heat, adding a splash of water if needed. This dish also freezes well. Portion it out and freeze it for up to three months. When you're ready, thaw it overnight in the fridge and reheat. For more details, check the Full Recipe. {{image_4}} You can easily make a vegetarian version of Chicken Tikka Masala. Replace the chicken with firm tofu or vegetables like bell peppers and zucchini. Tofu soaks up flavors well. Marinate it the same way as chicken. Cook it in the same sauce for that rich taste. This way, you keep the essence of the dish while making it meat-free. If you enjoy spicy food, add some heat to your Chicken Tikka Masala. You can include chopped green chilies or a pinch of cayenne pepper in the marinade. Adjust the spice level to your liking. Just remember, a little heat goes a long way! You can also serve it with a side of spicy chutney for an extra kick. You can swap chicken for other proteins too. Paneer, a fresh cheese, works great in this dish. Cut the paneer into cubes and marinate it just like the chicken. Cook it in the same way for a rich and creamy meal. Tofu and paneer both add their own unique texture and flavor to the dish. This makes it more exciting and diverse for your taste buds. For the complete recipe, check out the [Full Recipe]. To keep your Chicken Tikka Masala fresh, let it cool down first. Use an airtight container for storage. Place it in the fridge. It will stay good for about three to four days. For best results, store it without the rice or naan. To enjoy your Chicken Tikka Masala again, use the stove or microwave. If using the stove, heat it over low heat. Stir often to prevent sticking. If using the microwave, cover the dish and heat in short bursts. This way, it warms evenly. Always check the temperature to ensure it is hot throughout. You can freeze Chicken Tikka Masala if you want to save some for later. Place it in a freezer-safe container or bag. Make sure to leave some space for expansion. It can stay good for up to three months. When you’re ready to eat, thaw it in the fridge overnight. Reheat it on the stove or microwave, and enjoy this rich flavor again! For the full recipe, check the section above. You should marinate chicken for at least 30 minutes. For the best taste, let it sit overnight. This allows the spices to soak in deeply. The yogurt keeps the chicken tender while adding flavor. Yes, you can use bone-in chicken. It will add more flavor to your dish. Just be aware that it may take longer to cook. Adjust your cooking time to ensure the chicken is fully cooked. Serve Chicken Tikka Masala with fluffy basmati rice or warm naan. Both options soak up the rich sauce well. You can also add a side of cucumber salad for a fresh crunch. For the complete recipe, check out the Full Recipe section. You’ll find all the steps to make this rich, flavorful dish in no time! In this post, we covered the key ingredients for easy Chicken Tikka Masala, from marinade to sauce. I shared tips for perfect flavor and cooking techniques. You can even explore vegetarian options or different proteins like tofu. Storing leftovers properly ensures you enjoy this dish later. Remember, marinating the chicken is key, and you can customize it to your taste. With these steps, you’ll cook a delicious meal that’s sure to impress!](https://joymealplan.com/wp-content/uploads/2025/07/18c11e8b-b17f-4eb1-983f-851954d1111b-768x768.webp)