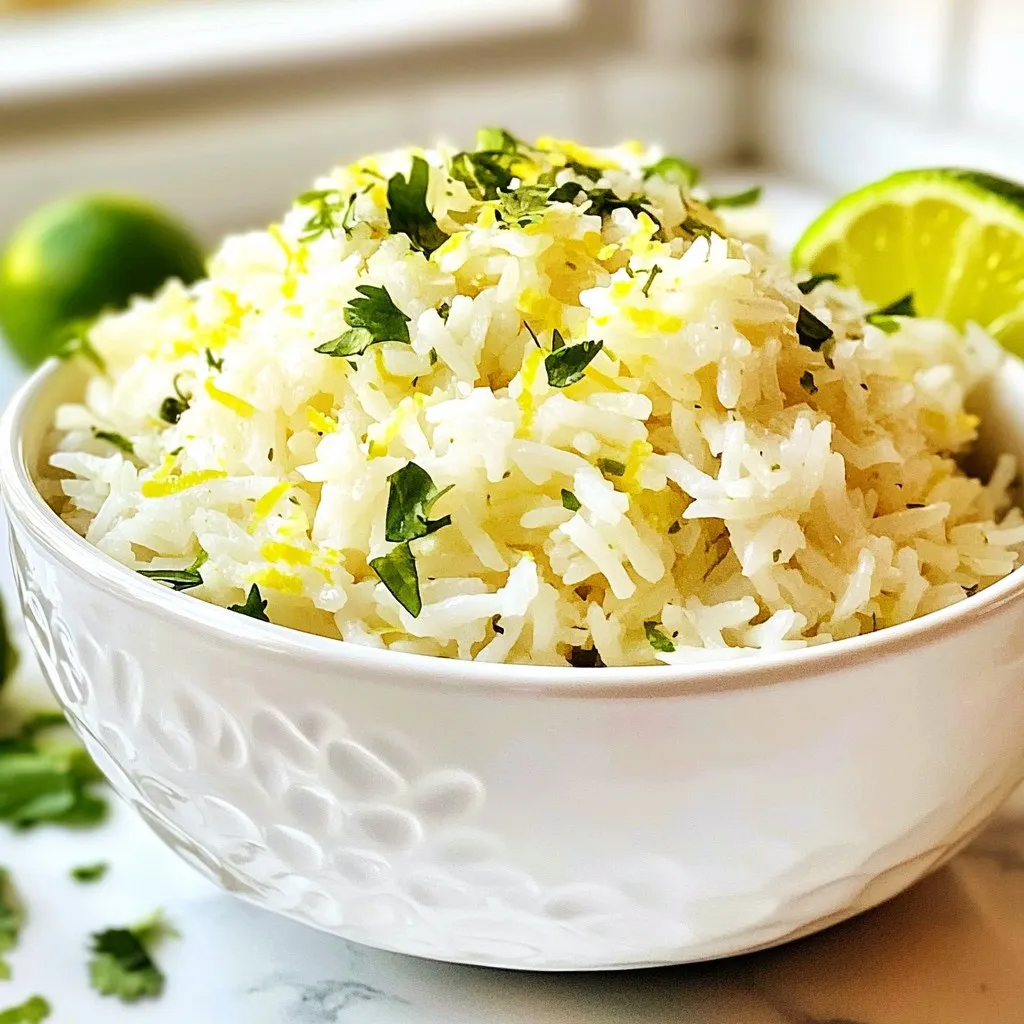
Are you ready to elevate your meal with a burst of tropical flavor? Coconut Lime Rice is a fluffy delight that combines creamy coconut and zesty lime. This dish is simple to make and full of vibrant taste, perfect as a side or a main. Join me as I guide you through easy steps to create this delicious recipe while offering tips for perfect results. Let’s dive into the world of Coconut Lime Rice!
Why I Love This Recipe
- Refreshing Flavor: The combination of coconut and lime creates a light, tropical taste that’s perfect for any meal.
- Quick and Easy: This recipe is simple to follow and can be made in just 30 minutes, making it a great choice for busy weeknights.
- Versatile Side Dish: Coconut lime rice pairs wonderfully with various proteins, from grilled chicken to shrimp, enhancing any dish.
- Beautiful Presentation: The vibrant colors of lime and cilantro make this dish visually appealing, perfect for impressing guests.
Ingredients
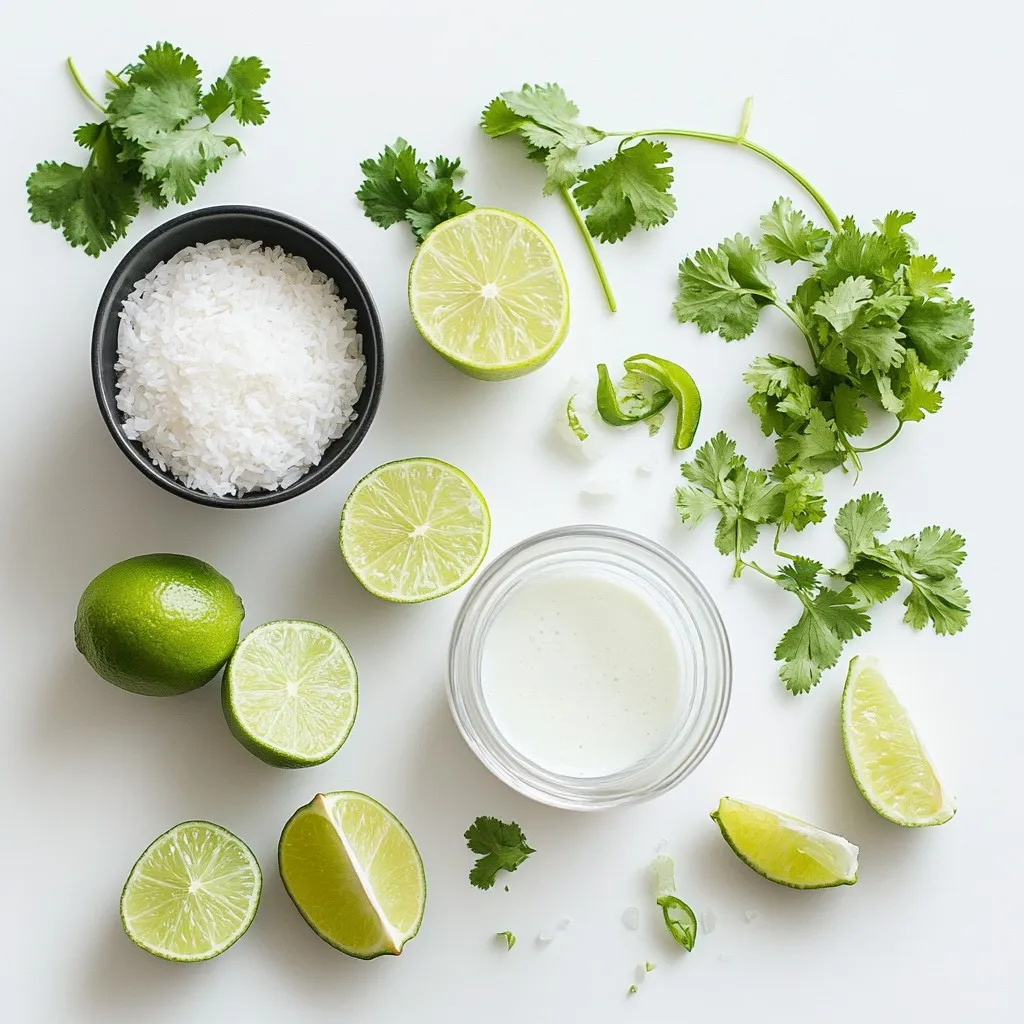
List of Ingredients
– 1 cup jasmine rice
– 1 cup coconut milk
– 1 cup water
– 1 tablespoon fresh lime zest
– 2 tablespoons fresh lime juice
– 1 teaspoon granulated sugar
– 1/2 teaspoon sea salt
– Fresh cilantro, chopped (for garnish)
– Lime wedges (for serving)
Ingredient Substitutions
You can swap jasmine rice with other rice types, like basmati or long-grain. Canned coconut milk works well, but fresh coconut milk gives richer flavor. If you don’t have lime, try lemon zest and juice instead. These swaps can help you create the dish with what you have on hand. Remember, each change can alter the flavor slightly, so adjust to your taste.
Step-by-Step Instructions
Preparation Steps
– Rinsing the rice: Start by rinsing 1 cup of jasmine rice. Use a fine-mesh strainer and run cold water over it. Keep rinsing until the water runs clear. This step is key. It removes extra starch and helps the rice stay fluffy.
– Combining ingredients in the saucepan: Next, grab a medium saucepan. Add the rinsed rice. Pour in 1 cup of coconut milk and 1 cup of water. Add 1 tablespoon of fresh lime zest, 1 teaspoon of sugar, and 1/2 teaspoon of sea salt. Stir everything well to mix the ingredients.
Cooking Process
– Boiling the mixture: Place the saucepan on medium heat. Watch closely as the mixture heats up. You want it to come to a gentle boil. Be careful not to let it boil over.
– Simmering tips for perfect rice: Once the mixture boils, lower the heat to a simmer. Cover the saucepan tightly with a lid. Let it cook for about 15 to 18 minutes. Do not lift the lid. This keeps the steam in, which is vital for cooking the rice perfectly.
Finishing Touches
– Letting the rice rest: After cooking, take the saucepan off the heat but leave it covered. Let it sit for an extra 5 minutes. This step helps the rice absorb any remaining moisture.
– Fluffing and adding lime flavor: Carefully remove the lid. Use a fork to fluff the rice gently. Drizzle 2 tablespoons of fresh lime juice over the rice. Mix lightly to spread the lime flavor all around. Taste the rice and adjust if you want more lime or salt.
Tips & Tricks
Common Mistakes to Avoid
– Avoiding gummy rice: Rinsing the jasmine rice is key. You want to wash away the excess starch. Use cold water until it runs clear. This method helps keep your rice fluffy.
– Proper simmering techniques: When the mixture comes to a boil, reduce the heat to low. Cover the pan tightly to trap steam. Avoid lifting the lid while it cooks. This ensures even cooking and soft rice.
Enhancing Flavor
– Adjusting lime intensity: If you want a stronger lime flavor, add more lime juice. Start with a teaspoon at a time. Taste as you go to find your perfect balance.
– Additional seasoning options: You can add spices like garlic or ginger. Fresh herbs like cilantro also boost the flavor. A pinch of chili powder can add heat if you like spice.
Serving Suggestions
– Presentation ideas: Serve the rice in a nice bowl. Garnish it with chopped cilantro and lime wedges. This adds a fresh look and makes it inviting.
– Pairing recommendations with main dishes: Coconut lime rice goes well with grilled chicken or fish. It also pairs nicely with spicy dishes. Try it alongside curries for a great match.
Pro Tips
- Rinse for Fluffiness: Thoroughly rinsing the rice before cooking removes excess starch, resulting in a fluffier texture.
- Measure Liquid Precisely: Ensure the coconut milk and water are measured accurately for the perfect rice consistency—too much liquid can lead to mushy rice.
- Keep the Lid On: Avoid lifting the lid while the rice is simmering; this keeps the steam trapped, ensuring even cooking and preventing dryness.
- Customize Citrus Flavor: Adjust the amount of lime juice to your taste; adding a bit more can enhance the freshness and brightness of the dish.
Variations
Flavor Add-ins
You can easily enhance coconut lime rice with fun add-ins. Adding vegetables is a great choice. Peas and bell peppers add color and nutrients. Simply stir them in during the last few minutes of cooking.
You can also explore spices for extra flavor. Fresh ginger and minced garlic work wonderfully. They bring warmth and depth to the dish. Cook them briefly in the saucepan before adding rice for the best results.
Dietary Adjustments
If you want vegan options, this recipe is already friendly. Coconut milk is dairy-free, making it a perfect choice. You can enjoy this dish guilt-free while still keeping it tasty.
For gluten-free needs, you are in luck! Jasmine rice is gluten-free. This means you can serve it to anyone avoiding gluten. Just check your broth or stock if you use any.
International Twists
Try a Thai twist on your coconut lime rice. Add a splash of fish sauce or soy sauce. This adds umami and depth, creating a mouthwatering dish.
For a Caribbean flavor, consider adding black beans or pineapple. These ingredients bring a tropical vibe. They pair perfectly with the coconut and lime for a fun twist. Enjoy exploring these variations for your meals!
Storage Info
Storing Coconut Lime Rice
To keep your coconut lime rice fresh, follow these tips:
– Refrigeration: Allow the rice to cool completely. Store it in an airtight container. It will last up to 4 days in the fridge.
– Freezing: If you want to freeze it, place the cooled rice in freezer-safe bags. Squeeze out excess air and seal them tightly. The rice can stay frozen for up to 3 months.
Reheating Methods
When it’s time to enjoy your coconut lime rice again, you have a couple of options:
– Microwave: Put the rice in a bowl. Add a splash of water to keep it moist. Cover it with a damp paper towel. Heat in 30-second bursts, stirring in between, until warm.
– Stove: Place the rice in a pan with a little water or coconut milk. Heat over low heat. Stir often to keep it from sticking. This method helps retain the rice’s lovely texture and flavor.
Using these storage and reheating methods keeps your coconut lime rice delightful and ready to enjoy!
FAQs
How long does coconut lime rice last in the fridge?
Coconut lime rice lasts about three to four days in the fridge. Store it in an airtight container. This keeps it fresh and prevents it from drying out.
Can I use brown rice instead of jasmine rice?
Yes, you can use brown rice. However, it will need more liquid and a longer cooking time. Brown rice takes about 40-45 minutes to cook. Adjust your coconut milk and water ratios accordingly to keep it creamy.
What dishes pair well with coconut lime rice?
Coconut lime rice pairs well with many dishes. Here are some great options:
– Grilled chicken or shrimp
– Fish tacos
– Stir-fried vegetables
– Curry dishes
– Tofu for a vegan option
Is it possible to make coconut lime rice ahead of time?
Yes, you can make coconut lime rice ahead of time. Cook it and let it cool, then store it in the fridge. Just reheat it before serving. You may need to add a splash of water to avoid dryness.
What are the nutritional benefits of coconut lime rice?
Coconut lime rice offers several benefits:
– Jasmine rice provides energy through carbohydrates
– Coconut milk adds healthy fats
– Lime juice boosts vitamin C intake
– Fresh cilantro adds antioxidants and flavor
This dish is tasty and provides a balance of nutrients!
In this blog post, we explored the key ingredients for coconut lime rice, step-by-step cooking instructions, and useful tips. I shared ingredient substitutions and variations, making the dish adaptable to your taste. Lastly, we covered storage methods to keep your rice fresh and safe.
Use these simple steps and tricks to create a tasty dish. Enjoy experimenting with flavors and serving it with your favorite meals! Your journey in cooking coconut lime rice can be fun and rewardin


