Cottage Cheese Ranch Dip Delightful and Simple Snack

If you’re looking for a quick, tasty snack, you’re in the right place! I’ll show you how to make a delicious Cottage Cheese Ranch Dip that combines creamy goodness with bold flavors. This dip is not only simple to prepare but also versatile enough to wow at parties or just satisfy your cravings. Join me as we explore the easy steps and tips to turn cottage cheese into a delightful treat!
Ingredients
Main Ingredients List
– 1 cup cottage cheese
– 1/2 cup sour cream
– 1/4 cup mayonnaise
– 2 tablespoons ranch seasoning mix
– 1 green onion, finely chopped
– 1 teaspoon garlic powder
– 1 teaspoon onion powder
– 1/2 teaspoon freshly ground black pepper
Optional Garnishes
– Fresh dill, for garnish
Tools You Will Need
– Mixing bowl
– Whisk or spatula
– Plastic wrap
Step-by-Step Instructions
Preparation of Base Mixture
Start by gathering your ingredients. In a large mixing bowl, add 1 cup of cottage cheese, 1/2 cup of sour cream, and 1/4 cup of mayonnaise. Use a whisk or a spatula to mix them well. Aim for a smooth and creamy blend. This mixture is the heart of your dip.
Mixing in Seasonings
Next, it’s time to flavor your dip. Add 2 tablespoons of ranch seasoning mix, 1 teaspoon of garlic powder, 1 teaspoon of onion powder, and 1/2 teaspoon of freshly ground black pepper to the bowl. Stir everything together until the dry ingredients are fully mixed in. Make sure there are no lumps. This step makes your dip rich in flavor.
Chilling for Flavor Enhancement
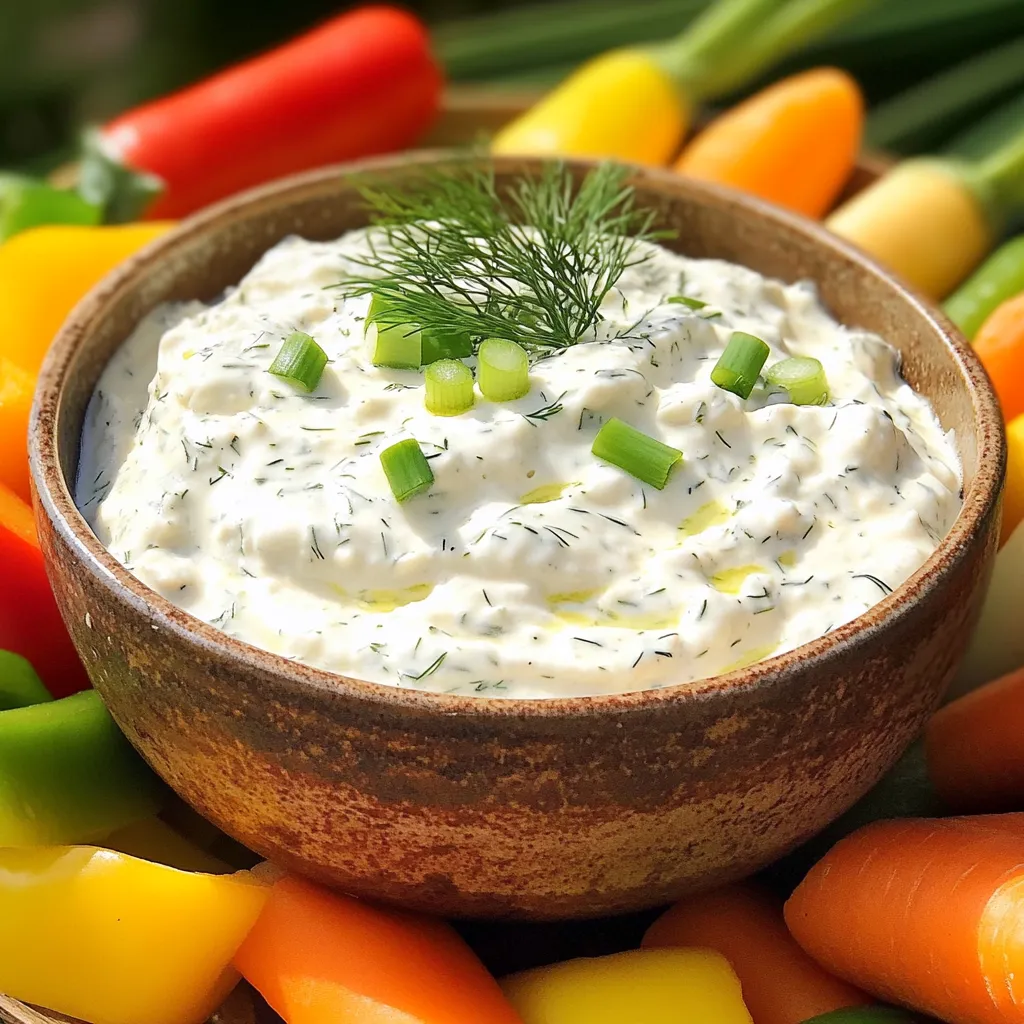
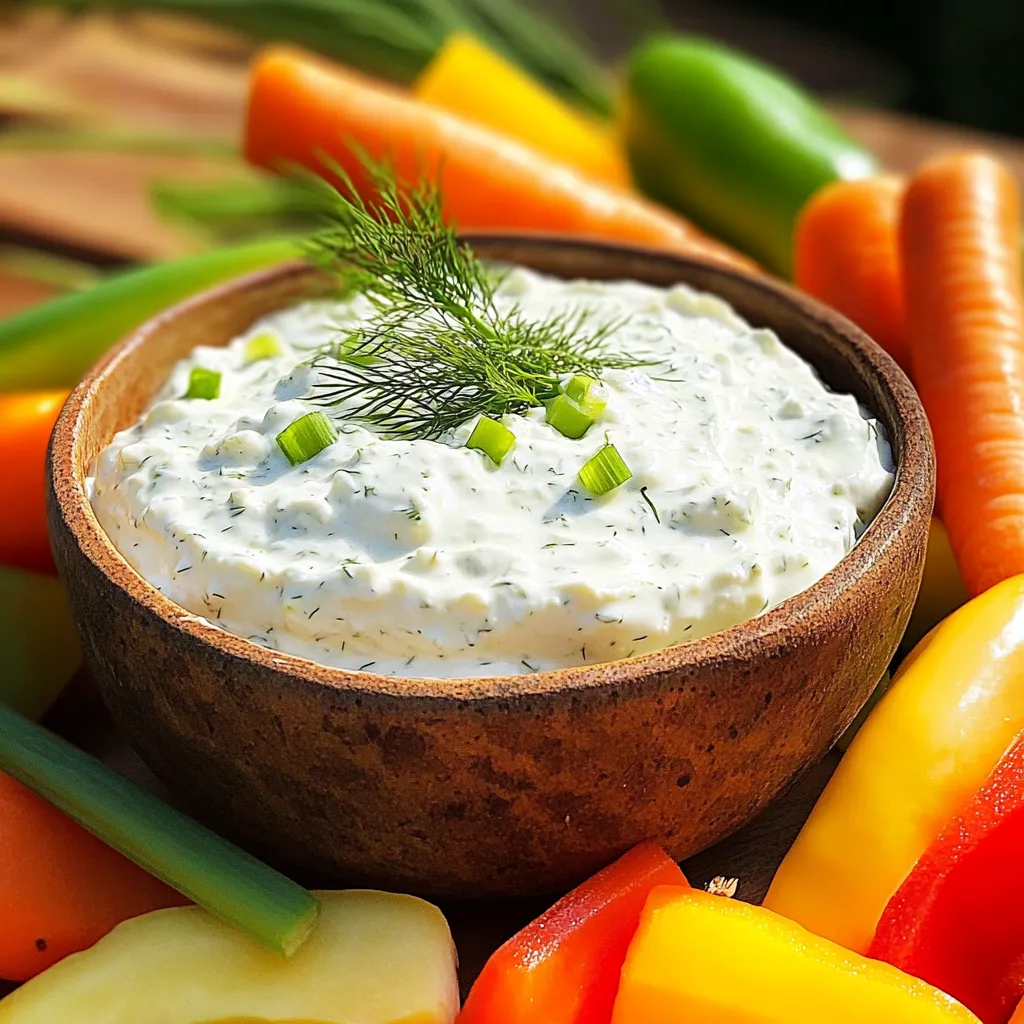
Once the dip is mixed well, fold in the finely chopped green onion. This gives a nice crunch and an extra burst of flavor. Taste the dip, and adjust the seasonings if needed. After that, cover the bowl with plastic wrap. Place it in the fridge for at least 30 minutes. This chilling time lets all the flavors come together. Just before serving, stir the dip again. Optionally, add fresh dill on top for a nice touch. Enjoy your dip with fresh veggies or crunchy chips!
Tips & Tricks
Achieving the Perfect Creamy Texture
To get that smooth and creamy dip, start with fresh cottage cheese. I like to use small curd cottage cheese for a velvety bite. Mix it well with sour cream and mayonnaise. Use a whisk or spatula to blend until there are no lumps. This step is key to a great texture. If you want it even creamier, blend the mixture in a food processor. This creates a dip that is rich and smooth.
Customizing Seasonings to Taste
Once you mix in the ranch seasoning, garlic powder, onion powder, and black pepper, taste your dip. You can adjust the flavor to fit your liking. If you want a stronger ranch flavor, add more ranch mix. For a kick, try adding a pinch of cayenne pepper or a dash of hot sauce. Remember, the goal is to make it taste just right for you.
Presentation Ideas for Serving
When it comes to serving, presentation matters. Use a rustic bowl to hold your dip. Surround it with colorful, sliced veggies like carrots, cucumbers, and bell peppers. You can also add a variety of crunchy chips to the platter. For a finishing touch, sprinkle fresh dill on top. This adds a pop of color and a nice aroma. Your dip will not only taste great but also look amazing!

Variations
Adding Extra Vegetables
You can easily boost your dip with extra veggies. Try adding chopped bell peppers, carrots, or cucumbers. These add color and crunch. Mixing in some grated zucchini or shredded carrots enhances the nutrition. You can also fold in diced tomatoes for freshness. These veggies make the dip more fun and crunchy.
Spicy Cottage Cheese Ranch Dip
If you want some heat, add spicy elements. Mix in diced jalapeños or a splash of hot sauce. This gives your dip a nice kick. You can also try adding cayenne pepper for extra spice. Just remember to taste as you go. Adjust the heat to your liking.
Alternative Seasoning Ideas
Feel free to play with seasonings. Instead of ranch mix, try taco seasoning for a zesty twist. You can also use Italian herbs for a fresh taste. A sprinkle of paprika adds a subtle smoky flavor. Experimenting with different spices can lead to new favorites. Each variation can make your dip unique and exciting!
Storage Info
Best Practices for Storing Leftovers
To keep your cottage cheese ranch dip fresh, store it in an airtight container. This helps prevent air from spoiling the dip and keeps it creamy. Make sure the lid fits snugly. If you use a bowl, cover it tightly with plastic wrap. Always let the dip cool to room temperature before storing.
How Long Does It Last?
This dip can last in the fridge for about 3 to 5 days. The flavors will blend nicely over time. However, if you see any change in color or smell, it’s best to throw it away. Always check for freshness before enjoying leftovers.
Reheating Instructions
You do not need to heat this dip. It tastes great cold. If you prefer it warm, you can gently warm it in the microwave. Use a low setting and heat it for short bursts. Stir in between to avoid hot spots. Enjoy your creamy dip either way!
FAQs
Can I make this dip in advance?
Yes, you can make this dip ahead of time. It tastes even better after chilling. I recommend making it a few hours before your event. This gives the flavors time to blend nicely. Just cover it tightly and keep it in the fridge.
What can I use instead of sour cream?
If you want a substitute for sour cream, try plain yogurt. Greek yogurt works well too. It adds a nice creaminess and tang, similar to sour cream. You can also use a little more cottage cheese for a lighter dip.
Is this dip suitable for meal prep?
Absolutely! This dip is great for meal prep. You can make it in advance and store it in an airtight container. It holds up well in the fridge for several days. Pair it with veggies or chips for healthy snacks all week.
This blog post covered how to make a great dip from scratch. You learned about the key ingredients, helpful tips, and variations to try. I shared easy steps for mixing and chilling to get the best flavor. Remember to store leftovers well and consider meal prep options. Experimenting with spices can make your dip truly unique. Enjoy crafting and sharing this tasty treat!


![This Mediterranean chickpea salad is fresh and easy. You can make it in just 15 minutes. It’s perfect for a quick lunch or a side dish. You can find the full recipe at the bottom. Here are the ingredients you will need: - 1 can (15 oz) chickpeas, drained and rinsed - 1 cup cherry tomatoes, halved - 1 cucumber, diced into bite-sized pieces - 1/2 red onion, finely chopped - 1/3 cup Kalamata olives, pitted and sliced - 1/4 cup feta cheese, crumbled - 2 tablespoons fresh parsley, chopped - 2 tablespoons extra virgin olive oil - 2 tablespoons fresh lemon juice - 1 teaspoon dried oregano - Salt and freshly ground black pepper to taste When you pick your ingredients, look for bright colors and firm textures. For tomatoes, choose ones that feel heavy for their size. A ripe cucumber should be smooth and firm. When selecting red onion, avoid any that have soft spots. For olives, pick a jar that looks full and well-sealed. Fresh herbs should smell fragrant and look vibrant. Always choose extra virgin olive oil for the best flavor. Finally, opt for feta that is creamy and not too dry. First, grab a large mixing bowl. Add the drained and rinsed chickpeas to the bowl. Next, toss in the halved cherry tomatoes and diced cucumber. Chop the red onion finely and add that too. Finally, include the sliced Kalamata olives. Gently mix everything to blend well. Now, it’s time for cheese and herbs. Sprinkle the crumbled feta cheese over the chickpea mix. Then, add the chopped fresh parsley. This will give the salad a nice pop of color and flavor. In a small bowl, whisk together the extra virgin olive oil and fresh lemon juice. Add the dried oregano, salt, and freshly ground black pepper. Mix until everything is well combined. This dressing will bring the salad to life. Pour the dressing over the chickpea mixture. Use a spatula or large spoon to toss gently. Make sure all the ingredients are well coated with the dressing. This step helps every bite taste amazing. Take a moment to taste your salad. If it needs more flavor, add more salt, pepper, or lemon juice. Adjust the seasoning until it suits your taste. This is your salad, so make it yours! Cover the bowl with plastic wrap or a lid. Place the salad in the fridge for at least 30 minutes. Chilling allows the flavors to meld beautifully. This step is key for a refreshing salad. Once chilled, it’s time to serve. You can serve it straight from the fridge or at room temperature. For a special touch, garnish with more crumbled feta and parsley. This adds a nice finish and makes it look inviting. For the full recipe, check out the [Full Recipe] section. When making Mediterranean Chickpea Salad, always use fresh ingredients. Fresh herbs and ripe tomatoes make a big difference. Rinse your chickpeas well to remove any canning liquid. This helps improve flavor and texture. Cut your vegetables into similar sizes for even bites. It makes the salad look nice and taste better. You can prepare this salad a day in advance. Just follow the recipe and chill it in the fridge. The flavors will blend well overnight. If you make it ahead, wait to add the feta and parsley until right before serving. This keeps them fresh and tasty. Serve this salad as a light lunch or as a side dish. It pairs nicely with grilled chicken or fish. You can also serve it with pita bread or hummus for a fun twist. For extra crunch, add some toasted nuts or seeds on top. Feel free to experiment with your favorite ingredients! Check out the Full Recipe for more ideas. {{image_4}} You can change some ingredients if you want. For example, swap feta cheese for avocado. This adds creaminess and healthy fats. If you don’t like olives, try capers instead. They bring a nice tangy flavor. You can also use any fresh herbs you like, such as mint or cilantro. This salad fits many diets. It’s already vegan if you skip the feta cheese. For low-carb eaters, reduce chickpeas and add more veggies. You can make it gluten-free by using only safe ingredients. This salad is hearty, making it perfect for those on a plant-based diet. You can change the salad with the seasons. In spring, add fresh peas or asparagus. In summer, include bell peppers or zucchini. In fall, roasted squash adds warmth. In winter, use kale for a hearty twist. You can mix and match as you like for a fresh vibe each time. Using the Full Recipe, you can create a delightful dish that fits any season or diet. Store any leftover Mediterranean Chickpea Salad in an airtight container. This keeps it fresh. Place the container in the fridge. The cold air helps maintain flavor and texture. While I don’t recommend freezing this salad, you can freeze the chickpeas. Drain and rinse them first. Place them in a freezer-safe bag. Squeeze out the air before sealing. They can last up to three months in the freezer. The salad lasts about three days in the fridge. After that, the veggies may get soggy. To keep it fresh longer, store the dressing separately. Combine it right before serving. This keeps all the flavors bright and tasty. For more details on preparing the dish, refer to the Full Recipe. Yes, you can use dried chickpeas. Just soak them overnight. Cook them until tender. This method takes longer but adds great flavor. This salad pairs well with grilled chicken or fish. You can also serve it with pita bread or quinoa. It makes a tasty side dish or a light main meal. The salad can stay fresh in the fridge for about three days. Keep it in a sealed container. The flavors will deepen as it sits. Absolutely! Just skip the feta cheese. You can replace it with vegan cheese or leave it out. The salad still tastes great without it. Yes, this Mediterranean Chickpea Salad is gluten-free. All the ingredients are safe for a gluten-free diet. Enjoy it without worry! This blog post covers how to make a delicious Mediterranean Chickpea Salad. We started with key ingredients and then went through step-by-step instructions. You learned valuable tips for prep and how to store leftovers. Variations allow for personal taste and dietary needs. In conclusion, with simple steps and fresh ingredients, you can create a tasty dish. Enjoying this salad can be fun and healthy. Experiment with it to make it your own!](https://joymealplan.com/wp-content/uploads/2025/05/7c349552-9bfa-4234-aaf2-b24410fd6834-768x768.webp)

![- 1 can (15 oz) chickpeas, thoroughly drained and rinsed - 1 perfectly ripe avocado, peeled and pitted - 1 cup cherry tomatoes, halved - 1 medium cucumber, diced - 1/4 red onion, finely chopped - 1/4 cup fresh cilantro, chopped - 2 tablespoons freshly squeezed lemon juice - 1 tablespoon high-quality olive oil - Sea salt and freshly ground black pepper - 1/4 teaspoon ground cumin - Extra herbs for garnish - Each serving has about 200 calories. - Key vitamins include vitamin C, vitamin K, and fiber. This avocado chickpea salad packs a punch of flavor and nutrients! You get protein from chickpeas, healthy fats from avocado, and lots of vitamins from fresh veggies. The combo is not just tasty; it is good for you too. Pair this salad with pita chips for a crunchy bite. For the full recipe, check out the [Full Recipe]. To start, you need to mash the avocado. Take a ripe avocado and cut it in half. Remove the pit and scoop the flesh into a bowl. Use a fork to mash it. You want it creamy but still chunky. This adds a nice texture to your salad. Next, mix in the chickpeas. Open a can of chickpeas, drain and rinse them well. Carefully add them to the mashed avocado. Gently fold the chickpeas into the avocado. Be careful not to mash them. You want to keep the chickpeas whole for great bites. Now it's time to add in your vegetables. Chop up one cup of cherry tomatoes in half, dice a cucumber, and finely chop a quarter of a red onion. Don’t forget the cilantro! Add all these colorful veggies to your bowl. Gently mix everything together until the ingredients are well combined and coated in avocado. Then, you’ll make the dressing. In a small bowl, whisk together two tablespoons of freshly squeezed lemon juice and one tablespoon of high-quality olive oil. Add sea salt and freshly ground black pepper to taste. If you like, you can add a quarter teaspoon of ground cumin for extra flavor. This dressing will brighten the salad and tie everything together nicely. Now, drizzle the dressing over the chickpea and avocado mixture. Toss the salad gently. Make sure each ingredient gets a nice coat of dressing. Taste the salad. If it needs more flavor, adjust your seasoning. You can add more salt or lemon juice if you want it brighter. For the best taste, serve your salad right away. If you have time, let it chill in the refrigerator for 15-20 minutes. This allows the flavors to mix well. Don’t forget to check out the Full Recipe for more details! To select ripe avocados, look for ones that yield slightly when pressed. They should feel soft but not mushy. If they are hard, leave them at room temperature for a few days. Once ripe, keep them in the fridge to slow down the ripening process. To store leftover salad, use an airtight container. This keeps the salad fresh for up to two days. If you notice browning from the avocado, add a bit more lemon juice to help keep it vibrant. For a tasty pairing, serve your salad with crispy pita chips. The crunch adds a fun texture. You can also enjoy it on toasted bread for a quick meal. To present the salad, use a colorful bowl. Garnish with extra cilantro for a lively look. A sprinkle of sea salt on top can enhance the visual appeal, too. One common mistake is over-mashing the avocado. You want a creamy yet chunky texture. This keeps the salad interesting. Another mistake is not seasoning adequately. Be sure to taste and adjust your salt and lemon juice. Proper seasoning brings out all the fresh flavors in this dish. {{image_4}} You can easily boost your avocado chickpea salad with protein. Here are two great options: - Grilled chicken or shrimp: Both add a delicious, savory flavor. Just grill them and slice them up before mixing in. - Tofu for a vegetarian option: Tofu is a great meat substitute. Use firm tofu, press it, and cube it. Then toss it in for added protein. Adding new flavors can make your salad even better. Try these ideas: - Adding feta cheese: Crumbled feta adds a tangy taste that pairs well with the creamy avocado. - Experimenting with different dressings: You can switch up the dressing to change the flavor. Try balsamic, ranch, or a spicy vinaigrette for a twist. Using fresh, seasonal ingredients makes your salad shine. Here are some tips: - Incorporating seasonal veggies: Add bell peppers, radishes, or zucchini when they are in season for extra crunch and flavor. - Switching up herbs for different flavors: Try basil, parsley, or dill instead of cilantro to give your salad a new taste. These variations can turn your avocado chickpea salad into a unique dish every time you make it. For the full recipe, check out the earlier section. To keep your salad fresh, store it in the fridge. Use an airtight container to seal in the flavors. This method helps prevent browning and keeps the salad crisp. If you have space, consider using glass containers. They do not absorb odors and help you see the salad clearly. This salad lasts about three days in the fridge. After that, the ingredients may start to spoil. Check for signs like brown avocado or a sour smell. If you see either, it’s best to toss the salad. Freshness is key to enjoying this dish. Can you freeze avocado chickpea salad? I do not recommend freezing it. The avocado and tomatoes do not freeze well. They can become mushy when thawed. If you want to freeze, store the chickpeas and veggies separately. This way, you can mix fresh ingredients when you’re ready to eat. To make your avocado chickpea salad creamy, mash the ripe avocado well. Use a fork for this step. Aim for a mix of smooth and chunky textures. This keeps it interesting. Combine the mashed avocado with chickpeas gently. Folding helps maintain the shape of the chickpeas. Also, add a drizzle of olive oil for extra creaminess. Finally, use fresh lemon juice to brighten the flavors. These steps ensure your salad has a rich, creamy base. Yes, you can prepare this salad in advance. Start by chopping all the vegetables and storing them separately. This keeps them fresh and crisp. Mash the avocado just before serving. If you mash it early, it may brown. To keep the salad fresh, store it in an airtight container. You can also add lemon juice to the avocado to slow down browning. Chill the salad in the fridge for about 20 minutes before serving. This helps the flavors blend well. If you want to switch things up, try other legumes. White beans are a great option. They have a mild taste and a creamy texture. Black beans can add a fun twist with a bolder flavor. You can also use lentils for a different texture. Each legume gives a unique taste to the salad. So, feel free to get creative with your choices. Yes, this salad is gluten-free. All the main ingredients, like chickpeas and vegetables, are naturally free from gluten. This makes it a great option for those with gluten sensitivities. Always check your ingredient labels, especially for dressings. Some pre-made dressings may contain gluten. Using fresh lemon juice and olive oil ensures your dressing stays gluten-free. Enjoy this light and healthy salad without worry! For the full recipe, check out this Creamy Avocado Chickpea Delight. This blog post covered how to make a tasty avocado chickpea salad. We discussed key ingredients and gave precise steps for preparation. I shared helpful tips on freshness, serving ideas, and common mistakes to avoid. You can customize it with proteins or seasonal veggies. In summary, this salad is simple, nutritious, and versatile. It’s perfect for any meal. I encourage you to try it and share it with others. Enjoy crafting your delicious creation!](https://joymealplan.com/wp-content/uploads/2025/06/f9e70452-dbea-4dff-b8d7-5421933c3ab4-768x768.webp)


