Cottage Cheese Strawberry Cheesecake Parfait Delight

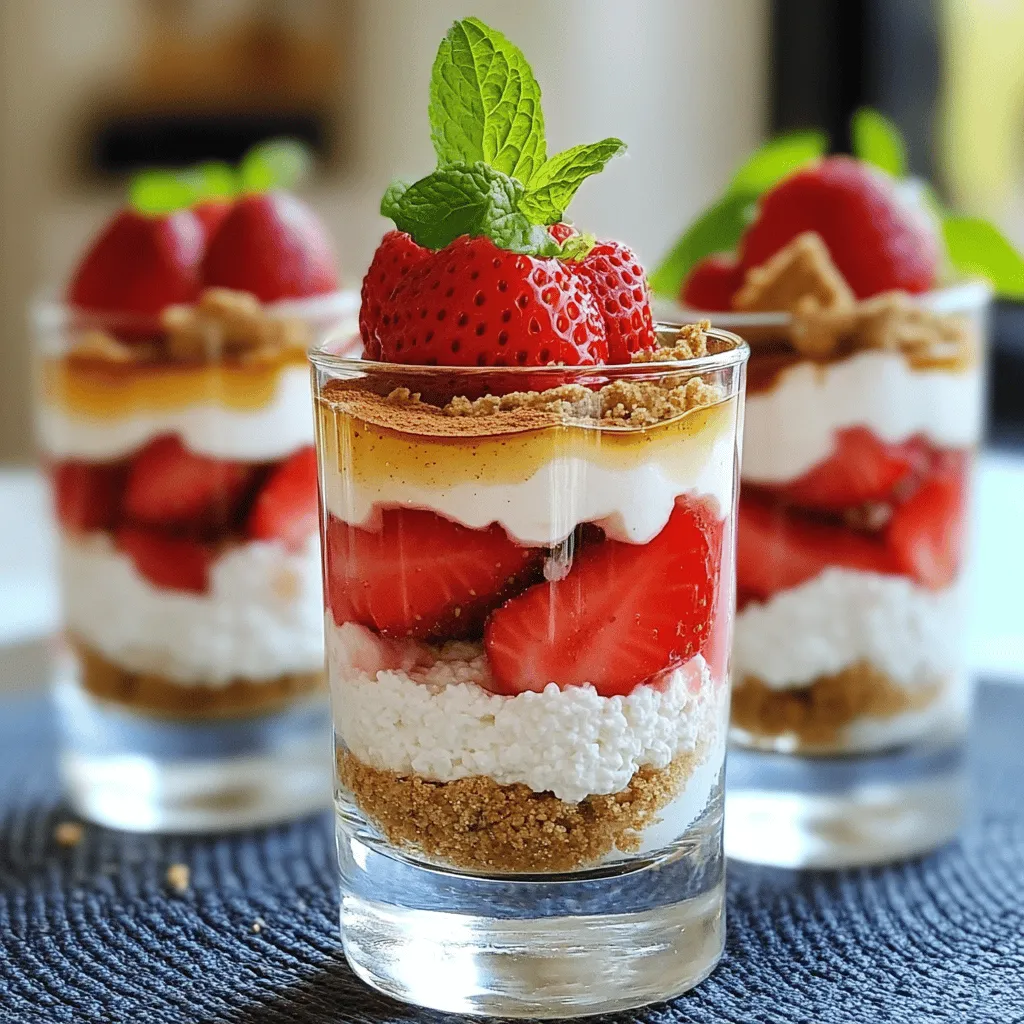
Looking for a tasty, easy dessert? Try my Cottage Cheese Strawberry Cheesecake Parfait Delight! This treat is creamy, fruity, and simply delicious. With layers of fluffy cheesecake and fresh strawberries, it’s perfect for any occasion. Plus, it’s a great source of protein! In this blog post, I’ll share the simple steps to create this delightful parfait, along with tips and tricks to customize your treat. Let’s get started!
Ingredients
Main Ingredients List
For this Cottage Cheese Strawberry Cheesecake Parfait, you need the following:
– 2 cups cottage cheese
– 1/2 cup Greek yogurt
– 1/4 cup honey or maple syrup
– 1 teaspoon vanilla extract
– 1 cup fresh strawberries, hulled and sliced
– 1/2 cup graham cracker crumbs
– 1/4 teaspoon cinnamon
These ingredients create a creamy, sweet, and flavorful treat that everyone will love.
Optional Garnishes and Mix-Ins
You can add a few fun touches to make your parfait even better:
– Fresh mint leaves for garnish
– A sprinkle of chocolate shavings
– A drizzle of extra honey or maple syrup
– A handful of nuts or granola for crunch
These garnishes can give your parfait a unique twist and enhance the look.
Substitutions for Dietary Needs
If you have special dietary needs, here are some easy swaps:
– Use dairy-free yogurt and cottage cheese for a vegan option.
– Swap honey for agave syrup to keep it vegan.
– For gluten-free, choose gluten-free graham cracker crumbs.
– Use a sugar substitute if you want to cut calories.
These substitutions will help you enjoy the parfait while meeting your needs.
Step-by-Step Instructions
Preparing the Cheesecake Layer
First, grab a large mixing bowl. You will need 2 cups of cottage cheese. Add in 1/2 cup of Greek yogurt. Next, pour in 1/4 cup of honey or maple syrup. That will add sweetness. Then, add 1 teaspoon of vanilla extract. This gives the layer a nice flavor.
Now, use a hand mixer or a blender. Mix on medium speed until the blend is smooth and creamy. Taste it! If you want it sweeter, add more honey or maple syrup.
Creating the Graham Cracker Crust
In a separate small bowl, take 1/2 cup of graham cracker crumbs. Add 1/4 teaspoon of cinnamon to it. This will give your parfait a tasty cheesecake crust flavor. Stir it well to combine.
This mixture is key to adding texture and taste. The crunch will balance the creamy cheesecake layer.
Layering the Parfait Components
Now, it’s time to layer your parfait. Use serving glasses or small bowls. Start with about 1/4 cup of the cottage cheese mixture as your first layer.
Next, add about 2 tablespoons of the graham cracker crumb mixture on top of that layer.
Then, follow with a layer of fresh strawberries. Use around 1/4 cup of sliced strawberries per glass.
Repeat these layers. You can do this 2-3 times. Always finish with a layer of strawberries on top. This makes it look nice and colorful.
For the final touch, sprinkle any leftover graham cracker crumbs on the top layer. If you want, add a sprig of fresh mint as a garnish.
Now, chill the parfaits in the refrigerator for at least 30 minutes. This helps the flavors blend beautifully.
Enjoy making this easy and tasty Cottage Cheese Strawberry Cheesecake Parfait!
Tips & Tricks
How to Achieve the Best Texture
To get the perfect texture for your parfait, start with quality cottage cheese. Use a blender or hand mixer to whip the cottage cheese and yogurt together. Mix until smooth and creamy. This step is key. If you want it even creamier, add a bit more yogurt. You can also blend in some whipped cream for a light touch.
Adjusting Sweetness to Taste
Sweetness can vary based on your taste. Start with the 1/4 cup of honey or maple syrup. After mixing, taste it. If you want it sweeter, add a little more sweetener. Remember, the strawberries also add natural sweetness. So, adjust carefully. You can use a sugar substitute too if you prefer.
Presentation Tips for Serving
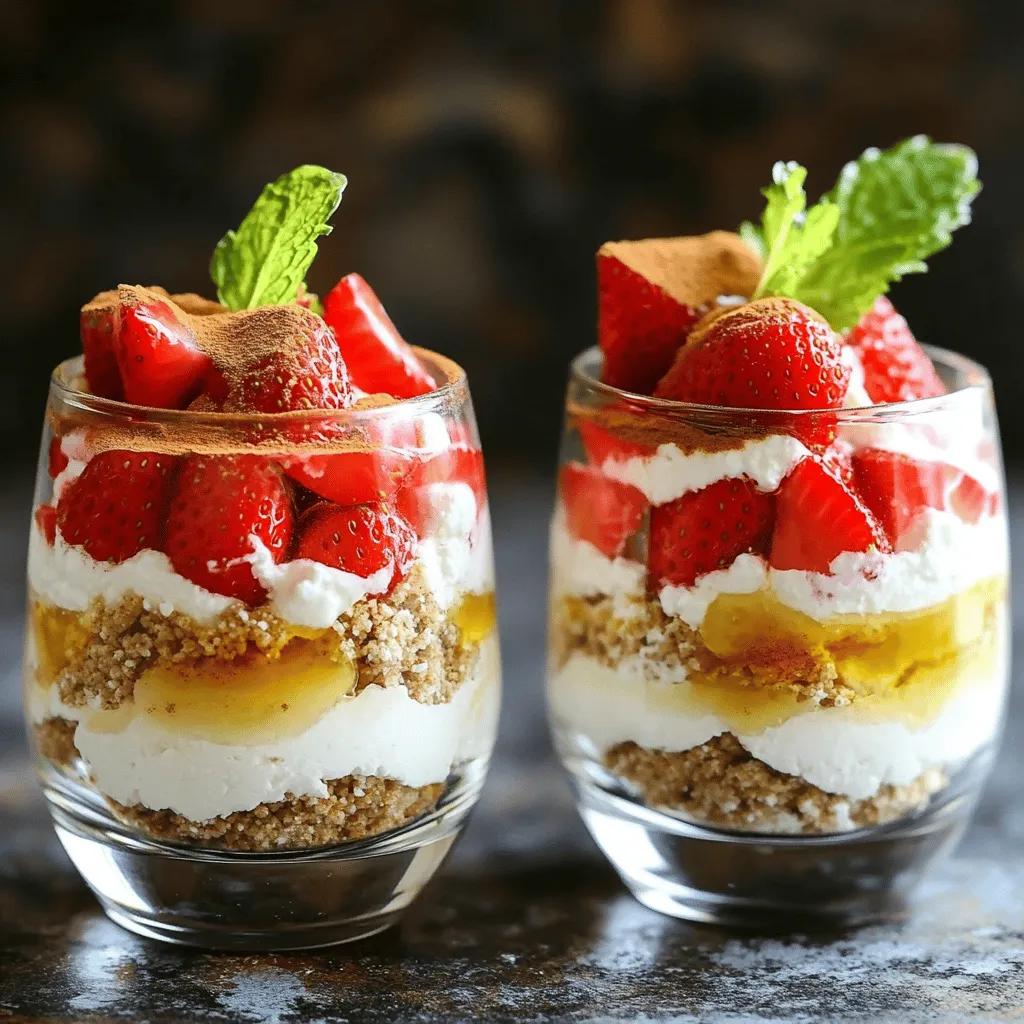
Presentation matters! Use clear glasses to show off those beautiful layers. Start with the cottage cheese mixture, then add the graham crust, and top with strawberries. Repeat until the glass is full. Finish with fresh strawberries and a sprinkle of graham crumbs on top. A mint leaf adds a pop of color. Serve on a fun tray with colorful spoons. This makes your parfait look even more inviting!

Variations
Fruit Substitutions for Different Flavor Profiles
You can switch up the fruit in your parfait for new tastes. Try blueberries for a sweeter bite. Raspberries add a nice tartness. Peaches can bring a hint of summer to your treat. Just use the same amount as strawberries. Mix and match to find your favorite!
Vegan or Dairy-Free Options
To make this parfait vegan or dairy-free, swap the cottage cheese and Greek yogurt. Use a plant-based yogurt like almond or coconut. For the sweetener, maple syrup works great. This keeps the same creamy texture without dairy. You still enjoy all the flavors while being kind to your tummy!
Flavored Cottage Cheese or Yogurt Ideas
For a fun twist, try flavored cottage cheese or yogurt. Look for vanilla or strawberry-flavored options. These can add extra taste without extra effort. You can even use lemon or lime flavors for a zesty kick. Just adjust the sweetness as needed. This way, you can create a unique parfait every time!
Storage Info
How to Store Leftovers
To store your leftover Cottage Cheese Strawberry Cheesecake Parfait, first cover it tightly. Use plastic wrap or a lid. This keeps the parfait fresh and prevents it from absorbing other smells in your fridge. If you have multiple servings, separate them into individual containers for easy access.
Best Practices for Meal Prep
Meal prep makes enjoying this parfait easy. You can assemble the ingredients in advance. Keep the layers separate until you are ready to eat. This helps maintain the parfait’s texture and flavor. Store the cottage cheese mixture and graham cracker crumbs in airtight containers. Keep the sliced strawberries in a separate container. Combine them just before serving for the best taste.
Duration of Freshness in the Fridge
Your parfait will stay fresh in the fridge for about three days. The strawberries remain tasty and bright for this time. After three days, the strawberries may start to lose their appeal. If they look mushy or dull, it’s best to toss them. For optimal flavor, enjoy your parfait within this timeframe.
FAQs
Can I use frozen strawberries instead of fresh?
Yes, you can use frozen strawberries. Just thaw them before using. Drain any excess juice to keep your parfait from getting soggy. Frozen strawberries work well if fresh ones aren’t available. They can still add great flavor and color to your parfait.
Is this parfait suitable for meal prep?
Absolutely! This parfait is great for meal prep. You can make it ahead of time and store it in the fridge. Just layer the ingredients in jars or containers. Keep the parfaits in the fridge for up to three days. This way, you have a tasty treat ready whenever you want.
How can I make this recipe lower in calories?
To lower the calories, you can swap some ingredients. Use low-fat cottage cheese and Greek yogurt. Instead of honey, try a sugar substitute or reduce the amount. You can also cut down on the graham cracker crumbs. This keeps the flavor while making it lighter.
This blog post covered how to make a delicious parfait. We looked at the key ingredients, including the main components and possible substitutions. You learned step-by-step instructions to create creamy layers and a tasty crust. Tips helped perfect your texture and sweetness. We explored various flavor options and how to store your parfait.
In conclusion, this parfait recipe is easy to adjust to your needs. With this guide, you can create a treat that fits your taste and diet perfectly. Enjoy experimenting and savor your delicious creation!


![- 1 ½ cups all-purpose flour - 1 teaspoon baking powder - ½ teaspoon baking soda - ¼ teaspoon salt - ½ cup unsalted butter, softened - 1 cup granulated sugar - 2 large eggs, room temperature - Zest of 1 lemon - 2 tablespoons lemon juice - ½ teaspoon vanilla extract - ½ cup Greek yogurt - 1 cup fresh blueberries - 1 tablespoon flour (for coating blueberries) Gather these ingredients before you start baking. They are the stars of this loaf. The butter gives it a rich taste while the lemon adds brightness. The blueberries bring sweetness and color. Make sure your butter is softened. It helps mix well with sugar. Room temperature eggs also blend better. The Greek yogurt adds moisture and keeps the loaf fluffy. The flour, baking powder, baking soda, and salt work together to give the loaf structure. The lemon zest and juice infuse a fresh, zesty flavor. Coating the blueberries in flour helps them stay suspended in the batter. This step is key to a beautiful loaf. You will love how all these flavors come together. For the full recipe and instructions, check out the [Full Recipe]. - Preheat your oven to 350°F (175°C). - Grease a 9x5-inch loaf pan with butter or cooking spray. - Lightly dust the pan with flour, or line it with parchment paper. - In a medium bowl, whisk together 1 ½ cups of all-purpose flour, 1 teaspoon of baking powder, ½ teaspoon of baking soda, and ¼ teaspoon of salt. - In a large bowl, cream together ½ cup of softened butter and 1 cup of granulated sugar until light and fluffy, about 2 to 3 minutes. - Add 2 large eggs, one at a time, mixing well after each. Stir in the zest of 1 lemon, 2 tablespoons of lemon juice, and ½ teaspoon of vanilla extract until well combined. - Gradually add the dry mixture to the wet ingredients, alternating with ½ cup of Greek yogurt. Start and end with the flour mixture. Mix gently to combine without overmixing. - In a small bowl, toss 1 cup of fresh blueberries with 1 tablespoon of flour to coat them. - Fold the blueberries into the batter gently, ensuring they are spread evenly throughout. - Pour the batter into your prepared loaf pan, smoothing the top if needed. Bake for 50 to 60 minutes, or until a toothpick inserted in the center comes out clean. - If the top browns too quickly, cover it with aluminum foil. Allow the loaf to cool in the pan for about 10 minutes. Then, transfer it to a wire rack to cool completely. For more details on the ingredients and instructions, check the Full Recipe. To make a great loaf, avoid overmixing the batter. This keeps your loaf light and fluffy. When you mix the wet and dry ingredients, do it gently. Also, use eggs and butter at room temperature. This helps them blend better and gives your loaf a nice rise. For a beautiful presentation, slice the loaf neatly. Dust each slice with powdered sugar. Add a few lemon slices beside the loaf. This adds color and a fresh look. Serve your loaf with tea or coffee. The flavors of lemon and blueberry pair well with these drinks. If your loaf is overcooked, it may be dry. Lower the oven temperature next time. Check it a few minutes earlier to avoid this. If it’s undercooked, bake it longer. Insert a toothpick into the center; it should come out clean. For a moist loaf, make sure to measure your ingredients correctly. Adding Greek yogurt helps keep it tender. Follow the Full Recipe for detailed steps and tips. {{image_4}} You can make this loaf even more fun! Try adding other fruits like raspberries or strawberries. These fruits will give a nice twist to the flavor. Spices like cinnamon or nutmeg can also add warmth. Just a pinch can change the whole taste. If you need a gluten-free version, use almond flour or coconut flour instead of all-purpose flour. For a dairy-free option, swap Greek yogurt with coconut yogurt. You can also use vegan butter instead of regular butter. These small changes still keep the loaf tasty. In summer, add more citrus flavors. Try using orange zest or juice for a bright note. For the holidays, consider adding cranberries or spices like ginger and cloves. These seasonal changes will make your loaf fit the time of year. Mix and match these ideas to create your perfect buttery lemon blueberry loaf. For the complete recipe, check out the Full Recipe. Enjoy baking! To keep your buttery lemon blueberry loaf fresh, store it in an airtight container. This prevents moisture loss and keeps the loaf soft. You can also wrap it in plastic wrap before placing it in the container for extra protection. If you have leftover slices, I suggest placing parchment paper between them. This helps avoid sticking. For the best storage, use a glass or plastic container with a tight seal. Avoid metal containers, as they can affect the loaf's flavor. Keep the container at room temperature, away from direct sunlight. If you want to freeze the loaf, wrap it tightly in plastic wrap. After that, place it in a freezer-safe bag. Make sure to remove as much air as possible to prevent freezer burn. You can freeze the loaf for up to three months. When you're ready to enjoy it, thaw the loaf in the fridge overnight. For the best texture, let it sit at room temperature for a few hours after thawing before slicing. This helps restore the moisture lost during freezing. At room temperature, the buttery lemon blueberry loaf stays fresh for about three days. If you store it properly, it can last up to a week in the fridge. Watch for signs of spoilage, such as an off smell or mold. If you notice any changes in texture, it’s best to discard the loaf. Enjoy every slice while it’s fresh for the best flavor! Yes, you can use frozen blueberries. They add great flavor. Just follow these tips for best results: - Do not thaw them before adding to the batter. This helps keep the color bright. - Coat them in flour before mixing in. This keeps them from sinking to the bottom. - Reduce baking time slightly. Frozen berries can add moisture, so check for doneness a few minutes early. If you don’t have Greek yogurt, here are some great options: - Sour cream works well and gives a nice tang. - Plain yogurt can be used, but choose a thicker variety if possible. - Cottage cheese blended smooth can also work as a substitute. You can check for doneness using these signs: - The top should be golden brown and spring back when touched. - A toothpick inserted in the center should come out clean or with a few moist crumbs. - The loaf should pull away from the sides of the pan slightly. Absolutely! Here’s how to adjust: - For mini loaves, divide the batter into smaller pans. Bake for about 25-30 minutes. - For muffins, fill each muffin cup about 2/3 full. Bake for 18-22 minutes. Keep an eye on them as baking times may vary. Serving this loaf can elevate your experience: - Slice it neatly and place it on a wooden board for a rustic look. - Dust with powdered sugar for a sweet touch. - Add lemon slices or fresh blueberries on the side for color. Pair it with tea or coffee for a delightful treat. Try the Full Recipe to create your own buttery lemon blueberry loaf! This blog post covered everything you need for a delicious lemon blueberry loaf. We went through the simple ingredients, step-by-step instructions, and helpful tips. You learned about variations, storage methods, and common questions. Baking this loaf is easy and fun. Enjoy the fresh taste and share it with others. Dive in and let your baking journey begin!](https://joymealplan.com/wp-content/uploads/2025/07/6f5180c5-8cb8-4276-b09e-ab74a4ecf0f2-768x768.webp)

![To make classic banana pudding, you need these key ingredients: - 4 ripe bananas, sliced into rounds - 1 cup heavy cream - 1 cup whole milk - 1/2 cup granulated sugar - 1/4 cup cornstarch - 1/4 teaspoon kosher salt - 1 teaspoon pure vanilla extract - 2 large egg yolks - 1 package (approximately 200g) vanilla wafers - Whipped cream for topping (optional) - Additional banana slices for garnish These ingredients create the creamy base and the delightful layers that make banana pudding so special. The ripe bananas add a natural sweetness. The vanilla wafers provide crunch and texture. You can enhance your banana pudding with a few optional ingredients: - A hint of cinnamon for warmth - Chocolate chips for a sweet twist - A splash of rum extract for depth These additions can give your pudding a unique flavor. Experiment with them to find your favorite mix! If you’re missing a few ingredients, don’t worry. Here are some common substitutions you can use: - Use almond milk instead of whole milk for a dairy-free option. - Substitute coconut cream for heavy cream for a tropical flair. - Replace granulated sugar with honey or maple syrup for sweetness. These substitutions will still give you a tasty result. Just remember to adjust measurements based on taste. For the full recipe, check the [Full Recipe]. To start, gather all your ingredients. You need milk, cream, sugar, cornstarch, salt, and eggs. In a medium saucepan, mix the whole milk, heavy cream, sugar, cornstarch, and salt. Use a whisk to blend everything until smooth. Make sure there are no lumps from the cornstarch. Heat this mix over medium heat. Stir it often with a wooden spoon. You want it to thicken and bubble, which takes about 5 to 7 minutes. Next, crack the two large eggs, separating the yolks into a bowl. Whisk the yolks until they look smooth and pale. To temper the yolks, take a few spoonfuls of the hot mix and whisk them into the yolks. This step keeps the eggs from cooking too fast. After that, pour the yolk mix back into the saucepan. Cook for another 2 to 3 minutes while stirring. The pudding should be thick and creamy when done. Remove it from heat and stir in the vanilla extract. Let it cool for about 10 minutes. Now it’s time to build your pudding layers. Start with a large serving dish or individual cups. Place a layer of vanilla wafers at the bottom. Next, add a layer of sliced bananas. Pour a generous amount of pudding over the bananas and cookies. Repeat this layering until you use all ingredients. Make sure the last layer is pudding. This creates a beautiful top. After layering, cover the dish tightly with plastic wrap. This step helps keep the pudding moist. Next, place it in the fridge for at least 4 hours. This time lets the pudding chill and firm up. When you’re ready to serve, add a dollop of whipped cream on top. You can also garnish with extra banana slices for a nice touch. This dessert looks as good as it tastes! If you'd like to see the complete guide, check out the Full Recipe for more details. To get that smooth, creamy texture, follow these tips: - Whisk well: When mixing the milk and cornstarch, make sure to whisk until there are no lumps. - Stir constantly: While cooking the pudding base, stir it continuously to prevent sticking and burning. - Temper the eggs: Slowly add hot mixture to egg yolks. This helps keep them from cooking too fast. - Cool gradually: Let the pudding cool for about 10 minutes before layering. It will thicken more as it cools. To keep your pudding fresh: - Cover tightly: Use plastic wrap to seal the dish. This keeps moisture out. - Refrigerate: Always store it in the fridge. It stays good for 2-3 days. - Layer with care: If you have leftovers, keep layers separate. This avoids mushy bananas. Want to make your banana pudding even better? Try these ideas: - Add spices: A pinch of cinnamon or nutmeg can add warmth. - Use flavored wafers: Try lemon or chocolate wafers for a fun twist. - Incorporate extracts: Add a drop of almond extract for an extra layer of flavor. - Top it off: Fresh berries or nuts can give a nice crunch and taste contrast. For the full recipe, check out the details above! {{image_4}} To make chocolate banana pudding, simply add cocoa powder. Use 1/3 cup of unsweetened cocoa powder. Mix it into the milk mixture after combining the sugar and cornstarch. This gives your pudding a rich chocolate flavor. Layer it just like the classic recipe. The chocolate pairs well with bananas, creating a great dessert. For a nutty twist, add chopped pecans or walnuts. You can mix in 1/2 cup of nuts into the pudding. You can also sprinkle some on each layer. This adds a delightful crunch to each bite. The nuts contrast nicely with the creamy pudding and soft bananas. To create a vegan version, swap dairy for plant-based options. Use almond or coconut milk instead of whole milk and cream. Replace egg yolks with 1/4 cup of silken tofu blended until smooth. Sweeten with maple syrup or coconut sugar. This makes a tasty, dairy-free pudding that everyone can enjoy. Each of these variations adds a new twist to the classic banana pudding. They keep the spirit of the dessert while offering different flavors and textures. For the full recipe, make sure to check out the details above. Banana pudding has a rich history that dates back to the 19th century. This dish first appeared in American cookbooks in the late 1800s. It gained popularity in the Southern states, where fresh bananas were easy to find. The sweet, creamy dessert combined layers of pudding, bananas, and vanilla wafers. This simple yet delicious treat quickly became a staple at family gatherings and potlucks. Over the years, banana pudding has evolved in many ways. In the 1930s, brands like Nabisco made vanilla wafers popular in homes. Many cooks began using these cookies as a key ingredient. Today, you can find various versions, including chocolate and vegan options. Some recipes even add whipped cream or meringue on top for extra flavor and texture. This evolution shows how versatile and beloved banana pudding truly is. In Southern cuisine, banana pudding holds a special place. It represents comfort and warmth. Families often serve it at holidays, birthdays, and reunions. Many people have fond memories of enjoying this sweet treat with loved ones. This dessert is not just a dish; it’s a tradition passed down through generations. The combination of flavors and textures captures the essence of Southern hospitality, making it a cherished part of the culture. Yes, you can use other types of bananas. While ripe Cavendish bananas are common, you can try red or plantain bananas. Each type brings a unique flavor. Red bananas are sweeter and softer. Plantains are firmer and less sweet. Just remember, the texture and taste will change. To keep bananas from browning, you can use lemon juice. Just squeeze a little juice over the banana slices. This helps slow down oxidation. You can also cover the bananas tightly with plastic wrap. Keeping them chilled also helps. Serve the pudding soon for the best look. If you don’t have vanilla wafers, don’t worry! You can use graham crackers or shortbread cookies. Both options add a nice crunch. You can even use sponge cake for a softer layer. Get creative! The pudding will still taste great, no matter what you use. This blog shows you how to make classic banana pudding. We covered key ingredients, optional add-ins, and substitutions. I also shared simple steps for preparing, layering, and chilling the pudding. You learned tips for perfect texture and storing leftovers. Plus, I explored fun variations like chocolate and vegan options. Finally, we discussed the history and cultural roots of this dish. Banana pudding is more than a dessert; it's a beloved tradition. Enjoy creating your own version and sharing it with friends and family.](https://joymealplan.com/wp-content/uploads/2025/06/2270da16-0b21-4017-a800-73ddf1839134-768x768.webp)


![Gather these ingredients to make your Strawberry Cheesecake French Toast Bake a hit. Each one plays a key role in bringing that creamy, fruity flavor to life. - 1 loaf of brioche bread, cut into 1-inch cubes - 8 ounces cream cheese, softened to room temperature - 1/2 cup granulated sugar - 1/4 cup sour cream - 3 large eggs - 1 cup whole milk - 1 teaspoon pure vanilla extract - 1 teaspoon ground cinnamon - 2 cups fresh strawberries, hulled and sliced - 1/4 cup powdered sugar (for dusting) - Whipped cream (for serving) Using brioche bread gives the dish a soft and rich base. Cream cheese adds that cheesecake flavor we love. Granulated sugar and sour cream create a sweet, creamy mixture. Eggs and whole milk bind everything together and add fluffiness. Don’t forget the vanilla and cinnamon for added warmth. Finally, fresh strawberries bring bright, juicy bites. For a complete guide, check the [Full Recipe]. - Preheating the Oven and Preparing the Baking Dish: Start by preheating your oven to 350°F (175°C). Grease a 9x13-inch baking dish with non-stick spray to stop sticking. - Making the Cream Cheese Mixture: In a large bowl, add 8 ounces of softened cream cheese, 1/2 cup of granulated sugar, and 1/4 cup of sour cream. Use a hand mixer or whisk to blend until smooth and creamy. - Incorporating the Wet Ingredients: Add 3 large eggs, 1 cup of whole milk, 1 teaspoon of vanilla extract, and 1 teaspoon of ground cinnamon to the bowl. Mix on medium speed until everything is well combined. - Assembling the French Toast Bake: Place your cubed brioche bread evenly in the greased baking dish. Pour the cream cheese mixture over the bread cubes, making sure all pieces are soaked. - Adding the Strawberries: Gently fold in 2 cups of sliced strawberries. Ensure they are spread evenly, adding sweet bursts of flavor to the dish. - Resting and Baking the Dish: Cover the dish tightly with aluminum foil and let it sit at room temperature for at least 20 minutes. To deepen the flavor, you can refrigerate it overnight. Bake the covered dish for 30 minutes, then remove the foil. Continue baking for another 15-20 minutes until golden brown and set. For the full recipe, check out the detailed steps! Choosing the Right Bread I love using brioche bread for this dish. Its soft texture makes it perfect for soaking up the creamy mix. You can also use challah or a sturdy white bread. Just make sure it’s fresh for the best taste. Ensuring Smooth Cream Cheese Mixture To get a smooth cream cheese mixture, let the cream cheese sit out before you start. It should be soft, not cold. Use a hand mixer or whisk to blend it until there are no lumps. This step is key for a creamy texture. Letting It Rest for Flavor Enhancement Resting the mixture is crucial. After you assemble everything, cover it and let it sit for at least 20 minutes. This lets the bread soak up all the flavors. For a richer taste, refrigerate it overnight. Ideal Toppings and Garnishes When serving, top each piece with whipped cream. Add some fresh strawberries for color and taste. A dusting of powdered sugar also makes it look fancy. You can even add a drizzle of maple syrup if you want extra sweetness. Pairing with Beverages This dish pairs well with coffee or a light tea. You can also serve it with a glass of fresh orange juice. The bright flavor of the juice complements the richness of the bake. For a special touch, consider a mimosa for brunch. If you want the full experience, check out the [Full Recipe]. It’s packed with all the details you need to make this dish a hit! {{image_4}} You can have fun with different fruits in this dish. Blueberries and raspberries work great too! They add a nice tartness that complements the sweet cream cheese. Try mixing in chopped bananas for a new twist. You can also add nuts like walnuts or pecans for crunch. Chocolate chips can bring a sweet surprise in every bite. Just sprinkle them in with the strawberries. If you need a gluten-free option, use gluten-free bread. Many brands offer tasty choices that work well. For a dairy-free version, swap the cream cheese for a dairy-free cream cheese. Almond or coconut milk can replace whole milk easily. This way, everyone can enjoy this dish without worry! For the full recipe, check out the Strawberry Cheesecake French Toast Bake . To store leftovers, let the dish cool to room temperature. Cover the baking dish tightly with plastic wrap or aluminum foil. This helps keep the moisture in. You can store it in the fridge for up to three days. For reheating, preheat your oven to 350°F (175°C). Place the covered dish in the oven for about 15-20 minutes. This warms it up without drying it out. Alternatively, you can microwave individual portions for about one to two minutes. If you want to save it for later, freezing is a great option. First, let the dish cool completely. Cut it into squares and wrap each piece tightly in plastic wrap. Then, place the wrapped pieces in a freezer-safe bag or container. You can freeze it for up to three months. When it's time to enjoy again, take out a piece and place it in the fridge overnight to thaw. If you're in a hurry, you can also thaw it in the microwave. Just be sure to do it on a low setting to keep the texture nice. Can I make this recipe ahead of time? Yes, you can! Prepare the dish the night before. Cover it and place it in the fridge. Letting it sit overnight helps the bread soak up the flavors. The next morning, just bake it as usual. What can I use instead of cream cheese? You can use Greek yogurt or mascarpone cheese. Both options will give a creamy texture. However, the flavor will change a bit. Try to choose a rich option for the best taste. How do I know when it's done baking? Look for a golden brown top. The center should be firm, not jiggly. You can also insert a knife in the middle. If it comes out clean, the bake is ready. What to do if it’s too soggy? If your French toast bake is too soggy, it might have soaked too long. You can bake it a bit longer. Cover it loosely with foil to avoid burning the top. How to fix burnt edges? If the edges burn, cover them with foil. This will keep them from getting worse. If the center is still not set, keep baking until it firms up. This French toast bake uses simple ingredients like brioche, cream cheese, and strawberries. You learned each step to prepare, assemble, and bake this delicious dish. We also explored tips for success, tasty variations, and storage options. Enjoy this recipe any time, and don't shy away from experimenting with flavors. Bake it for breakfast or brunch, and savor the sweet, creamy delight. With these easy steps, you will impress your family and friends. Happy cooking!](https://joymealplan.com/wp-content/uploads/2025/07/d3f26ead-c14c-48e2-ba51-186e07c440ec-768x768.webp)