Are you ready to elevate your game day snacks? This Creamy Buffalo Chicken Dip is your new go-to treat! Packed with bold flavors and easy to make, it’s perfect for any gathering. I’ll guide you through simple steps, tips, and even tasty variations. Whether you want to impress your friends or just enjoy a cozy night in, this dip has got you covered. Let’s dive into this mouthwatering recipe!
Ingredients
List of Required Ingredients
To make creamy buffalo chicken dip, you will need:
– 2 cups cooked chicken, shredded
– 1 package (8 oz) cream cheese, softened
– 1/2 cup Greek yogurt
– 1/2 cup Buffalo sauce
– 1 cup shredded sharp cheddar cheese
– 1/2 cup crumbled blue cheese (optional)
– 1/4 cup green onions, finely chopped
– Salt and black pepper, to taste
– Tortilla chips or celery sticks for serving
Optional Ingredients for Enhanced Flavor
To take your dip to the next level, you can add:
– Extra Buffalo sauce for more heat
– More green onions for a fresh taste
– Diced jalapeños for added spice
– Garlic powder or onion powder for depth
Ingredient Substitutions and Dietary Adjustments
You can easily tweak this recipe to fit your needs:
– Use rotisserie chicken for quick preparation.
– Swap Greek yogurt for sour cream if you prefer.
– For a dairy-free option, try vegan cream cheese and cheese.
– Use plant-based chicken substitutes for a vegetarian version.
These choices help you create a dip that suits your tastes and dietary needs. Enjoy experimenting with your buffalo chicken dip!
Step-by-Step Instructions
Preparation Method
To start, gather your ingredients. You need cooked chicken, cream cheese, Greek yogurt, and Buffalo sauce. Add shredded cheddar cheese, crumbled blue cheese, and green onions. Don’t forget salt and pepper for taste.
1. In a big bowl, mix the cream cheese and Greek yogurt. Use a hand mixer or spatula. Blend until it’s smooth, with no lumps.
2. Next, fold in the shredded chicken and Buffalo sauce. Stir well. You want all the chicken coated in that spicy sauce.
3. Now, add the shredded cheddar, blue cheese, and half the green onions. Gently mix until everything is combined.
4. Taste your dip and season with salt and pepper. If you want more heat, splash in some extra Buffalo sauce.
Baking Instructions
1. Preheat your oven to 350°F (175°C).
2. Transfer your dip to a greased baking dish. Spread it out evenly.
3. For extra cheese, sprinkle some more cheddar on top.
4. Bake for 20-25 minutes. Look for bubbling dip and a golden brown top.
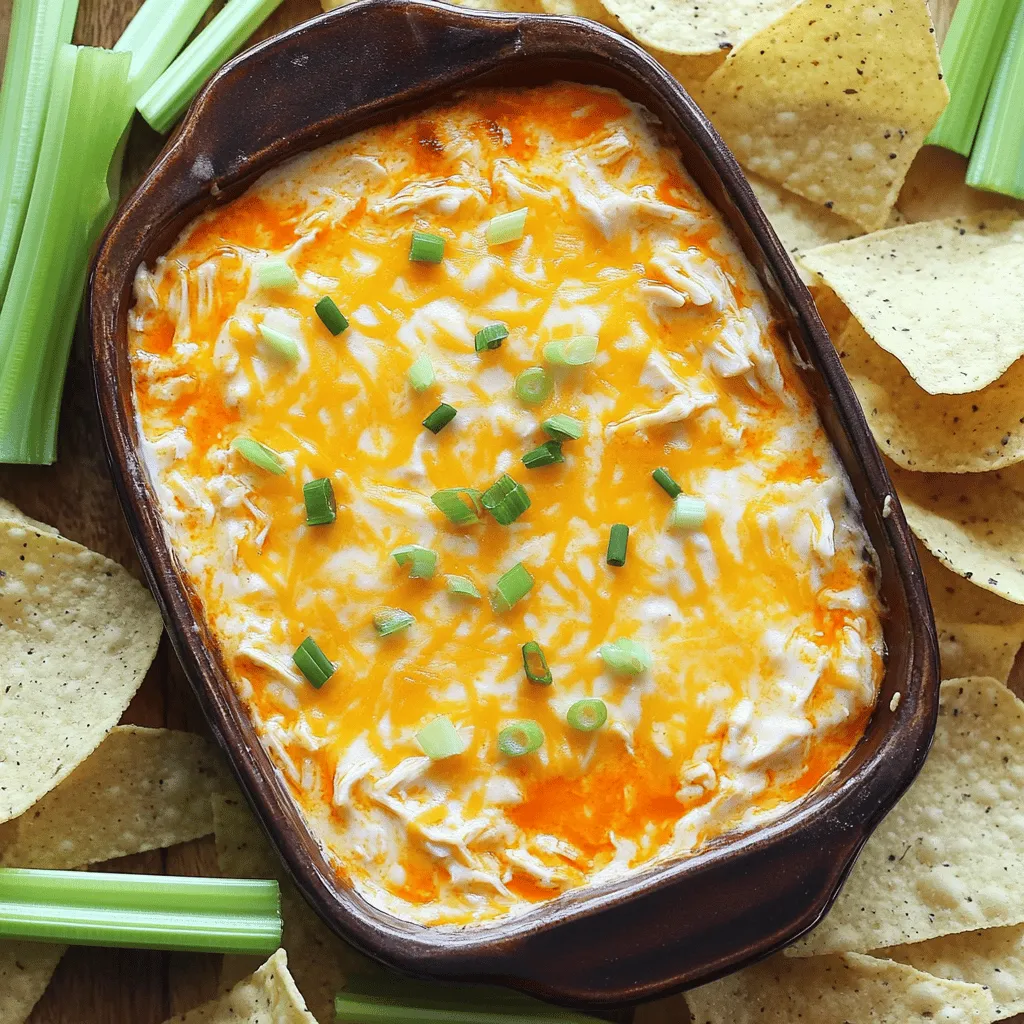
Serving Suggestions
Once baked, take the dip out and let it cool for a few minutes. This helps it set. Before serving, sprinkle the rest of the green onions on top for color. Serve the dip warm. Pair it with crunchy tortilla chips or fresh celery sticks. Enjoy the creamy, spicy goodness!
Tips & Tricks
Best Practices for Creamy Consistency
To get a creamy dip, start with softened cream cheese. It blends better. I mix it with Greek yogurt for extra creaminess. Use a hand mixer or spatula to make sure there are no lumps. After that, fold in your chicken and sauce gently. This keeps the texture smooth.
How to Adjust Heat Levels
Want more spice? Add more Buffalo sauce. You can start with half a cup and taste it. If you like it mild, use less sauce. You can also add crumbled blue cheese for a rich flavor without too much heat.
Make-Ahead and Reheating Tips
You can make this dip ahead of time! Just store it in the fridge after mixing. When you are ready, bake it straight from the fridge. If it seems thick, add a little cream or yogurt before heating. Bake until bubbling and golden. Enjoy it warm with chips or celery sticks!

Variations
Vegetarian Version of Buffalo Chicken Dip
To make a vegetarian version of Buffalo chicken dip, swap the chicken for a mix of beans. Use black beans or chickpeas for a hearty texture. This change adds protein while keeping the dip creamy. You can also add diced vegetables like bell peppers or carrots for extra crunch. The key is to maintain that creamy base with cream cheese and Greek yogurt. You can still use Buffalo sauce to give it that spicy kick.
Spicy Alternatives and Additions
If you love heat, consider adding diced jalapeños or a dash of hot sauce. This gives the dip an extra kick. You can also mix in some smoked paprika for a different flavor. For a smoky taste, try using smoked cheddar cheese. You can play around with different cheese types. Pepper jack cheese adds a creamy and spicy twist. Adjust the heat level based on your preference, and enjoy the explosion of flavors!
Serving for Different Occasions
This dip fits many events. For game day, serve it warm with tortilla chips. For a party, you might want to use veggie sticks like celery or carrots for a healthy option. You can even serve it in a bread bowl for a fun twist. If it’s a more casual setting, try serving it on a charcuterie board with various dips. This dip is sure to please everyone, regardless of the occasion!
Storage Info
How to Store Leftover Dip
To store leftover dip, let it cool to room temp. Then, transfer it to an airtight container. Make sure to press a piece of plastic wrap against the dip’s surface before sealing. This helps keep it fresh and prevents it from drying out. Store it in the fridge for up to three days.
Freezing Instructions for Long-Term Storage
If you want to freeze the dip, first cool it completely. Place it in a freezer-safe container, leaving some space for expansion. You can also use freezer bags for easy storage. Remove as much air as possible before sealing. The dip can last up to three months in the freezer. When you’re ready to eat it, thaw it in the fridge overnight.
Shelf Life and Best Practices
The dip stays fresh in the fridge for about three days. For the best taste, eat it within that time. If you freeze it, aim to use it within three months. Always check for changes in smell or texture before enjoying. Reheat the dip in the oven or microwave until it’s hot and bubbly. Enjoy your creamy buffalo chicken dip anytime!
FAQs
What is the Best Way to Serve Creamy Buffalo Chicken Dip?
The best way to serve this dip is warm. Serve it in a bowl with some chips or veggie sticks. Tortilla chips are crunchy and great for scooping. Crisp celery sticks add a fresh crunch. You can also use carrot sticks or bell pepper slices. For a fun twist, try serving it in a bread bowl!
Can I Make This Dip in a Slow Cooker?
Yes, you can absolutely make this dip in a slow cooker! Start by mixing all the ingredients in the slow cooker. Set it on low for about 2-3 hours. Stir occasionally to keep the dip creamy. This method is great for parties, as it keeps the dip warm for longer.
What Pairs Well with Buffalo Chicken Dip?
Many foods pair well with Buffalo chicken dip. Here are some tasty options:
– Tortilla chips
– Celery sticks
– Carrot sticks
– Pita chips
– Crackers
– Sliced bell peppers
Each of these options adds a nice crunch and balances the dip’s creaminess.
How Can I Make It Healthier?
To make this dip healthier, try these swaps:
– Use low-fat cream cheese instead of regular cream cheese.
– Substitute Greek yogurt for sour cream.
– Add more veggies like chopped spinach or bell peppers for extra fiber.
– Use less cheese or choose low-fat cheese.
These changes still keep the dip creamy and tasty while cutting down on calories.
This blog post covered everything you need to make creamy Buffalo chicken dip. We explored the right ingredients and how to prepare them. You learned step-by-step baking instructions and serving ideas. We discussed tips for perfect texture, heat adjustments, and even make-ahead tricks. You can try variations for any occasion and store leftovers properly too.
Now, you can enjoy this tasty dip anytime, knowing how to enhance its flavor and make it fit your needs. Embrace your new skills and share this fun dish with others!


