
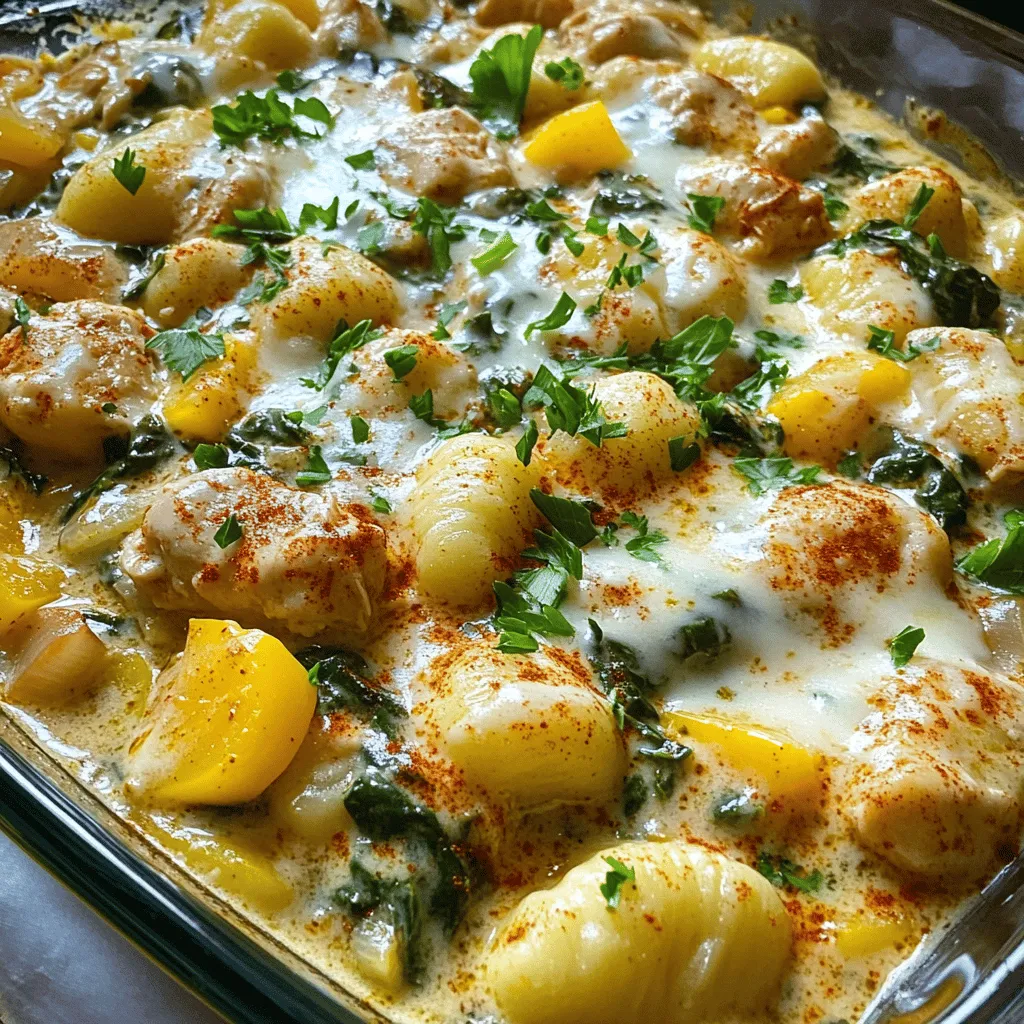
If you’re looking to spice up your dinner routine, you’ve come to the right place! This Creamy Cajun Chicken Gnocchi recipe brings bold flavors to your table. It’s packed with tasty chicken, soft gnocchi, and a creamy sauce that everyone will love. You’ll find simple steps and tips to make cooking fun and easy. Let’s dive right in and make a meal worthy of any occasion!
Ingredients
Key Ingredients List
To make Creamy Cajun Chicken Gnocchi, you need a few key items. Here’s what you will gather:
– 1 pound chicken breast, diced into bite-sized pieces
– 1 tablespoon Cajun seasoning
– 2 tablespoons olive oil
– 1 cup onion, finely diced
– 1 cup bell pepper, diced (any color for a vibrant dish)
– 3 cloves garlic, minced
– 1 cup heavy cream
– 1 cup chicken broth
– 1 package (16 oz) gnocchi
– 1 cup fresh or frozen spinach
– 1/2 cup Parmesan cheese, grated
– Salt and pepper to taste
– Fresh parsley, chopped (for a bright garnish)
Optional Ingredients for Variation
You can switch things up with these optional ingredients. They add fun and flavor:
– Cherry tomatoes for added sweetness
– Mushrooms for an earthy taste
– Broccoli for more greens
– Different types of cheese like feta or mozzarella
– Hot sauce for extra heat
Recommended Seasonings
Seasonings make this dish pop! Besides Cajun seasoning, try these:
– Garlic powder for a deeper flavor
– Onion powder for more sweetness
– Smoked paprika for a rich, smoky taste
– Red pepper flakes to kick up the heat
– Fresh herbs like thyme or basil for a fresh touch
With these ingredients ready, you can dive into making this creamy and delicious dinner.
Step-by-Step Instructions
Preparation of Chicken
Start by cutting the chicken breast into small pieces. This makes it easier to cook and eat. In a bowl, sprinkle the Cajun seasoning over the chicken. Mix it well so every piece gets flavor. This step is key to a tasty dish.
Sautéing the Chicken and Vegetables
Heat olive oil in a large skillet on medium heat. Once it’s hot, add the seasoned chicken. Cook it for about 7-10 minutes. Stir it often to brown all sides. When the chicken is fully cooked, move it to a plate. Don’t clean the skillet; we want those tasty bits left inside. Next, add diced onion and bell pepper. Cook for around 5 minutes until they soften. Then, add minced garlic and cook for one more minute. This will fill your kitchen with a wonderful smell.
Sauce Creation and Gnocchi Cooking
Pour in the chicken broth and heavy cream. Stir well to mix everything together. Let it simmer for 3-4 minutes. This thickens the sauce just right. Now, add the gnocchi to the skillet. Make sure they are covered by the sauce. Cook them for about 3-5 minutes. You know they’re done when they float to the top.
Combining and Final Touches
Return the chicken to the skillet along with the spinach. Stir until the spinach wilts. This adds a nice pop of color and nutrition. Gradually mix in the grated Parmesan cheese. It melts and makes the sauce creamy. Taste your dish and add salt and pepper if needed. For a pretty finish, serve it hot with chopped parsley on top.
Tips & Tricks
Best Practices for Perfectly Cooked Gnocchi
To cook gnocchi just right, follow these steps:
– Boil water: Start with a big pot of salted water. Bring it to a boil.
– Add gnocchi gently: Place them in the boiling water. This helps them cook evenly.
– Watch for floating: Gnocchi are done when they float to the top. This usually takes 3-5 minutes.
– Avoid overcooking: Remove them quickly to keep them soft and fluffy.
Enhancing Cajun Flavors in the Dish
To boost those Cajun flavors, try these tips:
– Use fresh spices: Use fresh Cajun seasoning for a stronger taste. You can even mix your own with paprika, cayenne pepper, and garlic powder.
– Sauté with care: Cook your chicken and veggies until they get a nice golden brown. This adds depth to the flavor.
– Add a splash of hot sauce: If you like heat, a dash of hot sauce can elevate the dish.
Presentation and Serving Suggestions
Serving your dish well makes it even more enjoyable. Here are some ideas:
– Choose shallow bowls: These help show off the creamy sauce and colorful ingredients.
– Top with extras: Add more grated Parmesan and parsley on top for a fresh look.
– Serve with bread: Fresh bread on the side can complement the meal nicely.
Variations
Vegetarian Adaptation (without Chicken)
To make a vegetarian version of this dish, simply skip the chicken. You can replace it with mushrooms, which add a hearty texture. Use about 1 pound of sliced mushrooms. Sauté them in the same way you would the chicken. They will soak up the Cajun seasoning and add great flavor. You can also add more vegetables like zucchini or cherry tomatoes for extra color and taste.
Spice Level Adjustments
If you like more heat, add extra Cajun seasoning or a pinch of cayenne pepper. You can also use fresh chopped jalapeños for a kick. Start with a small amount, taste, and keep adding until you reach your desired heat level. For a milder dish, reduce the Cajun seasoning by half. You can balance flavors by adding a splash of lemon juice.
Alternative Sauces or Ingredients
You can switch up the sauce to suit your taste. A tomato-based sauce can work well, giving a different flavor profile. For a lighter sauce, use vegetable broth instead of chicken broth. You can also experiment with different cheeses. Feta or goat cheese can add tanginess to the dish. For a creamy twist, try adding cream cheese or mascarpone for extra richness.
Storage Info
Storing Leftovers Properly
To keep your creamy Cajun chicken gnocchi fresh, place leftovers in an airtight container. Make sure the dish cools to room temperature before sealing. Store it in the fridge for up to three days. This way, the flavors stay vibrant and tasty.
Reheating Instructions
When you’re ready to enjoy your leftovers, reheat them in a pot over low heat. Add a splash of chicken broth or cream to keep it moist. Stir gently to warm everything through. You can also use the microwave. Heat it in short bursts, stirring in between, until warm.
Freezing Tips for Future Meals
If you want to freeze your creamy Cajun chicken gnocchi, use a freezer-safe container. It can last for up to three months. To reheat, thaw it in the fridge overnight. Then, follow the reheating instructions to enjoy a quick, delicious meal later.
FAQs
How long does Creamy Cajun Chicken Gnocchi last in the fridge?
Creamy Cajun Chicken Gnocchi lasts about 3 to 4 days in the fridge. Store it in an airtight container to keep it fresh. Before eating, check for any signs of spoilage. If it smells off or looks strange, it’s best to throw it away. Reheat it on the stove for the best taste.
Can I use store-bought gnocchi for this recipe?
Yes, you can use store-bought gnocchi for this recipe. Fresh or frozen gnocchi works well. They save you time and still taste great. Just follow the package instructions for cooking time. This way, you can enjoy a quick and tasty meal without the fuss of making gnocchi from scratch.
What sides pair well with Creamy Cajun Chicken Gnocchi?
Several sides pair well with Creamy Cajun Chicken Gnocchi. Some great options include:
– A simple green salad with a light vinaigrette
– Garlic bread for a crunchy texture
– Steamed broccoli or green beans for extra veggies
– A refreshing coleslaw to balance the rich flavors
These sides complement the creamy dish and enhance your meal.
How can I make this dish healthier?
To make this dish healthier, try these tips:
– Use less heavy cream and replace it with Greek yogurt.
– Incorporate more vegetables like zucchini or cherry tomatoes.
– Swap chicken for grilled shrimp or tofu for a lighter option.
– Use whole wheat gnocchi for added fiber.
These changes keep the flavor while making the dish more nutritious. You can still enjoy a delicious meal without the extra calories.
This blog post covered everything you need for a tasty dish. We explored key ingredients, tips, and variations for Creamy Cajun Chicken Gnocchi. Remember to use fresh seasonings for the best flavor. Try the vegetarian option if you want a meat-free meal. Storing leftovers properly helps keep the dish fresh. Enjoy your cooking, and don’t be afraid to experiment! Each step can lead to a new favorite dish. You’ve got the tools to make it your own. Happy cooking!


