Creamy Garlic Shrimp Pasta Easy Flavorful Recipe

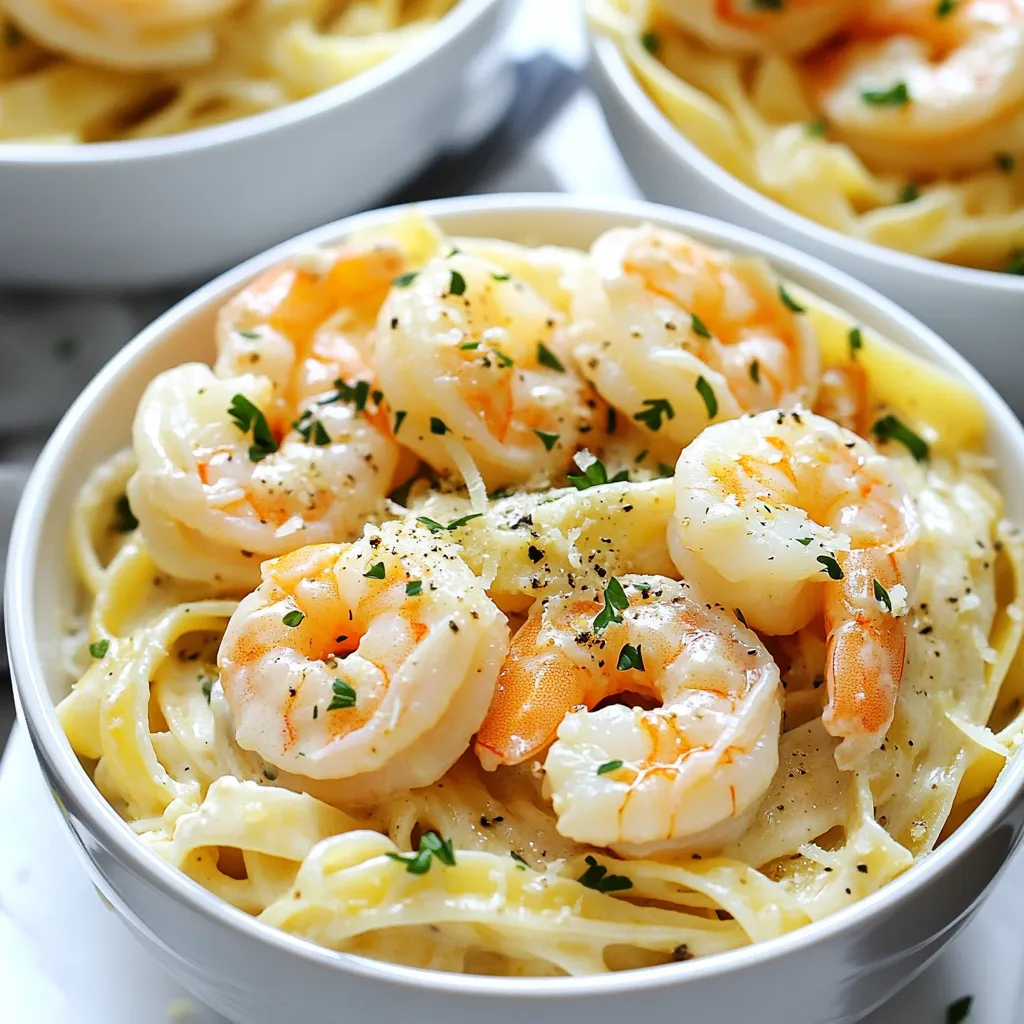
If you’re looking for a quick dinner that bursts with flavor, I’ve got you covered! This Creamy Garlic Shrimp Pasta is easy to make and perfect for any night. With tender shrimp, rich cream, and just the right spices, you’ll have a dish that’s sure to impress. Let’s dive into the simple steps and tasty ingredients so you can create this mouthwatering meal tonight!
Why I Love This Recipe
- Quick and Easy: This recipe is perfect for busy weeknights, taking only 30 minutes from start to finish.
- Rich and Creamy Flavor: The combination of heavy cream and Parmesan cheese creates a luxurious sauce that coats the pasta beautifully.
- Versatile Ingredients: Using shrimp makes this dish feel special, but you can easily substitute with chicken or vegetables if preferred.
- Perfect for Any Occasion: This creamy garlic shrimp pasta impresses guests at dinner parties yet is simple enough for a family meal.
Ingredients
Key Ingredients
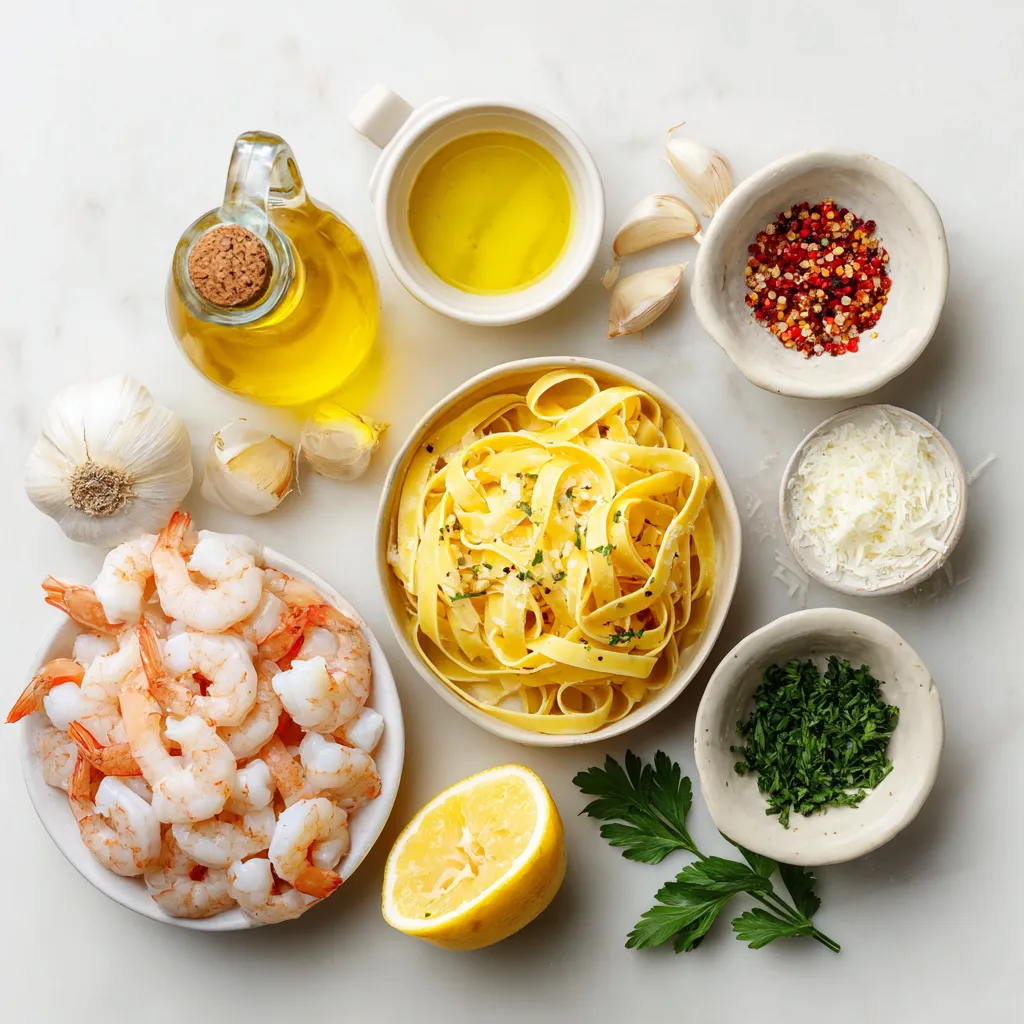
For the base of this creamy garlic shrimp pasta, you need good pasta and shrimp. You can choose between fettuccine or spaghetti. Fettuccine gives a nice, thick bite, while spaghetti offers a classic feel.
Use 1 lb of shrimp, peeled and deveined. This can be fresh or frozen. If using frozen shrimp, thaw them properly before cooking. This ensures they cook evenly and stay tender.
Essential Seasonings and Additions
The key flavors come from a few simple ingredients. You will need 3 tablespoons of olive oil to sauté the shrimp. This adds richness to the dish.
Garlic is a star player here. Use 4 cloves, minced. It brings a strong, aromatic flavor. For a touch of heat, add 1/2 teaspoon of red pepper flakes. This is optional but adds a nice kick.
For the creamy texture, you need 1 cup of heavy cream and 1/2 cup of grated Parmesan cheese. These two make the sauce rich and smooth.
Optional Garnishes
To finish, consider adding a pop of freshness. Fresh parsley, chopped, makes a great garnish. It adds color and flavor. You can also sprinkle some lemon zest on top. This gives a bright note that balances the creaminess of the dish.

Step-by-Step Instructions
Cooking the Pasta
To start, fill a large pot with water and add a pinch of salt. Bring the water to a rolling boil. This step is key, as it helps flavor the pasta. Once boiling, add 8 oz of fettuccine or spaghetti. Cook it for about 8-10 minutes. You want the pasta to be al dente, which means it’s still firm when bitten. Before you drain the pasta, save 1/2 cup of the pasta water. This water will help adjust the sauce later. After cooking, drain the pasta and set it aside.
Sautéing the Shrimp
Next, heat a large skillet over medium-high heat. Add 3 tablespoons of olive oil to the pan. Once the oil is hot, add 1 lb of peeled and deveined shrimp. Season them with salt, pepper, and red pepper flakes if you like some spice. Cook the shrimp for about 2-3 minutes on each side. You want them to turn pink and opaque. When done, remove the shrimp from the skillet and place them on a plate. Set them aside for later.
Preparing the Sauce
Now, let’s make the sauce. In the same skillet where you cooked the shrimp, turn the heat down to medium. Don’t wash the pan! Those bits left from the shrimp add flavor. Add 4 cloves of minced garlic and sauté it for about 1 minute. Stir it constantly so it doesn’t burn. After the garlic is fragrant, pour in 1 cup of heavy cream. Stir well to combine. Let the mixture simmer for 2-3 minutes until it thickens. Gradually whisk in 1/2 cup of grated Parmesan cheese. Keep stirring until the cheese melts and the sauce is creamy. If it gets too thick, add some reserved pasta water to reach your desired consistency.
Tips & Tricks
Achieving Perfectly Cooked Shrimp
To know if shrimp is done, look for a few signs. Cooked shrimp turns pink and opaque. It also curls slightly. This usually takes about 2-3 minutes per side. Avoid cooking too long, as shrimp can turn rubbery. If you see a tight curl, it’s overcooked. To prevent this, keep the heat at medium-high. Cook in batches if needed. This way, each shrimp cooks evenly.
Sauce Consistency Adjustments
Using reserved pasta water can really help your sauce. Before you drain your pasta, save about half a cup of that starchy water. You can add it to your sauce to thin it out if it gets too thick. Start with a little, then mix well and check the texture. For a smoother sauce, whisk the heavy cream in slowly. Stir constantly as you add the Parmesan cheese. This helps it melt nicely without clumping.
Flavor Enhancements
To add more flavor, think about extra spices and herbs. You can try adding basil, thyme, or even a pinch of smoked paprika. These can really boost the taste. If you want to switch up the cheese, consider using Pecorino Romano or Asiago. They bring a unique twist to the creamy sauce. Just remember to adjust the salt as each cheese has its own saltiness.
Pro Tips
- Perfectly Cooked Pasta: To achieve al dente pasta, always follow the package instructions and taste test a minute before the suggested cooking time ends.
- Fresh Ingredients Matter: Using fresh garlic and parsley can significantly enhance the flavor of your dish compared to dried alternatives.
- Adjust Sauce Consistency: If the sauce becomes too thick, gradually add reserved pasta water until you reach your desired creaminess without diluting the flavor.
- Garnishing Tips: For an extra burst of flavor, consider adding a squeeze of fresh lemon juice right before serving to brighten the dish.

Variations
Alternative Protein Options
You can swap shrimp for chicken or tofu. Chicken gives a hearty taste. Cut chicken breasts into bite-sized pieces. Cook them in the same way as shrimp. For a plant-based option, use firm tofu. Press it to remove extra water, then cube and sauté until golden.
Vegetarians can also try chickpeas. They add protein and texture. Simply toss them in with the sauce for a satisfying meal.
Flavor Twist Ideas
Adding fresh veggies can elevate your dish. Spinach works great. Toss it in when you add the sauce, letting it wilt. Sun-dried tomatoes are another option. They add a tangy flavor and a nice color.
You can also play with different cheeses. Try goat cheese for a creamy twist. Feta adds a salty kick. Mixing cheeses can create a unique flavor profile.
Dietary Modifications
If you need gluten-free options, choose gluten-free pasta. There are many brands that taste great. Cook it just like regular pasta for best results.
For dairy-free adaptations, replace heavy cream with coconut milk. It brings a rich texture and a hint of sweetness. Use nutritional yeast instead of Parmesan for a cheesy flavor without dairy.
Storage Info
Refrigeration Guidelines
To store creamy garlic shrimp pasta, let it cool first. Place it in an airtight container. This helps keep it fresh. You can store it in the fridge for up to three days. Be sure to check for any signs of spoilage before eating.
Reheating Instructions
To rewarm the pasta, use a skillet over medium heat. Add a splash of water or extra cream to help it heat evenly. Stir often to ensure the sauce stays creamy. You can also use the microwave, but cover it to keep moisture in. Heat in short bursts to avoid overcooking.
Freezing Tips
Yes, you can freeze this dish! Place it in a freezer-safe container. It can last up to two months in the freezer. To thaw, move it to the fridge overnight. Reheat gently on the stove or in the microwave. Add a little cream or water if the sauce is too thick.
FAQs
What can I serve with creamy garlic shrimp pasta?
You can pair creamy garlic shrimp pasta with several tasty side dishes. Here are some great options:
– Garlic bread: Crunchy and buttery, it complements the pasta well.
– Green salad: A fresh mix of greens adds a nice crunch. Use a light vinaigrette.
– Roasted vegetables: Try bell peppers, zucchini, or asparagus for a colorful side.
If you enjoy wine, I suggest a glass of white wine. A crisp Sauvignon Blanc or a light Pinot Grigio works well. The acidity balances the creaminess of the pasta.
Can I make this dish ahead of time?
Yes, you can prepare creamy garlic shrimp pasta in advance. Here are some tips to help you:
– Cook the pasta: You can cook the pasta a few hours ahead. Drain and toss it with a little olive oil to prevent sticking.
– Prepare the sauce: Make the creamy sauce up to two days in advance. Store it in the fridge in a sealed container.
– Shrimp: Sauté the shrimp just before serving for the best taste.
To reheat, gently warm the sauce on low heat. Add a splash of pasta water to restore the creamy texture.
How do I make it spicier?
If you want to kick up the heat in your creamy garlic shrimp pasta, consider these options:
– Red pepper flakes: Add more red pepper flakes while cooking the shrimp.
– Hot sauce: Drizzle your favorite hot sauce into the sauce for extra spice.
– Chili powder: Mix in a pinch of chili powder for a different flavor profile.
Always taste as you go. Adjust the heat to match your personal preference!
This post covered how to make creamy garlic shrimp pasta. We explored key ingredients like pasta, shrimp, and seasonings. I shared step-by-step cooking instructions, including tips for perfect shrimp. Variations let you swap proteins or add veggies, making this dish your own. Finally, we discussed how to store, reheat, and serve with sides. Enjoy creating a tasty meal that suits your styl

Creamy Garlic Shrimp Pasta
Ingredients
- 8 oz fettuccine or spaghetti
- 1 lb shrimp, peeled and deveined
- 3 tablespoons olive oil
- 4 cloves garlic, minced
- 1 cup heavy cream
- 1 2 cup grated Parmesan cheese
- 1 2 teaspoon red pepper flakes (optional)
- Salt and pepper to taste
- Fresh parsley, chopped (for garnishing)
- 1 Zest of 1 lemon
Instructions
- In a large pot, fill with water, add a generous pinch of salt and bring it to a rolling boil. Carefully add the fettuccine or spaghetti to the boiling water and cook according to the package instructions until al dente, usually about 8-10 minutes. Before draining, reserve 1/2 cup of the pasta water to adjust the sauce later. Once cooked, drain the pasta and set aside.
- Heat a large skillet over medium-high heat and pour in the olive oil. As the oil heats, add the peeled and deveined shrimp, seasoning them liberally with salt, pepper, and red pepper flakes if you desire a bit of heat. Cook for 2-3 minutes on each side until the shrimp turn pink and opaque. Once done, carefully remove the shrimp from the skillet and transfer them to a plate; set aside.
- In the same skillet where the shrimp were cooked, lower the heat to medium. Add the minced garlic and sauté for about 1 minute, stirring constantly until fragrant but not allowing it to brown.
- Pour the heavy cream into the skillet and gently stir to combine it with the garlic. Let the mixture simmer for 2-3 minutes until it begins to thicken. Gradually whisk in the grated Parmesan cheese, continuing to stir until the cheese melts completely and the sauce turns creamy and smooth. If it becomes too thick, slowly incorporate some of the reserved pasta water until you achieve your preferred consistency.
- Add the sautéed shrimp back into the skillet, tossing them to coat in the creamy sauce. Next, introduce the cooked pasta along with the lemon zest, gently mixing everything together until the pasta is evenly coated with the creamy mixture. Taste the dish and adjust seasoning with more salt and pepper if necessary.
- Portion the creamy garlic shrimp pasta into bowls, finishing each serving with a sprinkle of freshly chopped parsley for a pop of color and flavor. Add more grated Parmesan on top if desired for an extra cheesy touch.


![To make garlic roasted green beans, you'll need these simple items: - 1 pound fresh green beans, trimmed and rinsed - 4 large cloves garlic, finely minced - 3 tablespoons extra virgin olive oil - 1 teaspoon freshly grated lemon zest - 1 teaspoon balsamic vinegar - ½ teaspoon red pepper flakes (optional for heat) - Sea salt and freshly ground black pepper to taste - 2 tablespoons finely grated Parmesan cheese (optional) I always prefer fresh green beans for this recipe. They taste better and have a nice crunch. Fresh beans roast evenly and soak up the flavors well. If you can’t find fresh ones, frozen beans work too. Just make sure to thaw and drain them first. They may not be as crisp, but they will still taste great. You can change some ingredients if you need to. If you don’t have garlic, try using garlic powder. Instead of lemon zest, you can use orange zest for a different flavor. If you want a different vinegar, try red wine vinegar. For a dairy-free option, skip the Parmesan cheese or use a vegan cheese instead. These swaps keep the dish tasty and fun! To start, gather your ingredients. You will need: - 1 pound fresh green beans, trimmed and rinsed - 4 large cloves garlic, finely minced - 3 tablespoons extra virgin olive oil - 1 teaspoon freshly grated lemon zest - 1 teaspoon balsamic vinegar - ½ teaspoon red pepper flakes (optional for heat) - Sea salt and freshly ground black pepper to taste - 2 tablespoons finely grated Parmesan cheese (optional) First, preheat your oven to 425°F (220°C). This step is key for crispy beans. Next, take a large mixing bowl and add the green beans. Toss in the minced garlic, olive oil, lemon zest, and balsamic vinegar. If you like a little heat, add red pepper flakes. Season with sea salt and black pepper to taste. Mix everything well. You want each bean coated with flavor. Now, it’s time to roast! Spread the green beans on a large baking sheet. Make sure they lie flat in a single layer. This helps them roast evenly. Place the baking sheet in the oven and roast for 15-20 minutes. Halfway through, give the beans a toss. This ensures they cook evenly. You’ll know they’re done when they’re tender but still have a slight crunch. Once out of the oven, if you like, sprinkle grated Parmesan cheese on top. The heat will melt it slightly, making it even better. Transfer the roasted green beans to a nice serving dish. Serve them warm to your family or guests. They pair well with many main dishes. Try them with grilled chicken or fish. You can also serve them as a stand-alone snack. For the full recipe, please see the earlier section. Enjoy your tasty green beans! To boost the taste of garlic roasted green beans, add a squeeze of lemon. Lemon brings brightness and freshness. You can also use fresh herbs like thyme or rosemary. These herbs add depth and aroma. If you love heat, try adding more red pepper flakes. Just be careful not to overdo it! For the best texture, spread the beans on the baking sheet. Make sure they are in a single layer. This helps them roast evenly. Toss them halfway through cooking to ensure all sides get crispy. If you want them extra crispy, leave them in for a few more minutes. Serve your garlic roasted green beans in a nice dish. You can sprinkle extra Parmesan cheese on top for a gourmet look. Adding a few lemon wedges next to the beans can enhance the presentation. It also invites your guests to add more flavor if they wish. For a pop of color, place fresh herbs on top before serving. This will make your meal look and taste amazing! You can find the full recipe for garlic roasted green beans [Full Recipe]. {{image_4}} You can mix in other veggies with garlic roasted green beans. Carrots, bell peppers, and zucchini work well. Just cut them into similar sizes. This way, they all cook evenly. Toss them with the green beans in the same mix for great flavor. You can also try adding cherry tomatoes for a pop of color and sweetness. Add herbs to change the taste of your garlic roasted green beans. Fresh thyme or rosemary adds a lovely aroma. A sprinkle of smoked paprika gives a warm, savory hint. You can also try a dash of cumin for a unique flavor. These twists make your dish exciting and fresh each time. This recipe is already vegetarian. To make it vegan, simply skip the Parmesan cheese. You can also add nutritional yeast for a cheesy flavor without dairy. It’s a great way to keep it creamy and flavorful. Enjoy these garlic roasted green beans as a side dish or main meal. Each variation keeps it fun and tasty! For the full recipe, check out the detailed instructions provided earlier. After enjoying your garlic roasted green beans, you might have leftovers. Cool the beans down first. Then, place them in an airtight container. They stay fresh in the fridge for about 3-4 days. When ready to eat, check for any signs of spoilage. If they look good, you can enjoy them again! If you have more leftovers than you can eat, freezing is a great option. First, let the beans cool completely. Then spread them on a baking sheet in a single layer. Freeze them for about an hour. This step helps the beans stay separate. After freezing, transfer them to a freezer-safe bag. They can last up to 3 months in the freezer. Label the bag with the date so you know when to use them. Reheating garlic roasted green beans is simple. You can use the oven or a microwave. For the oven, preheat it to 350°F (175°C). Spread the beans on a baking sheet and heat for about 10 minutes. If you use a microwave, place the beans in a safe dish. Heat them for 1-2 minutes, stirring halfway. This method keeps them tasty and warm. For extra flavor, add a splash of olive oil or a sprinkle of salt before serving. Enjoy your meal! To make garlic roasted green beans, start by preheating your oven to 425°F (220°C). In a big bowl, mix 1 pound of fresh green beans with 4 minced garlic cloves, 3 tablespoons of olive oil, 1 teaspoon of lemon zest, and 1 teaspoon of balsamic vinegar. If you like spice, add ½ teaspoon of red pepper flakes. Season with sea salt and black pepper. Toss everything until the beans are well coated. Spread the beans on a baking sheet in a single layer. Roast them for 15-20 minutes, tossing halfway. When they are tender and crisp, serve hot. You can find the Full Recipe for more details. Yes, you can prepare garlic roasted green beans ahead of time. You can trim and wash the green beans and mix them with the garlic and oil. Store this mix in the fridge for up to a day. When you’re ready to eat, just roast them as directed. This makes dinner prep easier, and you can enjoy more time with your guests. Garlic roasted green beans pair well with many dishes. You can serve them alongside grilled chicken or fish for a balanced meal. They also complement pasta dishes, like spaghetti or fettuccine. If you want a vegetarian option, try them with quinoa or rice. Their bright flavor adds a nice touch to any plate. This post covered garlic roasted green beans from ingredients to serving ideas. Fresh or frozen beans work well, and you can swap key ingredients easily. Roasting creates a rich flavor, and adding herbs boosts it even more. Don’t forget about storage; knowing how to keep leftovers can help. Remember, you can customize this dish with other veggies or herbs. Enjoy experimenting with flavors! Roasted green beans can fit any meal.](https://joymealplan.com/wp-content/uploads/2025/07/774fbef7-0e10-49a5-abc6-76b985870023-768x768.webp)
![- 8 corn tortillas - 1 cup black beans, drained and rinsed - 1 cup corn kernels (fresh or frozen) - 1 red bell pepper, diced - 1 small zucchini, diced - 1 cup fresh spinach, chopped - 1 teaspoon ground cumin - 1 teaspoon chili powder - 1/2 teaspoon garlic powder - 1 1/2 cups enchilada sauce - 1 cup shredded cheese - 1 tablespoon olive oil - Salt and pepper to taste - Fresh cilantro for garnish You can swap black beans for pinto or kidney beans. You might also try non-dairy cheese if you want a vegan option. If you need gluten-free, use gluten-free tortillas. These swaps keep the recipe flexible and fun! Each serving has about 300 calories. You get protein from beans and fiber from veggies. Black beans boost heart health, while spinach adds iron. Corn gives you energy, making these enchiladas not just tasty but also good for you. - Preheat the oven to 375°F (190°C). - In a large skillet, heat 1 tablespoon of olive oil over medium heat. - Add 1 diced red bell pepper and 1 small diced zucchini. - Sauté for about 5 minutes until they soften. Stir often to avoid sticking. - Next, stir in 1 cup of drained black beans, 1 cup of corn, and 1 cup of chopped spinach. - Cook for 3-4 minutes until the spinach wilts. - Season the mix with 1 teaspoon of ground cumin, 1 teaspoon of chili powder, and 1/2 teaspoon of garlic powder. - Add salt and pepper to taste. Mix well and cook for another 2 minutes. - Pour 1/2 cup of enchilada sauce into a baking dish. Spread it evenly across the bottom. - Warm 8 corn tortillas in the microwave for 20 seconds, or heat them in a skillet. - Take one tortilla and spoon a portion of the filling into the center. - Sprinkle some shredded cheese on top, then roll it up tightly. Place the rolled tortilla seam-side down in the baking dish. - Repeat this for all the tortillas until the filling is used up. - Pour the remaining enchilada sauce over the assembled enchiladas. - Sprinkle the remaining shredded cheese on top of the sauce. - Place the dish in the oven and bake for 20-25 minutes. Look for melted and bubbly cheese. - Allow the enchiladas to cool for a few minutes before serving. Enjoy with fresh cilantro if you like! For the full recipe, check the details above. - Add smokiness with chipotle peppers: Chipotle peppers add a rich, smoky taste. You can use them in the filling or mix them into the sauce. Just chop a few and add them to your veggies while cooking. This will elevate the flavor profile. - Use fresh herbs for garnish: Fresh herbs brighten up your dish. I love adding cilantro or parsley on top before serving. It adds color and freshness, making the enchiladas look even more appealing. - Importance of softening tortillas: Softening the tortillas is key. If they are too hard, they will crack when you roll them. Heat them in the microwave for 20 seconds or warm them on a skillet. This makes them easy to roll and fill without breaking. - Tips for perfectly melted cheese: To get that perfect melt, use a cheese blend with good melting properties. Cheddar and Monterey Jack work great. Add a little extra cheese on top when baking for a delicious, bubbly finish. - Pair with side dishes: Serve your enchiladas with rice or beans on the side. These help balance the meal and add more protein. You can also serve them with a simple salad for extra crunch. - Ideas for toppings: Top your enchiladas with sour cream or guacamole. These creamy toppings add richness and flavor. You can also sprinkle some diced onions or jalapeños for extra spice. These tips will help you make your vegetarian enchiladas even more delicious. For the full recipe, check out the [Full Recipe]. {{image_4}} You can make your enchiladas even better by changing the filling. - Adding roasted vegetables: Roasting veggies like carrots, eggplant, or butternut squash adds depth. The sweet, caramelized flavor makes the filling more exciting. - Using different kinds of cheese: Try mixing cheeses like queso fresco or pepper jack. Each cheese brings its unique taste. This change can keep your enchiladas fresh and fun. The sauce can change the whole dish. - Homemade enchilada sauce recipe: Making your own sauce is simple and rewarding. Blend tomatoes, chili powder, and spices for a rich flavor. This way, you control the heat and taste. - Alternatives like verde sauce: If you like a fresh twist, try verde sauce made with tomatillos. It adds a nice tangy kick that contrasts well with the cheese and veggies. You can adjust the recipe to fit various diets. - Vegan version of enchiladas: Swap cheese for a nut-based cheese or leave it out. Use more beans and veggies to fill the tortillas. You still get a hearty meal without animal products. - Low-carb or keto adaptations: Use lettuce wraps instead of tortillas. This swap keeps the taste while reducing carbs. You can still enjoy the flavors of enchiladas without the extra carbs. For a complete guide on making these delicious meals, check out the Full Recipe. To store leftovers, first, let the enchiladas cool down. Place them in an airtight container. This keeps them fresh and tasty. Glass or plastic containers work well. I prefer glass for easy reheating. If you want to freeze enchiladas, wrap them tightly in plastic wrap. Then, place them in a freezer-safe bag or container. Label the bag with the date. To reheat frozen enchiladas, remove them from the freezer. Let them thaw in the fridge overnight. Bake in a preheated oven at 350°F (175°C) until hot. In the fridge, these enchiladas last about 3 to 5 days. Always check for signs of spoilage. Look for off smells, mold, or changes in color. If you see any of these, it’s best to throw them out. Enjoy your tasty vegetarian enchiladas with confidence! For the full recipe, check the earlier sections. To prevent soggy enchiladas, apply the sauce wisely. Use a thin layer on the bottom of your dish. Do not drown the rolled enchiladas in sauce. Pour the rest of the sauce on top after filling them. Bake them just right. Overcooking can cause sogginess. Bake at 375°F for 20-25 minutes. This keeps them firm and tasty. Yes, you can use flour tortillas. They are softer and easier to roll. However, corn tortillas add a nice flavor. They are also gluten-free. Flour tortillas can get too soft and break. Each type has its charm. Choose based on your taste and needs. Many sides pair well with vegetarian enchiladas. Try Mexican rice for a classic touch. Beans add protein and fiber. A fresh salad can balance the meal. Guacamole or sour cream makes a great dip. You can also serve with a refreshing drink. Consider agua fresca or a light beer. These sides enhance the flavor of your enchiladas. Enjoy exploring different pairings! This blog post covered all you need for delicious vegetarian enchiladas. We discussed key ingredients, from black beans to fresh spinach. I shared tips on prepping and cooking, plus variations for your taste. You learned how to store leftovers and reheat them. These enchiladas are tasty, healthy, and easy to make. Enjoy trying different flavors and ingredients. Whether for a quick dinner or a party, these enchiladas will impress everyone. Now, get in the kitchen and start cooking!](https://joymealplan.com/wp-content/uploads/2025/06/0bc30ee8-fb20-468c-811c-2f42a5691433-768x768.webp)