Creamy Mushroom Risotto Perfectly Rich and Filling

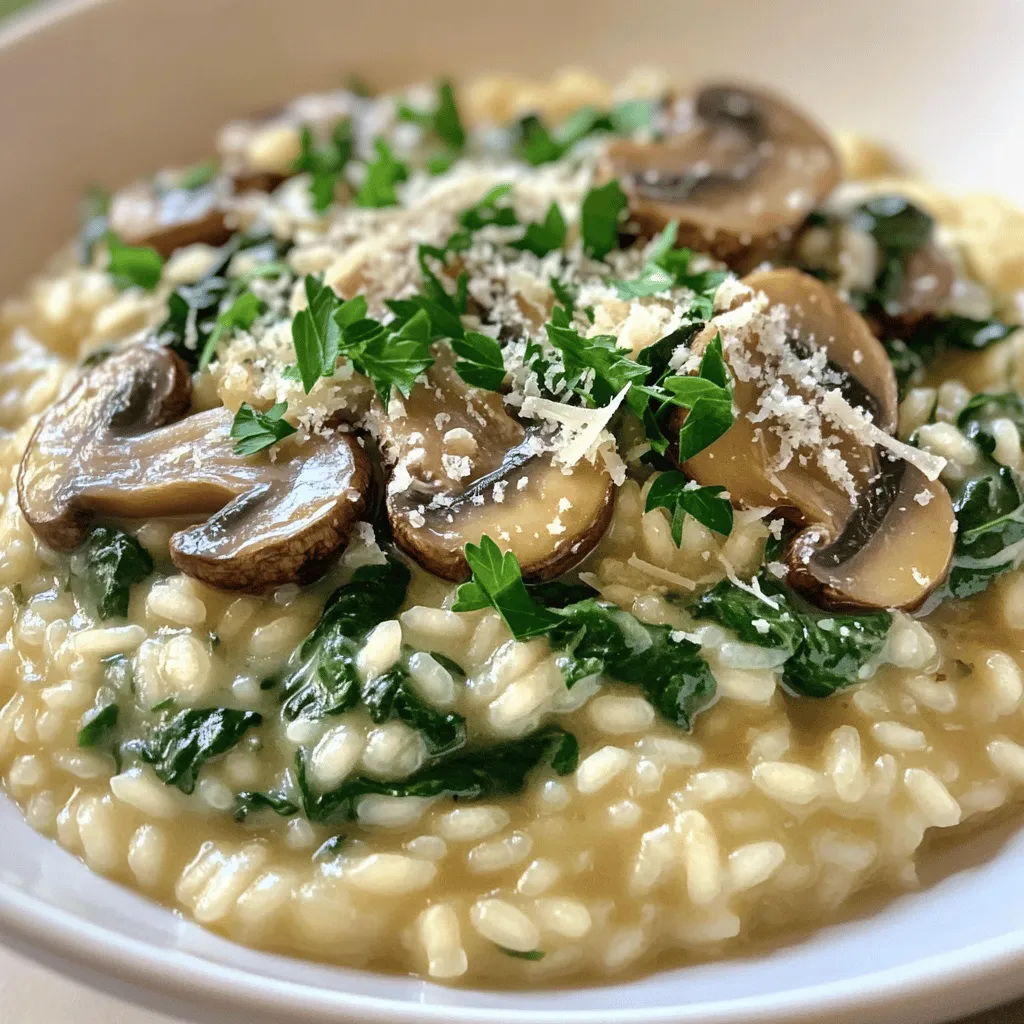
Are you ready to dive into a bowl of creamy mushroom risotto? This dish is rich, filling, and perfect for any occasion. With simple ingredients like Arborio rice, fresh mushrooms, and Parmesan cheese, you can wow your family and friends. Follow my step-by-step guide for a creamy, dreamy experience that’s sure to impress. Let’s get started on this culinary journey that will elevate your dinner game!
Ingredients
To make a rich and filling creamy mushroom risotto, you need the following ingredients:
– Arborio rice
– Vegetable broth
– Fresh mushrooms (cremini or shiitake)
– Chopped onion
– Minced garlic
– Fresh spinach
– Grated Parmesan cheese
– Heavy cream
– Olive oil
– Seasoning (salt and pepper)
– Fresh parsley for garnish
Each ingredient plays a key role in making the risotto creamy and tasty. Arborio rice is special because it has a high starch content. This starch helps create that creamy texture we love. Fresh mushrooms add depth and earthiness, while the onion and garlic bring flavor. Spinach gives a nice touch of color and nutrients.
Grated Parmesan cheese and heavy cream create richness. Olive oil adds a smooth taste and helps sauté the onions and garlic. Finally, seasoning with salt and pepper enhances all the flavors. For a lovely finish, fresh parsley adds brightness and a pop of color.
Step-by-Step Instructions
Preparation Steps
1. Heating the vegetable broth:
Start by pouring 4 cups of vegetable broth into a medium saucepan. Heat it over low heat. Keeping it warm is key. This helps the rice cook evenly.
2. Sautéing the onion and garlic:
In a large skillet, add 2 tablespoons of olive oil. Warm it over medium heat. Once hot, toss in 1 finely chopped onion. Cook for 3-5 minutes until the onion looks clear. Then, add 2 cloves of minced garlic. Stir for 1 minute for a rich aroma.
3. Cooking the mushrooms:
Next, add 1 cup of sliced mushrooms to your skillet. You can use cremini or shiitake. Cook them for 5-7 minutes until they become soft. Stir them often to mix in the flavors.
Cooking the Risotto
1. Toasting the Arborio rice:
Now, it’s time to add 1 cup of Arborio rice to the skillet. Stir well to coat every grain with oil. Toast the rice for 1-2 minutes. This adds a nice nutty flavor.
2. Gradually adding broth:
Begin adding the warm vegetable broth, one ladle at a time. Stir often as the rice absorbs the liquid. Repeat this for about 20 minutes. The rice should turn creamy and tender but still firm inside.
3. Incorporating spinach and cheese:
As the rice cooks, fold in 1 cup of chopped spinach, ½ cup of cream, and ½ cup of grated Parmesan cheese. Mix well until the spinach wilts and the cheese melts. This step creates a rich, creamy texture.
Final Touches
1. Tasting and seasoning:
Taste your risotto at this point. Add salt and pepper to your liking. This is crucial for flavor. Each bite should be satisfying and delicious.
2. Resting the dish before serving:
Once cooked, remove the skillet from heat. Let it rest for a minute. This allows the flavors to blend nicely.
For the complete recipe, refer to the earlier mentioned section. Enjoy the rich and filling creamy mushroom risotto!
Tips & Tricks
Key Tips for Perfect Risotto
– Maintaining consistent broth temperature: Always keep your broth warm. This helps the rice cook evenly. A consistent temperature means creamy risotto without waiting.
– Stirring techniques for creaminess: Stir often, but not too hard. This helps release the starches from the rice. Creaminess comes from the movement of the grains.
Avoiding Common Mistakes
– Overcooking the rice: Keep an eye on the rice. It should be tender but still firm. If you cook it too long, it turns mushy.
– Skipping seasoning adjustments: Taste as you go. Each batch of mushrooms can taste different. Adjust salt and pepper to make it perfect.
Serving Suggestions
– Presentation tips for serving: Use shallow bowls for a nice look. Add some fresh parsley and a sprinkle of cheese on top. This makes a simple dish look fancy.
– Pairing with wines or salads: A light white wine goes well with risotto. You can also serve it with a fresh salad for a complete meal. Enjoy your creamy mushroom risotto!

Variations
Ingredient Substitutions
You can switch out the rice for other types. Try using jasmine or basmati rice for a different taste. Each type of rice has its own texture and flavor. You can also mix in different veggies. Peas, asparagus, or bell peppers can add color and crunch. Experimenting with these substitutes keeps the dish fresh and exciting.
Flavor Enhancements
To boost flavor, add fresh herbs like thyme or rosemary. A sprinkle of nutmeg can create warmth in your risotto too. You can also add proteins. Shrimp or chicken can make the dish heartier. Simply cook the protein in the skillet before adding the rice. This way, you infuse the risotto with extra flavor.
Dietary Adjustments
For a vegan version, swap out the cream and cheese for coconut milk or nutritional yeast. This keeps the dish creamy while adding a rich flavor. You can also make a low-fat risotto. Use low-fat cream and skip the cheese. You’ll still enjoy a tasty meal without the extra calories.
Storage Info
Refrigeration Tips
Store your creamy mushroom risotto in an airtight container. Make sure it cools down first. This keeps it fresh and tasty. Place it in the fridge. It’s best to eat it within three days for the best flavor. If you want to reheat it, add a splash of broth or water. This helps bring back its creamy texture.
Freezing Instructions
You can freeze risotto for later use. First, let it cool completely. Then, scoop it into freezer bags or containers. Try to remove as much air as you can. Label the bags with the date. When you want to eat it, thaw it in the fridge overnight. Reheat in a saucepan on low heat. Add some broth or water to restore creaminess. Stir often to keep it smooth.
Shelf Life
Creamy mushroom risotto lasts in the fridge for about three days. If you freeze it, it can stay good for up to three months. After that, the taste may fade. Always check for signs of spoilage before eating leftovers. If it smells off or looks strange, it’s best to throw it away. Enjoy your creamy mushroom risotto by storing it properly!
FAQs
What is the best type of rice for risotto?
The best rice for risotto is Arborio rice. This rice has a high starch content. It makes the risotto creamy and smooth. Other good options include Carnaroli and Vialone Nano. These types also have a rich texture and absorb flavors well. When you use Arborio rice, your creamy mushroom risotto will turn out perfect!
Can I make risotto in advance?
You can prepare risotto in advance, but it is best fresh. If you make it early, cool it quickly and store it in the fridge. Keep it in an airtight container for up to two days. When you want to serve it, reheat with a little broth or water. This helps bring back its creamy texture.
How do I reheat leftover risotto without drying it out?
To reheat risotto, add a splash of broth or water. Place it in a pan over low heat. Stir it gently until warmed through. This keeps the rice creamy and moist. Avoid using a microwave, as it can dry it out. A little patience goes a long way in making your leftovers taste great!
Why is stirring important when making risotto?
Stirring is key when making risotto. It helps release the starch from the rice. This starch gives the risotto its creamy texture. Stirring also prevents the rice from sticking to the pan. It promotes even cooking, so every grain becomes tender and flavorful. So keep stirring for a perfect creamy mushroom risotto!
What can I serve with creamy mushroom risotto?
Creamy mushroom risotto pairs well with many dishes. You can serve it with grilled chicken or fish for protein. A fresh salad with lemon vinaigrette adds a nice crunch. For a special touch, try it with garlic bread or roasted vegetables. These sides complement the rich flavors of the risotto beautifully.
This blog post guides you through making creamy mushroom risotto. We covered essential ingredients, preparation, cooking steps, and final touches. I shared tips to avoid common mistakes and offered serving suggestions and variations. You can even adjust the recipe for dietary needs.
With these steps, you can create a delicious dish. Enjoy your cooking and feel proud of the meal you make!


![To make this savory sweet potato black bean chili, gather these main ingredients: - 2 medium sweet potatoes, peeled and cut into 1-inch cubes - 1 can (15 oz) black beans, thoroughly rinsed and drained - 1 can (14.5 oz) diced tomatoes - 1 medium onion, finely chopped - 2 cloves garlic, finely minced - 1 bell pepper, diced - 1 cup vegetable broth - 2 teaspoons ground cumin - 1 teaspoon smoked paprika - 1 teaspoon chili powder - ½ teaspoon dried oregano - Salt and freshly cracked pepper to taste - 2 tablespoons extra virgin olive oil - Fresh cilantro, chopped, for garnish - Lime wedges, for serving If you want to take your chili to the next level, you can add some optional ingredients: - 1-2 jalapeños, diced for heat - 1 cup corn, for sweetness and crunch - 1 teaspoon cayenne pepper, for extra spice - 1 tablespoon apple cider vinegar, to brighten flavors This chili is not just tasty; it’s also packed with nutrition. Here’s a quick breakdown: - Calories: About 250 per serving - Protein: 10 grams - Fat: 7 grams - Carbohydrates: 45 grams - Fiber: 12 grams - Sugars: 5 grams This dish is rich in fiber and protein, making it a filling meal. It also provides a good source of vitamins A and C from the sweet potatoes and peppers. For the full recipe, check out the provided link! Start by gathering your ingredients. You need sweet potatoes, black beans, diced tomatoes, onion, garlic, bell pepper, vegetable broth, spices, olive oil, salt, and pepper. Make sure to peel and cube the sweet potatoes into 1-inch pieces. Rinse the black beans well and drain them. Chop the onion and garlic finely. Dice the bell pepper. This will set you up for success! Heat olive oil in a large pot over medium heat. Add the chopped onion and bell pepper. Sauté them for about 5 minutes until they are soft. Then, add the minced garlic. Stir for 1 minute until you smell its great aroma. Next, add the sweet potatoes, diced tomatoes, and vegetable broth. Sprinkle in cumin, smoked paprika, chili powder, oregano, and season with salt and pepper. Mix everything together. Bring the mix to a gentle boil, then lower the heat. Cover the pot and let it simmer for 25-30 minutes. The sweet potatoes should be tender and easy to fork. Finally, fold in the black beans and let them warm for about 5 minutes. Taste it and adjust the seasoning if you want. Serve the chili hot in vibrant bowls. Top each bowl with fresh cilantro and a lime wedge. The lime adds a nice burst of flavor. For more richness, you can add a dollop of avocado or sour cream. This chili tastes great and looks beautiful on the table. For the full recipe, check out the [Full Recipe] link! To boost flavors in your sweet potato black bean chili, use a few easy tricks. Start by sautéing your onions and peppers in olive oil. This step builds a solid flavor base. Make sure they soften and release their natural sugars. Next, add garlic for aroma, stirring it briefly. This brings out the richness in your chili. Using smoked paprika adds depth. It gives a subtle, smoky taste that lifts the dish. Always taste as you go. Adjusting the seasoning lets you find the perfect balance. Many people rush when cooking chili. Give your sweet potatoes enough time to soften. If they are still hard, your chili will not taste great. Another mistake is ignoring the beans. Be sure to fold them in gently so they don’t break apart. Also, don’t skip the lime! It brightens the flavors. Lastly, avoid overcooking the chili. A gentle simmer is enough to meld the flavors without losing texture. If you like heat, there are simple ways to spice things up. Start with mild chili powder, then add cayenne or hot sauce for more warmth. You can also use diced jalapeños for a fresh kick. For less heat, choose milder peppers and skip the extra spices. Always taste before serving. This way, you can adjust the spice level to suit everyone’s palate. {{image_4}} This chili is already vegetarian and vegan. You can enhance it by adding more veggies. Try using zucchini, corn, or mushrooms. These add texture and flavor. You can also swap the vegetable broth for a homemade version. Just boil water with herbs and spices to boost taste. This chili is gluten-free as is. If you want, you can add gluten-free grains. Quinoa or brown rice make great additions. Cook them separately and mix them in before serving. This will give you a hearty meal without gluten. You can make this chili your own with fun add-ins. Try adding fresh spinach or kale for extra greens. A splash of lime juice brightens the flavors. For a smoky kick, add chipotle peppers in adobo sauce. You can also top it with avocado, cheese, or yogurt. These toppings add creaminess and contrast. Check out the Full Recipe for more ideas! To keep your sweet potato black bean chili fresh, first, let it cool down. Then, pour it into an airtight container. This helps prevent spills and keeps the flavor locked in. You can store it in the fridge for up to three days. Make sure to label the container with the date for easy tracking. If you want to save your chili for later, freezing is a great option. Use freezer-safe bags or containers. Pour the chili into the bags, leaving some space for expansion. Seal them tightly to avoid freezer burn. You can freeze your chili for up to three months. Remember to label the bags with the date so you know when to use them. When you're ready to enjoy your chili again, there are a few ways to reheat it. The best method is to use a pot on the stove. Heat it over medium-low heat, stirring often until it's hot. If you prefer the microwave, pour the chili into a microwave-safe bowl. Cover it loosely and heat for 2-3 minutes, stirring halfway through. Always check that it’s hot all the way through before serving. For added flavor, squeeze some fresh lime juice on top before you dig in! If you do not have sweet potatoes, you can use butternut squash or regular potatoes. Both options will add a nice texture and flavor to the chili. You may also try carrots for a slightly sweeter taste. Adjust the cooking time as needed, since these veggies may take different times to cook. To add heat to your chili, you can use fresh jalapeños or serrano peppers. Chop them up and add them with the onions. You can also increase the chili powder or smoked paprika. Adding a dash of hot sauce or cayenne pepper at the end can give it an extra kick too! Yes, canned black beans work great in this recipe. They save time and still taste delicious. Make sure to rinse and drain them well before adding to the chili. This helps remove excess sodium and keeps the flavor balanced. To serve more people, just double or triple the ingredients. Keep the same cooking steps, but watch the cooking time. You may need a larger pot to accommodate the extra chili. Always taste and adjust seasoning as you increase the amounts. For the full recipe, check out the earlier section. This article covered key ingredients and cooking steps for your dish. You learned about optional ingredients for added flavor and useful tips to improve taste. We explored variations, including vegetarian and gluten-free options. You also picked up on how to store leftovers and common questions. Remember, cooking is fun, and experimenting makes it even better. Enjoy your dish and feel proud of your culinary skills!](https://joymealplan.com/wp-content/uploads/2025/07/8c039768-80c3-4c1c-94c6-06aef8e7156d-768x768.webp)
 for all the details! {{image_4}} You can switch up the protein in Chicken Alfredo Stuffed Shells easily. Ground turkey or beef works well. Both give a rich taste and fit well in the shells. If you want a lighter option, ground chicken is great too. For vegetarian options, you can use mushrooms or spinach. They add flavor and nutrients without meat. Tofu is also a good choice. It soaks up the sauce nicely and adds protein. You can play with the sauce to create different flavors. Try adding garlic or herbs to the Alfredo sauce. This gives it a fresh taste. You might also enjoy a white wine cream sauce for a twist. Adding roasted vegetables to the sauce works wonders too. Think peppers, zucchini, or even spinach. This makes the dish colorful and healthy. Cheese can change the whole vibe of your dish. You can mix in different cheeses like fontina or gouda. These cheeses melt beautifully and add a new flavor. If you want a lighter option, try part-skim mozzarella. For those who avoid dairy, vegan cheese is a great alternative. Look for brands made from nuts or soy. They can also melt well and taste great. To store Chicken Alfredo stuffed shells in the fridge, let them cool first. Place them in an airtight container. Keep them in the fridge for up to three days. For best freshness, cover the top with a bit of extra Alfredo sauce. This keeps the shells moist and tasty. To freeze stuffed shells, first let them cool completely. Then, place them in a single layer on a baking sheet. Freeze until solid, about two hours. After that, pack them in a freezer-safe container or bag. They can last for up to three months in the freezer. When you’re ready to eat, thaw them in the fridge overnight. Reheat in the oven at 350°F (175°C) for about 25 minutes. Cover with foil to avoid drying out. Enjoy your delicious meal again! Can I use non-dairy substitutes? Yes, you can! Use non-dairy cheese and a plant-based Alfredo sauce. This keeps the dish creamy without dairy. How long does it take to cook from frozen? If you cook from frozen, add about 15 to 20 minutes to the baking time. This ensures everything heats through well. What can I serve with Chicken Alfredo Stuffed Shells? These shells pair great with a fresh green salad or warm garlic bread. Both options add balance to your meal. Why are my shells falling apart? Overcooking the pasta shells can cause this. Make sure to cook them just until al dente. How can I prevent the filling from spilling out? Don’t overfill the shells. Fill them just enough, but leave some space at the top. This helps keep the filling secure. What's the best way to know when it's fully cooked? Check if the cheese on top is bubbly and golden brown. You can also insert a knife to see if it’s hot inside. Can I make this dish ahead of time? Absolutely! You can prepare the shells and store them in the fridge. Just bake them when you're ready to eat. For details, check the Full Recipe. In this article, we explored how to make Chicken Alfredo Stuffed Shells. We covered the key ingredients, including pasta shells, chicken, and cheeses. I shared clear steps for preparation, filling, and baking. We also discussed tips for perfecting your dish and variations to suit your taste. Remember, cooking is fun and can be creative. Don't hesitate to try new flavors or ingredients. Enjoy your delicious stuffed shells and share them with friends and family!](https://joymealplan.com/wp-content/uploads/2025/07/ca290995-1373-40bc-abd5-a22e15d03aa0-768x768.webp)