Crispy Air Fryer Chicken Tenders Easy and Flavorful Meal

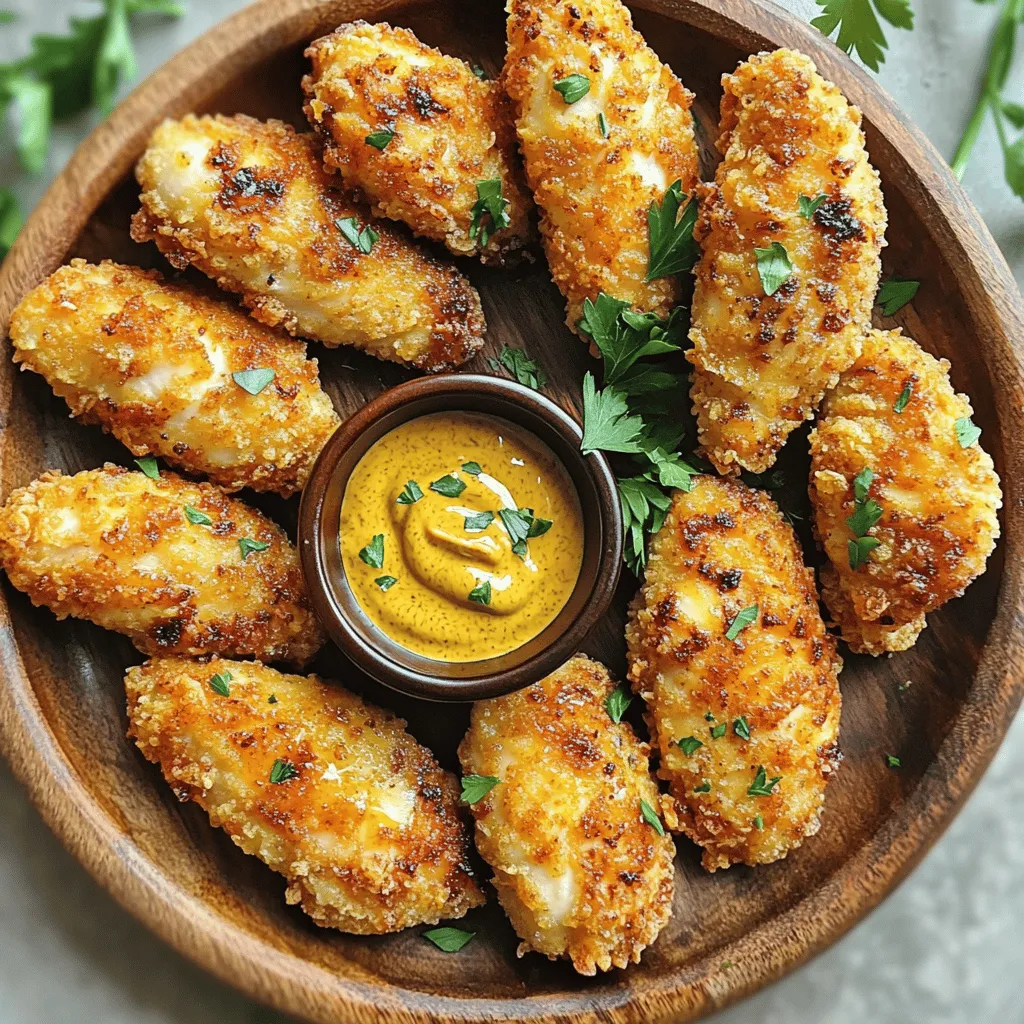
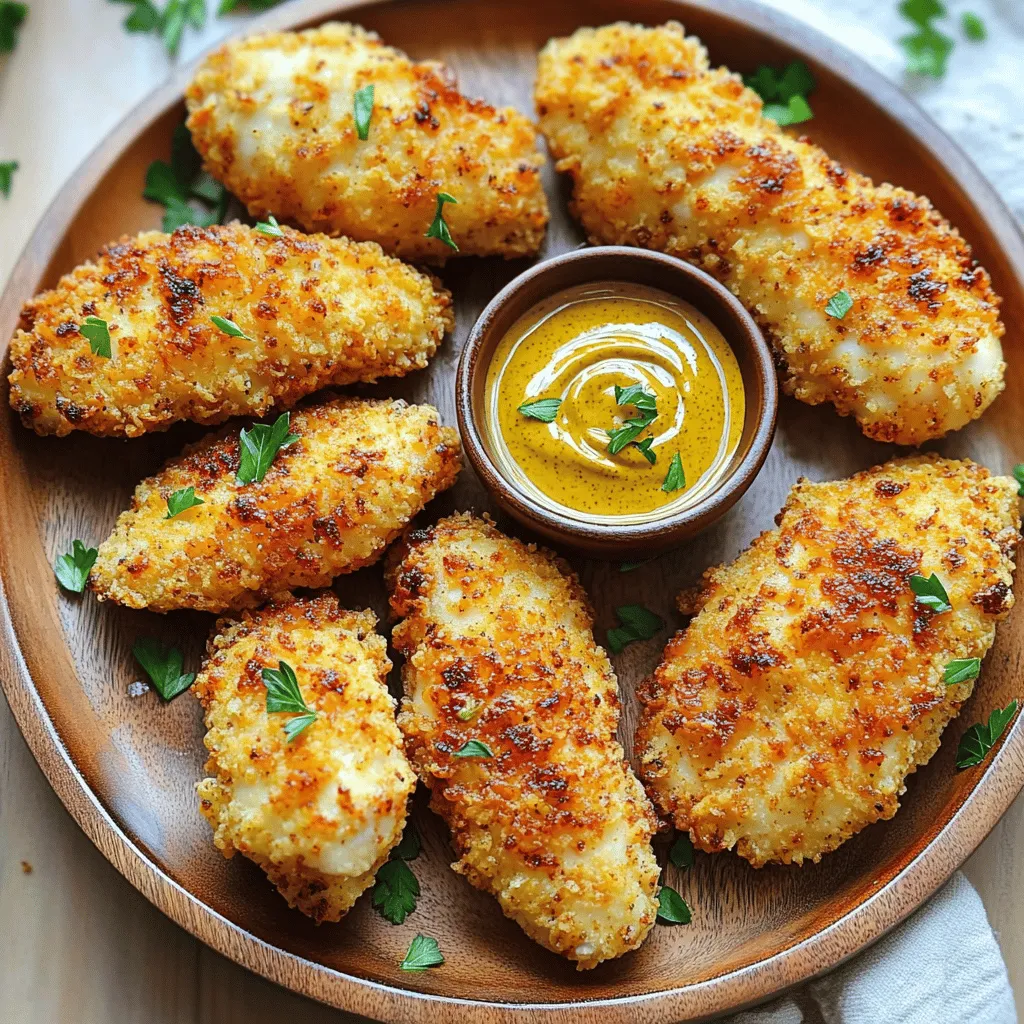
Craving a quick and tasty meal? You’re in for a treat with my Crispy Air Fryer Chicken Tenders! This easy recipe gives you juicy chicken coated in seasoned breadcrumbs. Plus, it’s healthier than frying in oil. In just a few simple steps, you can enjoy a delicious dish that the whole family will love. Let’s dive into the ingredients and get cooking!
Ingredients
List of Ingredients
– 1 lb chicken breast, cut into uniform strips
– 1 cup buttermilk
– 1 cup all-purpose flour
– 1 cup seasoned breadcrumbs
– 1 teaspoon garlic powder
– 1 teaspoon onion powder
– 1 teaspoon smoked paprika
– 1/2 teaspoon salt
– 1/2 teaspoon black pepper
– Light cooking spray
This list has everything you need for crispy air fryer chicken tenders. The chicken breast is the star. It’s juicy and tender when cooked right. Buttermilk adds flavor and helps keep the meat moist. The flour and breadcrumbs create that crunchy outer layer.
Optional Add-ins
– Other spices (e.g., cayenne pepper for heat)
– Parmesan cheese for added flavor
You can spice things up with optional add-ins. For heat, add cayenne pepper to the breading. If you love cheese, sprinkle in some Parmesan. This will make your tenders even tastier!
Step-by-Step Instructions
Marinade the Chicken
First, I coat the chicken strips in buttermilk. This step makes the chicken juicy and flavorful. Place the chicken in a large bowl and pour in the buttermilk. Make sure every piece is covered well. Cover the bowl with plastic wrap and put it in the fridge. For the best taste, marinate for at least 1 hour. Overnight is even better!
Prepare the Breading
Next, I mix the flour and spices in a shallow dish. For this recipe, I use all-purpose flour, garlic powder, onion powder, smoked paprika, salt, and black pepper. Stir the mixture well with a fork. This ensures every bite has great flavor. An even coating makes a big difference!
Coat the Chicken
Now, it’s time to coat the chicken. Take the marinated chicken strips out of the buttermilk. Let any extra liquid drip off. First, dredge each piece in the flour mixture. Shake off the extra flour before dipping them back into buttermilk. Now, coat the strips in seasoned breadcrumbs. Press gently to help them stick.
Preheat the Air Fryer
Before cooking, I preheat the air fryer. Set it to 400°F (200°C) for about 5 minutes. This step is very important! Preheating helps create that crispy outer layer we all love.
Cook the Chicken Tenders
Place the chicken tenders in a single layer in the air fryer basket. Make sure not to crowd them. This ensures even cooking. Lightly spray the tops with cooking spray for extra crispiness. Cook for about 10-12 minutes. Flip the tenders halfway through. They are done when they are golden brown and reach an internal temperature of 165°F (74°C).
Serve
Once cooked, carefully remove the chicken tenders. Let them rest for a few minutes. This keeps them juicy. Serve them with your favorite dipping sauce, like honey mustard. For a nice touch, garnish with chopped parsley or a sprinkle of paprika. Enjoy your crispy chicken tenders!
Tips & Tricks
Achieving Maximum Crispiness
To get that perfect crunch, use light cooking spray. It helps the coating become golden and crisp. Spray it just before cooking. Another key tip is to avoid overcrowding the air fryer. If the basket is too full, the hot air can’t circulate well. This can lead to soggy tenders, which no one wants!
Common Mistakes to Avoid
A common mistake is over or under-marination. If you don’t marinate long enough, the chicken may taste bland. However, too long can make it mushy. A good rule is to marinate for at least one hour. Also, be careful when coating your chicken. If you handle it too much, the breadcrumbs can flake off. Gently press the crumbs onto the chicken to keep them intact.
Enhancing Flavor
You can spice things up with dips and sauces! Honey mustard is a classic choice. You can also try ranch, barbecue, or spicy sriracha. Each adds a new twist to your meal. For a bolder flavor, consider adding cayenne pepper to the breading. It gives an extra kick that many will love.

Variations
Flavor Variations
You can add different herbs and spices for unique flavors. Try mixing in thyme, rosemary, or oregano for a fresh taste. For a spicy kick, blend in some jalapeños with the buttermilk. This gives the chicken tenders a zesty heat. If you want something sweeter, consider a hint of cinnamon in the breadcrumb mix. Each variation opens a new door to taste!
Cooking Time Adjustments
If you use thicker chicken strips, extend the cooking time by a few minutes. This ensures the inside cooks through. For frozen chicken, you should add about 5 extra minutes to the cooking time. Always check the chicken’s internal temperature. It should reach 165°F (74°C) to be safe to eat.
Substitutions for Dietary Needs
For gluten-free options, swap regular breadcrumbs with gluten-free ones. You can also use crushed cornflakes for a crispy texture. If you need a dairy-free choice, replace buttermilk with almond milk or coconut milk mixed with a bit of vinegar. These substitutions help everyone enjoy this tasty dish!
Storage Info
Storing Leftover Chicken Tenders
To keep your chicken tenders fresh, place them in an airtight container. This helps maintain their flavor and moisture. Store them in the fridge for up to three days. If you want them to last longer, consider freezing.
Reheating Methods
The best way to reheat chicken tenders is in the air fryer. Set it to 350°F (175°C) and cook for about 5-7 minutes. This method keeps them crispy. The microwave is quick but may make them soggy. If you use the microwave, heat them in short bursts of 30 seconds.
Freezing Tips
You can freeze both uncooked and cooked chicken tenders. For uncooked tenders, place them on a parchment-lined tray until frozen. Then, transfer them to a freezer bag. For cooked tenders, let them cool before freezing. To thaw, place them in the fridge overnight. This way, they thaw safely without losing quality.
FAQs
How do I know when the chicken is fully cooked?
To check the chicken, use a meat thermometer. The inside should reach 165°F (74°C). This ensures the chicken is safe to eat. If you don’t have a thermometer, look for visual cues. The chicken should be golden brown and juices should run clear. No pink should remain inside the chicken.
Can I use frozen chicken for this recipe?
Yes, you can use frozen chicken. However, it is best to thaw it first. This helps the chicken cook evenly. To thaw, place the chicken in the fridge overnight. If you need to cook it from frozen, add a few extra minutes to the cooking time. Make sure the internal temperature still reaches 165°F (74°C).
What can I serve with crispy air fryer chicken tenders?
You can serve these chicken tenders with many sides. Some family-friendly options include:
– French fries
– Coleslaw
– Steamed vegetables
– Macaroni and cheese
For dips, try:
– Honey mustard
– Ranch dressing
– Barbecue sauce
These sides and dips make a complete meal that everyone will love.This will guide you through making the best crispy air fryer chicken tenders.
In this blog post, we covered how to make delicious air fryer chicken tenders. We explored the essential ingredients, marinade tips, and step-by-step cooking instructions. We also shared variations, storage tips, and common cooking mistakes to avoid.
Remember, crispy chicken tenders are easy to achieve with the right techniques. You can adjust flavors and make this recipe your own. Enjoy your cooking journey and the tasty results!


![- 1 can (15 oz) chickpeas, thoroughly drained and rinsed - 1 perfectly ripe avocado, peeled and pitted - 1 cup cherry tomatoes, halved - 1 medium cucumber, diced - 1/4 red onion, finely chopped - 1/4 cup fresh cilantro, chopped - 2 tablespoons freshly squeezed lemon juice - 1 tablespoon high-quality olive oil - Sea salt and freshly ground black pepper - 1/4 teaspoon ground cumin - Extra herbs for garnish - Each serving has about 200 calories. - Key vitamins include vitamin C, vitamin K, and fiber. This avocado chickpea salad packs a punch of flavor and nutrients! You get protein from chickpeas, healthy fats from avocado, and lots of vitamins from fresh veggies. The combo is not just tasty; it is good for you too. Pair this salad with pita chips for a crunchy bite. For the full recipe, check out the [Full Recipe]. To start, you need to mash the avocado. Take a ripe avocado and cut it in half. Remove the pit and scoop the flesh into a bowl. Use a fork to mash it. You want it creamy but still chunky. This adds a nice texture to your salad. Next, mix in the chickpeas. Open a can of chickpeas, drain and rinse them well. Carefully add them to the mashed avocado. Gently fold the chickpeas into the avocado. Be careful not to mash them. You want to keep the chickpeas whole for great bites. Now it's time to add in your vegetables. Chop up one cup of cherry tomatoes in half, dice a cucumber, and finely chop a quarter of a red onion. Don’t forget the cilantro! Add all these colorful veggies to your bowl. Gently mix everything together until the ingredients are well combined and coated in avocado. Then, you’ll make the dressing. In a small bowl, whisk together two tablespoons of freshly squeezed lemon juice and one tablespoon of high-quality olive oil. Add sea salt and freshly ground black pepper to taste. If you like, you can add a quarter teaspoon of ground cumin for extra flavor. This dressing will brighten the salad and tie everything together nicely. Now, drizzle the dressing over the chickpea and avocado mixture. Toss the salad gently. Make sure each ingredient gets a nice coat of dressing. Taste the salad. If it needs more flavor, adjust your seasoning. You can add more salt or lemon juice if you want it brighter. For the best taste, serve your salad right away. If you have time, let it chill in the refrigerator for 15-20 minutes. This allows the flavors to mix well. Don’t forget to check out the Full Recipe for more details! To select ripe avocados, look for ones that yield slightly when pressed. They should feel soft but not mushy. If they are hard, leave them at room temperature for a few days. Once ripe, keep them in the fridge to slow down the ripening process. To store leftover salad, use an airtight container. This keeps the salad fresh for up to two days. If you notice browning from the avocado, add a bit more lemon juice to help keep it vibrant. For a tasty pairing, serve your salad with crispy pita chips. The crunch adds a fun texture. You can also enjoy it on toasted bread for a quick meal. To present the salad, use a colorful bowl. Garnish with extra cilantro for a lively look. A sprinkle of sea salt on top can enhance the visual appeal, too. One common mistake is over-mashing the avocado. You want a creamy yet chunky texture. This keeps the salad interesting. Another mistake is not seasoning adequately. Be sure to taste and adjust your salt and lemon juice. Proper seasoning brings out all the fresh flavors in this dish. {{image_4}} You can easily boost your avocado chickpea salad with protein. Here are two great options: - Grilled chicken or shrimp: Both add a delicious, savory flavor. Just grill them and slice them up before mixing in. - Tofu for a vegetarian option: Tofu is a great meat substitute. Use firm tofu, press it, and cube it. Then toss it in for added protein. Adding new flavors can make your salad even better. Try these ideas: - Adding feta cheese: Crumbled feta adds a tangy taste that pairs well with the creamy avocado. - Experimenting with different dressings: You can switch up the dressing to change the flavor. Try balsamic, ranch, or a spicy vinaigrette for a twist. Using fresh, seasonal ingredients makes your salad shine. Here are some tips: - Incorporating seasonal veggies: Add bell peppers, radishes, or zucchini when they are in season for extra crunch and flavor. - Switching up herbs for different flavors: Try basil, parsley, or dill instead of cilantro to give your salad a new taste. These variations can turn your avocado chickpea salad into a unique dish every time you make it. For the full recipe, check out the earlier section. To keep your salad fresh, store it in the fridge. Use an airtight container to seal in the flavors. This method helps prevent browning and keeps the salad crisp. If you have space, consider using glass containers. They do not absorb odors and help you see the salad clearly. This salad lasts about three days in the fridge. After that, the ingredients may start to spoil. Check for signs like brown avocado or a sour smell. If you see either, it’s best to toss the salad. Freshness is key to enjoying this dish. Can you freeze avocado chickpea salad? I do not recommend freezing it. The avocado and tomatoes do not freeze well. They can become mushy when thawed. If you want to freeze, store the chickpeas and veggies separately. This way, you can mix fresh ingredients when you’re ready to eat. To make your avocado chickpea salad creamy, mash the ripe avocado well. Use a fork for this step. Aim for a mix of smooth and chunky textures. This keeps it interesting. Combine the mashed avocado with chickpeas gently. Folding helps maintain the shape of the chickpeas. Also, add a drizzle of olive oil for extra creaminess. Finally, use fresh lemon juice to brighten the flavors. These steps ensure your salad has a rich, creamy base. Yes, you can prepare this salad in advance. Start by chopping all the vegetables and storing them separately. This keeps them fresh and crisp. Mash the avocado just before serving. If you mash it early, it may brown. To keep the salad fresh, store it in an airtight container. You can also add lemon juice to the avocado to slow down browning. Chill the salad in the fridge for about 20 minutes before serving. This helps the flavors blend well. If you want to switch things up, try other legumes. White beans are a great option. They have a mild taste and a creamy texture. Black beans can add a fun twist with a bolder flavor. You can also use lentils for a different texture. Each legume gives a unique taste to the salad. So, feel free to get creative with your choices. Yes, this salad is gluten-free. All the main ingredients, like chickpeas and vegetables, are naturally free from gluten. This makes it a great option for those with gluten sensitivities. Always check your ingredient labels, especially for dressings. Some pre-made dressings may contain gluten. Using fresh lemon juice and olive oil ensures your dressing stays gluten-free. Enjoy this light and healthy salad without worry! For the full recipe, check out this Creamy Avocado Chickpea Delight. This blog post covered how to make a tasty avocado chickpea salad. We discussed key ingredients and gave precise steps for preparation. I shared helpful tips on freshness, serving ideas, and common mistakes to avoid. You can customize it with proteins or seasonal veggies. In summary, this salad is simple, nutritious, and versatile. It’s perfect for any meal. I encourage you to try it and share it with others. Enjoy crafting your delicious creation!](https://joymealplan.com/wp-content/uploads/2025/06/f9e70452-dbea-4dff-b8d7-5421933c3ab4-768x768.webp)


