Crispy Coconut Shrimp Air Fryer Easy Dinner Recipe

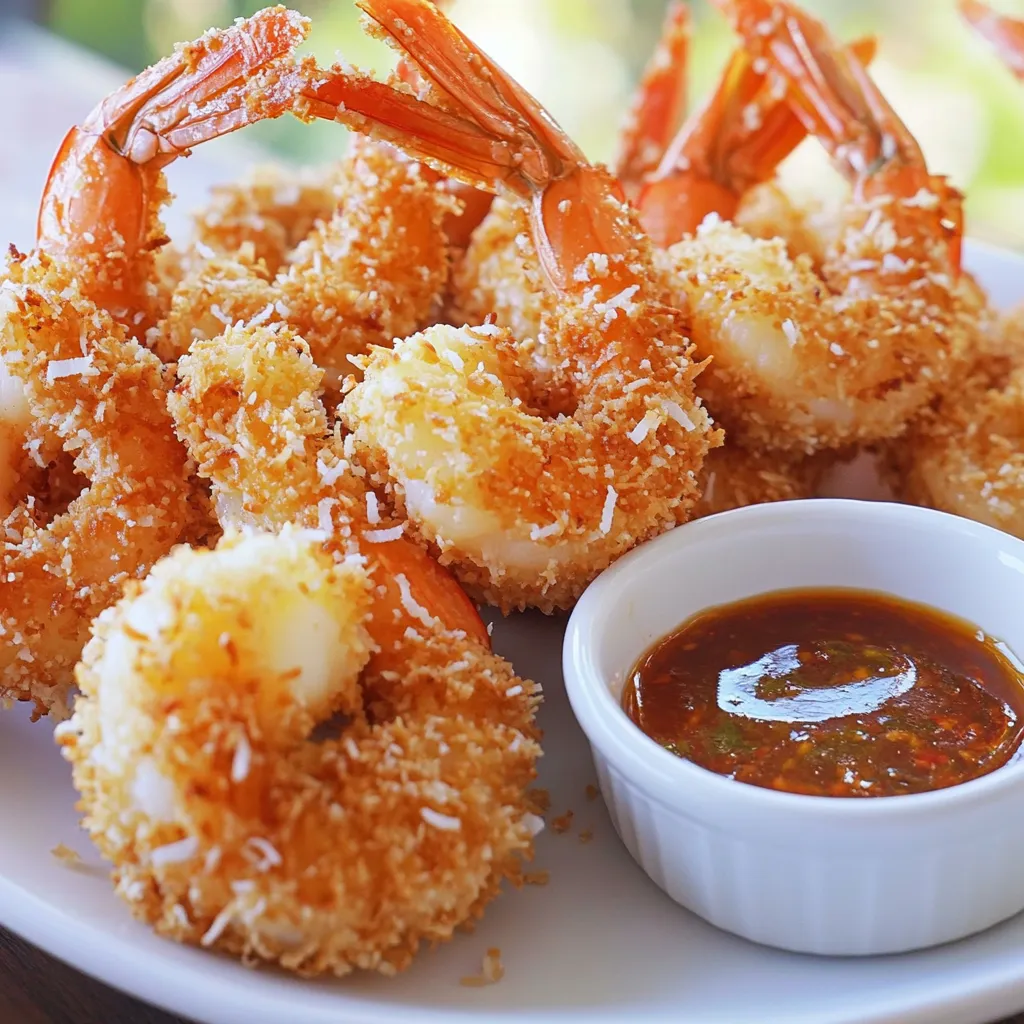
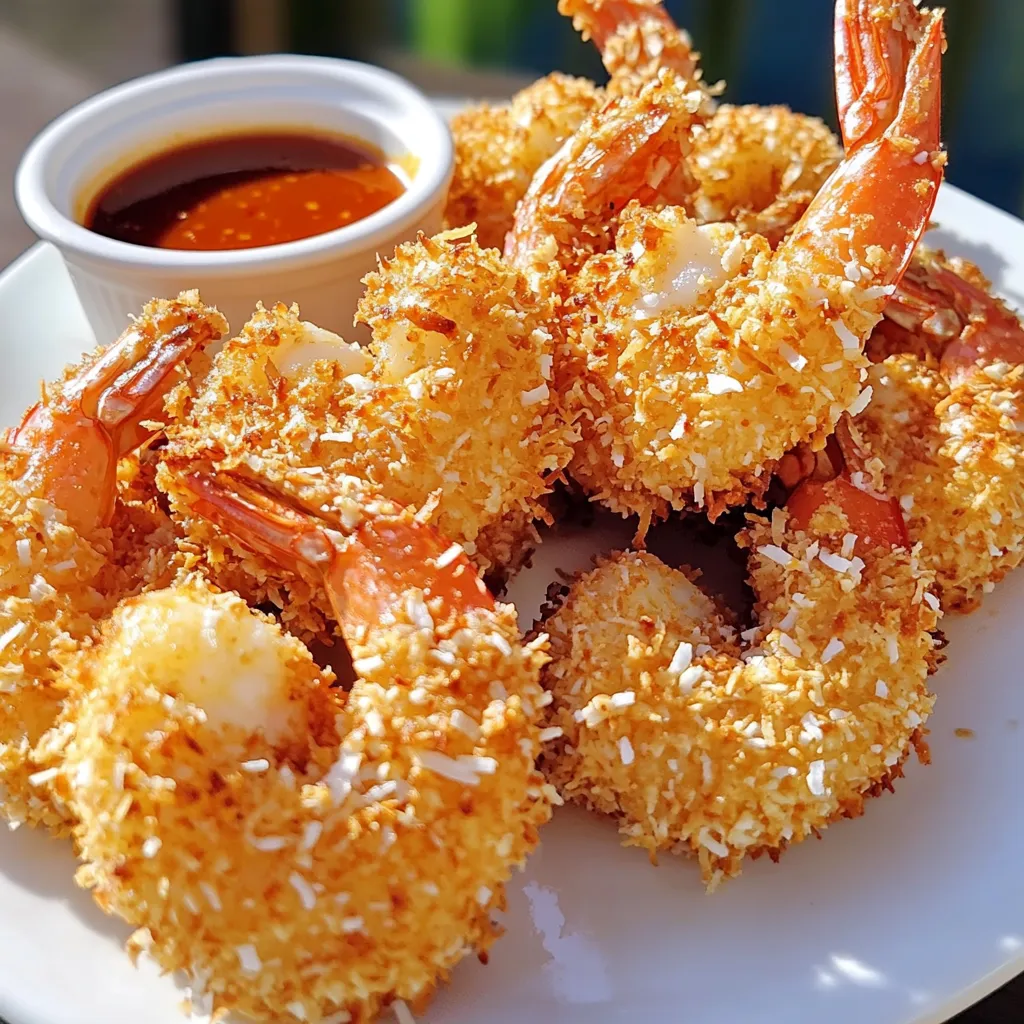
Love crispy, golden shrimp? This easy Crispy Coconut Shrimp Air Fryer recipe is your go-to for a tasty dinner. With juicy shrimp coated in crunchy coconut and panko, it’s perfect for busy nights and impressing guests. You’ll find simple steps and handy tips to make these bites unforgettable. Ready to whip up this delicious dish? Let’s dive into the fun world of air frying!
Ingredients
List of Essential Ingredients
– 1 pound of large shrimp, peeled and deveined
– 1 cup of shredded unsweetened coconut
– 1 cup of panko breadcrumbs
– 1/2 cup of all-purpose flour
– 2 large eggs, beaten
– 1 teaspoon of garlic powder
– 1 teaspoon of paprika
– 1/2 teaspoon of salt
– 1/4 teaspoon of black pepper
– Cooking spray
– Optional: Sweet chili sauce for dipping
Ingredient Substitutions
If you want to make this dish gluten-free, you can use gluten-free breadcrumbs instead of panko. There are many brands that work well and give you that nice crunch. For those who want to skip the sweet chili sauce, you can try honey or a simple garlic aioli instead.
When it comes to coconut, you can use sweetened coconut if you prefer a sweeter taste. However, I recommend sticking with unsweetened for a good balance of flavors. You can also use shredded or flaked coconut based on your texture preference.
Step-by-Step Instructions
Prepping your Air Fryer
First, preheat your air fryer to 400°F (200°C). This step is crucial. A hot air fryer helps the shrimp get crispy. If you skip this, your shrimp may turn out soggy instead of crunchy.
Breading Process Explained
Next, let’s prepare the breading station. In a shallow bowl, mix the all-purpose flour, garlic powder, paprika, salt, and black pepper. Whisk them together until they blend well. In another bowl, beat the eggs until smooth. In a third bowl, mix the shredded coconut and panko breadcrumbs. This mix should be even and well combined.
Now, it’s time for the breading. Take a shrimp and coat it in the flour mix. Shake off any extra flour. Then, dip the shrimp into the beaten eggs. Make sure it gets fully coated. Finally, roll the shrimp in the coconut-panko mix. Press gently to help it stick. This three-step process ensures a tasty crust.
Cooking the Shrimp
Now, arrange the coated shrimp in a single layer in the air fryer basket. Be careful not to overcrowd them. This will help them cook evenly. Lightly spray the shrimp with cooking spray. This helps them crisp up nicely.
Air fry the shrimp for 8-10 minutes. Flip them halfway through cooking. This ensures they brown evenly on both sides. When they turn golden brown, they are ready. Carefully take the shrimp out. Enjoy them warm, with sweet chili sauce for dipping if you like!
Tips & Tricks
Achieving Optimal Crispiness
To make your coconut shrimp super crispy, use cooking spray. A light coat helps the breadcrumb mix brown perfectly. Without it, you might end up with a soggy shell. Spray each shrimp well before cooking.
Do not overcrowd the basket in your air fryer. If you add too many shrimp at once, the hot air can’t flow. This leads to uneven cooking and less crispiness. Cook in batches if needed for best results.
Serving Suggestions
Pair crispy coconut shrimp with tasty dipping sauces. Sweet chili sauce is a fantastic choice. It adds a nice, spicy-sweet kick. You can also try a tangy mango salsa or a zesty lime aioli.
For sides, think about fresh salads or light coleslaw. A simple cucumber salad balances the richness of the shrimp. Rice or quinoa can also work well. They soak up any extra sauce and keep your meal light.

Variations
Spice It Up
You can make your crispy coconut shrimp even more exciting. Adding cayenne pepper or chili flakes gives it a nice kick. Just a pinch can change the flavor. You can also try adding fresh herbs like cilantro or parsley. These will add freshness and brightness to each bite.
Cooking Alternatives
If you don’t have an air fryer, don’t worry! You can bake the shrimp in the oven. Preheat your oven to 425°F (220°C) and bake for 15-20 minutes. Turn them halfway for even crispiness. Another option is pan-frying. Heat some oil in a skillet and fry for about 2-3 minutes on each side. Both methods will still give you tasty crispy shrimp!
Storage Info
Storing Leftovers
After enjoying your crispy coconut shrimp, store any leftovers in the fridge. Place them in an airtight container. This keeps them fresh and prevents them from drying out. You can store them for up to three days. Remember to let them cool first before sealing.
Reheating Instructions
To reheat, I recommend using the air fryer. It helps keep the shrimp crispy. Set the air fryer to 350°F (175°C) and heat for about 5 minutes. This will revive their crunch. If you use the oven, preheat it to 350°F. Bake for 10 minutes, checking to ensure they don’t dry out. The microwave is quick, but it may make them soggy. If you must use it, heat in short bursts at low power. Enjoy your crispy coconut shrimp again!
FAQs
Can I use frozen shrimp?
Yes, you can use frozen shrimp. Start by thawing them first. Place the shrimp in a bowl of cold water. Let them sit for about 15-20 minutes. After thawing, pat them dry with paper towels. This helps the breading stick better. If you skip this step, the shrimp may not crisp up well.
How do I know when the shrimp are cooked?
Look for a few signs to check if your shrimp are done. The shrimp should turn pink and opaque. The tails might curl slightly. A good rule of thumb is to cook them until they reach an internal temperature of 120°F (49°C). Use a meat thermometer for accuracy. If you don’t have one, check for a firm texture.
What to do if the shrimp are not crispy?
If your shrimp lack crispiness, there are a few fixes. First, make sure you use enough cooking spray on them. This helps the coating get golden brown. Second, check if the air fryer is overcrowded. Overcrowding leads to steaming, not frying. Try cooking in batches for the best texture. If they still aren’t crispy, consider adding a bit more panko. This adds crunch.
This post covered essential ingredients, step-by-step cooking instructions, and helpful tips for air-fried shrimp. You learned how to prep your air fryer and achieve optimal crispiness. The variations and storage info offered new ideas for your shrimp dish. Enjoy experimenting with different spices and serving suggestions. These shrimp make a tasty meal or snack. Follow these steps to ensure great results every time. Happy cooking!


![To make Pickle Ranch Snack Crackers, you need the following ingredients: - 1 cup all-purpose flour - 1/2 cup cornmeal - 1 teaspoon baking powder - 1/2 teaspoon baking soda - 1/2 teaspoon salt - 1 tablespoon ranch seasoning mix - 1/4 cup dill pickle juice - 1/4 cup melted butter (cooled slightly) - 1/2 cup shredded cheddar cheese - 1/4 cup dill pickle slices (finely chopped) You can swap some ingredients if needed. For the all-purpose flour, try using whole wheat flour for added fiber. If you prefer a gluten-free option, use a gluten-free flour blend. Instead of cornmeal, you can use fine breadcrumbs for a different texture. If you want to skip the ranch seasoning, use herbs like dill, garlic powder, or onion powder to create your own flavor. Each serving, which is about two crackers, provides: - Calories: 120 - Total Fat: 8g - Saturated Fat: 4g - Cholesterol: 20mg - Sodium: 150mg - Carbohydrates: 10g - Fiber: 1g - Sugar: 1g - Protein: 3g These crackers are tasty and balanced, making them a fun snack for any occasion. You can enjoy them without guilt! 1. Preheat your oven to 350°F (175°C). This is key for baking. 2. Line a baking sheet with parchment paper. This helps with easy cleanup. 3. In a large bowl, mix the flour, cornmeal, baking powder, baking soda, salt, and ranch seasoning. Use a whisk to mix well. 4. Slowly add the dill pickle juice and melted butter. Stir until a dough forms. 5. Fold in the cheddar cheese and chopped dill pickles. Make sure they spread evenly in the dough. 6. Roll the dough into small balls, about the size of a quarter. Place them on the sheet, leaving space between them. 1. Flatten each ball gently with a fork or your fingers. Aim for even thickness. 2. Bake the crackers for 12-15 minutes. Watch closely for a light golden brown color. 1. Once baked, let the crackers cool on the sheet for a few minutes. 2. Transfer them to a wire rack to cool completely. This makes them crispier. 3. For a fun serving idea, arrange them on a colorful platter. Add fresh dill sprigs or serve with ranch dip for a tasty snack. Enjoy your Pickle Ranch Snack Crackers! You can find the full recipe above for more details. To get the right texture for your Pickle Ranch Snack Crackers, focus on mixing. Combine the dry ingredients well to avoid lumps. When adding the wet ingredients, mix just until combined. Overmixing can make your crackers tough. Roll the dough into small balls. Keep them uniform in size to ensure even baking. Flatten them gently for a crispier edge. To boost flavor, consider adding more ranch seasoning. You could also try garlic powder or onion powder. A pinch of cayenne can add a nice kick if you like spice. Adding herbs like dill or parsley can enhance the pickle flavor. For extra richness, sprinkle some grated Parmesan cheese on top before baking. One common mistake is using hot melted butter. It can change the dough's texture. Be careful not to skip the cooling step after baking. Allowing them to cool helps the crackers firm up. Also, don’t crowd the baking sheet. If they are too close, they may stick together. Check them often while baking to avoid burning. For a full recipe, refer to the complete instructions. {{image_4}} You can add fun twists to Pickle Ranch Snack Crackers. Want some heat? Try adding cayenne pepper or crushed red pepper flakes. Just a pinch will do! For a cheesy version, swap in pepper jack cheese instead of cheddar. Mixing in some garlic powder can also boost flavor. These tweaks keep your snack game exciting! If you need a gluten-free option, use gluten-free all-purpose flour. It works well in this recipe. You can also try almond flour for a nutty taste. Make sure your ranch seasoning is gluten-free too. This way, everyone can enjoy these tasty crackers without worry. These crackers shine when paired with dips. Creamy ranch dip is a favorite, but you can also serve them with hummus or guacamole. For a fun party snack, arrange them on a platter with fresh veggies. They also taste great with cheese slices or charcuterie. Each bite will surprise your guests! Explore the [Full Recipe] to start making your own delicious Pickle Ranch Snack Crackers today! Store your Pickle Ranch Snack Crackers in an airtight container. This keeps them fresh and crisp. You can use a glass jar or a plastic container. Make sure they are completely cool before sealing. If you live in a humid area, consider adding a small bag of rice to absorb moisture. When stored properly, these crackers can last up to one week. They taste best in the first few days. After that, they may lose some crunch. If you want to keep them longer, you can freeze them. Just place them in a freezer-safe bag or container. If your crackers lose their crunch, you can reheat them. Preheat your oven to 300°F (150°C). Spread the crackers on a baking sheet in a single layer. Heat them for about 5-7 minutes. Check often to avoid burning. Let them cool before enjoying again. For the full recipe, refer to the earlier section. Pickle Ranch Snack Crackers are tasty, crunchy treats. They mix the flavors of dill pickles and ranch dressing. These snacks are perfect for parties or game nights. They are easy to make at home with simple ingredients. To make Pickle Ranch Snack Crackers at home, follow these steps: 1. Preheat your oven to 350°F (175°C). 2. Line a baking sheet with parchment paper. 3. Mix flour, cornmeal, baking powder, baking soda, salt, and ranch seasoning in a bowl. 4. Add dill pickle juice and cooled melted butter. Stir to form a dough. 5. Fold in cheddar cheese and chopped pickles. 6. Roll the dough into small balls. Flatten each ball on the baking sheet. 7. Bake for 12-15 minutes until golden. 8. Let them cool on a wire rack. For the full recipe, check the details provided above. Pickle Ranch Snack Crackers can be a fun snack. They contain some healthy ingredients like cheese and pickles. However, they also have butter and flour, which add calories. Enjoy them in moderation as part of a balanced diet. You can find Pickle Ranch Snack Crackers at many grocery stores. Look in the snack aisle or near the crackers. Some stores may also sell them online. Check popular websites for easy shopping options. These crackers pair well with many dips and spreads. Serve them with ranch dressing, creamy dip, or hummus. You can also enjoy them with cheese or fresh veggies. They make a great snack for any gathering. This blog post covers everything about Pickle Ranch Snack Crackers. We discussed the key ingredients, including substitutions, and shared helpful nutritional data. You learned precise steps for preparation and baking, along with cooling tips for best results. I shared easy tricks to get the perfect texture and flavor. You now know various tasty variations to try and how to store them properly. Finally, you have answers to common questions about these delicious snacks. Enjoy making and sharing your own Pickle Ranch Snack Crackers!](https://joymealplan.com/wp-content/uploads/2025/07/696f27ca-dd07-4295-82fd-de9c637e8141-768x768.webp)


