
Are you ready to transform your boring egg salad into a crispy, tangy delight? In this post, I’ll walk you through making a Crispy Egg Salad that packs a crunch and bursts with flavor. You’ll discover easy steps, handy tips, and delicious variations. Whether you’re serving it on lettuce or just want a tasty snack, this recipe will be your new go-to. Let’s dive into this culinary adventure together!
Why I Love This Recipe
- Crispy Texture: The addition of crispy fried shallots provides an irresistible crunch that elevates the classic egg salad experience.
- Flavor Balance: The mix of Dijon mustard, apple cider vinegar, and smoked paprika creates a delightful tanginess that complements the eggs perfectly.
- Easy to Prepare: This recipe is simple and quick, making it a great option for busy weekdays or casual gatherings with friends.
- Versatile Serving: Serving the egg salad on fresh lettuce leaves adds a refreshing touch and makes for a beautiful presentation.
Ingredients
List of Ingredients
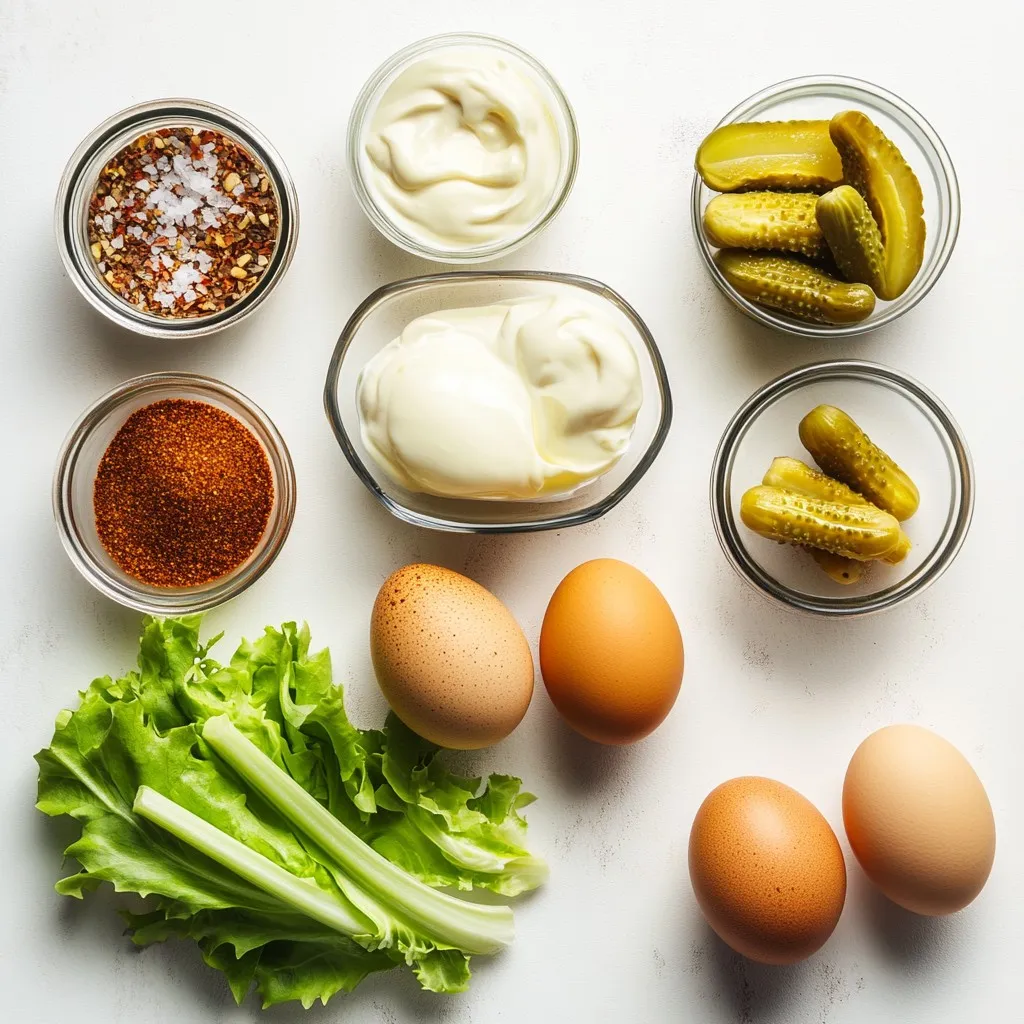
– 6 large eggs
– 1/4 cup mayonnaise
– 1 tablespoon Dijon mustard
– 1 tablespoon apple cider vinegar
– 1/2 teaspoon garlic powder
– 1/2 teaspoon smoked paprika
– Salt and black pepper to taste
– 1/4 cup celery, finely chopped
– 1/4 cup sweet pickles, finely chopped (or relish)
– 1 cup crispy fried shallots (store-bought or homemade)
– Fresh lettuce leaves for serving
To make crispy egg salad, you need fresh ingredients. Start with large eggs. The eggs form the base of this dish. Choose mayonnaise that you enjoy. It adds creaminess to the salad. Dijon mustard gives it a nice tang. Apple cider vinegar adds a bit of zest. Garlic powder and smoked paprika bring in flavor. Don’t forget salt and black pepper to taste. For crunch, add finely chopped celery and sweet pickles. Crispy fried shallots take the crunch to another level. Serve it all on fresh lettuce leaves. This combination makes a delightful and crunchy meal!
Step-by-Step Instructions
Boiling the Eggs
To start, place the eggs gently in a large pot. Cover them with cold water. Make sure there is about an inch of water above the eggs. Turn the heat to medium-high. Bring the water to a rolling boil. Once it boils, cover the pot with a lid. Turn off the heat and let the eggs sit for 12 minutes. This method cooks them evenly.
Cooling the Eggs
After 12 minutes, transfer the eggs to a bowl filled with ice water. This ice bath is key. It stops the cooking and makes peeling easier. Let the eggs sit for at least 10 minutes in the ice bath. This will help you peel them without hassle.
Preparing the Egg Mixture
Once the eggs are cool, crack the shells. Peel the eggs under running water. This helps remove the shells smoothly. Next, chop the eggs into small pieces. Place them in a large mixing bowl. Add the mayonnaise, Dijon mustard, apple cider vinegar, garlic powder, smoked paprika, and a pinch of salt and pepper. Mix well until combined.
Adding Crunch
Now, gently fold in the finely chopped celery and sweet pickles. Make sure they are evenly spread throughout the egg mixture. Then, add in the crispy fried shallots. Reserve some shallots for garnish later. This adds a lovely crunch to your salad.
Taste and Adjust
Take a moment to taste your egg salad. Check for flavor balance. If it needs more zing, add extra salt, pepper, or mustard. Adjust until it tastes just right for you.
Serving Suggestions
Spoon generous amounts of the egg salad onto fresh lettuce leaves. This makes a great presentation. Finally, sprinkle the reserved crispy shallots on top. This gives each bite an irresistible crunch. Enjoy your crispy egg salad!
Tips & Tricks
Perfecting the Egg Salad Texture
To make a creamy egg salad, use the right mix of ingredients. Start with fresh eggs for the best flavor. When mixing, add enough mayonnaise to coat the eggs but not drown them. Dijon mustard adds a nice tang. The apple cider vinegar enhances the taste and balances the creaminess.
Crispy elements play a key role too. Fried shallots add crunch and flavor. You can make them at home or buy them. Fold in the shallots gently. This keeps them crispy and brightens the overall dish.
Recommended Cooking Tools
The right tools make cooking easier. Use a large pot to boil the eggs. It should fit all the eggs in a single layer. Look for a pot with a tight-fitting lid for best results.
For mixing, a large bowl is best. Use a sturdy spatula to fold in ingredients. A good chopping board helps when prepping celery and pickles.
Presentation Ideas
Serving can make your dish shine. Use a large, shallow platter for the egg salad. This shows off the colors and textures.
Garnish with smoked paprika for added flair. A sprinkle of fresh herbs can brighten the look. For fun, serve crispy shallots in a small bowl on the side. This lets everyone add their own crunch!
Pro Tips
- Fresh Eggs are Best: Use the freshest eggs possible for the best flavor and texture in your egg salad.
- Customize Your Crunch: Feel free to experiment with different crunchy elements like toasted nuts or crispy bacon for added texture.
- Chill Before Serving: For optimal flavor, let the egg salad chill in the fridge for at least 30 minutes before serving to allow the flavors to meld.
- Use a Mixer for Creaminess: For a creamier texture, consider using a hand mixer to blend the egg salad ingredients together.
Variations
Classic Variations
To make your egg salad stand out, try some classic twists. One option is using hard-boiled egg whites only. This gives a lighter taste and texture. You can mix these with the yolks for a nice blend.
Another way to boost flavor is by adding spices. Try cayenne pepper for heat or paprika for smokiness. A little cumin can give it a warm, earthy taste. Each spice adds a new layer of fun.
Healthier Alternatives
Want a healthier version? Swap out the mayonnaise for Greek yogurt. This change cuts calories and adds protein. Greek yogurt gives a nice creamy texture without the extra fat.
You can also replace fried shallots with sautéed onions. Sautéed onions add great flavor without the crunch. This makes the dish lighter but still tasty.
Flavor Boosts
Herbs can change your egg salad game. Dill and chives add freshness and a pop of flavor. Just chop them finely and mix them in with the other ingredients.
Adding avocado is another great idea. It makes the salad creamier and richer. Plus, avocados are packed with healthy fats, making your dish even better. Mix it in for a smooth finish!
Storage Info
Storing Leftovers
Store your leftover crispy egg salad in an airtight container. This keeps it fresh and safe. Place it in the fridge as soon as you can. It will stay good for about three days. After that, the taste can change, and it might spoil.
Freezing Options
You can freeze egg salad, but it may change texture. If you freeze it, use a freezer-safe container. When you want to eat it, thaw it in the fridge overnight. Avoid using the microwave, as it can make the egg salad watery.
Fresh Serving Considerations
Crispy egg salad is best fresh. It stays good for about three days in the fridge. Look for signs of spoilage before eating. If it smells off or looks strange, it’s time to toss it. Always trust your senses for safety.
FAQs
How do you make egg salad crispy?
To make your egg salad crispy, focus on adding crunchy elements. Use fresh celery and sweet pickles for a nice texture. The key is crispy fried shallots. They add a great crunch. You can buy them or make your own. Just sprinkle some on top before serving for extra crunch.
Can I use different types of eggs?
Yes, you can use different types of eggs. Organic and free-range eggs are great options. They often have richer flavors. You can even try using quail eggs for a fun twist. Just remember to adjust cooking times for smaller eggs.
What can I serve with egg salad?
Egg salad pairs well with many dishes. You can serve it on fresh lettuce leaves. It also works great in sandwiches or wraps. For something extra, try it with crispy crackers. A side of fresh veggies adds a nice touch, too.
How long should hard boiled eggs be cooked for salad?
For perfect hard-boiled eggs, cook them for 12 minutes. Start with cold water and bring it to a boil. Once boiling, turn off the heat and cover the pot. This method gives you firm yolks without a green ring.
Is it safe to eat leftover egg salad?
Yes, but follow safety guidelines. Store leftover egg salad in the fridge right away. It should stay fresh for 3 to 4 days. Always check for bad smells or changes in color before eating. If unsure, it’s best to toss it out.
This egg salad recipe stands out for its flavor and crunch. We discussed the right ingredients, boiling methods, and tips for the best texture. Remember, adjusting seasonings can boost the taste. You can also explore creative variations and healthier substitutes.
Store leftovers well to keep them fresh, and watch for signs of spoilage. Feel free to experiment with flavors and serve it in new ways. Enjoy making this dish your own. It’s easy and deliciou


