Crispy Fish Tacos Easy and Flavorful Recipe

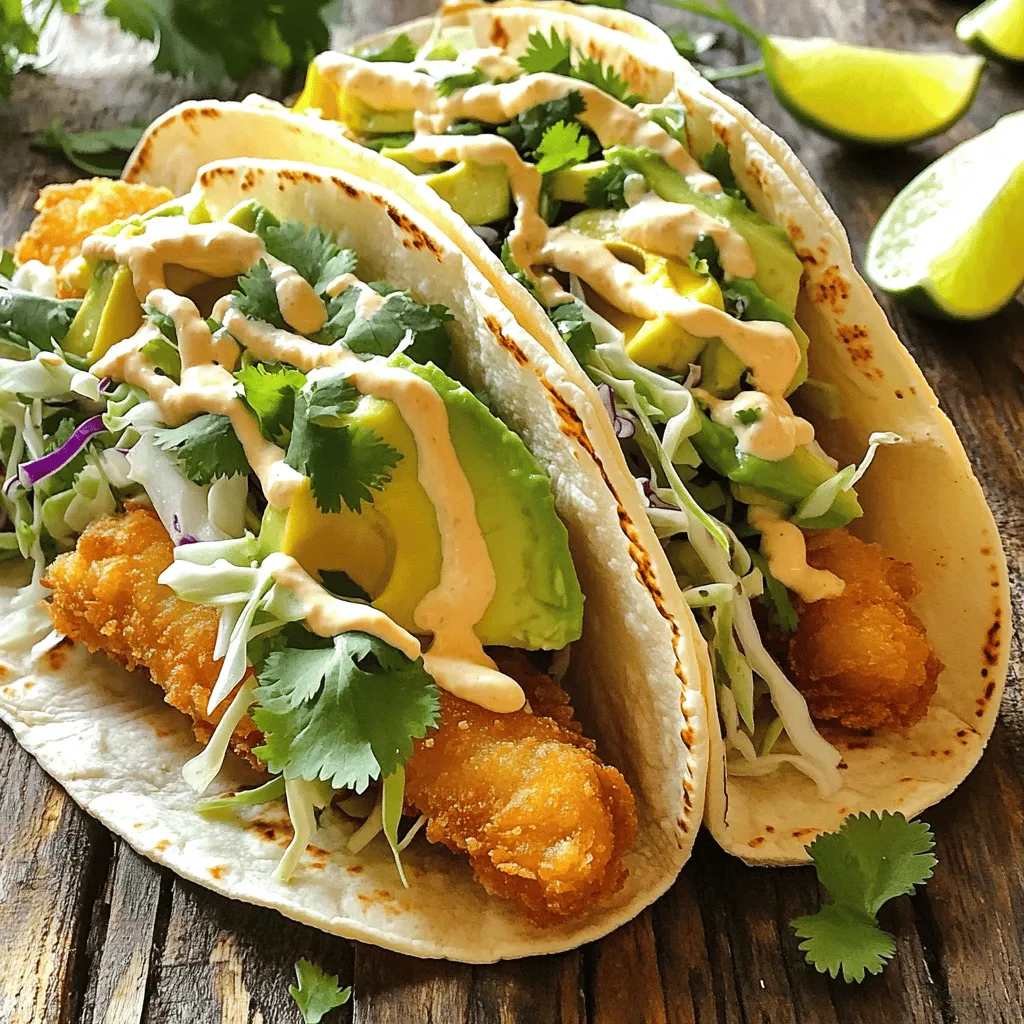
If you’re craving something fun and delicious, crispy fish tacos are the answer! This easy and flavorful recipe will have your taste buds dancing. With just a few fresh ingredients and simple steps, you’ll learn how to create the perfect fish tacos. Plus, I’ll share tips to make them extra crispy and flavorful. Ready to impress your friends and family with a tasty meal? Let’s dive in!
Ingredients
Main Ingredients for Crispy Fish Tacos
– 1 lb white fish fillets (cod or tilapia recommended)
– 1 cup all-purpose flour
– 1 cup cornmeal
– 2 large eggs, beaten
– 1 cup buttermilk
– Vegetable oil for frying
Toppings and Fillings
– 8 small corn tortillas
– 1 cup shredded cabbage
– 1 ripe avocado, sliced
– ½ cup fresh cilantro, chopped
– Lime wedges for serving
Spicy Mayo Preparation
– ½ cup mayonnaise
– 1 tablespoon sriracha
To make these tacos, I use fresh fish fillets. Cod or tilapia works best because they fry evenly. The batter is key to achieving that perfect crunch. I mix flour and cornmeal for a great texture. The buttermilk adds moisture, while eggs help the batter stick.
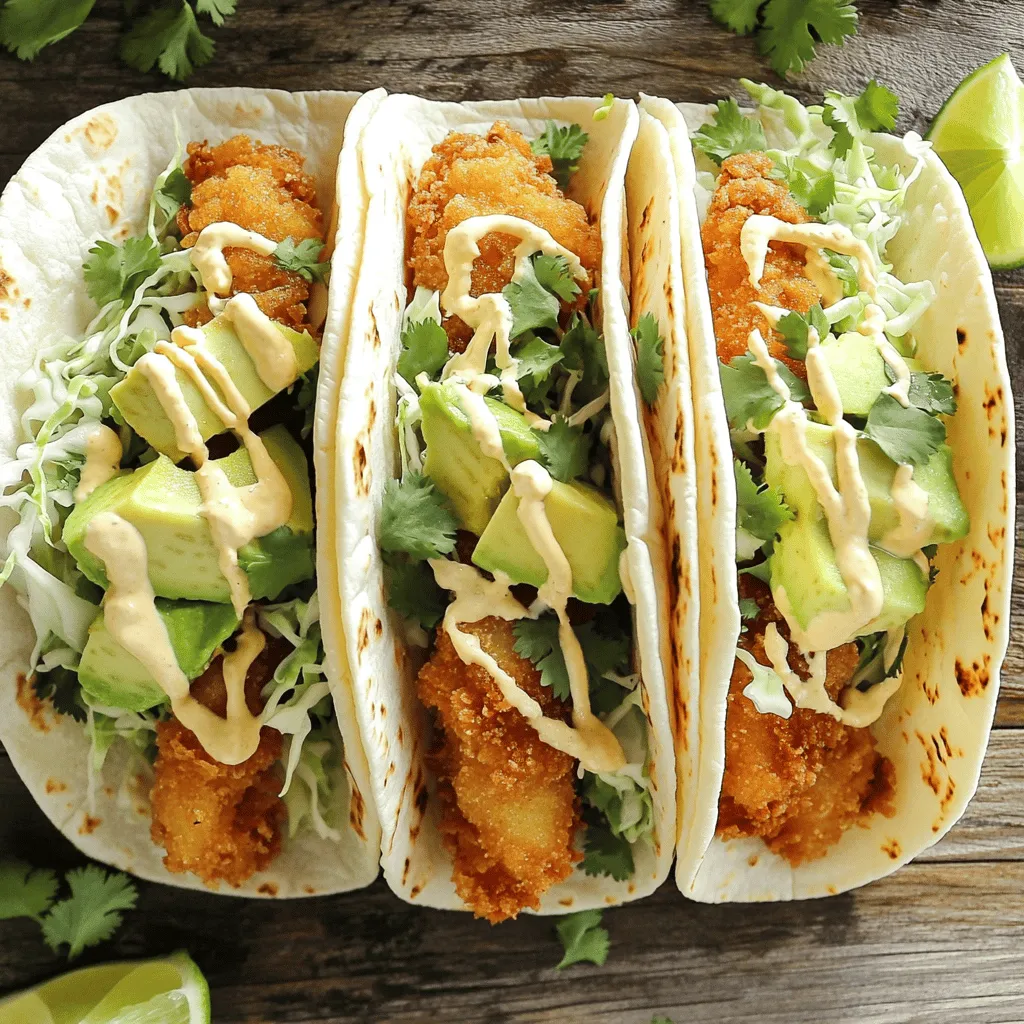
For toppings, I love adding shredded cabbage for crunch. Sliced avocado adds creaminess, and fresh cilantro brightens the dish. A squeeze of lime juice makes it all pop!
Don’t forget the spicy mayo! It’s easy to whip up with just mayo and sriracha. This creamy sauce adds a nice kick.Enjoy creating your tasty crispy fish tacos!
Step-by-Step Instructions
Preparing the Fish
– Rinse and pat dry fish fillets.
– Slice fish into strips or bite-sized pieces.
Start with your fish fillets. I love using cod or tilapia for this recipe. Rinse the fillets in cold water to wash off any residue. After rinsing, pat them dry with paper towels. This step helps the batter stick better. You can slice the fish into strips or keep them as small pieces. The choice is yours!
Making the Batter
– Combine dry ingredients in one bowl.
– Whisk together eggs and buttermilk in another bowl.
Now, let’s make the batter. In a medium bowl, mix your dry ingredients. You will need flour, cornmeal, baking powder, garlic powder, paprika, cumin, and a good pinch of salt and pepper. In another bowl, whisk the eggs and buttermilk together. This adds moisture and flavor to the fish.
Coating and Frying the Fish
– Dip fish in wet mixture then coat with dry batter.
– Heat oil and fry fish pieces until golden brown.
Next, it’s time to coat the fish. Dip each piece into the wet mixture first. Let any extra drip off. Then, roll it in the dry batter, making sure it is well-coated. Set the coated fish aside.
Now, heat about an inch of vegetable oil in a large skillet over medium-high heat. You can test if the oil is hot enough by dropping in a small bit of batter. If it sizzles, you’re ready! Fry the fish pieces in batches for about 3-4 minutes on each side. You want them golden brown and crispy. Once done, place the fish on a paper towel-lined plate to drain any excess oil.
This step is key for achieving that perfect crunch!
Tips & Tricks
Achieving Perfect Crispiness
To get that perfect crunch, oil temperature is very important. Heat your oil to 350°F. If it’s too cool, the fish will soak up oil and become soggy. You can test the oil by dropping in a bit of batter. If it sizzles and bubbles, it’s ready.
Next, avoid overcrowding the pan. Fry in small batches. This helps each piece cook evenly and stay crispy. If you crowd the pan, the fish will steam instead of fry.
Flavor Enhancements
For great flavor, use spices like garlic powder, paprika, and cumin. These add depth and warmth to the fish. You can even marinate the fish in lime juice and spices for 30 minutes. This adds a zesty kick.
When you make the batter, don’t skip the baking powder. It makes the coating light and airy. A good blend of spices and a bit of time will boost the taste.
Serving Suggestions
Crispy fish tacos taste amazing with fresh sides. Try serving them with a simple slaw or a bean salad. These add crunch and balance the meal.
For drinks, I suggest a cold beer or a refreshing limeade. Both complement the flavors well.

Variations
Alternative Fish Choices
You can switch the fish for other white fish. Try using haddock or flounder. They both taste great and fry well. If you want a change, use shrimp. Shrimp cooks fast and gives a nice flavor. Tofu is a good choice too. It’s great for a plant-based option. Just press it to remove extra water before frying.
Taco Variation Ideas
Get creative with toppings! Instead of just cabbage, add mango salsa or pickled onions. You can also sprinkle some cheese on top. For sauces, try a tangy cilantro lime sauce or a spicy chipotle sauce. If you want to mix styles, make a Thai taco. Use peanut sauce, slaw, and fresh herbs for a unique twist.
Gluten-Free Options
To make these tacos gluten-free, swap the all-purpose flour for almond flour or a gluten-free blend. You can also use corn flour for breading. For tortillas, choose corn tortillas that are labeled gluten-free. They add a nice flavor and work well with the fish. Enjoy your crispy tacos without worry!
Storage Info
Storing Leftovers
To store your leftover tacos, keep them in an airtight container. Line the container with paper towels to absorb moisture. This helps keep the fish crispy. You can store them in the fridge for up to three days. After that, the quality goes down.
Reheating Instructions
To reheat the fish and keep it crispy, place the fish on a baking sheet. Preheat your oven to 375°F (190°C). Bake for about 10 minutes. For tortillas, warm them in a dry skillet over medium heat for 30 seconds on each side. This will help them stay soft and pliable.
Freezing Options
Yes, you can freeze the fish. After frying, let it cool completely. Place the fish in a single layer on a baking sheet. Freeze for a few hours until solid. Then, transfer it to a freezer bag. To thaw, move the fish to the fridge overnight. Reheat directly from frozen for best results.
FAQs
What type of fish is best for crispy tacos?
For crispy tacos, I recommend using white fish like cod or tilapia. These fish have a mild flavor and firm texture. Cod stays flaky while frying, and tilapia is easy to find. Both options create the perfect bite for your tacos.
How can I make my fish tacos spicier?
You can add heat in many ways. Try using cayenne pepper in your batter. You can also mix diced jalapeños into your cabbage. Another option is to increase the sriracha in your spicy mayo. For extra kick, consider adding hot sauce on top.
Can I prepare the batter in advance?
Yes, you can make the batter ahead of time. Mix your dry ingredients and store them in a sealed container. You can also whisk the eggs and buttermilk, then keep them in the fridge. Just remember to mix them before using.
What sides pair well with crispy fish tacos?
Crispy fish tacos go well with many sides. Consider serving them with a fresh corn salad or black beans. You can also pair them with tortilla chips and salsa for a crunchy contrast. A light cucumber salad helps balance the meal too.
Crispy fish tacos are a fun and tasty meal you can enjoy. We covered key ingredients, simple steps, and helpful tips to make perfect tacos. Don’t forget to try different fish and toppings. You can even change flavors for a new twist. With these easy tips, you’re ready to impress your friends and family. Keep this guide handy for your next taco night! Enjoy your cooking and savor each bite.


. To make great sesame garlic green beans, avoid burnt garlic. Burnt garlic tastes bitter. Keep the heat at medium when you sauté it. Stir it often for about 30 seconds until it smells good. This way, you get all the flavor without the bad taste. For even flavor, coat every green bean with the oil and garlic. Toss them well in the skillet. This helps each bean absorb the yummy sauce. The right mix makes each bite tasty. Serving your green beans in colorful dishes makes them pop! Use a bright bowl to show off the green color. It makes the dish inviting and fun. You can add extra garnishes for flair. Try more sesame seeds or a drizzle of sesame oil on top. Fresh green onions also add a nice touch. These small details can make your dish look special. Prepping your ingredients in advance saves time. Trim the green beans and chop the garlic ahead of time. This way, you can cook quickly when you’re ready. Using frozen green beans is another great option. They are quick to cook and still taste good. Just follow the same steps as with fresh beans for a tasty dish. For the full recipe, check out the detailed steps and enjoy! {{image_4}} If you need to avoid nuts, sesame oil can be swapped. Try using olive oil or avocado oil. Both oils add a nice flavor without nuts. This makes the dish safe for those with nut allergies. To boost the taste, add crushed red pepper. It gives a spicy kick that many enjoy. You can also add other veggies. Carrots or bell peppers work well. They add color and extra nutrients. For a healthier option, consider coconut aminos. This sauce is lower in sodium than soy sauce. It works great in this recipe. You can also use a low-calorie sweetener instead of honey. This keeps the dish sweet without extra calories. For the full recipe, check out the [Full Recipe]. To store leftover sesame garlic green beans, let them cool first. Place them in an airtight container. You can refrigerate them for up to three days. This keeps the flavors fresh and tasty. When you're ready to eat, reheat the green beans carefully. I suggest using a skillet. Heat it over medium-low heat. Add a splash of water to keep them moist. Stir gently for about five minutes. This method helps maintain their crispness. You can also microwave them in short bursts. Cover the dish to keep the moisture in. If you want to freeze the green beans, do this before adding the sauce. Prepare as usual, then freeze them in a single layer on a baking sheet. Once they are frozen, transfer them to a zip-top bag. This way, they won’t clump together. To thaw, place the bag in the fridge overnight. When ready to use, sauté them with the sauce. Enjoy the fresh flavors from your freezer. For the full recipe, check out the details above. You can make this dish vegan by removing honey. Instead, use agave syrup. This keeps the sweetness while keeping it plant-based. Agave syrup is a great substitute and works well in this recipe. Yes, you can use canned green beans. However, fresh beans taste better. Canned beans save time, but they can be softer. If you use canned, rinse them well to remove extra sodium. Fresh beans will have a crunch that makes this dish shine. These green beans pair well with many dishes. Try serving them with grilled chicken or tofu. They also go great with rice or quinoa. For a full meal, add a side salad for fresh flavors. Yes, this dish can be gluten-free. Use tamari instead of soy sauce. Tamari is a gluten-free soy sauce that gives a rich taste. Always check labels to ensure your ingredients are gluten-free. Adding protein is easy! You can toss in cubed tofu or grilled chicken. Shrimp also works well. Just sauté them before adding the green beans. This will create a well-rounded meal, full of flavor and nutrients. For the full recipe, check out the details above. This post explored how to make tasty Sesame Garlic Green Beans. We covered key ingredients like fresh green beans, sesame oil, and garlic. You learned step-by-step instructions, tips for sautéing, and how to present your dish beautifully. We also discussed variations, storage methods, and common FAQs. These green beans are not just a side dish; they can shine on any table. With the skills you now have, feel confident to create this dish and impress your friends and family. Enjoy cooking!](https://joymealplan.com/wp-content/uploads/2025/07/aeac6747-6887-42be-b9f7-ffc1813a8658-768x768.webp)
![- 4 cups fresh spinach leaves, thoroughly washed and dried - 1 cup mixed berries (such as strawberries, blueberries, and raspberries) - 1/4 cup red onion, finely sliced I love using fresh spinach leaves as the base for this salad. They bring a bright green color and a crisp texture. The mixed berries add sweetness and a pop of color, making the salad look inviting. You can use any berries you have on hand. Strawberries, blueberries, and raspberries work well together. The red onion gives a nice sharpness that balances the sweetness of the berries. - 1/2 cup cooked quinoa, allowed to cool - 2 tablespoons chia seeds - 1/4 cup walnuts, chopped into small pieces - 1/4 cup feta cheese, crumbled Quinoa is a great superfood. It adds protein and makes the salad more filling. I always let it cool before adding it. Chia seeds are tiny but mighty. They boost nutrition and add a fun crunch. Walnuts provide a hearty bite and healthy fats. Feta cheese adds creaminess and a salty flavor. Together, these ingredients create a satisfying mix. - 3 tablespoons balsamic vinaigrette - Salt and pepper, to taste The balsamic vinaigrette ties everything together with its tangy flavor. I drizzle it over the salad just before serving. Always taste before you season. A pinch of salt and a dash of pepper can enhance the flavors. You can make your dressing or use store-bought for ease. For the full recipe, check out the Berry Spinach Superfood Salad section. 1. Start with a large salad bowl. Place 4 cups of fresh spinach leaves in it. This forms the base layer. The bright green color makes the salad inviting. 2. Next, take 1/2 cup of cooked quinoa that has cooled. Evenly spread it over the spinach. Quinoa adds a nutty flavor and protein to the mix. 3. Now, add 1 cup of mixed berries. Use strawberries, blueberries, and raspberries. Disperse them evenly. The berries bring sweetness and a pop of color. 4. Sprinkle 1/4 cup of chopped walnuts across the salad. They add a nice crunch. 5. Crumble 1/4 cup of feta cheese on top. This brings a creamy texture that balances the crunch of the walnuts. 6. Add 1/4 cup of finely sliced red onion. This adds a sharp flavor. 7. Finally, sprinkle 2 tablespoons of chia seeds over the salad. These are superfoods that boost nutrition. 8. Now, pour 3 tablespoons of balsamic vinaigrette all over the salad. Carefully toss the ingredients. Be gentle to avoid bruising the spinach. 9. Season with salt and pepper to taste. Adjust according to your preference. For serving, you can use a large bowl for a family-style meal. For individual servings, divide the salad into smaller bowls. Garnish each plate with extra berries and a sprinkle of chia seeds. This adds to the visual appeal. Use the [Full Recipe] for more details on making this delicious salad. If you want to switch things up, you can easily change the greens. Try kale or arugula for a new taste. They both add nice flavors and textures. For the berries, you have many options. You can use blackberries, cherries, or even diced mango. Each choice brings a unique twist to the salad. This salad pairs well with protein options. Grilled chicken, shrimp, or chickpeas make great additions. You’ll get a full meal with these proteins. Berry spinach superfood salad is perfect for many occasions. Serve it at picnics, potlucks, or family dinners. Its bright colors make it a hit at any gathering. To boost flavor, consider adding spices. A pinch of cinnamon or nutmeg can work wonders. They add warmth and depth to the salad. Toppings can add a fun crunch. Try sunflower seeds or roasted chickpeas for texture. You can even add crispy bacon for a savory kick. For the full recipe, check out the Berry Spinach Superfood Salad! {{image_4}} You can change the fruits in this salad with the seasons. In summer, use fruits like peaches or nectarines. These fruits add a juicy sweetness and a lovely texture. In the fall, swap in apples or pears. These fruits bring a crisp bite and complement the spinach well. If you follow a vegan diet, replace feta cheese with avocado. It adds creaminess without the dairy. You can also skip the cheese altogether for a lighter option. For those needing gluten-free options, this salad is naturally gluten-free. Just ensure the quinoa is certified gluten-free. To make this salad heartier, add proteins like grilled chicken or tofu. Both options boost the protein content and keep you full longer. You can also play with dressings. Try a honey mustard or a lemon-tahini dressing for a fresh twist. Each dressing changes the flavor and gives a new twist on the classic salad. For the complete recipe, check out the Full Recipe section. To keep your Berry Spinach Superfood Salad fresh, store the salad components separately. Place the spinach, quinoa, and berries in different containers. This method prevents sogginess and keeps flavors bright. You can add the nuts and feta just before serving. This way, you enjoy the crunch and creaminess every time. In the fridge, this salad lasts about three days. After that, the spinach may wilt, and the berries might spoil. Do not freeze the salad. Freezing changes the texture of spinach and berries. If you want to save quinoa, you can freeze it for later use. If you want to use leftover quinoa in a new salad, mix it with fresh ingredients. This adds a new flavor and keeps the dish exciting. For reheating quinoa, add a splash of water and microwave it for about one minute. This keeps it fluffy and tasty. Enjoy your leftovers with new twists! For the full recipe, refer back to the Berry Spinach Superfood Salad section. To keep your spinach salad fresh, store it in an airtight container. This helps lock in moisture and keeps the greens crisp. Place a paper towel inside to absorb excess moisture. If you want the best taste, eat the salad within two days. Yes, you can use other nuts in this salad. Almonds, pecans, or cashews work well. Each nut adds a unique flavor and crunch. Just chop them into small pieces before adding. This keeps the texture nice and even. To make the salad vegan, skip the feta cheese. You can replace it with avocado for creaminess. Another option is to use a dairy-free cheese. This keeps the flavors rich without animal products. Enjoy the same great taste while following a vegan diet! For the full recipe, check out the details above. In this blog post, we explored fresh ingredients for a vibrant salad. We used spinach, berries, quinoa, and topped it off with walnuts and feta. I shared easy steps for preparation and tips for serving and presentation. Variations, dietary options, and storage advice were also included. Remember, creativity makes cooking fun. Don't hesitate to add your own twists! Enjoy making this nutritious salad that fits any occasion.](https://joymealplan.com/wp-content/uploads/2025/06/ed68670f-61e3-4ee1-9cf1-77221924be16-768x768.webp)


