Crispy Korean Popcorn Chicken Delight in Every Bite

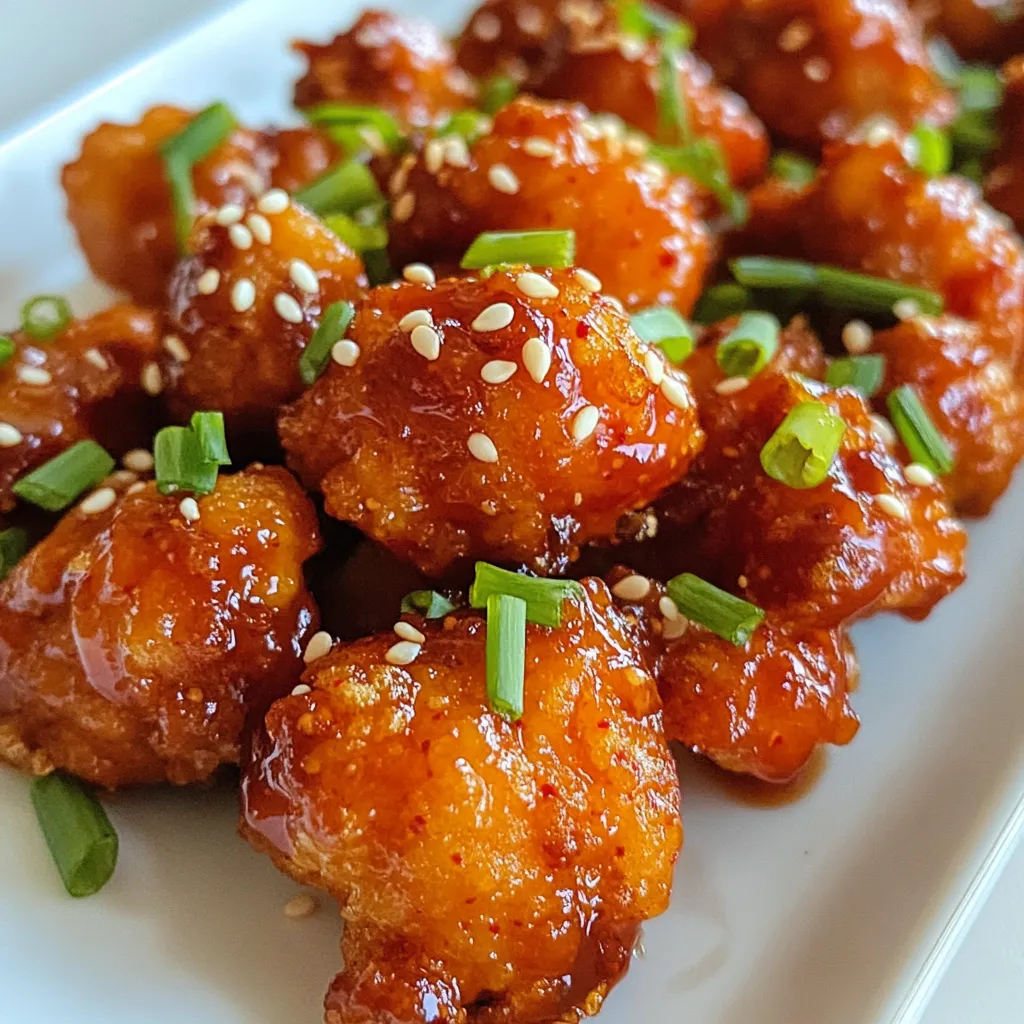
Are you ready to enjoy a crunchy, flavorful treat that will make your taste buds dance? My recipe for Crispy Korean Popcorn Chicken is a game-changer! With juicy chicken thighs, a crispy coating, and a spicy-sweet sauce, this dish promises delight in every bite. Whether you’re hosting a party or just treating yourself, this crispy chicken will impress. Let’s dive into the ingredients and make this mouthwatering dish together!
Why I Love This Recipe
- Crispy Texture: This popcorn chicken has an irresistible crunch that comes from the perfect combination of flour and cornstarch in the breading.
- Bold Flavors: The Korean sauce infused with gochujang, garlic, and ginger adds a sweet and spicy flavor that elevates the dish.
- Easy to Make: With straightforward steps and easily accessible ingredients, this recipe is perfect for both novice and experienced cooks.
- Perfect for Sharing: This dish is great for gatherings, parties, or a cozy night in, making it a versatile addition to any meal plan.
Ingredients
Main Ingredients
– 1 lb boneless chicken thighs
– 1 cup all-purpose flour
– 1/2 cup cornstarch
– 1 cup buttermilk (or regular milk)
Seasonings and Spices
– 1 teaspoon baking powder
– 1 teaspoon garlic powder
– 1 teaspoon onion powder
– 1/2 teaspoon black pepper
– 1/2 teaspoon salt
– 1/4 teaspoon cayenne pepper (optional)
Korean Sauce Ingredients
– 1/4 cup gochujang
– 2 tablespoons soy sauce
– 2 tablespoons honey
– 1 tablespoon sesame oil
– 1 teaspoon minced garlic
– 1 teaspoon minced ginger
– 1 tablespoon rice vinegar
– Sesame seeds and chopped green onions for garnish
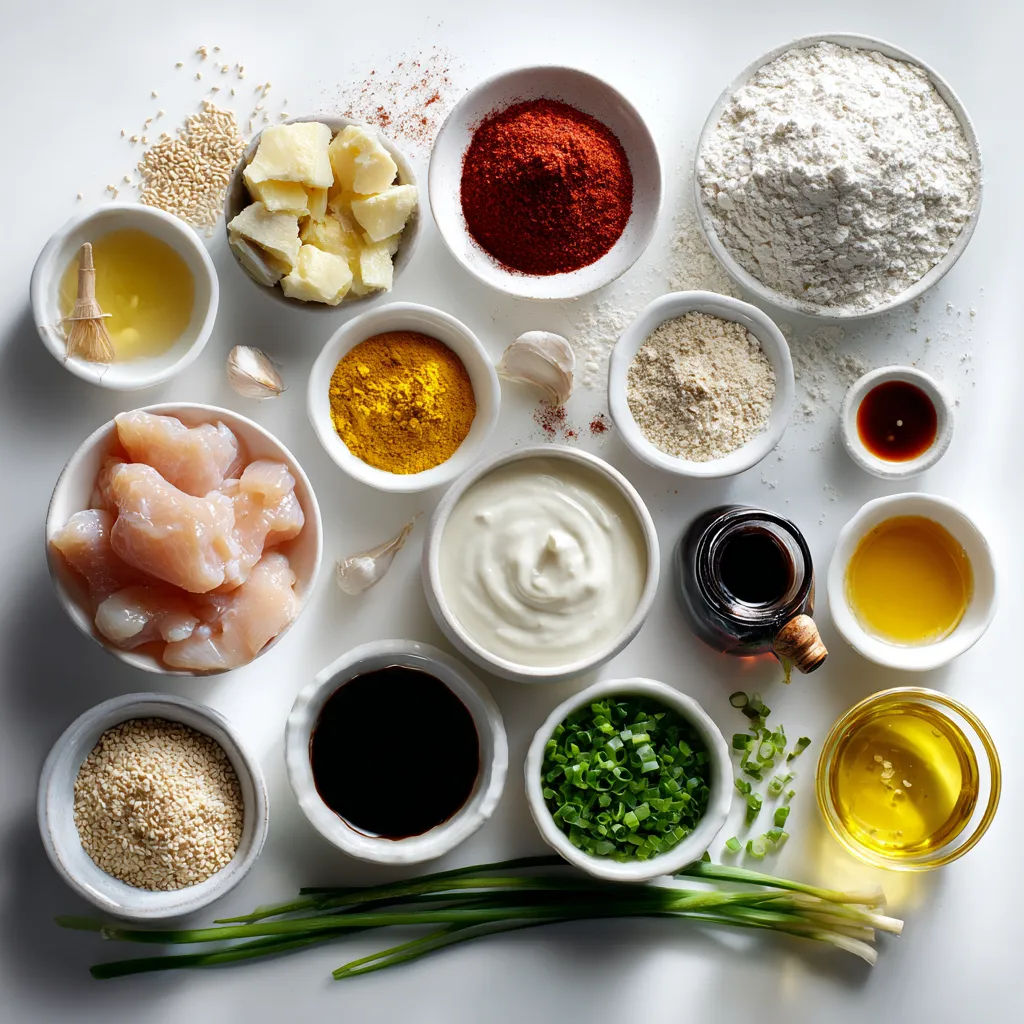
To make crispy Korean popcorn chicken, gather these key ingredients. You need chicken thighs for juicy bites. Flour and cornstarch create a crispy coating. Buttermilk adds moisture and flavor.
Next, mix the spices to give your chicken a kick. Baking powder helps the coating puff up. Garlic and onion powders add depth. Black pepper and salt enhance the taste. Cayenne pepper is optional for extra heat.
For the sauce, gochujang is the star. It gives a sweet and spicy flavor. Soy sauce adds umami. Honey brings sweetness, while sesame oil adds richness. Minced garlic and ginger boost the taste. Rice vinegar adds a bit of tang. Lastly, sprinkle sesame seeds and green onions for garnish.
These ingredients work together to create a delightful dish.

Step-by-Step Instructions
Marinating the Chicken
To start, take 1 pound of boneless chicken thighs and cut them into bite-sized pieces. Place these pieces in a medium bowl. Pour in 1 cup of buttermilk. Mix well so all the chicken is coated. Cover the bowl and let it sit in the fridge for 30 minutes. This step makes the chicken tender and flavorful.
Preparing the Breading
Next, get a large mixing bowl. In this bowl, combine 1 cup of all-purpose flour, 1/2 cup of cornstarch, 1 teaspoon of baking powder, 1 teaspoon of garlic powder, 1 teaspoon of onion powder, 1/2 teaspoon of black pepper, 1/2 teaspoon of salt, and an optional 1/4 teaspoon of cayenne pepper for heat. Whisk these dry ingredients together until well mixed. This mixture will give your chicken a nice crunch.
Frying the Chicken
Now, heat some vegetable oil in a deep pot over medium-high heat. Use a thermometer to check the temperature. You want it to be around 350°F (175°C). Make sure there is enough oil to cover the chicken pieces. While the oil heats, take the marinated chicken out of the fridge. Let any extra buttermilk drip off, then dredge each piece in the flour mixture. Shake off the excess flour. Carefully place the coated chicken into the hot oil in batches. Fry each batch for about 4-5 minutes until they are golden brown and crispy. Use a slotted spoon to remove them, letting the oil drain on paper towels.
Making the Korean Sauce
For the sauce, grab a small saucepan. Combine 1/4 cup of gochujang, 2 tablespoons of soy sauce, 2 tablespoons of honey, 1 tablespoon of sesame oil, 1 teaspoon of minced garlic, 1 teaspoon of minced ginger, and 1 tablespoon of rice vinegar. Heat this mixture over medium heat. Stir it constantly until it bubbles and thickens slightly. Once thickened, remove it from the heat and set it aside.
Coating the Chicken
In a large bowl, add your crispy fried chicken. Pour the warm Korean sauce over it. Toss the chicken gently until every piece is well coated in the sauce. This will give your chicken an amazing flavor and a beautiful glaze.
Serving Suggestions
To serve, plate the Korean popcorn chicken in a nice mound. You can garnish it with sesame seeds and chopped green onions. This not only adds flavor but also makes it look great. Enjoy your delicious crispy Korean popcorn chicken with some lime wedges on the side for a zesty kick!
Tips & Tricks
Achieving Perfect Crispiness
– Use the right oil temperature. Heat the oil to 350°F (175°C).
– Don’t overcrowd the frying pan. This keeps the oil hot and the chicken crispy.
Getting that perfect crunch is key. When you heat the oil correctly, the chicken fries quickly. If the oil is too cold, the chicken will soak up oil and get soggy.
Enhancing Flavor
– Marinate longer for more flavor. Aim for at least 30 minutes.
– Experiment with spice levels. Adjust the cayenne pepper to your taste.
Marinating the chicken in buttermilk not only adds flavor but also helps it stay juicy. Feel free to add more spices if you like heat. A dash of pepper or even a spicy sauce can make a big difference.
Presentation Tips
– Use garnishes for an appealing look. Sesame seeds and green onions add color.
– Serve with lime wedges for added zest. A squeeze of lime brightens the dish.
How you serve the chicken matters. A colorful plate is more inviting. Adding lime wedges gives a fresh taste that balances the rich flavors of the sauce. Enjoy your creation!
Pro Tips
- Marination Magic: Allow the chicken to marinate for at least 1 hour for maximum tenderness and flavor absorption.
- Fry in Batches: Fry the chicken in small batches to maintain the oil temperature, ensuring each piece becomes perfectly crispy.
- Temperature Check: Use a thermometer to ensure the oil is at 350°F (175°C) for optimal frying; too low will result in greasy chicken.
- Coating Technique: Double coat the chicken by dipping it back into the buttermilk and then the flour mixture again for extra crunch.

Variations
Spicy Version
If you love heat, boost your Korean popcorn chicken. Add more cayenne or chili flakes to the flour mix. This will give your chicken an extra kick. Adjust the spice to your taste. You can start with one teaspoon and go up from there. This spicy version is perfect for those who crave bold flavors.
Healthy Alternative
Want a lighter take on this dish? Use an air fryer instead of frying in oil. This cuts down on fat and keeps the chicken crispy. Just coat the chicken as usual, then place it in the air fryer. Cook at 400°F (200°C) for about 10-12 minutes. Flip halfway for even cooking. You’ll enjoy the same great taste with less guilt.
Different Sauces
Switch up the sauce for more variety. Try teriyaki sauce for a sweet twist. You can also use sweet and sour sauce for a tangy kick. Each sauce adds a unique flavor to the chicken. Feel free to mix and match to find your favorite. Experimenting with sauces can make this dish even more fun!
Storage Info
Leftovers
To keep your crispy chicken fresh, store it in an airtight container. Let it cool first. Place a paper towel at the bottom to soak up moisture. This helps keep the chicken crispy. You can store it in the fridge for up to three days.
Reheating Tips
When you want to enjoy leftovers, the best way to reheat is in the oven. Preheat the oven to 375°F (190°C). Spread the chicken on a baking sheet. Heat for about 10-15 minutes. This method keeps the outside crispy. You can also use an air fryer for quick reheating. Set it to 350°F (175°C) for 5-7 minutes.
Freezing Instructions
Yes, you can freeze the leftovers! Place the cooled chicken in a freezer bag. Remove as much air as possible before sealing. Properly stored, it lasts up to three months in the freezer. When ready to eat, let it thaw in the fridge overnight. Reheat using the oven method to restore the crispiness.
FAQs
What can I serve with Korean popcorn chicken?
You can enjoy Korean popcorn chicken with many tasty sides. Here are some ideas:
– Steamed rice: White or brown rice pairs well.
– Kimchi: This spicy, fermented dish adds flavor.
– Pickled vegetables: They bring a nice crunch and tang.
– Coleslaw: A fresh, crunchy side balances the meal.
– Dipping sauces: Serve with extra sauce for added flavor.
Can I use a different type of chicken?
Yes, you can use other cuts of chicken. Here are some options:
– Chicken breast: A leaner choice, great for frying.
– Chicken wings: They are fun and tasty for snacking.
– Chicken tenders: These are easy to coat and fry.
You can also try turkey or other poultry. Adjust cooking times as needed.
How spicy is Korean popcorn chicken?
Korean popcorn chicken can be mildly spicy. The spice level depends on the gochujang used. Here are some ways to adjust the heat:
– Less cayenne pepper: Skip it for milder chicken.
– Add more honey: This can balance the heat well.
– Use mild gochujang: Check labels for spice levels.
You can always serve extra sauce on the side.
Is it possible to make this recipe gluten-free?
Yes, you can make this recipe gluten-free with some swaps. Here are tips:
– Gluten-free flour: Use a blend or almond flour for the coating.
– Cornstarch: This is already gluten-free and adds crispiness.
– Tamari: Replace soy sauce with this gluten-free option.
Make sure all other ingredients are gluten-free too. Enjoy your tasty dish!
You learned how to make Korean popcorn chicken from scratch. We covered the main ingredients, spices, and the delicious sauce. I shared step-by-step tips to ensure a crispy finish. You can also explore variations based on your taste, like adding spice or using an air fryer. Remember to store your leftovers properly for the next craving. Enjoy this flavorful dish, and don’t hesitate to try out new sides or sauces. Happy cookin

Crispy Korean Popcorn Chicken
Ingredients
- 1 lb boneless chicken thighs, cut into bite-sized pieces
- 1 cup all-purpose flour
- 1 2 cup cornstarch
- 1 teaspoon baking powder
- 1 teaspoon garlic powder
- 1 teaspoon onion powder
- 1 2 teaspoon black pepper
- 1 2 teaspoon salt
- 1 4 teaspoon cayenne pepper (optional, for heat)
- 1 cup buttermilk (or regular milk)
- as needed cup vegetable oil for frying
- 1 4 cup gochujang (Korean chili paste)
- 2 tablespoons soy sauce
- 2 tablespoons honey
- 1 tablespoon sesame oil
- 1 teaspoon minced garlic
- 1 teaspoon minced ginger
- 1 tablespoon rice vinegar
- to taste sesame seeds and chopped green onions for garnish
Instructions
- In a medium-sized bowl, combine the bite-sized chicken thighs with the buttermilk. Cover and let it marinate in the refrigerator for a minimum of 30 minutes.
- In a large mixing bowl, whisk together the all-purpose flour, cornstarch, baking powder, garlic powder, onion powder, black pepper, salt, and cayenne pepper (if using).
- In a deep pot or heavy frying pan, heat vegetable oil over medium-high heat, aiming for 350°F (175°C).
- Once marinated, remove the chicken pieces from the buttermilk and coat each piece in the prepared flour mixture.
- Gently place the coated chicken pieces into the hot oil in batches, frying each batch for about 4-5 minutes until golden brown and crispy.
- In a small saucepan, combine gochujang, soy sauce, honey, sesame oil, minced garlic, minced ginger, and rice vinegar. Heat over medium heat until it bubbles and thickens slightly.
- In a large bowl, add the crispy fried chicken and pour the warm Korean sauce over. Toss gently until all pieces are well coated.
- Plate the Korean popcorn chicken and garnish with sesame seeds and chopped green onions.


![- 1 red bell pepper, cut into even-sized chunks - 1 yellow bell pepper, cut into even-sized chunks - 1 green zucchini, sliced into round pieces - 1 red onion, cut into wedges - 1 cup cherry tomatoes, washed and stems removed - 1 cup mushrooms, cleaned and stems trimmed - 1 cup fresh pineapple chunks - 3 tablespoons extra virgin olive oil - 2 tablespoons balsamic vinegar - 1 teaspoon garlic powder - 1 teaspoon dried oregano - Salt and freshly cracked black pepper, to taste - Fresh basil leaves, for garnish The ingredients are bright and colorful. They bring life to your plate. I love how fresh vegetables like bell peppers and zucchini can add crunch and flavor. The cherry tomatoes burst with sweetness. Pineapple brings a tropical twist. For the marinade, the extra virgin olive oil and balsamic vinegar work wonders. They help the veggies soak in all the flavors. Garlic powder and dried oregano add depth. Don’t forget salt and pepper; they bring balance. When it comes to garnishing, fresh basil leaves are a must. They add a lovely aroma and a splash of green. Your skewers will look stunning with these vibrant ingredients. For the complete recipe, check out the [Full Recipe]. Enjoy the process of gathering these ingredients. It sets the stage for a fun cooking adventure! - Preheating the grill Start by preheating your grill to medium-high heat. This step is key for even cooking. A hot grill helps create nice grill marks and adds flavor. - Making the marinade In a large bowl, mix together the extra virgin olive oil, balsamic vinegar, garlic powder, dried oregano, salt, and pepper. Whisk it all together until well blended. This marinade is what makes your veggies burst with flavor. - Soaking wooden skewers (if using) If you choose wooden skewers, soak them in water for 30 minutes. This prevents them from burning on the grill. It’s a simple step that makes a big difference. - Threading vegetables and pineapple Take your soaked or metal skewers and start threading on the veggies and pineapple. I like to alternate colors and shapes. This not only looks pretty but also makes every bite exciting. - Cooking time and turning frequency Place the skewers on the preheated grill. Grill them for about 10 to 15 minutes. Remember to turn them every couple of minutes. This ensures they cook evenly and get that lovely char. - Checking for doneness Check the veggies for tenderness. They should be soft but not mushy. You want them to have a nice bite. Once they reach that point, they are ready to come off the grill. This simple method lets you create a vibrant and tasty treat that's sure to impress. For the full recipe, check out the details above. To get the best grill marks, keep your grill hot. Place the skewers on the grill and don't move them too much. This helps veggies sear well and get those beautiful lines. Turn them every few minutes to cook evenly. Burning veggies can ruin your meal. To prevent this, choose the right veggies. Use firmer ones like bell peppers and mushrooms. Slice them thick enough to hold up on the grill. Soak wooden skewers in water for at least 30 minutes. This helps them not catch fire. Adding spices can boost the taste. Try adding smoked paprika for a nice kick. A sprinkle of cumin can also give a warm flavor. Fresh herbs like thyme or rosemary can make a big difference too. For marinades, you can try mixing soy sauce with the balsamic vinegar. This adds a salty, rich flavor. Citrus juices, like lemon or lime, are great too. They add a fresh, bright taste to the veggies. When serving, arrange the skewers on a large platter. Keep colors in mind for a vibrant look. Place the greens with the reds and yellows for a beautiful display. Drizzling the remaining marinade over the skewers adds flavor and shine. This step makes the dish look even more appealing. You can also serve with a side of tzatziki or hummus for extra dipping fun. {{image_4}} You can switch up the veggies for your skewers. Seasonal veggies add fun flavors. Try adding: - Carrots, cut into sticks - Bell peppers of various colors - Eggplant, diced into cubes - Asparagus, cut to fit Mushrooms come in many types. Use portobello or shiitake for great taste. You can also try oyster mushrooms; they add a nice texture. Want to make your skewers heartier? Add protein! You can use: - Chicken, cut into bite-sized pieces - Tofu, pressed and cubed - Shrimp, peeled and deveined Marinate your protein apart from the veggies. This helps each ingredient soak in its own flavors. You can use the same marinade for a tasty mix. Make your skewers fit the season! For a fall theme, use: - Sweet potatoes, cubed - Brussels sprouts, halved - Butternut squash, diced In summer, visit local farmers’ markets. Use fresh produce like zucchini, corn, or cherry tomatoes. This way, your skewers taste fresh and vibrant. For the full recipe, check out the Rainbow Veggie Skewers section above! To keep Rainbow Veggie Skewers fresh, store them in the fridge. Place them in an airtight container. This helps prevent moisture loss. They will stay good for about three days. You can also wrap them tightly in plastic wrap. When it’s time to eat leftovers, I recommend reheating them in the oven. Preheat your oven to 350°F (175°C). Place the skewers on a baking sheet and cover them with foil. Heat for about 10 minutes. This method keeps the skewers from getting soggy. You can also use a grill or skillet. Just be careful not to overheat them. You can freeze ungrilled skewers for later use. Just prepare them as normal, but skip grilling. Place the skewers in a single layer on a tray. Freeze them for about an hour. Once frozen, transfer them to a freezer bag. Be sure to squeeze out as much air as possible. When you’re ready to cook, thaw them in the fridge overnight. You can grill them straight from the freezer too, but add a few extra minutes to the cooking time. Grill veggie skewers for about 10 to 15 minutes. Different veggies need different times. For soft veggies like zucchini and tomatoes, check them after 8 minutes. For firmer veggies like bell peppers and onions, wait a bit longer. Turn the skewers every few minutes to cook evenly. Yes, you can prepare these skewers in advance. Cut up the veggies and marinate them the day before. Store them in the fridge in an airtight container. This saves time and boosts flavor. Just remember to soak wooden skewers if you use them. To make Rainbow Veggie Skewers, you need a few simple tools: - Grill - Skewers (metal or wooden) - Mixing bowl - Whisk - Tongs - Knife and cutting board If you don't have skewers, you can grill the veggies directly on the grill rack. Yes! You can use either metal or wooden skewers. Metal skewers are reusable and easy to clean. They also help cook veggies evenly. Wooden skewers are great for one-time use and can add a nice look, but soak them first to prevent burning. Dipping sauces can elevate your skewers. Here are some popular options: - Tzatziki - Hummus - Ranch dressing - Garlic aioli - Sweet chili sauce These dips add flavor and make your Rainbow Veggie Skewers even more fun to eat. For the full recipe, check out the complete instructions. In this article, we explored how to make flavorful veggie skewers. We discussed fresh vegetables, a tasty marinade, and garnishing with basil. I shared step-by-step instructions for preparation, skewering, and grilling. Tips offered help you achieve perfect results. You can add proteins, use seasonal variations, and store leftovers with ease. These skewers offer flavor, color, and fun for any meal. Enjoy grilling and making them your own!](https://joymealplan.com/wp-content/uploads/2025/06/6627606f-c135-4765-9273-fb487ae5d1cd-768x768.webp)


![- Preheat the oven to 400°F (200°C). - Rinse and trim the asparagus. First, I set my oven to 400°F (200°C). This temperature roasts the asparagus just right. Next, I rinse the asparagus under cold water. I clean each stalk well. To trim, I gently bend the end until it snaps. This removes the tough part. If you prefer, use a knife for a clean cut. - Mix garlic, olive oil, lemon zest, lemon juice, and seasonings. Now, let’s make the marinade! In a small bowl, I combine minced garlic, olive oil, lemon zest, and lemon juice. I add sea salt, black pepper, and red pepper flakes for a little heat. Whisk all these together until well mixed. This marinade brings a burst of flavor to our asparagus. - Toss asparagus in marinade. - Roast asparagus for 12-15 minutes in preheated oven. Next, I lay the asparagus on a baking sheet. I drizzle the marinade over them, making sure each spear gets coated. I use my hands or a spoon to toss gently. Then, I spread them out in a single layer. I place the tray in the hot oven. I roast the asparagus for 12-15 minutes. Halfway through, I give them a stir. This helps them cook evenly. When done, they should be tender with a bit of crispness. If you want, sprinkle grated Parmesan cheese over the asparagus in the last two minutes of roasting. It melts nicely and adds richness. Once finished, I take them out and garnish with fresh parsley. This adds color and makes the dish pop! For the complete recipe, check out the [Full Recipe]. How do you tell when asparagus is done cooking? Look for a bright green color. The stalks should be tender but still firm. You can also poke them with a fork to check for tenderness. If they bend easily but don’t break, they’re perfect! Want to boost the flavor? Try adding fresh herbs like thyme or basil. You can also use spices like garlic powder or onion powder. If you like a kick, sprinkle red pepper flakes on top. Just a pinch adds great heat without overpowering the dish. How can you serve Garlic Lemon Asparagus? First, arrange the asparagus on a nice platter. Keep them in a single layer for a neat look. You can sprinkle some extra lemon zest on top for brightness. Finally, add fresh parsley for a splash of color. This makes your dish pop and look tasty! For the full recipe, check out the complete guide. {{image_4}} You can cook Garlic Lemon Asparagus in different ways. Each method gives a unique taste. - Grilling: This adds a smoky flavor. You will get nice grill marks. But you should watch it closely. It cooks fast and may burn. - Roasting: This method brings out the natural sweetness. You will get a tender inside with a slight crisp. It takes a short time at high heat, which is perfect for busy cooks. - Sautéing on the stovetop: This is quick and easy. Heat oil in a pan, add the asparagus, and cook for a few minutes. You get a fresh taste and a bright green color. You can switch ingredients to suit your taste or diet. - Cheese Options: If you want a vegan dish, skip the Parmesan. You can use nutritional yeast for a cheesy taste without dairy. Feta cheese is also a great option if you want a different flavor. - Citrus Variations: Instead of lemon, try lime or orange. Each fruit brings its own twist. Lime gives a tangy kick, while orange adds sweetness. Many people have different diets. You can easily adapt this dish. - Gluten-Free: This recipe is already gluten-free. Just make sure any added ingredients are too. - Dairy-Free: Skip the cheese or use a dairy-free alternative. This keeps the dish light and fresh. - Low-Carb: Asparagus is low in carbs, making it perfect for health-conscious eaters. You can enjoy it without worries about carbs. Try these variations to make Garlic Lemon Asparagus your own! For the complete recipe, check the [Full Recipe]. To keep your Garlic Lemon Asparagus fresh, follow these tips: - Refrigeration: Place leftovers in an airtight container. This helps keep moisture in and prevents odors from other foods. Store them in the fridge for best results. - Freezing: If you want to save them longer, consider freezing. First, blanch the asparagus in boiling water for two minutes. Then cool them in ice water. Drain and place in freezer bags. Remove air to avoid freezer burn. When it's time to enjoy them again, you should reheat properly. - Reheating: For the best taste, heat in a skillet over medium heat. Add a splash of olive oil to keep them moist. Stir occasionally for even heating. You can also reheat them in the oven at 350°F (175°C) for about 10 minutes. Garlic Lemon Asparagus lasts about 3 to 5 days in the fridge. - Check for freshness: Look for any signs of spoilage, like discoloration or a sour smell. If they seem off, it's best to toss them. To maintain texture after storage, try these tips: - Avoid overcrowding in the container. This helps air circulate and keeps them crisp. - When reheating, don't overcook them. This keeps their vibrant color and crunch. Following these steps will help you enjoy your Garlic Lemon Asparagus longer, keeping the flavors fresh and delicious! For the complete preparation guide, check the Full Recipe. What are the health benefits of asparagus? Asparagus is low in calories and high in nutrients. It is rich in vitamins A, C, E, and K. This vegetable also has folate, which helps with cell growth. Asparagus is a good source of fiber, aiding digestion. Plus, it has antioxidants that fight free radicals in the body. Can I prepare Garlic Lemon Asparagus in advance? Yes, you can prepare Garlic Lemon Asparagus in advance. You can wash and trim the asparagus a day before. Mix the marinade and store it in the fridge. When you are ready to eat, toss the asparagus in the marinade and roast them. This helps the flavors meld well. Can I use frozen asparagus for this recipe? Yes, you can use frozen asparagus for this recipe. However, fresh asparagus will taste better. If using frozen, thaw them first. Drain excess water to avoid sogginess. Then proceed with the marinade and roasting steps. How can I make this recipe spicier? To make this recipe spicier, add more red pepper flakes. You can also add sliced fresh jalapeños or a dash of hot sauce. Mix these into the marinade for an extra kick. Start with a small amount and adjust to your taste. What dishes pair well with Garlic Lemon Asparagus? Garlic Lemon Asparagus pairs well with many dishes. It complements grilled chicken, fish, or steak. You can also serve it with pasta or rice. A light salad also works nicely with this dish. How can I incorporate this recipe into a meal prep plan? Incorporate Garlic Lemon Asparagus into your meal prep by adding it to your favorite meals. Roast a big batch and store it in the fridge. Use it as a side dish throughout the week. It can add color and flavor to your meals. In this blog post, we covered a simple yet delicious Garlic Lemon Asparagus recipe. We explored fresh ingredients, step-by-step cooking instructions, and useful tips for perfecting your dish. You learned about different cooking methods and diet modifications, plus how to store leftovers. Garlic Lemon Asparagus is a versatile side that enhances any meal. Try it out and enjoy creating your own flavors!](https://joymealplan.com/wp-content/uploads/2025/07/a67e5927-9a3c-4503-bb74-543c28219cb2-768x768.webp)