Cucumber Tomato Feta Salad Fresh and Flavorful Mix

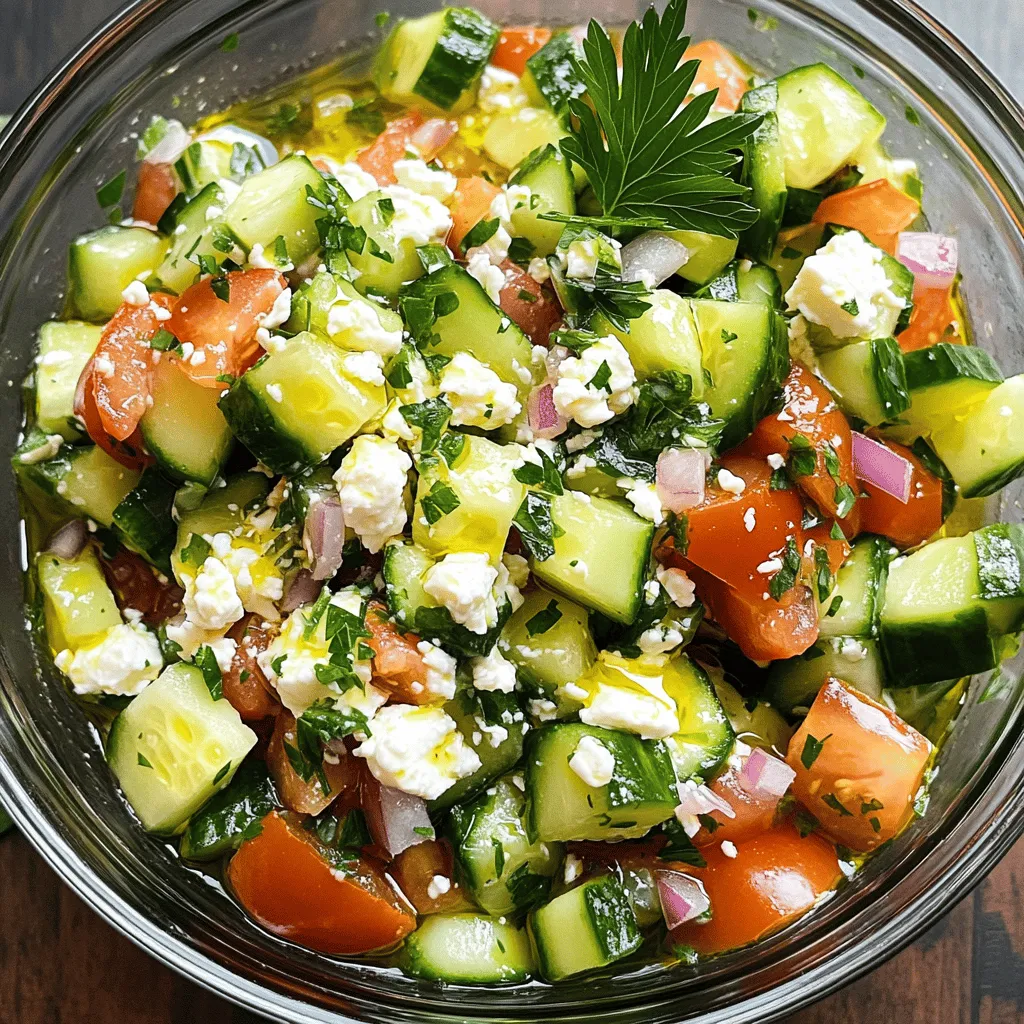
Looking for a fresh and tasty salad that’s simple to make? You’re in the right place! This Cucumber Tomato Feta Salad combines crisp cucumbers, juicy tomatoes, and creamy feta for a burst of flavor. Perfect as a side dish or a light lunch, it’s easy to whip up and even easier to enjoy. Join me as I share all the steps to make this vibrant salad at home.
Ingredients
Fresh Produce
– 2 large cucumbers
– 3 medium tomatoes
– 1/4 cup red onion
– 1/4 cup fresh parsley
Dairy
– 1 cup feta cheese
Pantry Essentials
– 3 tablespoons extra virgin olive oil
– 1 tablespoon red wine vinegar (optional)
– 1 teaspoon dried oregano
– Salt and freshly ground black pepper
When I make my Cucumber Tomato Feta Salad, I start with fresh produce. Fresh ingredients really bring the salad to life. I grab two large cucumbers. They should be crisp and firm. I also use three medium tomatoes. Look for bright colors and a slight give when you press them. A quarter cup of red onion adds a nice bite. I choose a small red onion for its sweet flavor. Lastly, I add a quarter cup of fresh parsley. This herb brightens the dish and adds color.
Next, I focus on the dairy. Feta cheese is a must for this salad. I use one cup of crumbled feta. Its creamy texture balances the crunch of the vegetables.
Now, let’s talk pantry essentials. I add three tablespoons of extra virgin olive oil. This oil adds richness and flavor. If you like a bit of tang, one tablespoon of red wine vinegar is optional. It brightens the salad. I sprinkle one teaspoon of dried oregano for that classic Mediterranean taste. Finally, I add salt and freshly ground black pepper to taste.This salad is simple, fresh, and full of flavor, perfect for any meal!
Step-by-Step Instructions
Preparation of Vegetables
1. Start by dicing the cucumbers. Cut them into small cubes. This makes them easy to eat.
2. Next, chop the tomatoes into bite-sized pieces. Make sure they are juicy and ripe for the best flavor.
3. Finely chop the red onion. This adds a great crunch and zing to your salad.
Combining Ingredients
1. In a large mixing bowl, add the diced cucumbers and chopped tomatoes.
2. Now, add the crumbled feta cheese and the chopped parsley. This will give the salad a fresh taste.
3. Sprinkle dried oregano over the mixture. This herb adds a lovely aroma and flavor.
Preparing the Dressing
1. In a small bowl, whisk together the olive oil and vinegar. This dressing will tie all the flavors together.
2. Pour the dressing over the salad ingredients. Make sure everything gets coated well.
Tossing the Salad
1. Gently fold the ingredients together. Be careful not to mash the feta cheese.
2. Season the salad with salt and freshly ground black pepper. Adjust the amounts to your liking.
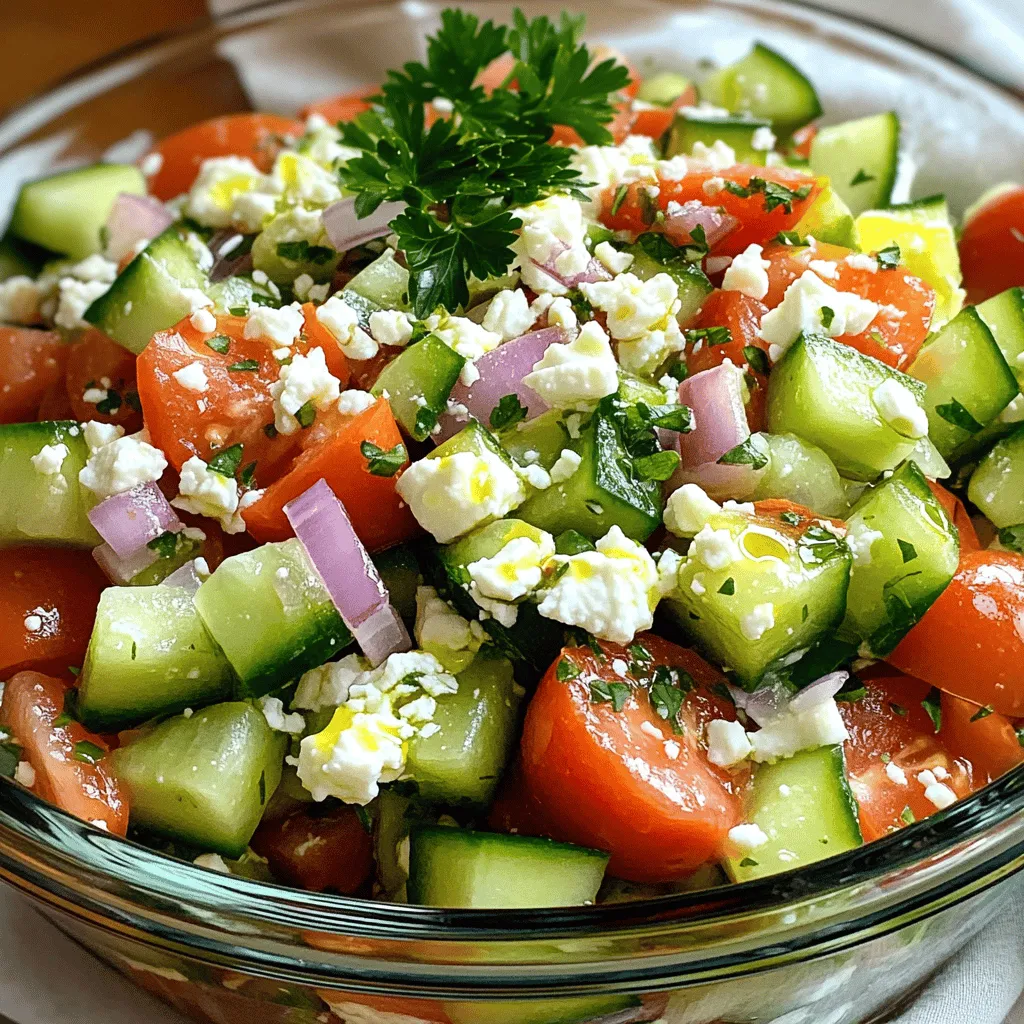
3. Allow the salad to rest for about 10 minutes. This helps the flavors blend well, making each bite delicious.Enjoy this fresh and flavorful mix!
Tips & Tricks
Flavor Enhancement
Let the salad rest for 10 minutes before serving. This step helps the flavors blend well. You can adjust the seasoning to taste. Start with a little salt and pepper, then add more if needed.
Presentation Ideas
Use a clear glass bowl to serve the salad. This lets the bright colors shine through. Garnish with extra feta and a sprinkle of parsley. A little extra touch makes it look fancy.
Serving Suggestions
Pair this salad with grilled meats for a tasty meal. It also works well as a light lunch. Serve it with some crusty bread for a nice combo.

Variations
Additional Ingredients
You can change your salad by adding more fun ingredients. Consider sliced olives for a briny kick. They add a nice salty flavor. Bell peppers are another great choice. Chop them in small pieces for a sweet crunch.
Dressing Alternatives
If you want to mix things up, try using avocado oil instead of olive oil. Avocado oil has a smooth taste that works well here. You can also play with herbs. Adding fresh basil or dill can give your salad a new twist.
Dietary Modifications
Want to make it vegan? Swap out the feta cheese for tofu. Tofu absorbs flavors well and adds protein. You can also use a dairy-free feta made from nuts or soy. This way, everyone can enjoy this salad.
Storage Info
Short-Term Storage
Store your salad in the refrigerator. Use an airtight container for best results. This keeps it fresh and crisp.
Long-Term Storage
Enjoy your salad within 2 days for the best taste. Avoid adding dressing until you are ready to serve. This helps keep the veggies crunchy.
Signs of Spoilage
Check for discoloration in the vegetables. If they look dull or mushy, it’s time to toss the salad. Smell the mix for freshness. If it smells off, don’t eat it.
FAQs
How do I make the best Cucumber Tomato Feta Salad?
To make the best salad, start with fresh ingredients. Use firm cucumbers and ripe tomatoes. Look for feta that is creamy and packed in brine for added flavor. When you chop, try to keep pieces similar in size. This helps with even flavor and texture.
Can I prepare this salad in advance?
Yes, you can prepare this salad in advance. I recommend making it no more than a few hours ahead. This keeps the vegetables crisp and fresh. If you prepare it too early, the cucumbers may get soggy.
What can I substitute for feta cheese?
If you need a substitute for feta, try goat cheese or ricotta. Both add creaminess and flavor. For a vegan option, use tofu or nutritional yeast. These options provide a similar texture and enhance the taste of your salad.
How can I enhance the flavor of my salad?
To enhance the flavor, consider adding herbs like basil or mint. Fresh herbs bring a bright taste. You can also add a dash of chili flakes for some heat. A squeeze of lemon juice can also brighten the mix.
Is it healthy to eat Cucumber Tomato Feta Salad?
Yes, this salad is healthy. Cucumbers are hydrating and low in calories. Tomatoes are rich in vitamins and antioxidants. Feta cheese adds protein and calcium. This mix is both tasty and good for you.
This blog post covers how to make a fresh and tasty Cucumber Tomato Feta Salad. We discussed key ingredients like cucumbers, tomatoes, feta cheese, and pantry essentials. I also shared step-by-step instructions for preparation and serving tips. You can enhance the flavor or modify the salad to fit your needs. Remember to store it properly to keep it fresh. This salad is not only healthy but also a joy to make and share. Enjoy creating this dish that brightens any meal!


![To make Pickle Ranch Snack Crackers, you need the following ingredients: - 1 cup all-purpose flour - 1/2 cup cornmeal - 1 teaspoon baking powder - 1/2 teaspoon baking soda - 1/2 teaspoon salt - 1 tablespoon ranch seasoning mix - 1/4 cup dill pickle juice - 1/4 cup melted butter (cooled slightly) - 1/2 cup shredded cheddar cheese - 1/4 cup dill pickle slices (finely chopped) You can swap some ingredients if needed. For the all-purpose flour, try using whole wheat flour for added fiber. If you prefer a gluten-free option, use a gluten-free flour blend. Instead of cornmeal, you can use fine breadcrumbs for a different texture. If you want to skip the ranch seasoning, use herbs like dill, garlic powder, or onion powder to create your own flavor. Each serving, which is about two crackers, provides: - Calories: 120 - Total Fat: 8g - Saturated Fat: 4g - Cholesterol: 20mg - Sodium: 150mg - Carbohydrates: 10g - Fiber: 1g - Sugar: 1g - Protein: 3g These crackers are tasty and balanced, making them a fun snack for any occasion. You can enjoy them without guilt! 1. Preheat your oven to 350°F (175°C). This is key for baking. 2. Line a baking sheet with parchment paper. This helps with easy cleanup. 3. In a large bowl, mix the flour, cornmeal, baking powder, baking soda, salt, and ranch seasoning. Use a whisk to mix well. 4. Slowly add the dill pickle juice and melted butter. Stir until a dough forms. 5. Fold in the cheddar cheese and chopped dill pickles. Make sure they spread evenly in the dough. 6. Roll the dough into small balls, about the size of a quarter. Place them on the sheet, leaving space between them. 1. Flatten each ball gently with a fork or your fingers. Aim for even thickness. 2. Bake the crackers for 12-15 minutes. Watch closely for a light golden brown color. 1. Once baked, let the crackers cool on the sheet for a few minutes. 2. Transfer them to a wire rack to cool completely. This makes them crispier. 3. For a fun serving idea, arrange them on a colorful platter. Add fresh dill sprigs or serve with ranch dip for a tasty snack. Enjoy your Pickle Ranch Snack Crackers! You can find the full recipe above for more details. To get the right texture for your Pickle Ranch Snack Crackers, focus on mixing. Combine the dry ingredients well to avoid lumps. When adding the wet ingredients, mix just until combined. Overmixing can make your crackers tough. Roll the dough into small balls. Keep them uniform in size to ensure even baking. Flatten them gently for a crispier edge. To boost flavor, consider adding more ranch seasoning. You could also try garlic powder or onion powder. A pinch of cayenne can add a nice kick if you like spice. Adding herbs like dill or parsley can enhance the pickle flavor. For extra richness, sprinkle some grated Parmesan cheese on top before baking. One common mistake is using hot melted butter. It can change the dough's texture. Be careful not to skip the cooling step after baking. Allowing them to cool helps the crackers firm up. Also, don’t crowd the baking sheet. If they are too close, they may stick together. Check them often while baking to avoid burning. For a full recipe, refer to the complete instructions. {{image_4}} You can add fun twists to Pickle Ranch Snack Crackers. Want some heat? Try adding cayenne pepper or crushed red pepper flakes. Just a pinch will do! For a cheesy version, swap in pepper jack cheese instead of cheddar. Mixing in some garlic powder can also boost flavor. These tweaks keep your snack game exciting! If you need a gluten-free option, use gluten-free all-purpose flour. It works well in this recipe. You can also try almond flour for a nutty taste. Make sure your ranch seasoning is gluten-free too. This way, everyone can enjoy these tasty crackers without worry. These crackers shine when paired with dips. Creamy ranch dip is a favorite, but you can also serve them with hummus or guacamole. For a fun party snack, arrange them on a platter with fresh veggies. They also taste great with cheese slices or charcuterie. Each bite will surprise your guests! Explore the [Full Recipe] to start making your own delicious Pickle Ranch Snack Crackers today! Store your Pickle Ranch Snack Crackers in an airtight container. This keeps them fresh and crisp. You can use a glass jar or a plastic container. Make sure they are completely cool before sealing. If you live in a humid area, consider adding a small bag of rice to absorb moisture. When stored properly, these crackers can last up to one week. They taste best in the first few days. After that, they may lose some crunch. If you want to keep them longer, you can freeze them. Just place them in a freezer-safe bag or container. If your crackers lose their crunch, you can reheat them. Preheat your oven to 300°F (150°C). Spread the crackers on a baking sheet in a single layer. Heat them for about 5-7 minutes. Check often to avoid burning. Let them cool before enjoying again. For the full recipe, refer to the earlier section. Pickle Ranch Snack Crackers are tasty, crunchy treats. They mix the flavors of dill pickles and ranch dressing. These snacks are perfect for parties or game nights. They are easy to make at home with simple ingredients. To make Pickle Ranch Snack Crackers at home, follow these steps: 1. Preheat your oven to 350°F (175°C). 2. Line a baking sheet with parchment paper. 3. Mix flour, cornmeal, baking powder, baking soda, salt, and ranch seasoning in a bowl. 4. Add dill pickle juice and cooled melted butter. Stir to form a dough. 5. Fold in cheddar cheese and chopped pickles. 6. Roll the dough into small balls. Flatten each ball on the baking sheet. 7. Bake for 12-15 minutes until golden. 8. Let them cool on a wire rack. For the full recipe, check the details provided above. Pickle Ranch Snack Crackers can be a fun snack. They contain some healthy ingredients like cheese and pickles. However, they also have butter and flour, which add calories. Enjoy them in moderation as part of a balanced diet. You can find Pickle Ranch Snack Crackers at many grocery stores. Look in the snack aisle or near the crackers. Some stores may also sell them online. Check popular websites for easy shopping options. These crackers pair well with many dips and spreads. Serve them with ranch dressing, creamy dip, or hummus. You can also enjoy them with cheese or fresh veggies. They make a great snack for any gathering. This blog post covers everything about Pickle Ranch Snack Crackers. We discussed the key ingredients, including substitutions, and shared helpful nutritional data. You learned precise steps for preparation and baking, along with cooling tips for best results. I shared easy tricks to get the perfect texture and flavor. You now know various tasty variations to try and how to store them properly. Finally, you have answers to common questions about these delicious snacks. Enjoy making and sharing your own Pickle Ranch Snack Crackers!](https://joymealplan.com/wp-content/uploads/2025/07/696f27ca-dd07-4295-82fd-de9c637e8141-768x768.webp)

. When making chutney, you may face some common issues. One frequent mistake is using unripe peaches. Unripe peaches lack flavor and sweetness. Always pick ripe, fragrant peaches for the best taste. Another error is not allowing the mixture to rest. Resting lets the peaches release juices, creating a rich base. If you skip this step, your chutney may end up dry. Sometimes, people add too much salt. Remember, you can always add more later. Start with a small pinch and taste before adding more. Also, avoid boiling the chutney on high heat. This can burn the sugar and ruin the flavor. Always cook on medium heat for better results. To make your chutney even more delicious, consider adding spices. A pinch of cardamom or nutmeg can boost flavor. Cinnamon and cloves are great, but try mixing in some allspice for a warm twist. If you want to adjust sweetness, add more brown sugar or honey. For a tangy kick, add extra apple cider vinegar. If you like heat, increase the red pepper flakes. Start with a little and taste as you go. You control the flavor! {{image_4}} You can switch out peaches for other fruits. Apples, mangoes, or plums work great. Each fruit brings its own taste and texture. Use ripe, juicy fruits for the best flavor. Fresh seasonal fruit always wins. For example, use apples in the fall and mangoes in summer. This keeps your chutney fresh and exciting. You can change the heat and sweetness easily. For more spice, add extra red pepper flakes. If you like it sweet, add more brown sugar or honey. Try adding spices like cumin or coriander for a unique twist. You can also mix in herbs like cilantro for freshness. These small changes can craft a new flavor profile. For more ideas, check the Full Recipe for suggestions on different flavor combinations. To keep your Quick Peach Chutney fresh, follow these steps: - Use a clean glass jar with a tight lid. - Make sure the chutney cools to room temperature before sealing. - Store it in the fridge. This helps lock in the flavors. Glass jars are great because they do not absorb odors. You can also use airtight plastic containers if you prefer. Just make sure they are food-safe. Quick Peach Chutney lasts about one week in the fridge. After that, the flavors may fade. Always check for any signs of spoilage, like off smells or mold. You can freeze the chutney if you want to keep it longer. Pour it into freezer-safe containers, leaving some space for expansion. It can last up to three months in the freezer. When you want to use it, simply thaw it in the fridge overnight. This way, you can enjoy your chutney whenever you like! Yes, you can make this chutney ahead of time. In fact, it tastes better after sitting for a day or two. The flavors mix and deepen, making the chutney even more delicious. You can store it in the fridge for up to two weeks. Just keep it in an airtight container to prevent it from drying out. Peach chutney is safe for canning if you follow proper methods. You should use a water bath canner for safe preservation. Always make sure to process jars for at least 10 minutes to ensure safety. Check seals before storing them in a cool, dark place. This way, you can enjoy your chutney long after peach season has ended. Peach chutney pairs well with many dishes. You can serve it with grilled chicken or pork for a burst of flavor. It also complements cheese boards, especially with creamy cheeses. Try it on sandwiches or burgers for a sweet and tangy kick. For a simple snack, enjoy it with crackers. The options are endless! Quick Peach Chutney is simple and fun to make. We explored the main ingredients, focusing on ripe peaches and how their quality matters. I shared tips on preparation, cooking steps, and even storage options to keep your chutney fresh. We talked about common mistakes and how to adjust flavors. You can use other fruits or tweak spice levels for personal taste. Remember, chutney makes a great addition to meals and snacks. Enjoy making this easy recipe, and feel free to share your creations!](https://joymealplan.com/wp-content/uploads/2025/07/68e09f5d-054f-4bea-af91-fb6a51bc34a0-768x768.webp)


