Easy Garlic Butter Shrimp Flavorful and Simple Dish

If you’re craving a dish that bursts with flavor yet is super easy to make, you’ve landed in the right spot! My Easy Garlic Butter Shrimp recipe combines fresh shrimp, aromatic garlic, and rich butter for a quick meal that delights your taste buds. In this post, I’ll guide you through each easy step, share handy tips, and even suggest some fun variations. Let’s get cooking and make dinner delicious!
Ingredients
List of Ingredients
– 1 pound large shrimp, peeled and deveined
– 4 tablespoons unsalted butter
– 4 cloves garlic, finely minced
– 1 lemon, zested and juiced
– 1/4 teaspoon red pepper flakes (optional)
– 1 tablespoon fresh parsley, finely chopped
– Salt and freshly cracked pepper to taste
– 1/2 teaspoon smoked paprika
– Lemon wedges for serving
Choosing fresh shrimp is key for flavor. Look for shrimp that are firm and have a slight sea smell. Avoid shrimp with a strong fishy scent or any discoloration. Always check the sell-by date when buying.
You can customize this dish with optional ingredients. Try adding a splash of white wine for depth. You can also include fresh herbs like thyme or basil for extra flavor. A pinch of lemon zest can enhance the freshness too.
Step-by-Step Instructions
Preparation
How to Peel and Devein Shrimp
Peeling and deveining shrimp is easy. Start by holding the shrimp in one hand. Use your other hand to grab the shell at the base of the shrimp. Gently pull the shell off, starting from the head to the tail. For deveining, look for the dark line on the back. Use a small knife to cut a shallow line and pull it out. Rinse the shrimp under cold water to clean them.
Preparing Garlic and Lemon
Garlic gives a rich taste to the dish. Take four cloves of garlic and finely mince them. Use a sharp knife for this task. Next, grab a lemon. Zest the lemon first by using a grater, then cut it in half and squeeze out the juice. Set both the zest and juice aside for later.
Cooking Process
Melting the Butter and Sautéing the Garlic
Start by heating a large skillet over medium heat. Add four tablespoons of unsalted butter. Let it melt completely. Swirl the pan to coat the bottom. Once melted, add the minced garlic. Sauté for one to two minutes, stirring often. Watch closely to avoid burning it.
Cooking the Shrimp to Perfection
Add the peeled and deveined shrimp to the skillet. Season with salt, cracked pepper, and half a teaspoon of smoked paprika. Let the shrimp cook without stirring for two to three minutes. When the bottom turns pink, flip each shrimp over to cook the other side.
Adding Flavor with Lemon and Spices
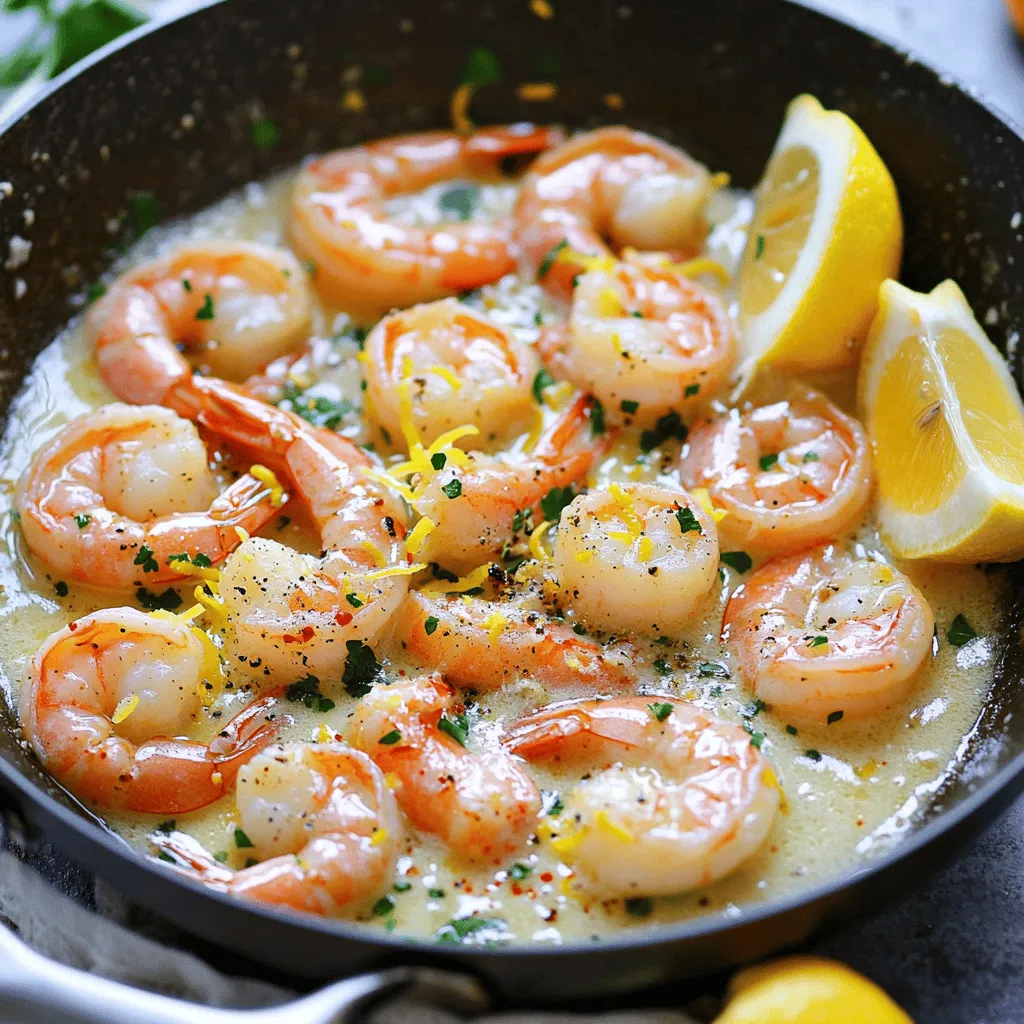
After flipping, sprinkle the lemon zest over the shrimp. Squeeze in the lemon juice for a fresh taste. If you like some heat, add red pepper flakes. Cook for another two to three minutes until the shrimp are opaque. Remove from heat and mix in chopped parsley to finish.
Tips & Tricks
Common Mistakes to Avoid
– Overcooking the Shrimp
Cooking shrimp too long makes them tough. They cook fast! Watch closely. They turn pink and opaque in just a few minutes. Remove them from heat when they are just done.
– Burning the Garlic
Garlic adds great flavor, but it burns easily. Cook it on medium heat for 1-2 minutes. Stir it often. When it turns golden, it’s ready. If it burns, it will taste bitter.
Enhancing Flavor
– Adding Herbs and Spices
Fresh herbs like parsley or basil can brighten the dish. You can also try a pinch of thyme or oregano. These herbs add depth and freshness to the shrimp.
– Adjusting Level of Heat with Red Pepper Flakes
Want some heat? Add red pepper flakes! Start with a small amount. You can always add more if you like it spicy. It gives the dish a nice kick without overpowering the garlic.
These tips will help you make the best garlic butter shrimp ever!

Variations
Different Protein Alternatives
You can easily swap shrimp for other proteins. Scallops work great in this dish. They cook quickly and have a sweet flavor. Just be sure to adjust the cook time. Chicken is another good option. Use boneless thighs or breasts for the best results. Cut the chicken into small pieces for even cooking. Cook until golden brown for about 5-7 minutes. Both options will soak up the garlic butter nicely.
Flavor Profile Adjustments
You can change the flavors to fit your taste. For an Asian twist, add soy sauce and ginger. This gives a nice umami kick and pairs well with shrimp. You can also toss in some snap peas or bell peppers for color and crunch.
For a Mediterranean vibe, add olives and cherry tomatoes. The olives will add brininess, while tomatoes bring freshness. Cook them in the garlic butter until soft, then mix in the shrimp. This creates a tasty and vibrant dish.
Storage Info
How to Store Leftovers
After enjoying your garlic butter shrimp, you may have some left. Store any leftovers in an airtight container. This helps keep the shrimp fresh. Place the container in the fridge. You can enjoy it for up to three days.
If you want to keep it longer, freezing is a great option. Place the shrimp in a freezer-safe bag. Remove as much air as possible before sealing. This will prevent freezer burn. Frozen shrimp can last for up to three months.
Reheating Methods
When it’s time to eat the leftovers, reheating is key. The best way to reheat shrimp is in a skillet. Add a splash of water or broth to keep it moist. Heat on low, stirring gently to avoid overcooking. This keeps the shrimp tender and juicy.
Microwaving is another option, but it can dry out the shrimp. If you use this method, heat in short bursts. Check the shrimp often so you don’t overdo it. Maintaining flavor and texture is important. You want to enjoy that garlic butter goodness again!
FAQs
How long does it take to cook shrimp?
Cooking shrimp is quick and easy. Here are the times based on size:
– Small shrimp (51-60 count): 2-3 minutes
– Medium shrimp (41-50 count): 3-4 minutes
– Large shrimp (31-40 count): 4-5 minutes
– Jumbo shrimp (21-30 count): 5-6 minutes
The key is to watch for a pink and opaque color. Overcooking makes shrimp tough.
Can I make Garlic Butter Shrimp ahead of time?
Yes, you can prep Garlic Butter Shrimp in advance. Here are some tips:
– Cook the shrimp until barely done.
– Cool them and store in a sealed container.
– Keep in the fridge for up to one day.
– Reheat gently in a skillet before serving.
This method saves time and gives you a tasty dish ready to go.
What should I serve with Garlic Butter Shrimp?
Garlic Butter Shrimp pairs well with many sides. Here are some tasty ideas:
– Rice: White, brown, or coconut rice works great.
– Pasta: Toss with spaghetti or linguine for a filling meal.
– Vegetables: Steamed broccoli or sautéed spinach adds color and nutrition.
– Bread: Crusty bread is perfect for mopping up the sauce.
Choose sides that balance the rich garlic butter flavor.It includes all the steps and tips to make this dish shine. Enjoy cooking!
In this blog post, I covered how to make easy garlic butter shrimp. You learned about the ingredients, including tips for choosing fresh shrimp. I also shared step-by-step instructions for preparation and cooking. We discussed common mistakes and ways to enhance flavor. Plus, I offered variations and storage tips.
Remember, cooking shrimp is simple if you follow these steps. Keep trying different flavors to find what you love. Enjoy your cooking journey!


![To make the Roasted Sweet Potato Black Bean Salad, you will need these fresh and vibrant ingredients: - 2 medium sweet potatoes, peeled and cut into bite-sized cubes - 1 can (15 oz) black beans, thoroughly rinsed and drained - 1 vibrant red bell pepper, diced - 1 small red onion, finely chopped - 2 cups fresh spinach, roughly chopped - 1 ripe avocado, diced - 3 tablespoons olive oil, divided - 1 teaspoon ground cumin - 1 teaspoon smoked paprika - Salt and freshly ground black pepper to taste - Juice from 1 lime - ¼ cup fresh cilantro, chopped (optional) Each item adds a layer of flavor. Sweet potatoes give a naturally sweet taste. Black beans add protein and creaminess. The red bell pepper brightens the dish with color and crunch. The red onion gives a nice zing. Spinach adds a fresh touch while the avocado brings richness. Olive oil helps blend it all together while the spices create a warm, smoky flavor. Finally, lime juice and cilantro brighten the salad, making it truly special. For the full recipe, check out the complete details to guide you through the cooking process! - Preheat the oven to 425°F (220°C). - Mix sweet potatoes with olive oil and seasonings. Start by preheating your oven. This step is key for getting those sweet potatoes nice and crispy. While the oven heats, grab a large bowl. Toss in your sweet potatoes, olive oil, ground cumin, and smoked paprika. Add a good pinch of salt and pepper. Stir well until every piece is coated in the mix. - Spread sweet potatoes on a baking sheet and roast for 25-30 minutes. Next, spread your sweet potatoes on a baking sheet. Make sure they are in a single layer. This helps them roast evenly. Place the baking sheet in the oven. Roast for 25-30 minutes. Halfway through, give them a quick stir. This way, all sides get that lovely caramelization. - In a bowl, combine black beans, red bell pepper, red onion, and spinach. - Add roasted sweet potatoes and mix with lime juice and remaining oil. - Gently fold in diced avocado and cilantro. While your sweet potatoes roast, take another bowl. Combine the black beans, diced red bell pepper, chopped red onion, and fresh spinach. Mix these ingredients well. Once the sweet potatoes are done, let them cool for just a moment. Then, add them to your bowl. Drizzle lime juice and the last bit of olive oil over the mix. Toss gently until everything is well combined. Finally, fold in your diced avocado and cilantro. Be gentle to keep the avocado nice. For the full recipe, check below! To get sweet potatoes just right, you need a few tricks. First, cut them into even pieces. This ensures they roast at the same time. Use a sharp knife for clean cuts. Next, toss them well with olive oil and spices. The oil helps with caramelization. Spread them out on the baking sheet. Avoid crowding the pan, as this can lead to steaming instead of roasting. Stir them halfway through roasting. This helps them brown evenly. If you see them getting too dark, reduce the oven temperature. Want to boost flavors? Add some extra spices. A pinch of cayenne pepper gives heat. Garlic powder adds depth. Fresh herbs like thyme or oregano can brighten the dish. Experiment with what you like best. Don’t forget about lime juice! It adds brightness and balances sweetness. You can also try a splash of balsamic vinegar for a unique twist. Make your salad pop! Use a large bowl to show off the colors. Layer your ingredients for a beautiful look. Start with greens at the bottom. Then add the roasted sweet potatoes and black beans. Garnish with fresh cilantro and lime wedges. This adds color and extra flavor. A sprinkle of feta cheese can also enhance visual appeal. Serve it chilled or at room temperature for the best experience. For the full recipe, check out the detailed steps to make this vibrant dish! {{image_4}} You can switch up the black beans if you like. Kidney beans or pinto beans work well too. If you want to change the sweet potatoes, try butternut squash for a different taste. If you need more protein, add cooked chicken or quinoa. Both options bring a nice texture and boost the nutrition. You can also toss in cooked lentils for a plant-based protein option. Homemade dressings can really change the flavor of your salad. A simple lime vinaigrette adds brightness. Just mix lime juice, olive oil, and a pinch of salt. For a creamier option, blend avocado with Greek yogurt and lime juice. This gives a rich, smooth texture. You can also try tahini dressing for a nutty flavor that pairs well with the salad. Seasonal veggies are a fun way to change your salad. In spring, add fresh peas or asparagus for a crisp bite. In summer, try ripe cherry tomatoes for sweetness. In fall, consider adding roasted Brussels sprouts or kale for a hearty feel. Fresh herbs like basil or mint can brighten up the dish. They add a lovely aroma and freshness that complements the flavors nicely. To keep your salad fresh, store the components separately. Place the roasted sweet potatoes in one container. Use another container for the black beans, red bell pepper, onion, and spinach. This way, the flavors stay bright, and the textures remain nice. You can mix them when you are ready to eat. This salad stays fresh in the fridge for about three to five days. The sweet potatoes hold well, while the other veggies stay crisp. Just make sure to seal the containers tightly. If you notice any changes in smell or texture, it's best to toss it. When reheating, keep the sweet potatoes and other veggies separate. Use a skillet on medium heat for the sweet potatoes. Stir gently until warm. This keeps them crispy. For the beans and veggies, you can heat them in the microwave for about 30 seconds. Avoid heating too long, so you don’t lose their crunch. Yes, you can make this salad ahead of time. Prepare the sweet potatoes and other ingredients separately. Store them in airtight containers in the fridge. Mix everything together right before serving. This way, the salad stays fresh and tasty. Absolutely! All the ingredients in this salad are gluten-free. Sweet potatoes, black beans, and veggies are safe for those with gluten issues. Always check labels, especially with canned goods, to ensure they are certified gluten-free. This salad pairs well with many dishes. You can serve it with grilled chicken or fish for added protein. It also goes great with quinoa or a warm tortilla. For a light meal, enjoy it with a bowl of soup. You can easily adjust this salad for different diets. For vegan options, skip the cheese and use a vegan dressing. If you're vegetarian, add cheese for extra flavor. For low-carb diets, reduce the sweet potatoes and add more greens or avocado. For the complete detailed recipe for Roasted Sweet Potato Black Bean Salad, check here: [Full Recipe]. This blog covered how to make a delicious roasted sweet potato and black bean salad. We explored the main ingredients, preparation steps, and useful tips to perfect your dish. You learned about variations and storage methods to keep your salad fresh. This salad is not just tasty; it’s also good for you. Try it for a quick meal or as a side. Enjoy customizing it to fit your taste and needs. With these techniques, you can impress anyone at the table.](https://joymealplan.com/wp-content/uploads/2025/07/525cd2b1-78c5-4050-8250-da110bbc1063-768x768.webp)

